
Customizing the RDP display size
The RDP display size (width and height settings) can be customized for Agentless VPN when creating a new connection or bookmark. Administrators can also specify the display size when preconfiguring bookmarks.
To configure the default window dimensions in an RDP Agentless VPN portal:
config vpn ssl web portal
    edit <name>
        set default-window-width <integer>
        set default-window-height <integer>
    next
end
|
default-window-width <integer> |
Set the default RDP screen width, in pixels (0 - 65535, default = 1024). |
|
default-window-height <integer> |
Set the default RDP screen height, in pixels (0 - 65535, default = 768). |
Example
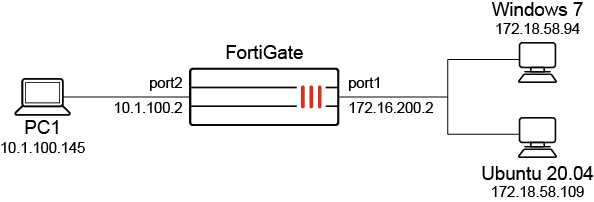
In this example, a user has a monitor with a resolution of 1920 × 1080. The user creates two bookmarks for RDP servers with different resolutions:
-
Windows 7: 1360 × 768
-
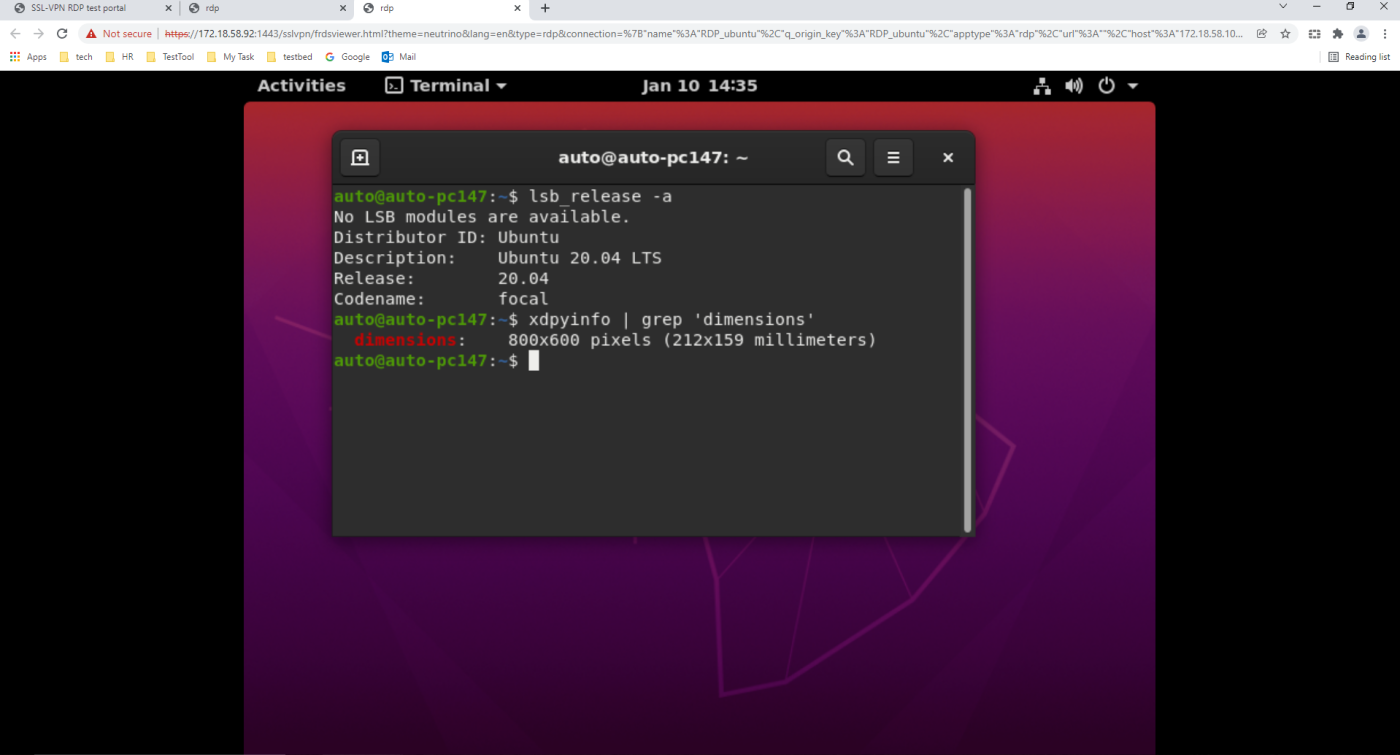
Ubuntu 20.04: 800 × 600
To customize the RDP bookmark display size:
-
Log in to the Agentless VPN web portal.
-
Under Bookmarks, click Create new bookmark for <user>.
-
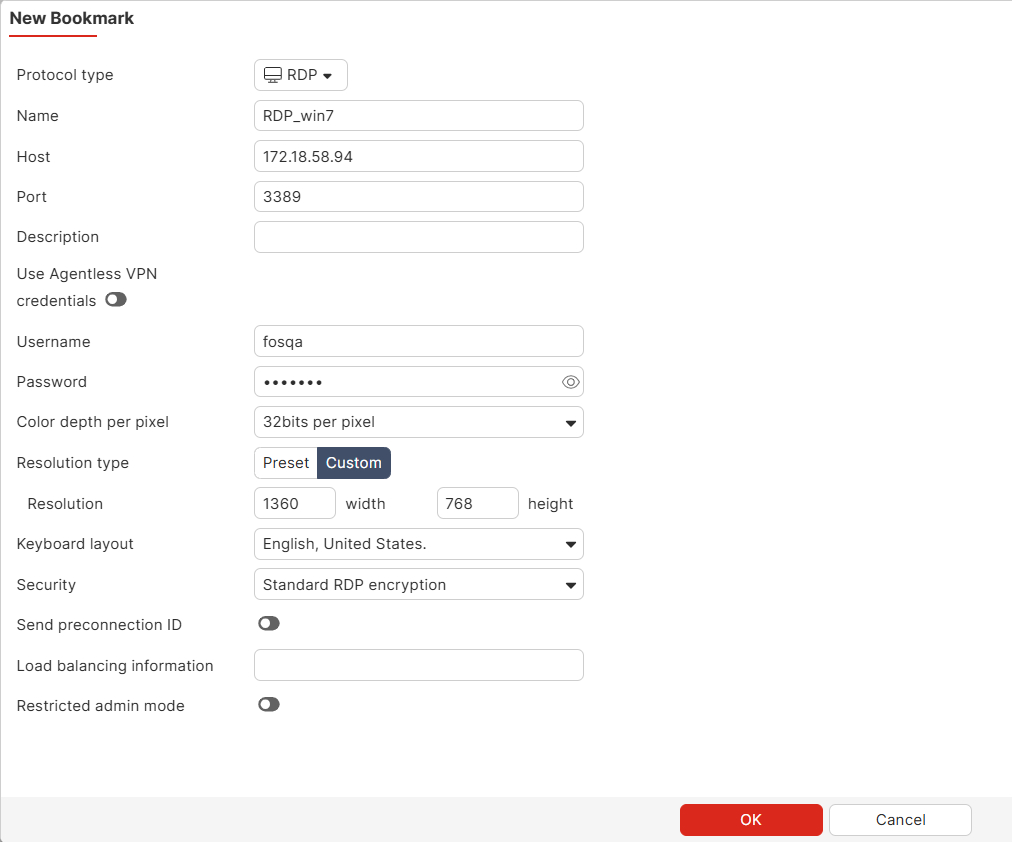
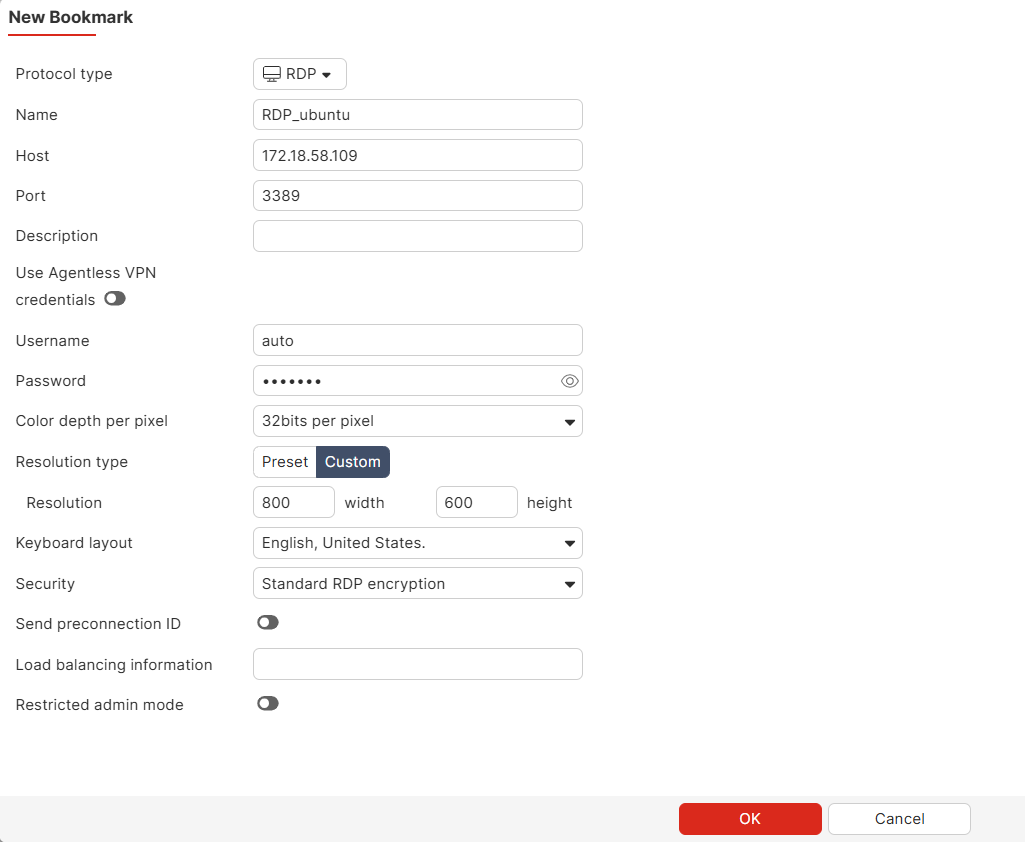
Set Protocol type to RDP, and enter a suitable Name, Host, and Port.
-
Set the Resolution width and height fields as required.
-
Windows 7: 1360 width and 768 height.
-
Ubuntu 20.04: 800 width and 600 height.
-
-
Click OK.
Verification:
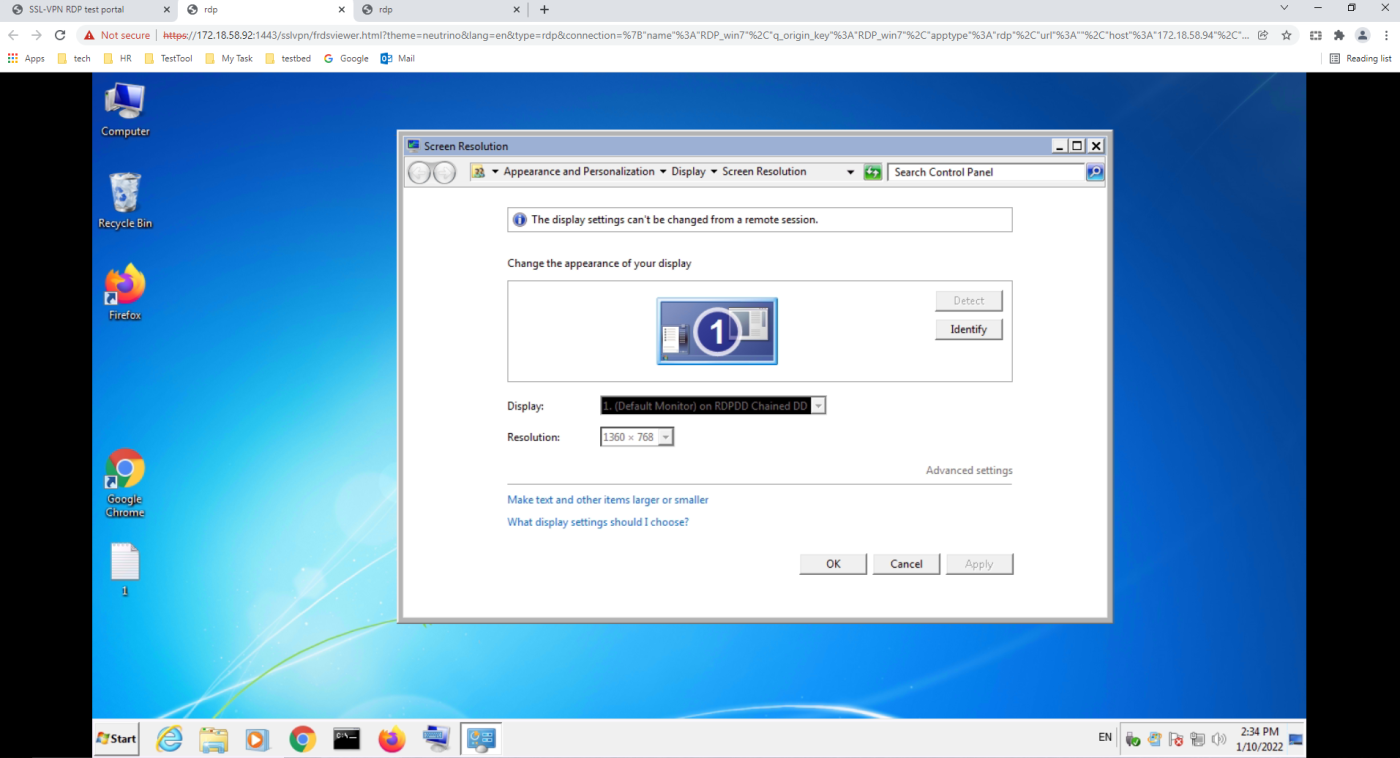
When the user connects to the RDP servers using the bookmarks, the customized screen resolutions are applied regardless of the client PC's screen resolution (1920 × 1080).
Windows 7:
Ubuntu 20.04:
To view the bookmarks created by the user:
show vpn ssl web user-bookmark
config vpn ssl web user-bookmark
    edit "rdp_user#"
        config bookmarks
            edit "RDP_win7"
                set apptype rdp
                set host "172.18.58.94"
                set port 3389
                set logon-user "fosqa"
                set logon-password ********
                set color-depth 32
                set width 1360
                set height 768
            next
            edit "RDP_ubuntu"
                set apptype rdp
                set host "172.18.58.109"
                set port 3389
                set logon-user "auto"
                set logon-password ********
                set color-depth 32
                set width 800
                set height 600
            next
        end
    next
end