
In most production environments, you want to use a certificate issued be your own PKI for deep packet inspection (DPI). This is due to the trust relationship involved with certificates and the access (trust) they are given. As such, it is extremely important to take precautions that these certificates are not misused and in the event that they are compromised, you retain the ability to revoke their validity.
Microsoft PKI best practice utilizes a two-tier system where a Root CA signs a sub-CA (or Issuing CA, named after its role), and this Sub-CA is used to sign (sometimes referred to as generate) end-entity certificates, such as the certificate used by FortiGates for DPI. The purpose of this two tier system is to keep the Root CA offline so that the private key of the Root CA is better protected from being compromised.
If a sub-CA becomes compromised, it can be removed from the PKI. If the Root CA becomes compromised, the entire PKI must be replaced. Therefore, the following steps take place on a sub-CA of the Root CA for your organization.
Complete the following steps to create your own sub-CA certificate and use it for DPI:
The FortiGate firewall uses information in the original web server certificate (e.g. www.google.com), then issues a new certificate signed by the DPI certificate. The FortiGate then sends this new certificate along with the issuing DPI certificate to the client's web browser when the SSL session is being established.
The browser verifies that the web server certificate (e.g.www.google.com) was issued by a valid CA, then looks for the issuing CA of the DPI certificate in its local trusted Root-CA store to complete the path to trusted Root-CA. In this case, the issuing CA is a sub-CA of the Root-CA. The end device will need a trust chain to ensure it understands that this sub-CA is approved by the Root-CA that the device trusts.
The Root-CA certificate is normally deployed to all client PCs in the Windows domain, so the client can complete the certificate path up to a trusted root CA. Note that this is the public key of the Root-CA. The FortiGate now controls and can inspect the two HTTPS sessions: one with the external web server, and one with the client PC.
Create a Microsoft sub-CA certificate
A Microsoft sub-CA certificate can be created directly on a Microsoft sub-CA server, or remotely using a web browser.
Creating a certificate remotely requires that the web enrollment option is configured on the Microsoft sub-CA server. Remote certificate requests require HTTPS; requests are not allowed with HTTP.
To create a Microsoft sub CA certificate remotely:
- Open a web browser and go to one of the following URLs:
- https://<FQDN-CA-server>/CertSrv
- https://<IP-CA-server>/CertSrv
- Log in to a domain administrator account that has web enrollment rights.
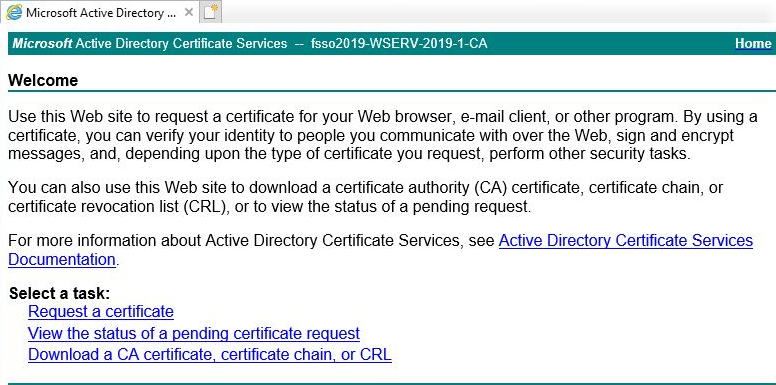
- Click Request a certificate.
- Click advanced certificate request.

- Click Create and submit a request to this CA, then click Yes in the Web Access Confirmation warning.
- For the Certificate Template, select Subordinate Certification Authority.
- Enable Mark keys as exportable.
- Fill out the remaining information according to your security policy.
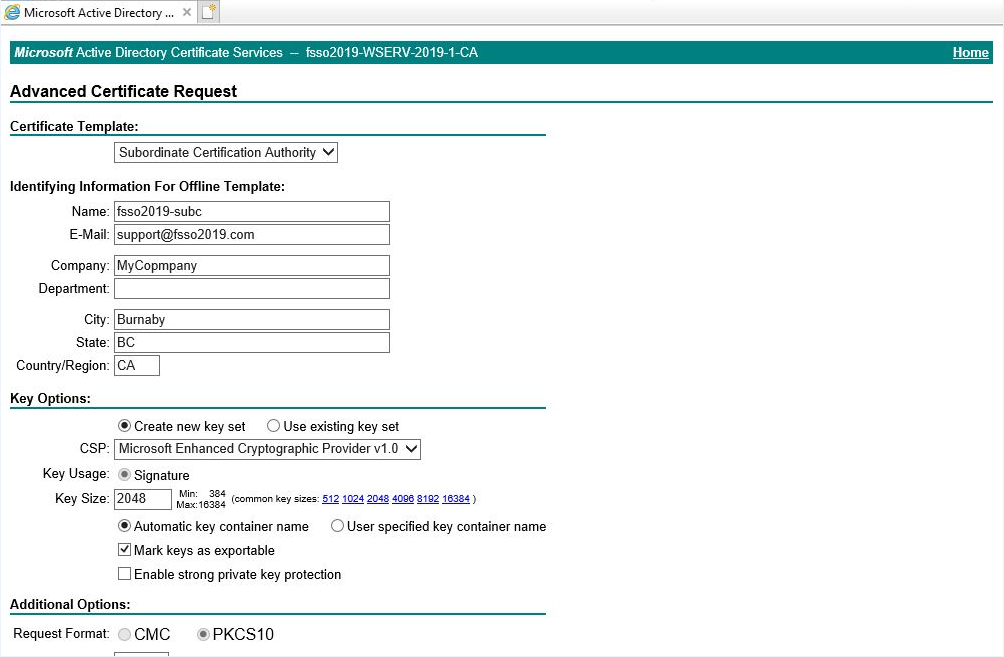
- Submit the request.
- Click Yes in the Web Access Confirmation warning.
- Click Install this certificate.
The certificate and private key are located in the current user's certificate store.
Export the certificate and private key
To export the certificate and private key:
- Open the Microsoft Management Console (MMC) and add the Certificate Snap-in.
- Go to the user's certificate store to locate the sub CA certificate that you just installed.
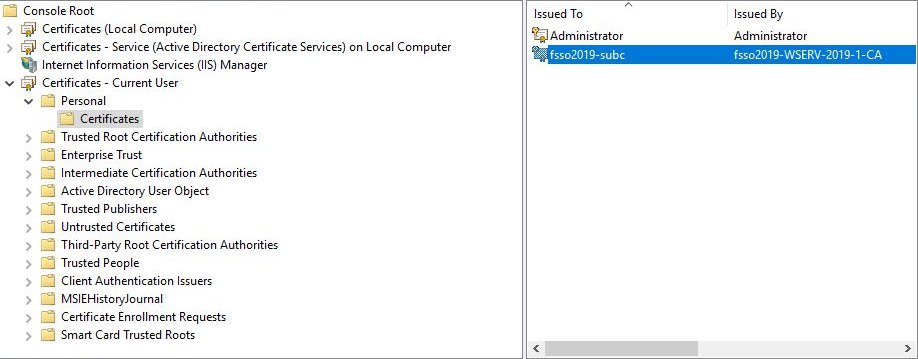
- Right-click the certificate and select All Tasks > Export.
- Click Next to start the Microsoft Certificate Export Wizard.
- Follow the steps in the wizard:
- When asked, select Yes, export the private key.
- Only the PKCS #12 (.PFX) format is available, and it requires a password.
- When selecting the encryption type, select TripleDES-SHA1 if you are using an older version of FortiOS (5.6.9 and earlier). Otherwise, select AES256-SHA256.
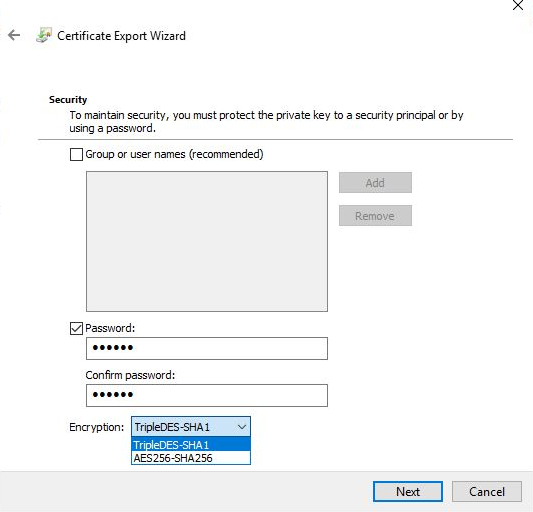
- Complete the wizard, and save the DPI certificate to a local folder.
Import the certificate and private key into the FortiGate
The certificate can be imported from the local computer using the GUI, or from a TFTP server using the CLI.
After importing the certificate, you can view it in the GUI to verify that it was successfully imported.
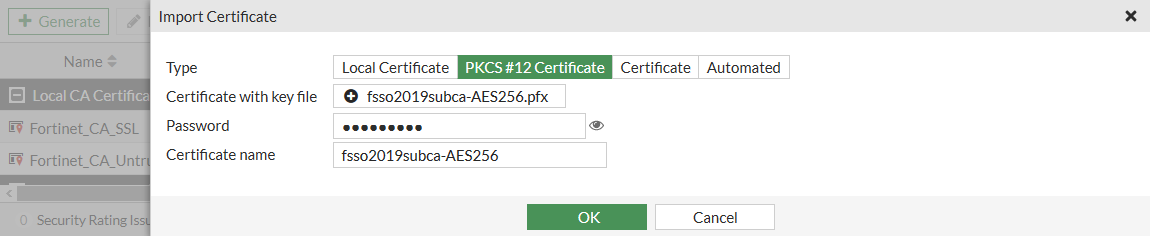
To import the certificate and private key into the FortiGate in the GUI:
-
Go to System > Certificates and select Create/Import > Certificate.
-
Click Import Certificate.
-
Set Type to PKCS #12 Certificate.
-
Click Upload, and locate the certificate on the management computer.
-
Enter the password, then confirm the password.
-
Optionally, customize the Certificate name.
-
Click OK.
To import the certificate and private key into the FortiGate in the CLI:
execute vpn certificate local import tftp fsso2019subca-AES256.pfx <tftp_IP> p12 <password>
To verify that the certificate was imported:
- Go to System > Certificates.
- Locate the newly imported certificate in the table.
- Select the certificate and click View Details to view the certificate details.
Configure a firewall policy for DPI
The certificate is used in an SSL/SSH inspection profile that is then used in a firewall policy.
To configure a firewall policy for DPI:
- Go to Security Profiles > SSL/SSH Inspection and click Create New.
- Configure the inspection profile, selecting the new certificate
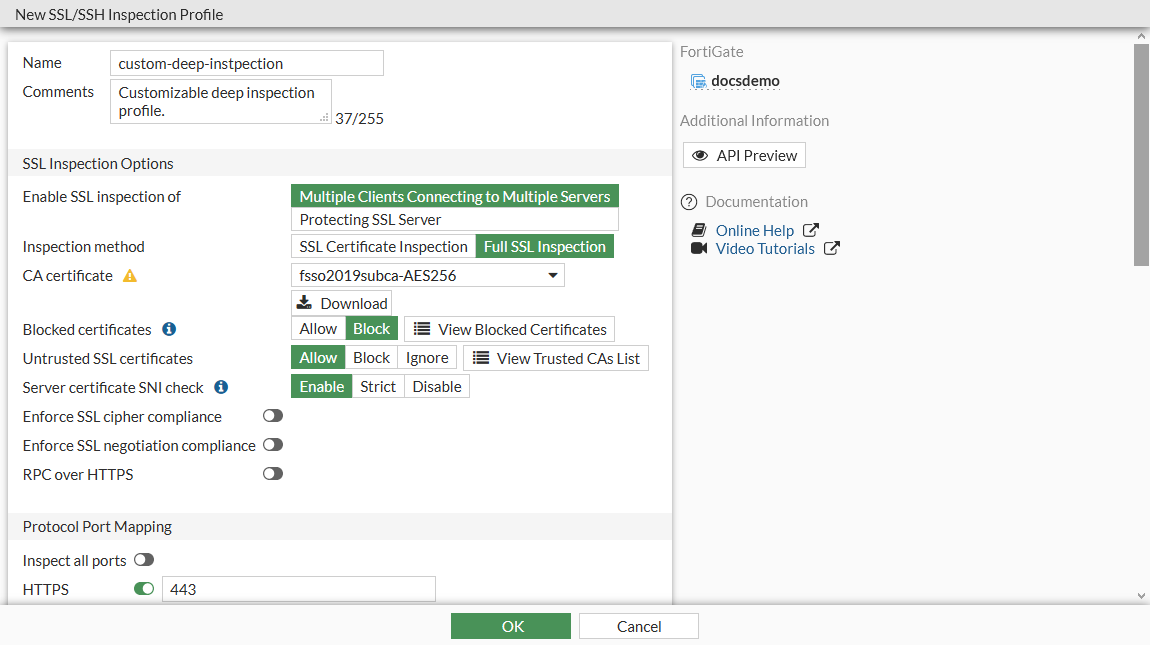
- Click Apply.
- Go to Policy & Objects > Firewall Policy.
- Create a new policy, or edit an existing policy.
- In the SSL Inspection field, select the new SSL inspection profile.
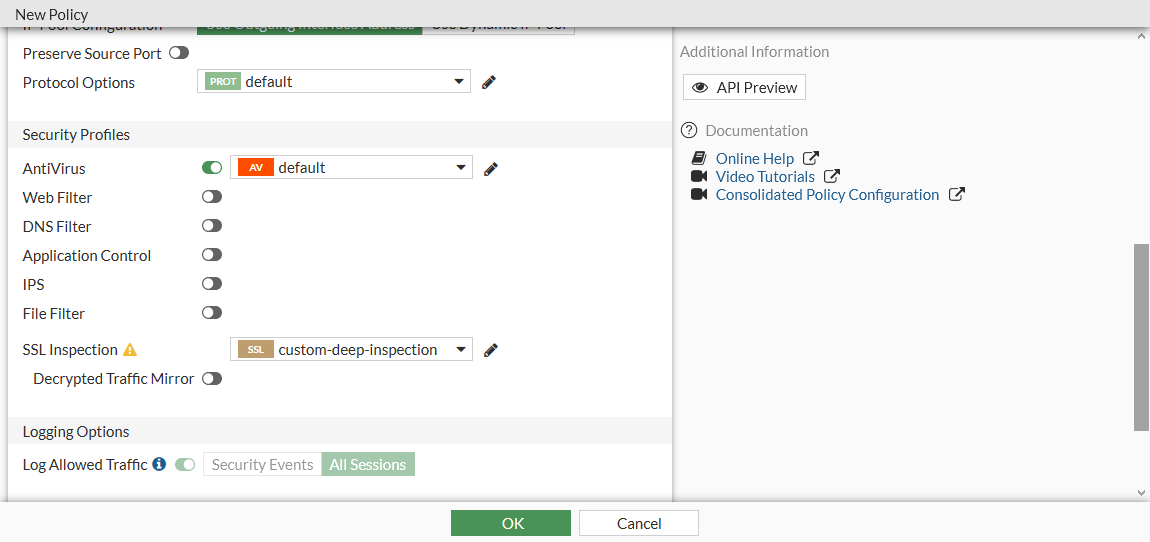
- Configure the remaining settings as needed.
- Click OK.
Verify that the sub CA certificate is being used for DPI
You can verify that the certificate is being used for resigning web server certificates when a user connects to an external HTTPS website.
To verify that the certificate is being used:
- On a client PC that is behind the FortiGate, go to an external HTTPS website.
When connecting to the website, no certificate warning should be shown.
- In your web browser, view the certificate and certificate path.
The methods for doing this vary depending on the browser. See your browsers documentation for information.