
Example 3: IPAM with auto-resolve conflicts
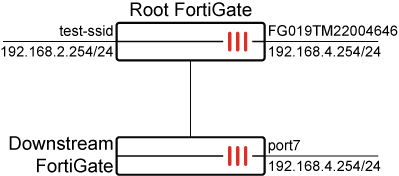
In this example, the FortiGate serves as the Security Fabric root with IPAM and Auto-resolve conflicts enabled and has two interfaces: test-ssid (vap-switch type) and FG019TM22004646 (lan-extension type) managed by IPAM. When a downstream FortiGate joins the Security Fabric, the port7 interface is configured with a static IP (192.168.4.254/24). It is observed that the FG019TM22004646 interface of the root FortiGate conflicts with port7 of the downstream FortiGate.
To configure Auto-resolve conflicts on the root FortiGate:
-
Go to Network > IPAM and select the IPAM Settings tab.
-
Enable Auto-resolve conflicts.
-
Click OK.
To verify the IP address conflict resolution:
-
On the root FortiGate, go to Network > IPAM and select the IPAM Interfaces tab.
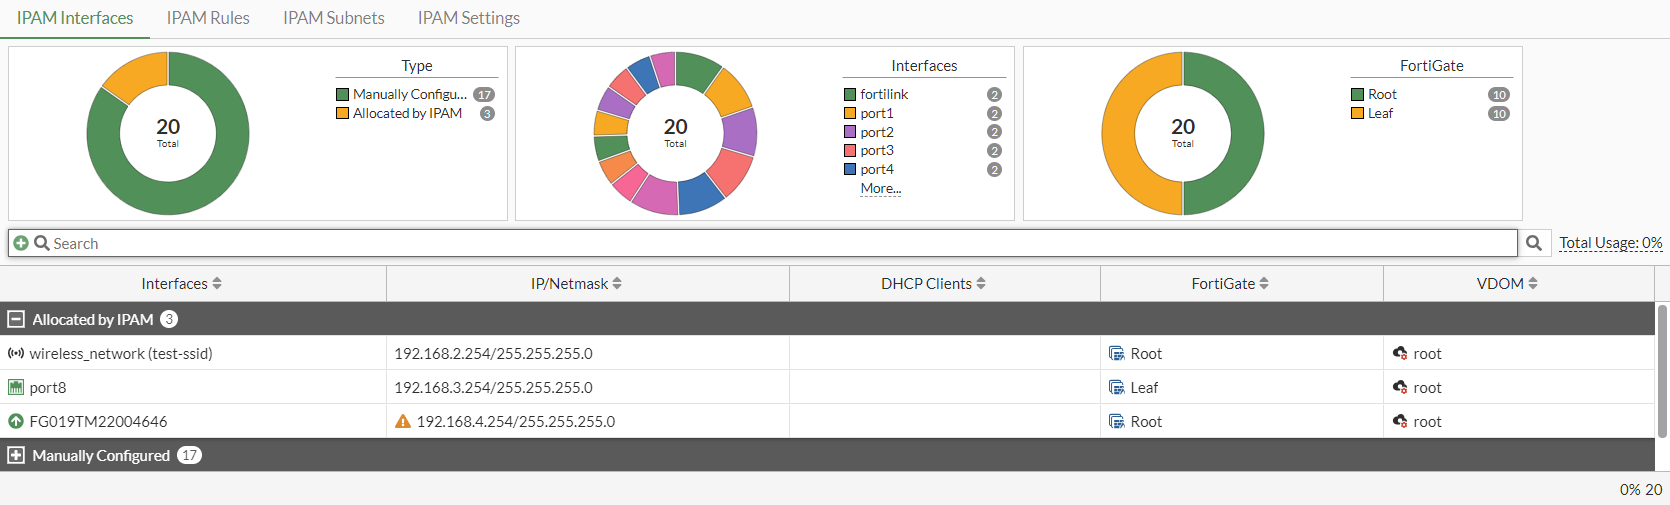
There is a conflict marker (warning icon) beside the IP address of FG019TM22004646 due to a conflict between the IPAM-assigned interface FG019TM22004646 of the root FortiGate and the manually configured interface of the downstream FortiGate.
-
Verify the list of IPAM entries in the CLI:
# diagnose sys ipam list entries
Entries: (sn, vdom, interface, subnet/mask, conflict)

  IPAM Entries:
  FGVM08TM22004645 root test-ssid 192.168.2.254/24
  FGVM08TM22004647 root port8 192.168.3.254/24
  FGVM08TM22004645 root FG019TM22004646 192.168.4.254/24 C
-
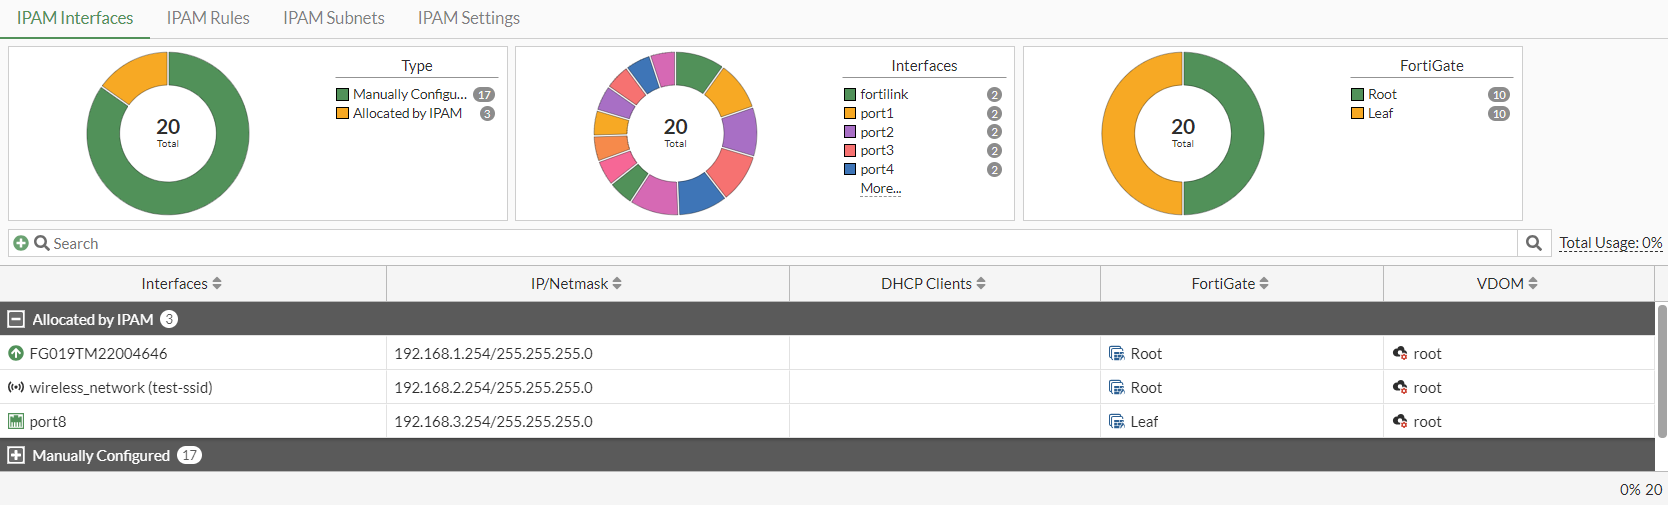
After some time, since Auto-resolve conflicts is enabled in the IPAM settings, the conflict is resolved automatically.
FG019TM22004646 has been assigned a new IP address of 192.168.1.254/24.
-
Verify the list of IPAM entries in the CLI:
# diagnose sys ipam list entries
Entries: (sn, vdom, interface, subnet/mask, conflict)

  IPAM Entries:
  FGVM08TM22004645 root FG019TM22004646 192.168.1.254/24
  FGVM08TM22004645 root test-ssid 192.168.2.254/24
  FGVM08TM22004647 root port8 192.168.3.254/24