
Fortinet Support Tool for capturing incidents
The Fortinet Support Tool application is used to capture real-time debugging information through a REST API key generated directly on the FortiGate device. It can be installed on Windows from the Microsoft Store and on macOS from the App store.
The program can run in the background for up to 48 hours. This increases the likelihood that it is active during an incident, allowing administrators to gather comprehensive logs and ensuring faster and more efficient troubleshooting.
To install the Fortinet Support Tool:
-
Open the Microsoft Store or the App Store.
-
Search for Fortinet Support Tool.
-
Install the tool.
To generate a support tool key:
-
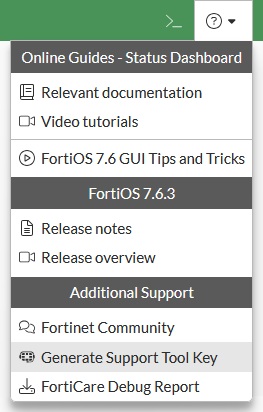
In the FortiOS GUI, select Generate Support Tool Key.
-
Configure the Connect to (IP/FQDN), Protocol, and Port, and set when the key will expire..
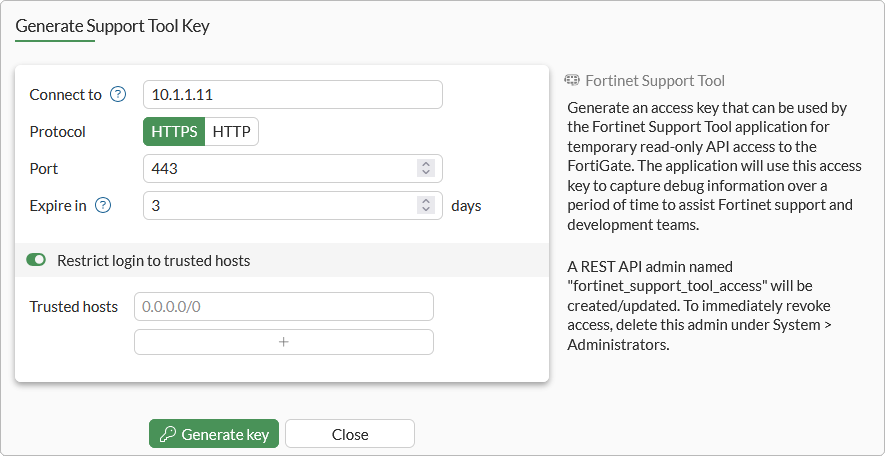
The Fortinet Support Tool will attempt to connect to this device using the specified IP/FQDN, protocol, and port.
-
Optionally, configure trusted hosts.
-
Click Generate key.
-
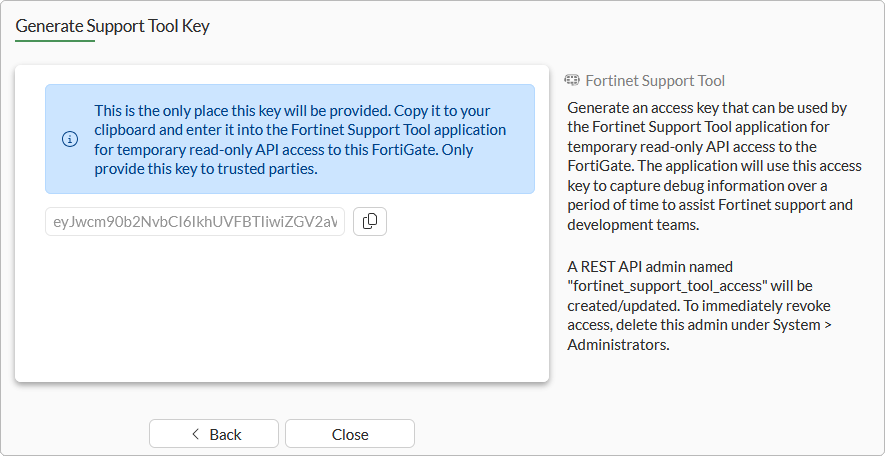
Copy the generated key, then click Close.
To create a new capture:
-
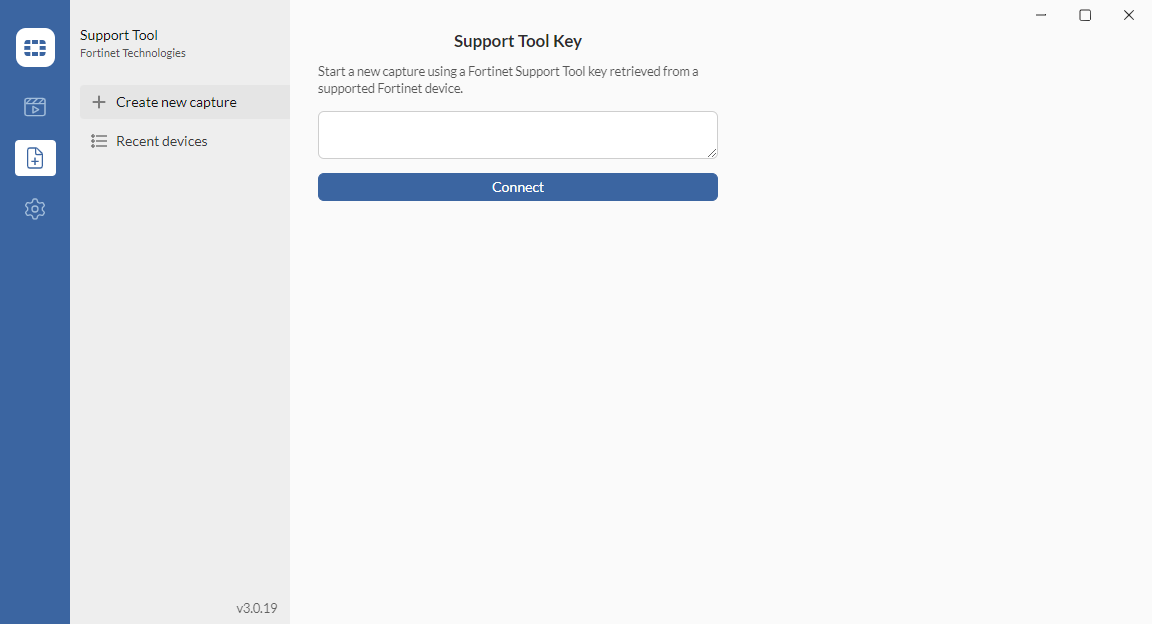
Open the Fortinet Support Tool and go to the capture tab.
-
Paste the generated key into the field. The connection will start to be established immediately.
You can also select Recent devices to try to reconnected to a previously used device.
-
Select the scenario to analyze.
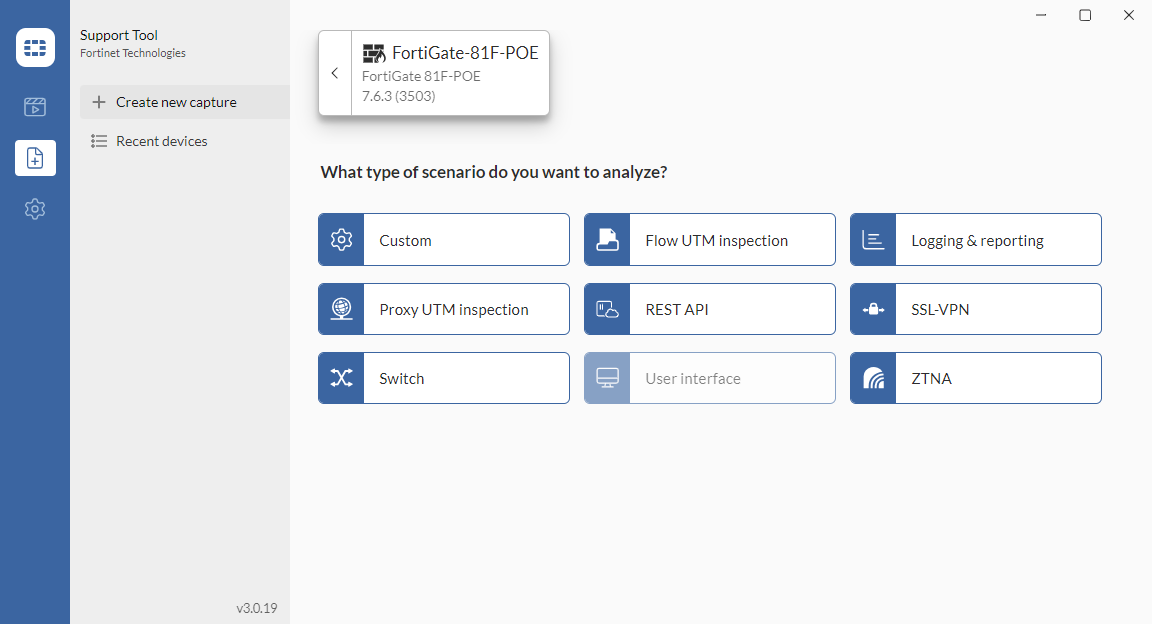
The user interface can only be captured using the Fortinet Support Tool Chrome extension.
-
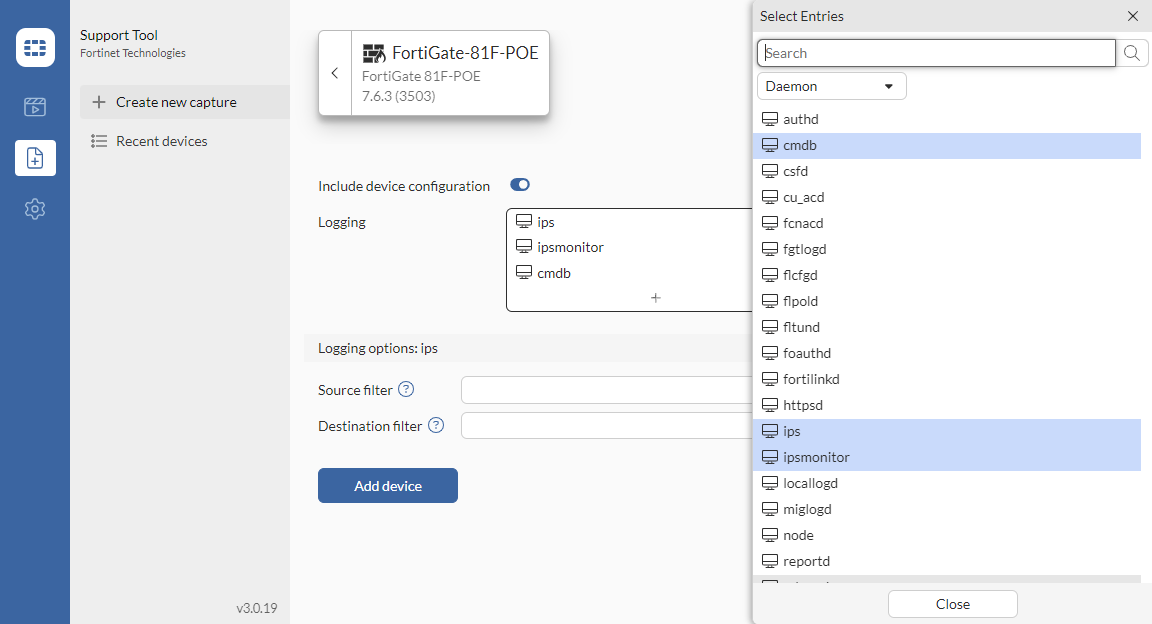
Select the daemons to collect logs and apply filters as needed.
-
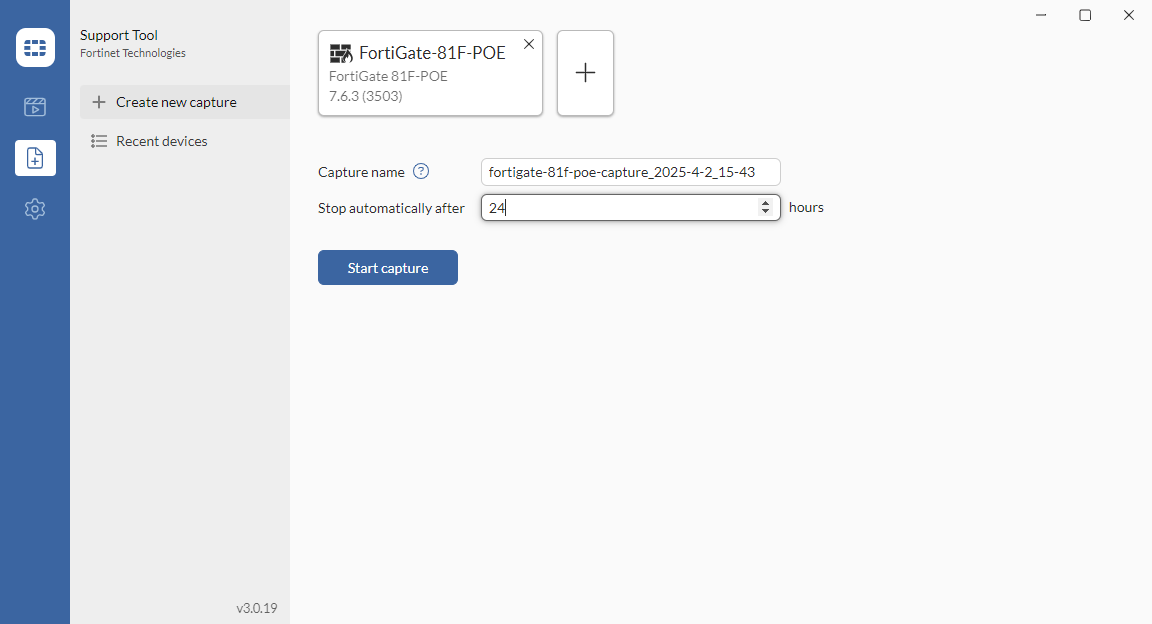
Specify the file name and length of the capture.
-
Click Start capture.
-
After the capture completes, or is manually stopped, save the capture file to the computer.
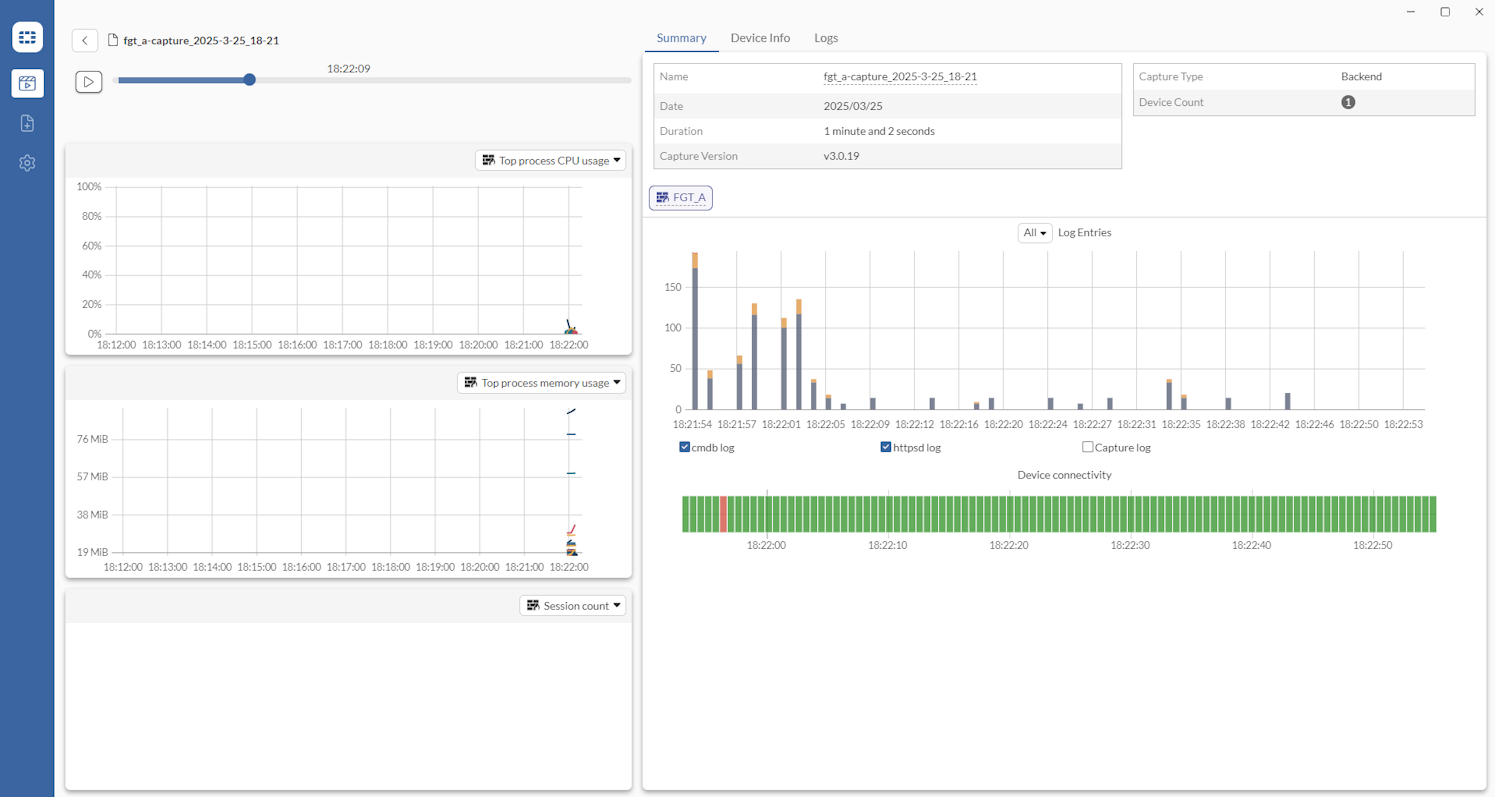
To view a capture:
-
Click Select capture file to get started.
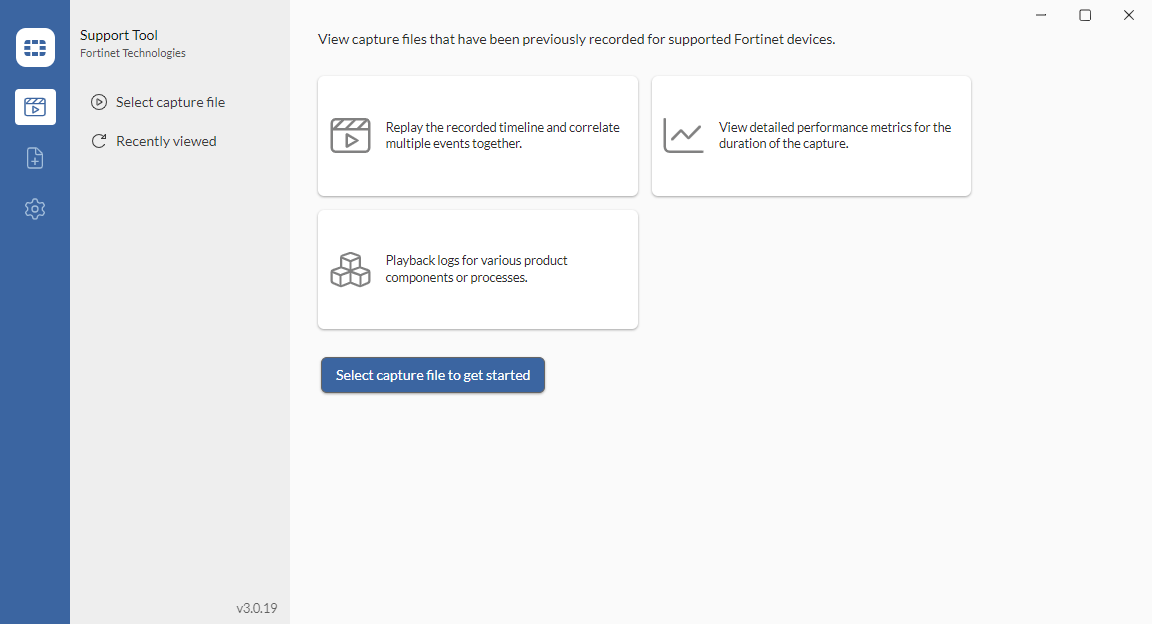
You can also select Recently viewed to review a previously opened capture.
-
Select a capture file with the extensions .fgtcapture, .ftntguicap, or .ftntcap for review.
When playing .fgtcapture or .ftntguicap files:
-
Top-left section: Video frame
-
Bottom-left section: Resource chart
-
Right section: Tabs including:
-
Summary
-
Device Info (Config, Crash log, Licenses, Table size, Profiling)
-
Client Info
-
Logs
-

When playing .ftntcap files:
-
Left section: Three resource charts
-
Right section: Tabs including:
-
Summary
-
Device Info (General [Config, Crash log, Table size, Profiling], CLI diagnostics [System, Hardware, Filesystem, HA, Session, Update], REST API responses)
-
Logs
-
-
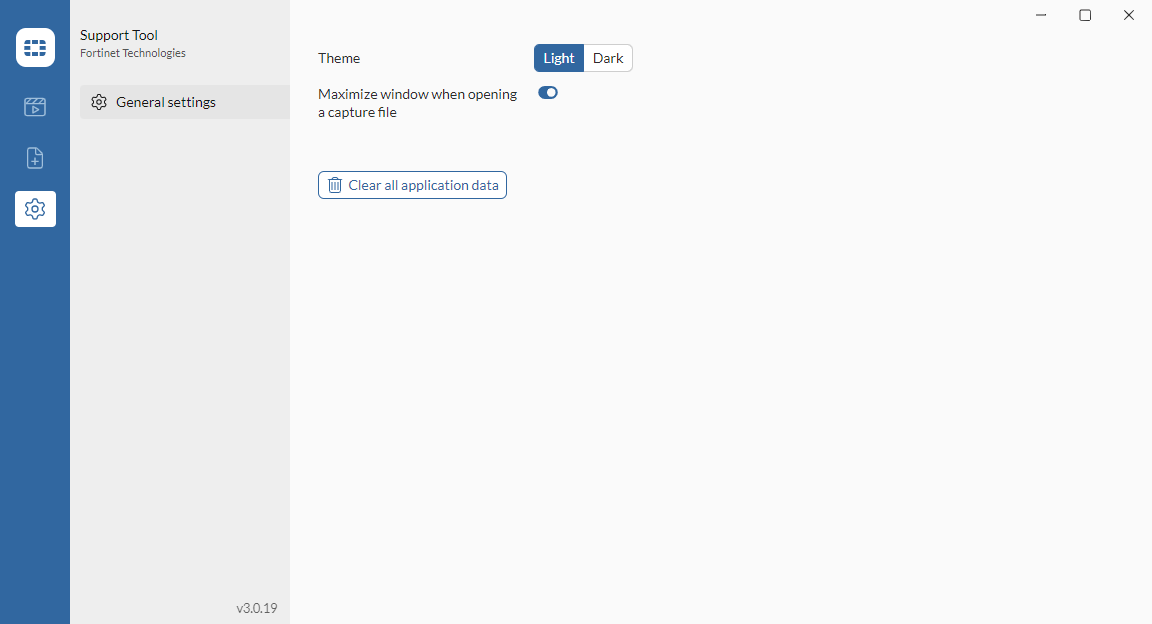
To configure the Fortinet Support Tool general settings:
-
Go to the Settings tab.
-
Adjust the Theme to Dark or Light (default).
-
Configure whether or not the application window is automatically maximized when viewing a capture file.
-
Click Clear all application data to clear all of the application data, such as recent devices or captures.