
Isolator servers in proxy policies
Web proxy isolator servers, such as FortiIsolator, are supported in proxy policies. Isolators are fundamentally the same as web proxy forward servers because both will redirect HTTP and HTTPS requests to an HTTP or HTTPS proxy server. However, isolators have the specific function of isolating potentially unsafe traffic from a user environment.
The isolate action in proxy policies can be used to distinguish isolated traffic from normal traffic in logs. Isolator servers can only be applied in explicit and transparent proxy policies. See Explicit web proxy and Transparent proxy.
To configure an isolator server in the CLI:
-
Configure the isolator server:
config web-proxy isolator-server edit <name> set addr-type {ip | ipv6 | fqdn} set ip <any_ip> set ipv6 <IPv6 address> set fqdn <string> set port <port> next end -
Apply the server to a proxy policy:
config firewall proxy-policy
    edit <id>
        set action isolate
        set isolator-server <name>
    next
end
To configure an isolator server in the GUI:
-
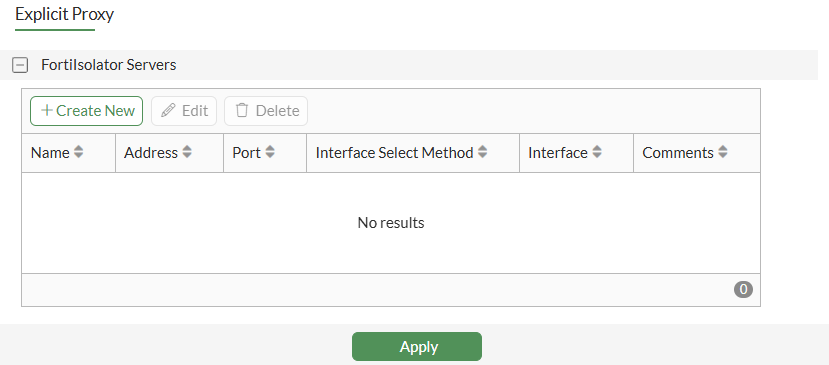
Go to Network > Explicit Proxy.
-
Enable Explicit Web Proxy and scroll to FortiIsolator Servers.
-
Click Create New.
-
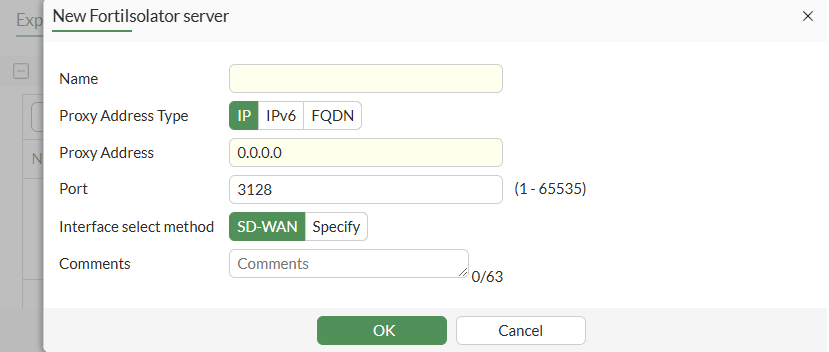
Configure the isolator server.
-
Click OK.
-
Configure the other explicit proxy fields, as needed, and click Apply.
-
Apply the isolator server to a proxy policy:
-
Go to Policy & Objects > Proxy Policy.
-
Click Create New.
-
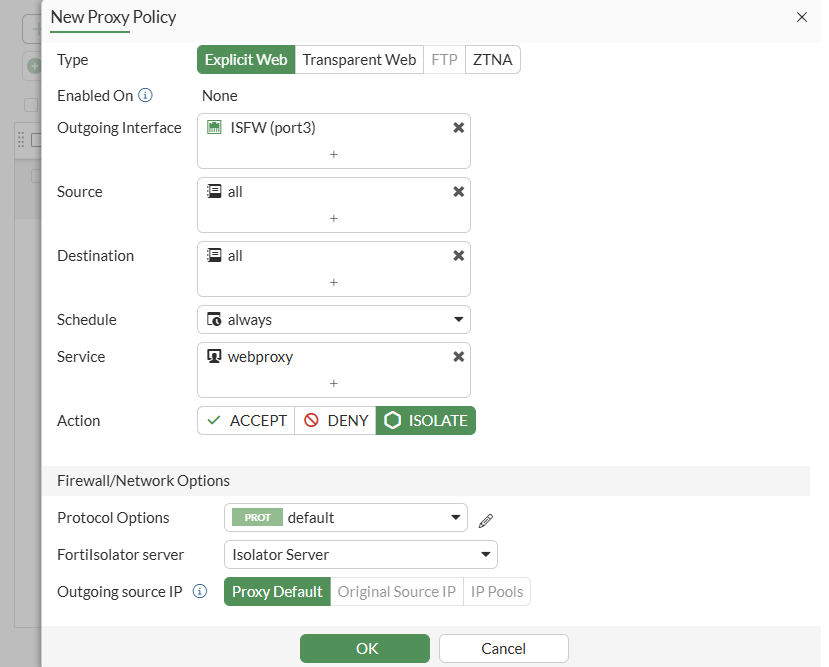
Set the Type to Explicit Web or Transparent Web.
-
Set Action to Isolate.
-
Set FortiIsolator server to the new server you configured.
-
Configure other proxy policy fields, as needed.
-
Click OK.
-
Example
The following example demonstrates how to apply an isolator server to a proxy policy. Two explicit proxy policies are configured:
-
A web proxy forward server is applied to one policy with the action set to accept.
-
An isolator server is applied to the other policy with the action set to isolate.
Each proxy policy uses a different destination IP address to separate traffic. Once traffic passes, logs are generated for the specific actions.
To configure an isolator server in the CLI:
-
Configure the isolator server:
config web-proxy isolator-server edit "isolator" set ip 172.16.200.7 set port 8080 next end -
Configure the forward server:
config web-proxy forward-server edit "fgt-b" set ip 172.16.200.7 set port 8080 next end -
Apply each server to a proxy policy:
config firewall proxy-policy edit 1 set proxy explicit-web set dstintf "port3" set srcaddr "all" set dstaddr "IT" set service "webproxy" set action accept set schedule "always" set logtraffic all set webproxy-forward-server "fgt-b" set utm-status enable set ssl-ssh-profile "deep-custom" set av-profile "av" next edit 3 set proxy explicit-web set dstintf "port3" set srcaddr "all" set dstaddr "Finance" set service "webproxy" set action isolate set schedule "always" set logtraffic all set isolator-server "isolator" set utm-status enable set ssl-ssh-profile "deep-custom" set av-profile "av" next end -
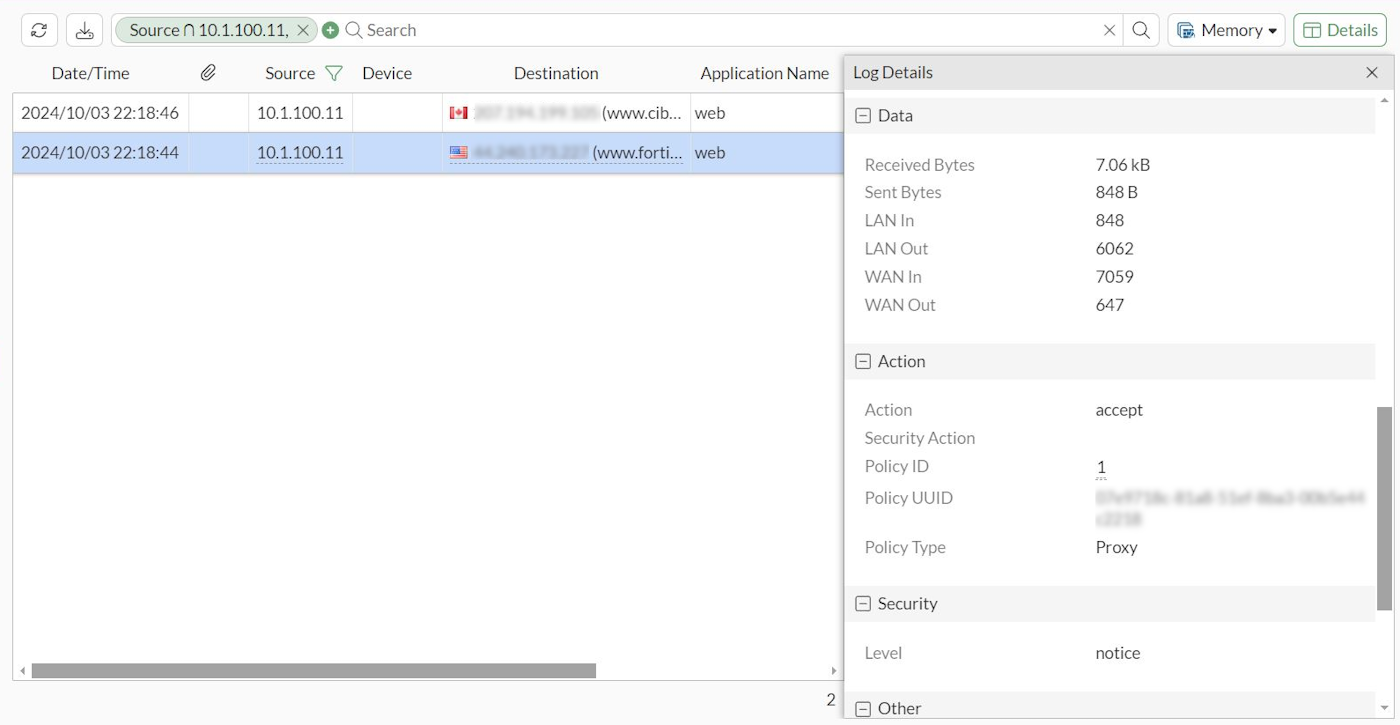
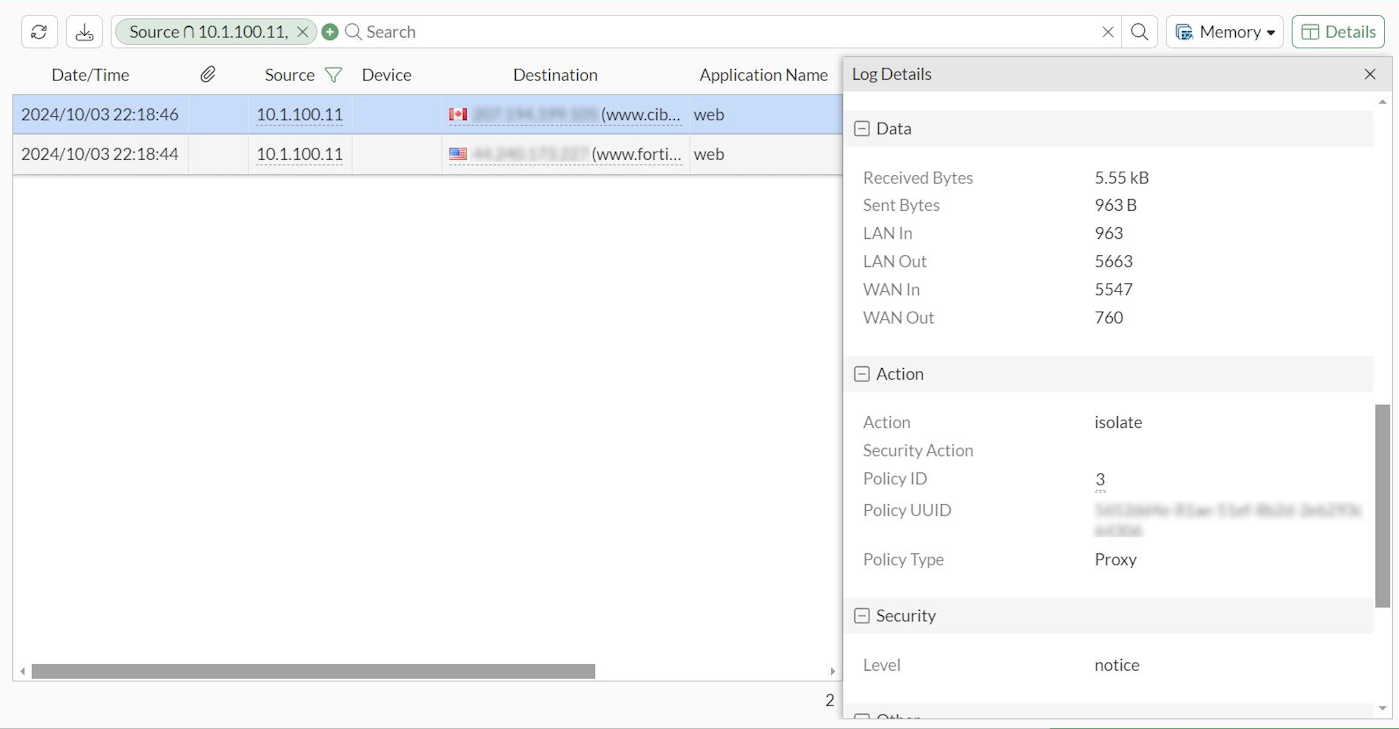
Generate traffic for the proxy policies and go to Log & Report > Forward Traffic in the GUI to review the logs:
-
When accessing www.fortinet.com, the traffic hits proxy policy
1and is accepted.Since the traffic matches the destination address, it goes to the forward server and then to the internet. A traffic log is generated with the action set to accept.
-
When accessing www.cibc.com, the traffic hits proxy policy
3and is isolated.Since the traffic matches the destination address, it goes to the isolator server and then to the internet. A traffic log is generated with the action set to isolate.
-