
Configure FortiClient SIA for IPsec VPN tunnels
The FortiClient Secure Internet Access (SIA) template for the VPN Wizard enables the configuration of a remote access IPsec VPN to ensure all FortiClient traffic is routed through the FortiGate IPsec VPN tunnel for security inspection. The template allows administrators to select the desired security profile, including certificate or deep inspection, and configure policies to block access to botnet and C&C servers. Additionally, it provides an option to allow remote VPN users access to specified local subnets and local interfaces.
To configure IPsec VPN with FortiClient as the dialup client in the GUI:
-
Configure a user and user group:
-
Go to User & Authentication > User Definition and create a local user. See Users.
-
Go to User & Authentication > User Groups and create a user group with the local user added as a member. See User groups.
-
-
Go to VPN > VPN Wizard and configure the tunnel settings:
-
Enter a VPN Tunnel name.
-
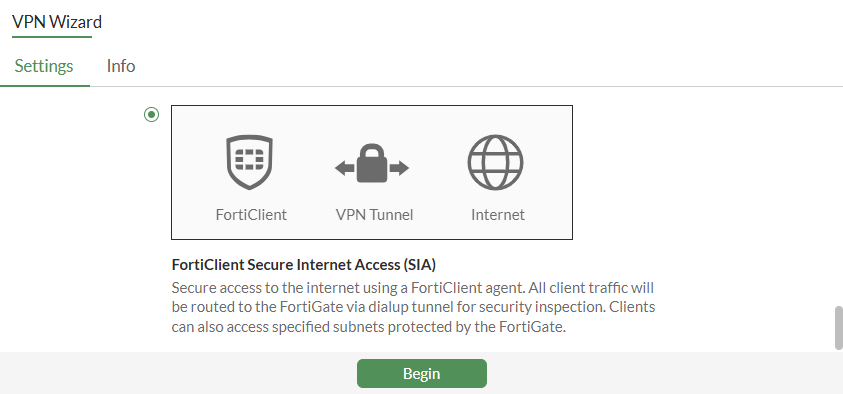
For Select a template, select FortiClient Secure Internet Access (SIA).
-
Click Begin.
-
-
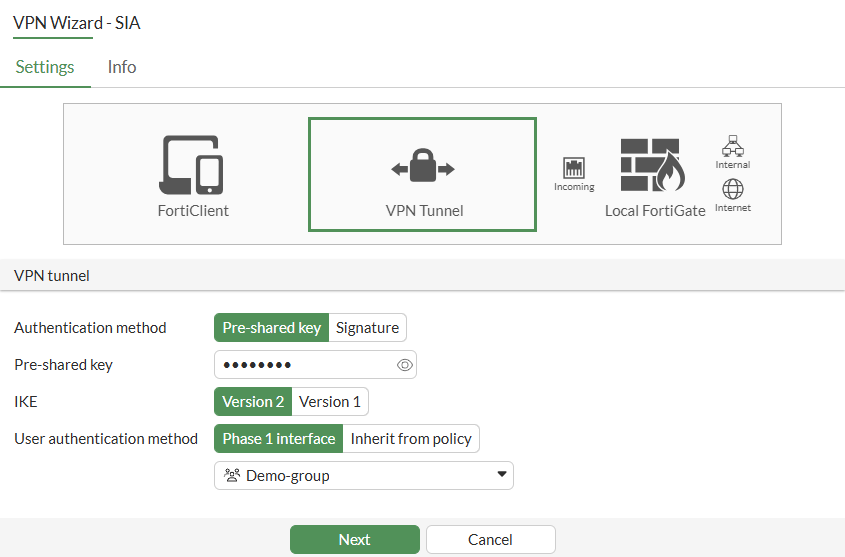
Configure the following VPN tunnel settings:
-
Set Authentication method to Pre-shared key.
-
Enter the Pre-shared key.
-
Set IKE to Version 2.
-
For User authentication method, select Phase 1 interface.
-
Click Next.

One or more user groups for user authentication can be configured under a single IPsec VPN tunnel. See Using single or multiple user groups for user authentication for details.
-
-
Configure the following Remote endpoint settings:
-
In Addresses to assign to connected endpoints, enter the client address range.
-
Enter the Subnet for connected endpoints.
-
Enable the FortiClient settings, as needed.
Field
Description
Security posture gateway matching
A tunnel connection will only be established when the endpoint is matched by a security posture tag. See Enforcing security posture tag match before dial-up IPsec VPN connection.
EMS SN verification
Enable/disable verification of EMS serial number. Requires both the FortiGate and FortiClient endpoints must be connected to the same FortiClient EMS. See Enhancing IPsec security using EMS SN verification.
Save password
Enable/disable saving username and password on VPN clients.
Auto Connect
Enable/disable allowing the VPN client to bring up the tunnel when there is no traffic.
Always up (keep alive)
Enable/disable allowing the VPN client to keep the tunnel up when there is no traffic.
-
Click Next.

-
-
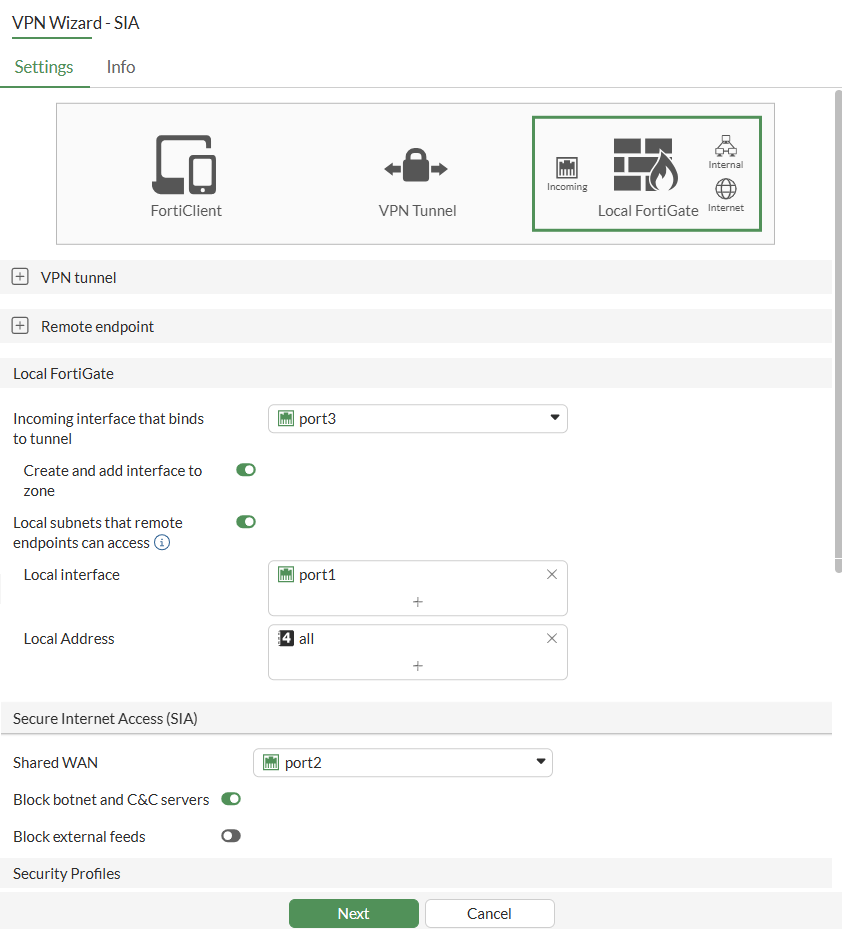
Configure the following Local FortiGate and Secure Internet Access (SIA) settings:
-
From the Incoming interface that binds to tunnel dropdown list, select the port. This port may be your WAN interface, or any other interface designated for establishing the IPsec tunnel on.
-
Enable Local subnets that remote endpoints can access.
-
Set the Local interface and Local Address.
-
From the Shared WAN dropdown list, select WAN interface. This interface can also be the same interface used for establishing the IPsec tunnel if your internet access is through it.
-
Enable the other Secure Internet Access (SIA) fields, as needed.

The Block external feeds field is an optional feature that allows you to block specific external feeds. After enabling the field, select an Address External Feed or Dynamic Address option to proceed.
-
Enable the required Security Profiles.
-
Click Next.
-
-
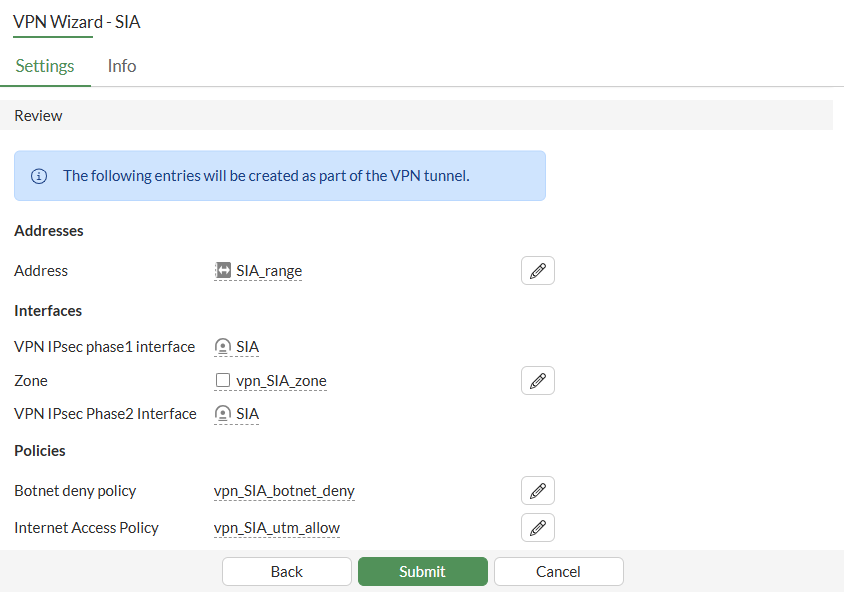
Click Submit.
To configure IPsec tunnels for FortiClient Secure Internet Access (SIA) in the CLI:
-
Configure the user and user group:
config user local edit "vpnuser1" set type password set passwd ******** next end config user group edit "vpngroup" set member "vpnuser1" next end -
Configure the LAN interface, such as port1:
Traffic from this interface routes out the IPsec VPN tunnel. Creating an address group for the protected network behind this FortiGate causes traffic to this network group to go through the IPsec tunnel.
config system interface edit "port1" set vdom "root" set ip 192.168.5.4 255.255.255.0 next end config firewall address edit "local_subnet_1" set subnet 192.168.5.0 255.255.255.0 next end config firewall addrgrp edit "local_network" set member "local_subnet_1" next end -
Configure the WAN interface for establishing the IPsec tunnel. Additionally, configure a separate WAN interface for internet access if applicable. If both functions use the same interface, configure only that single interface.
-
Configure the interface on which the IPsec tunnel is established:
config system interface edit "port3" set vdom "root" set ip 172.16.200.4 255.255.255.0 next end -
Configure the interface on which Internet access is enabled:
config system interface
    edit "port2"
        set vdom "root"
        set ip 172.17.200.4 255.255.255.0
    next
end
-
-
Configure the client address pool:
config firewall address edit "client_range" set type iprange set comment "VPN client range" set start-ip 10.10.2.1 set end-ip 10.10.2.200 next end -
Configure the IPsec Phase 1 interface:
config vpn ipsec phase1-interface
    edit "SIA"
        set type dynamic
        set interface "port3"
        set ike-version 2
        set peertype any
        set net-device enable
        set mode-cfg enable
        set proposal aes128-sha256 aes256-sha256 aes128gcm-prfsha256 aes256gcm-prfsha384 chacha20poly1305-prfsha256
        set dhgroup 20 21
        set eap enable
        set authusrgrp "vpngroup"
        set assign-ip-from name
        set ipv4-start-ip 10.10.2.1
        set ipv4-end-ip 10.10.2.200
        set dns-mode auto
        set eap-identity send-request
        set save-password enable
        set psksecret ********
        set transport auto
    next
end
One or more user groups for user authentication can be configured under a single IPsec VPN tunnel. See Using single or multiple user groups for user authentication for details.
-
Configure the IPsec Phase 2 interface:
config vpn ipsec phase2-interface edit "SIA" set phase1name "SIA" set dhgroup 20 21 set proposal aes128-sha1 aes256-sha1 aes128-sha256 aes256-sha256 aes128gcm aes256gcm chacha20poly1305 next end -
Configure the firewall policy to allow client traffic to flow over the IPsec VPN tunnel:
config firewall policy edit 1 set name "vpn_SIA_local_allow" set srcintf "SIA" set dstintf "port1" set action accept set srcaddr "SIA_range" set dstaddr "local_network" set schedule "always" set service "ALL" set nat enable next edit 2 set name "vpn_SIA_botnet_deny" set srcintf "SIA" set dstintf "port2" set srcaddr "all" set internet-service enable set internet-service-name "Botnet-C&C.Server" set schedule "always" set logtraffic all next edit 3 set name "vpn_SIA_utm_allow" set srcintf "SIA" set dstintf "port2" set action accept set srcaddr "SIA_range" set dstaddr "all" set schedule "always" set service "ALL" set utm-status enable set av-profile "default" set webfilter-profile "default" set dnsfilter-profile "default" set file-filter-profile "default" set ips-sensor "default" set application-list "default" set logtraffic all set nat enable next end -
Configure the FortiClient to connect to IPsec tunnel using the IP address configured on port 3. Review the IPsec tunnel details using CLI once it establishes:
# diagnose vpn ike gateway list

vd: root/0
name: SIA_0
version: 2
interface: port3 7
addr: 172.16.200.4:500 -> 172.16.200.242:500
tun_id: 10.10.2.1/::10.0.0.3
remote_location: 0.0.0.0
network-id: 0
transport: UDP
created: 119s ago
eap-user: userc
2FA: no
peer-id: 172.16.200.242
peer-id-auth: no
FortiClient UID: 6108A9179A5C40D7BD57504E15114C1F
assigned IPv4 address: 10.10.2.1/255.255.255.255
pending-queue: 0
PPK: no
IKE SA: created 1/1  established 1/1  time 20/20/20 ms
IPsec SA: created 1/1  established 1/1  time 0/0/0 ms

  id/spi: 1 f5244df351756ec7/8183f1f8f03b9f05
  direction: responder
  status: established 119-119s ago = 20ms
  proposal: aes256-sha256
  child: no
  SK_ei: 1d527193fb58b2dd-7019c0a5270cd57c-37e49e110ca64975-072b54563e4c1556
  SK_er: 4b393c9433147a16-eb5f2232fc46af80-bdfa28048275f780-7e7f0bf6da06db2c
  SK_ai: 98ed685e72dfd297-a049598cde672f86-e1e65682148cbe5b-ad6ceca024fcced4
  SK_ar: 655ee500ab17ed12-6fdb69e82ac827ee-21943cd3f206b69a-9e81df2b21ee0aab
  PPK: no
  message-id sent/recv: 0/29
  QKD: no
  PQC-KEM (IKE): no
  PQC-KEM (all IPsec): no
  lifetime/rekey: 86400/86010
  DPD sent/recv: 00000000/00000000
  peer-id: 172.16.200.242
-
Review the tunnel information:
# diagnose vpn tunnel list

list all ipsec tunnel in vd 0
------------------------------------------------------
name=SIA ver=2 serial=3 172.16.200.4:0->0.0.0.0:0 nexthop= tun_id=10.0.0.2 tun_id6=::10.0.0.2 status=up dst_mtu=0 weight=1
bound_if=7 real_if=0 lgwy=static/1 tun=intf mode=dialup/2 encap=none/552 options[0228]=npu frag-rfc  role=primary accept_traffic=1 overlay_id=0

proxyid_num=0 child_num=1 refcnt=3 ilast=42968340 olast=42968340 ad=/0
stat: rxp=681 txp=0 rxb=92088 txb=0
dpd: mode=on-demand on=0 status=ok idle=20000ms retry=3 count=0 seqno=0
natt: mode=none draft=0 interval=0 remote_port=0
fec: egress=0 ingress=0
------------------------------------------------------
name=SIA_0 ver=2 serial=4 172.16.200.4:0->172.16.200.242:0 nexthop= tun_id=10.10.2.1 tun_id6=::10.0.0.3 status=up dst_mtu=0 weight=1
bound_if=7 real_if=0 lgwy=static/1 tun=intf mode=dial_inst/3 encap=none/74408 options[122a8]=npu rgwy-chg frag-rfc  run_state=0 role=primary accept_traffic=1 overlay_id=0

parent=SIA index=0
proxyid_num=1 child_num=0 refcnt=5 ilast=0 olast=42968340 ad=/0
stat: rxp=681 txp=0 rxb=92088 txb=0
dpd: mode=on-demand on=1 status=ok idle=20000ms retry=3 count=0 seqno=0
natt: mode=none draft=0 interval=0 remote_port=0
fec: egress=0 ingress=0
proxyid=SIA proto=0 sa=1 ref=2 serial=1 add-route
  src: 0:0.0.0.0-255.255.255.255:0
  dst: 0:10.10.2.1-10.10.2.1:0
  SA:  ref=4 options=6a6 type=00 soft=0 mtu=1280 expire=43058/0B replaywin=2048
       seqno=1 esn=0 replaywin_lastseq=00000003 qat=0 rekey=0 hash_search_len=1
  life: type=01 bytes=0/0 timeout=43186/43200
  dec: spi=731984eb esp=aes key=16 cff89f9d407cb6e89f385a3cc92d1d2f
       ah=sha1 key=20 aaa09fadca2939fab551eaf1a7c79889ec6f1fb5
  enc: spi=15ee0fee esp=aes key=16 73f1af3bebd239e395aa42fe7e6a9687
       ah=sha1 key=20 814b04456e1f04eb8c6fadd057b54baa3dab47fa
  dec:pkts/bytes=3/120, enc:pkts/bytes=0/0
  npu_flag=02 npu_rgwy=172.16.200.242 npu_lgwy=172.16.200.4 npu_selid=1 dec_npuid=1 enc_npuid=0