
Selecting the Optimal Mode: VDOM vs. ADOM
In FortiADC deployments, administrators often face the decision of whether to use Virtual Domains (VDOMs) or Administrative Domains (ADOMs) to manage and isolate network resources effectively. VDOMs allow the creation of multiple, independent virtual instances of FortiADC, each with its own configuration, routing, and policies, offering granular control over traffic segmentation and security enforcement. ADOMs, on the other hand, provide a logical separation of administrative tasks, allowing centralized management across multiple FortiADC instances without affecting their underlying configurations.
Choosing between VDOMs and ADOMs is crucial for optimizing resource allocation, maintaining security, and ensuring scalability in complex environments. This technical guide examines the core functionality of VDOMs and ADOMs in FortiADC, and provides recommendations on when to deploy each based on factors such as system architecture, administrative hierarchy, and traffic management requirements.
For details, navigate to the respective sections for Use-case for VDOM and Use-case for ADOM.
Use-case for VDOM
Virtual Domains (VDOMs) in FortiADC provide the ability to partition a single appliance into multiple independent virtual instances, ideal for environments requiring traffic segregation and resource isolation. Each VDOM operates as a separate entity, with its own routing, security policies, and configurations. This allows for greater flexibility and isolation in environments where multiple tenants or distinct security zones must be maintained. VDOMs are ideal for organizations needing to consolidate hardware while ensuring isolated management and traffic control across different networks or clients. For instance, a service provider hosting multiple customers with separate application environments can utilize VDOMs to isolate customer traffic and configurations from each other.
In this use-case, each VDOM is configured with its own interfaces, routing, and address spaces, ensuring that no traffic crosses between VDOMs. This method supports unique address spaces, allowing even duplicate IP addresses across different VDOMs without conflict.
Scenario: Isolating Multiple Customer Environments
A service provider services multiple customers, where each customer deploys their own applications. To isolate customer traffic from each other, VDOMs can be configured as follows:
-
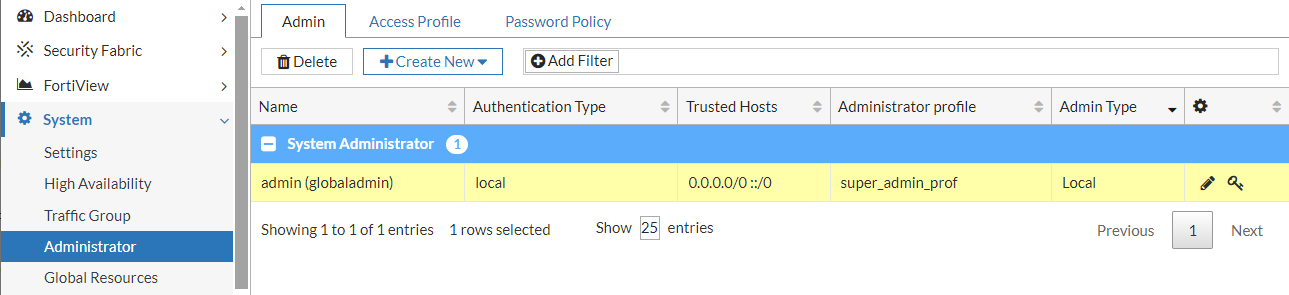
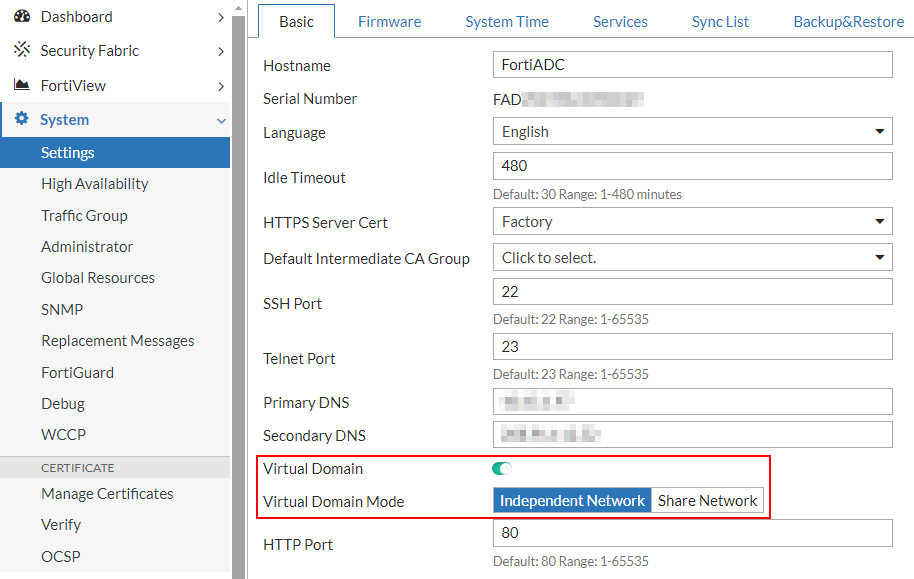
Log in as super admin and enable Virtual Domains in Independent Network mode.
-
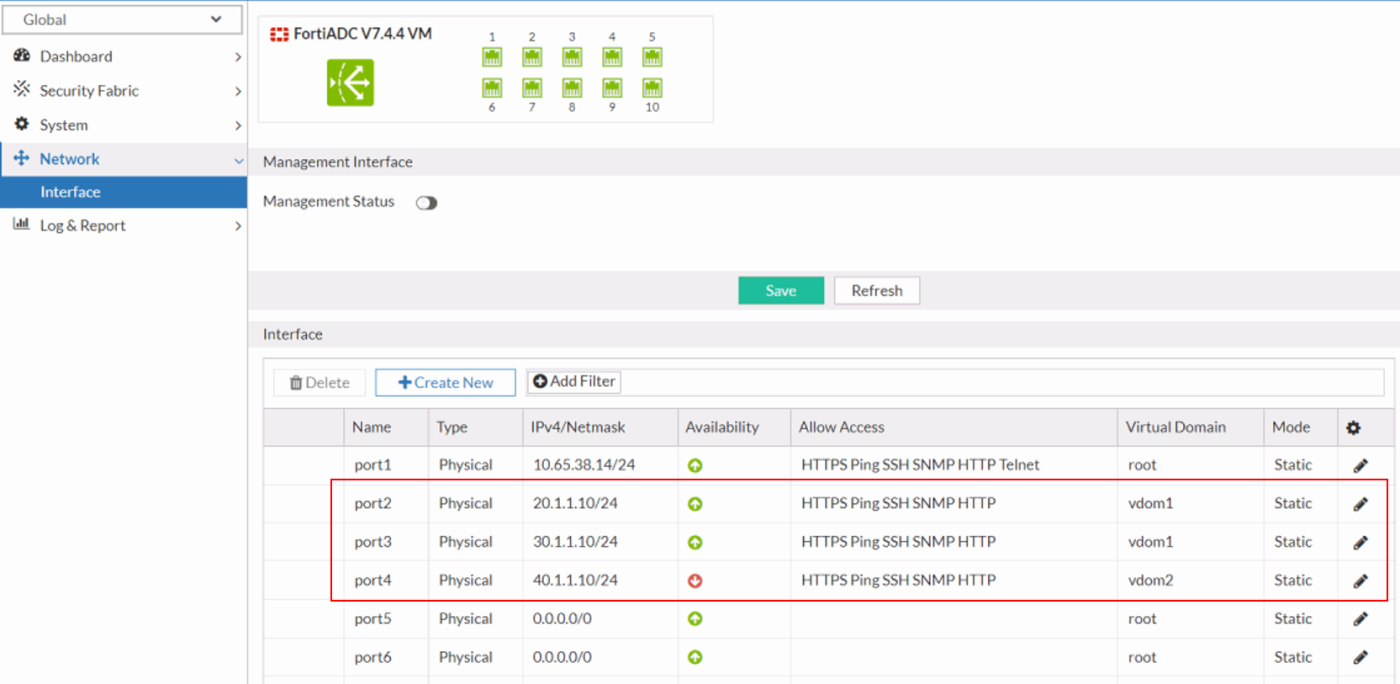
Provision separate VDOMs to host application environments for distinct customers. In this example, two VDOM instances—vdom1 and vdom2—were configured to isolate and manage traffic for customer1 and customer2, respectively.


-
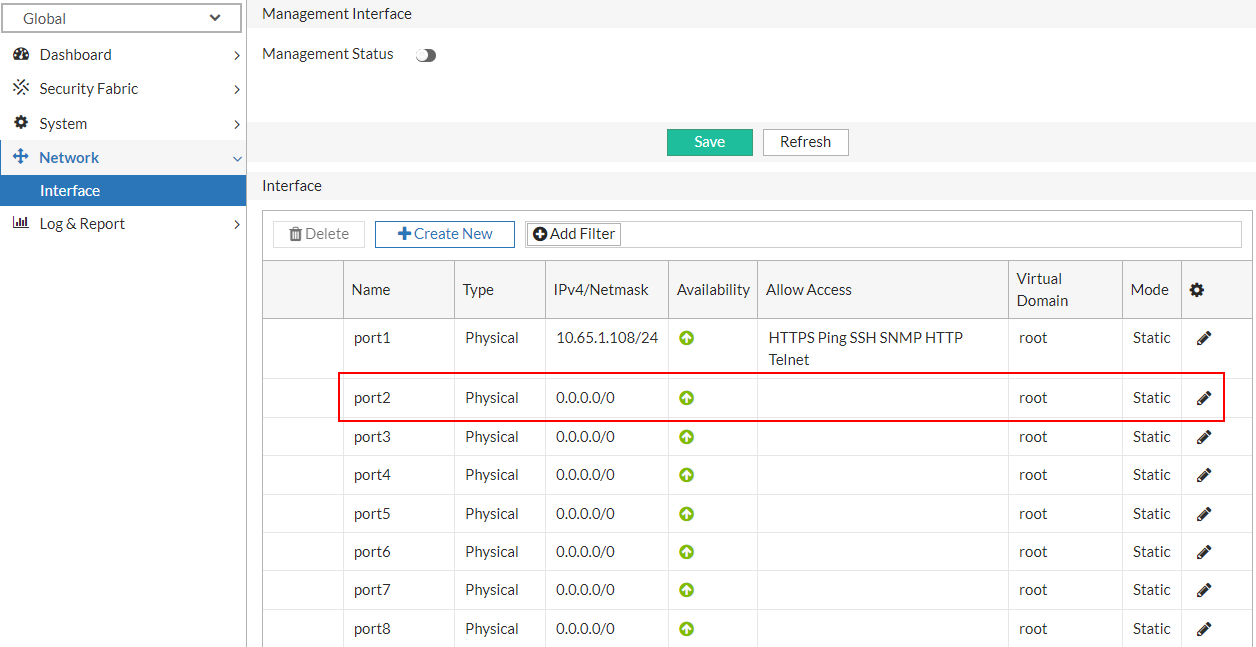
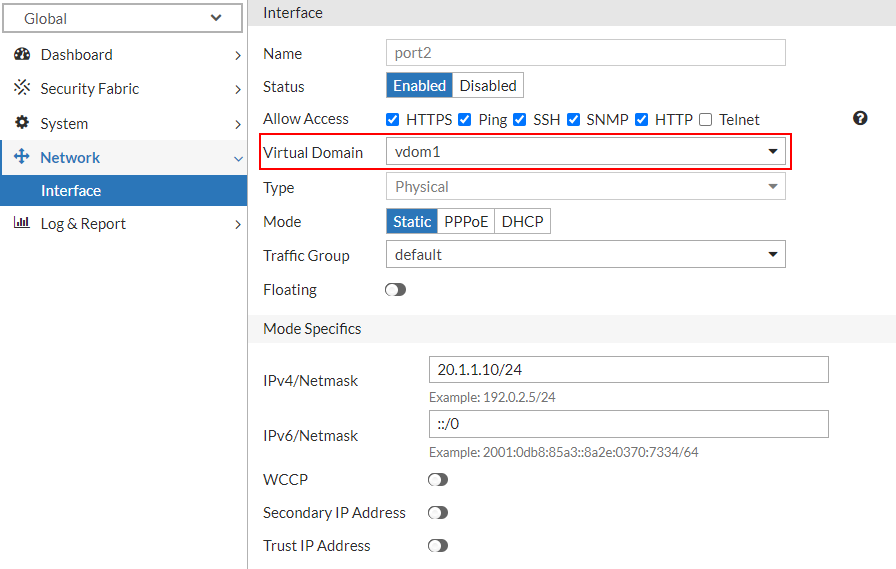
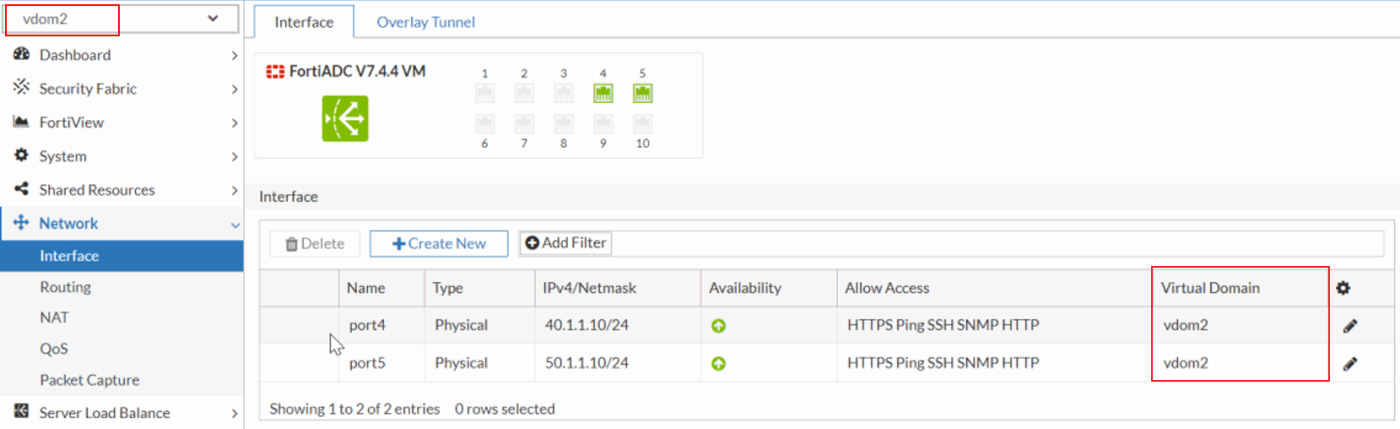
Allocate network interfaces to each VDOM and configure the corresponding IP addressing schemes. Ensure that each interface is bound to its respective VDOM with appropriate IP address assignments to facilitate traffic routing and network segmentation.
-
Within each VDOM, define a dedicated static route to ensure proper traffic forwarding to the corresponding backend server.
In this example, configure a static route in vdom1 to direct traffic toward customer1's real server, while vdom2's static route is set to forward traffic to customer2's designated server. Ensure each route is optimized for accurate destination reachability based on the configured next-hop and network topology.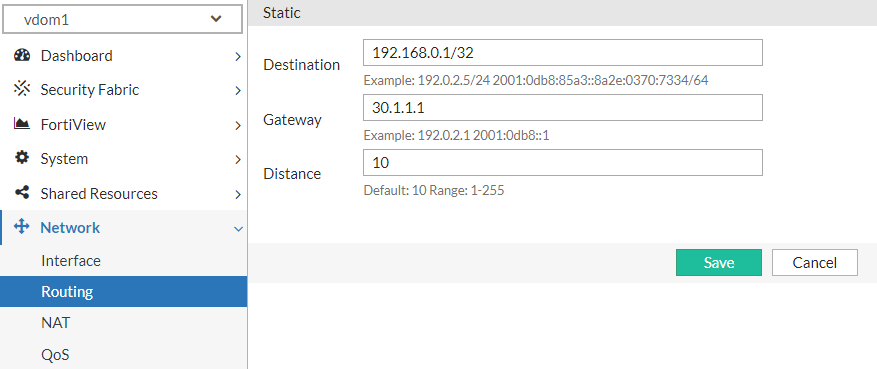

-
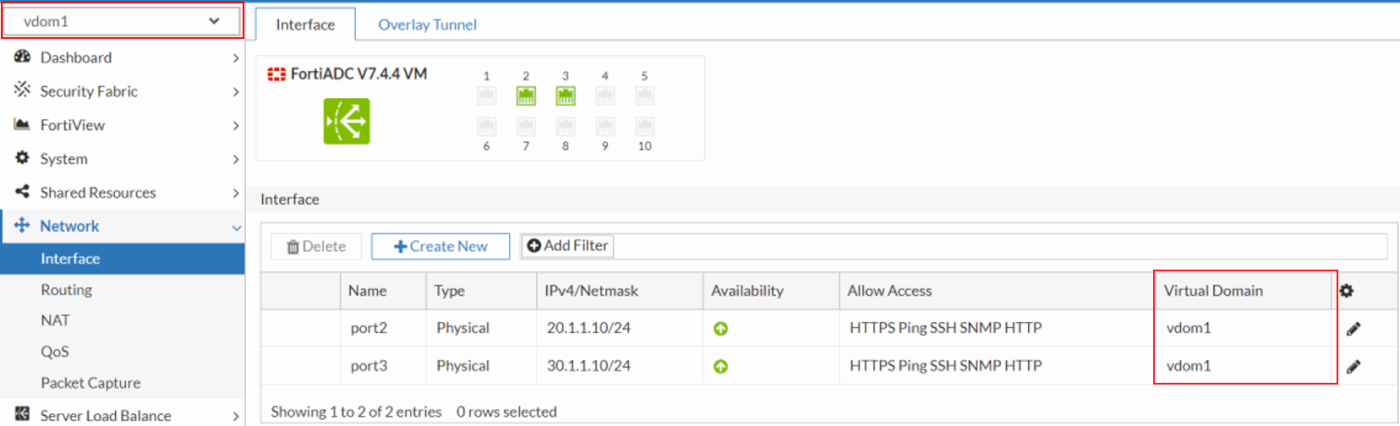
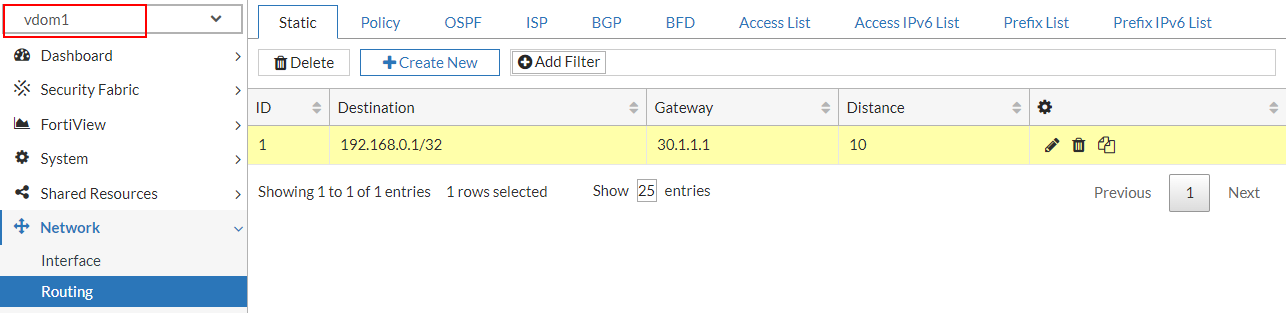
Validate that each VDOM has visibility restricted to its assigned network interfaces and routing table. Ensure that no cross-VDOM access to interfaces or route tables occurs, maintaining strict separation of resources and ensuring each VDOM operates within its own isolated network and routing domain.

-
Configure server load balancing on a per-VDOM basis for each customer application, encompassing the complete setup of real servers, real server pools, and virtual server definitions.
-
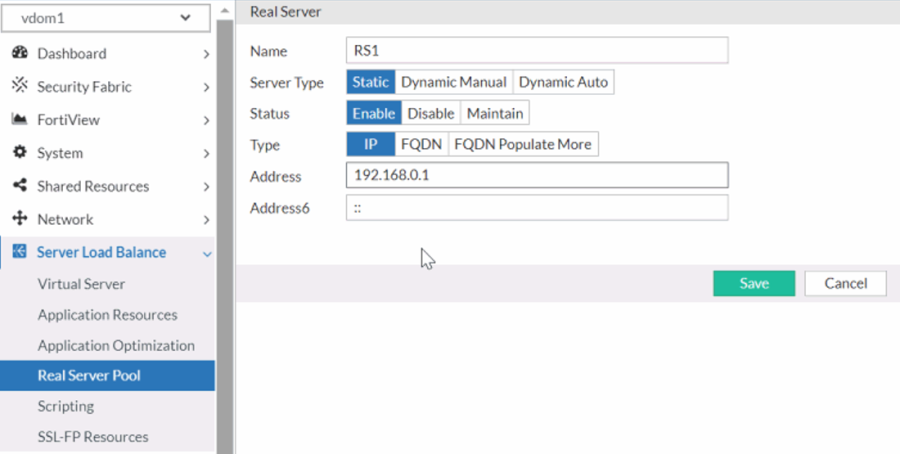
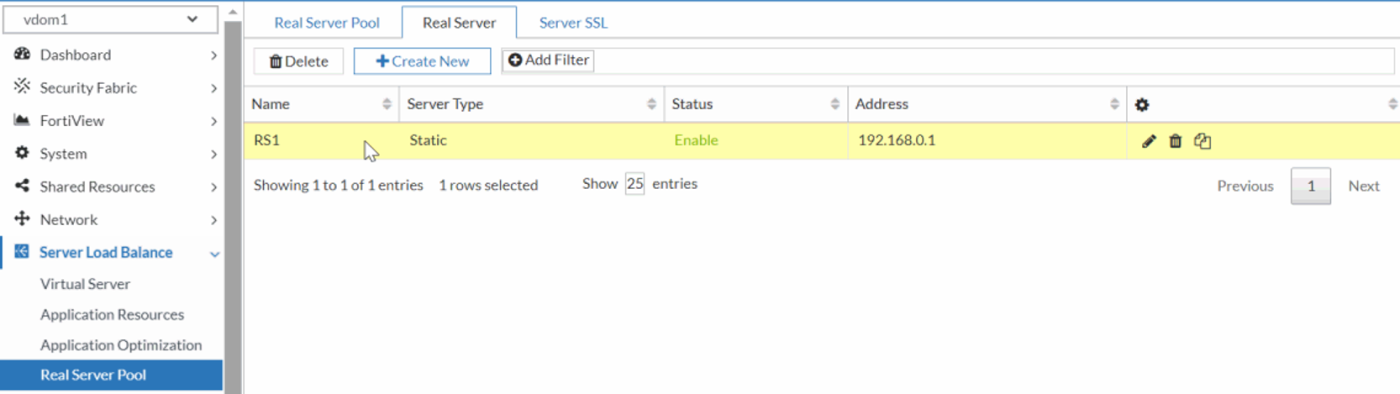
Create the real server to define and register the backend servers within each VDOM, specifying their IP addresses, ports, and any health check parameters required for monitoring server status.
-
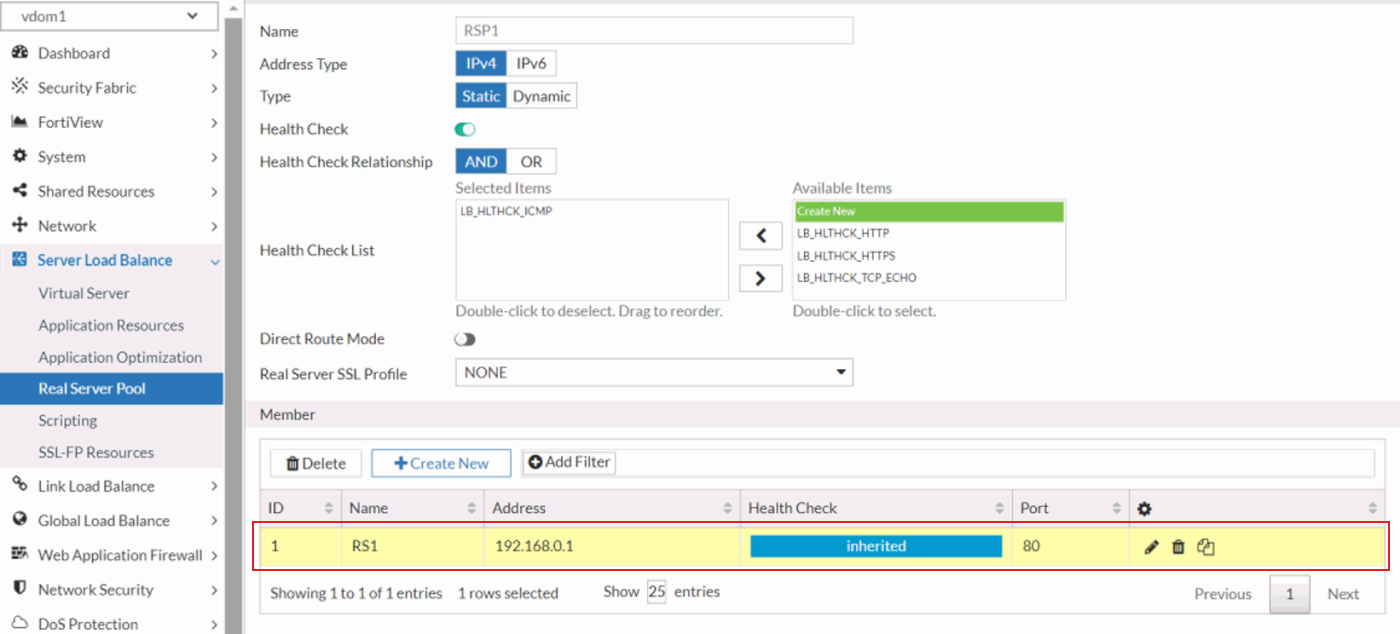
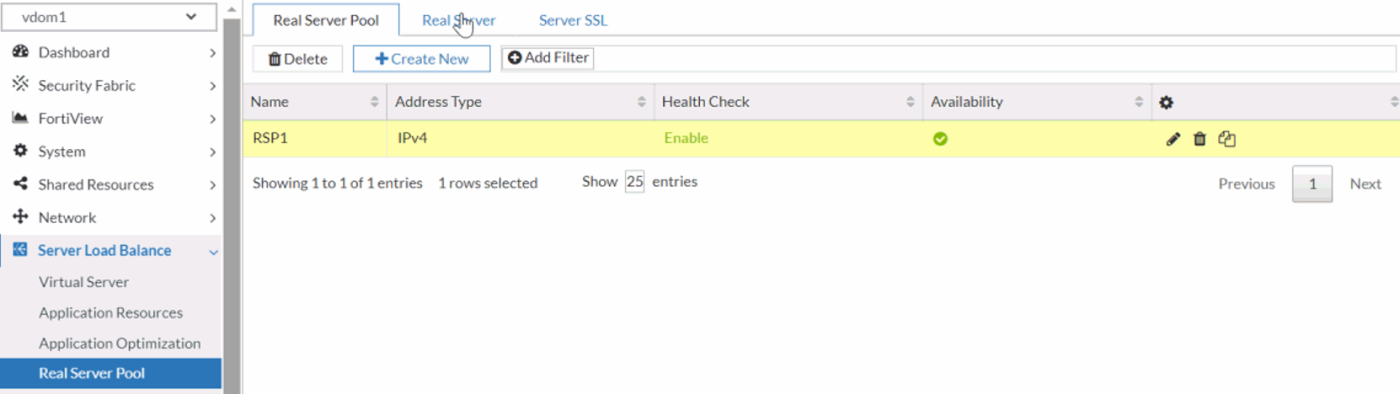
Create and manage the real server pools within each VDOM, aggregating real servers into logical groups for load distribution. Configure load-balancing algorithms and session persistence settings tailored to the application’s needs. In this example, the RS1 real server is added as a member to the RSP1 real server pool.
-
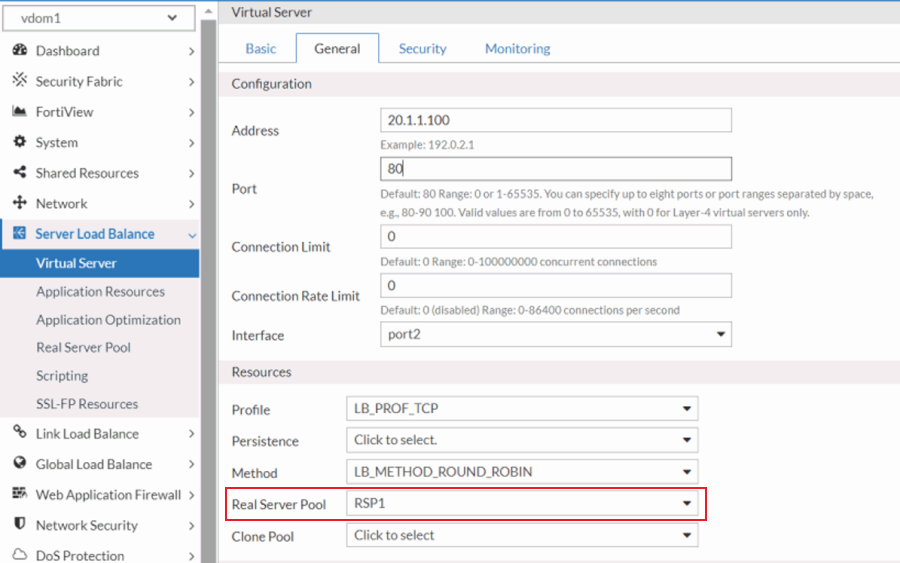
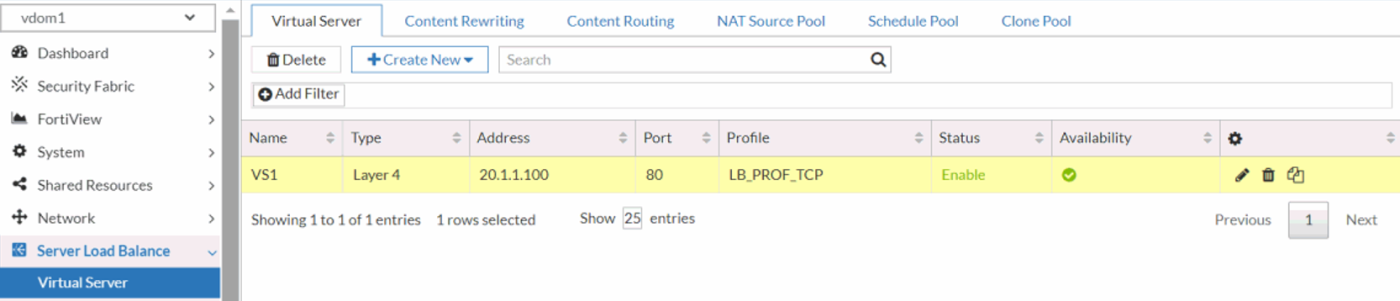
Create the virtual server within each VDOM, mapping them to the appropriate real server pools. Configure virtual servers with necessary IP addresses, ports, and access rules to handle incoming traffic and route it effectively to the designated real servers. In this example, the VS1 virtual server is mapped to the RSP1 real server pool.
-
-
Verify that each VDOM is configured to restrict visibility solely to its own virtual server, real server, and real server pool.
-
Verify that inter-VDOM traffic segmentation is properly enforced, ensuring complete isolation between traffic flows in each VDOM. Use the
execute pingcommand to test network connectivity between each VDOM and its respective virtual servers.
In this example, when vdom1 pings VS1 (its own virtual server), the packets should be successfully received. However, when vdom1 attempts to ping VS2 (the virtual server in vdom2), no packets should be received, confirming isolation. Perform the same test from vdom2, where VS2 should respond, but VS1 should remain unreachable, validating proper segmentation and isolation between the VDOMs.-
Retrieve the IP address assigned to the virtual server in each VDOM by accessing the respective VDOM’s configuration.
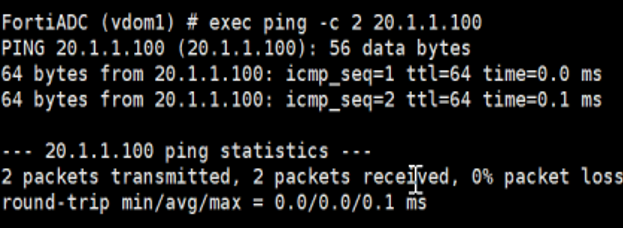
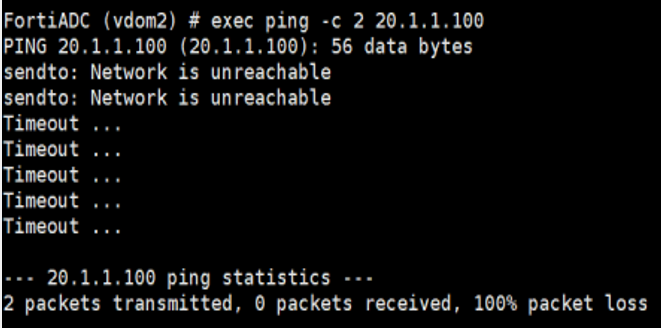
The IP address assigned to VS1, the virtual server in vdom1, is 20.1.1.100.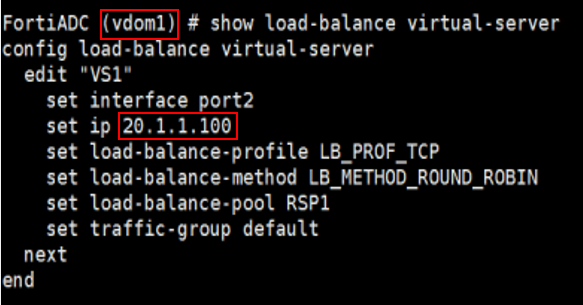
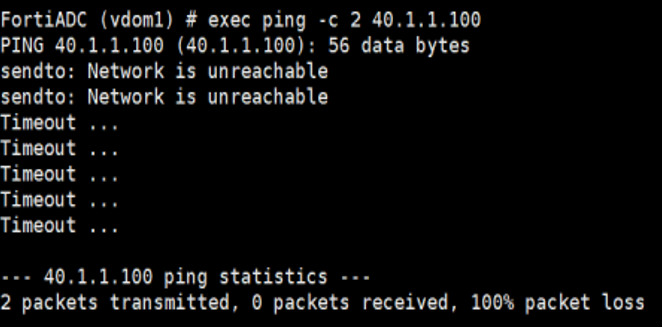
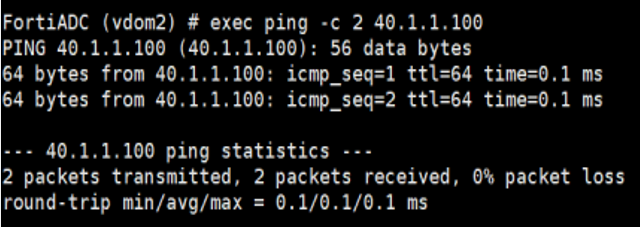
The IP address assigned to VS2, the virtual server in vdom2, is 40.1.1.100.
-
From vdom1, use the execute ping command to test connectivity to both VS1 (20.1.1.100) and VS2 (40.1.1.100). The ping to VS1 should succeed, confirming proper connectivity within vdom1, while the ping to VS2 should fail, verifying that inter-VDOM isolation is enforced.
-
From vdom2, use the execute ping command to test connectivity to both VS1 (20.1.1.100) and VS2 (40.1.1.100). The ping to VS2 should succeed, confirming proper connectivity within vdom2, while the ping to VS1 should fail, verifying that inter-VDOM isolation is enforced.
-
-
Verify that the virtual server in each VDOM works properly by connecting to the virtual servers from the client.
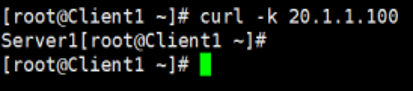
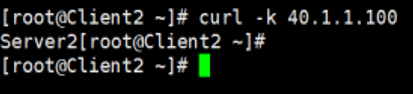
By following these steps, you can efficiently deploy and manage isolated network environments for multiple customers, ensuring robust traffic separation and independent resource allocation.
Use-case for ADOM
Administrative Domains (ADOMs) in FortiADC offer centralized management across multiple FortiADC instances while maintaining the integrity of each device’s individual configuration. By leveraging ADOMs, administrators can streamline policy, certificate, and object management across distinct devices without the risk of cross-device configuration interference. ADOMs are particularly useful in multi-appliance environments where consistency in administrative operations is key. For instance, in environments where multiple administrators need to manage different server load-balancing configurations but without segregating the network into isolated domains, ADOMs provide an efficient solution. By using shared interfaces and routes, multiple administrators can work within the same infrastructure while being assigned specific resources and management zones.
Scenario: Managing Server Load-Balancing with Multiple Administrators
For example, a customer wants to assign multiple administrators the responsibility to manage subsets of server load-balancing servers, but they do not want to break the network into multiple subdomains. In this case, ADOMs can be configured to share the same interfaces and routes while maintaining separate management zones for each admin.
-
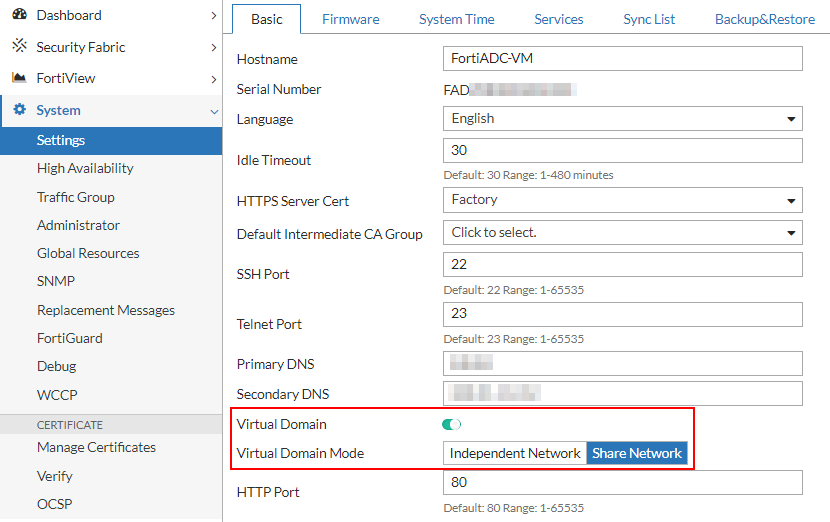
Log in as super admin and enable Virtual Domains in Shared Network mode.
-
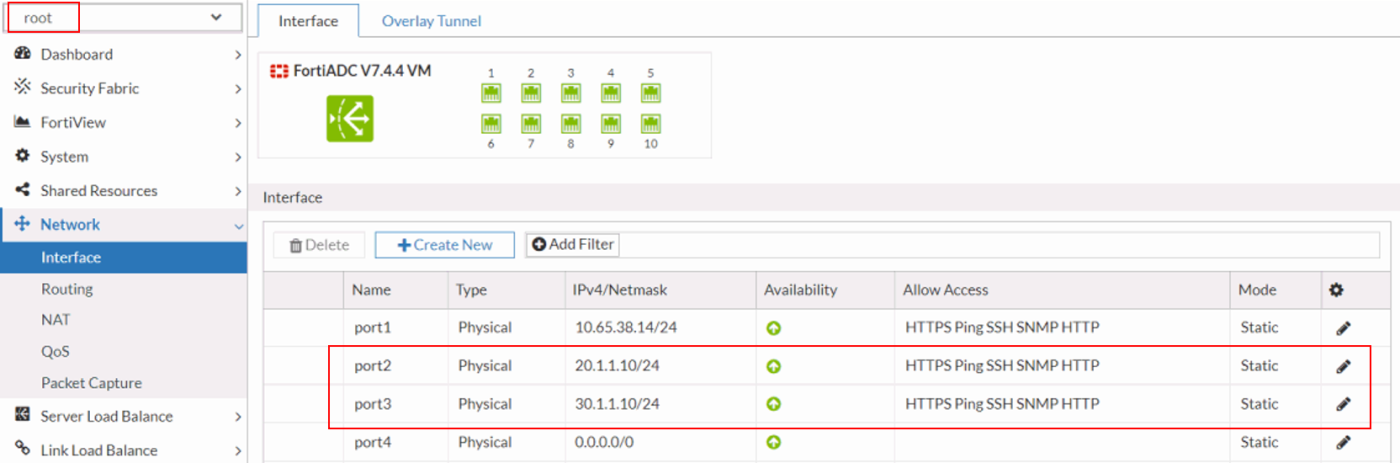
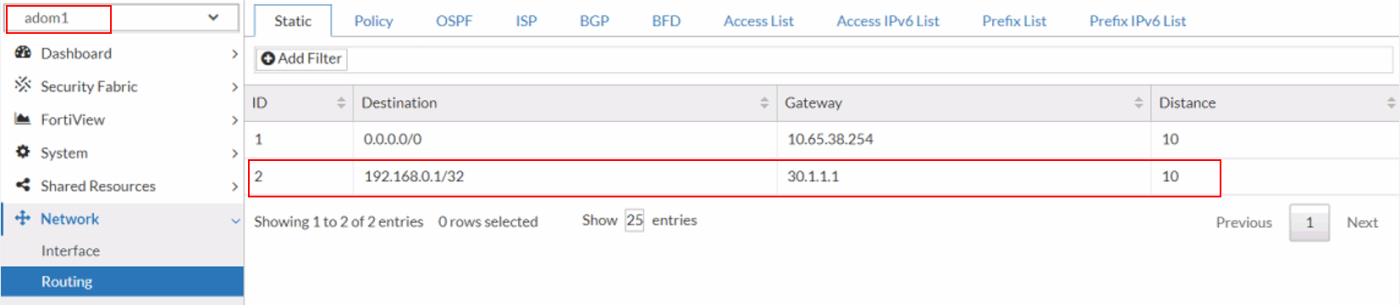
Configure the interfaces and establish network routing within the root ADOM to ensure proper communication across network segments. Assign the appropriate IP addresses and subnet masks to each interface, and define static or dynamic routing policies to direct traffic efficiently across the network infrastructure.
-
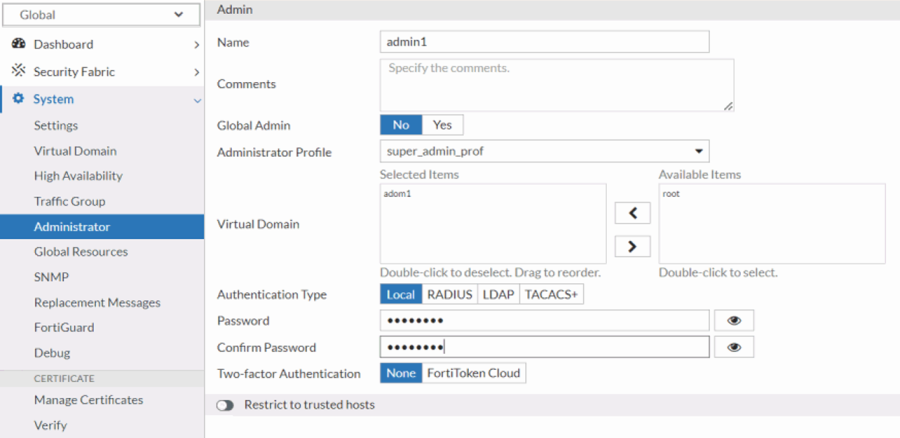
Create a non-root ADOM and assign a dedicated non-root ADOM administrator with the necessary permissions to manage and configure the ADOM. Ensure that role-based access control (RBAC) is properly applied to limit administrative privileges to the designated ADOM environment.


-
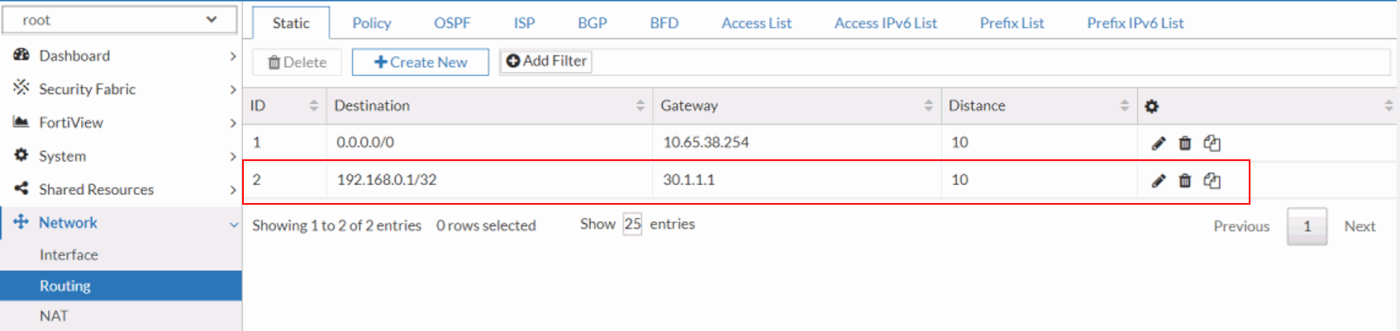
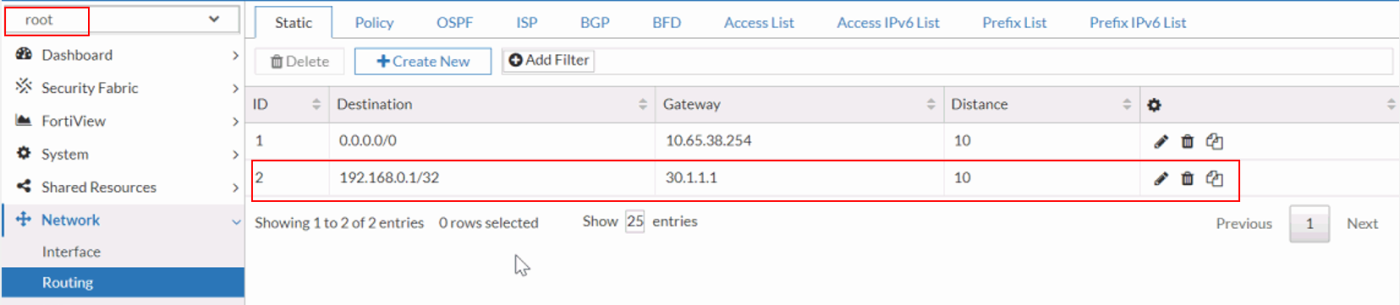
Verify that the interfaces and routes are accessible from both the root ADOM and the non-root ADOM (adom1). Ensure that the configurations are correctly propagated, allowing seamless visibility and management of the same network resources across both ADOM environments. Confirm that routing tables and interface assignments are consistent between the ADOMs, ensuring unified network operation.
root ADOM: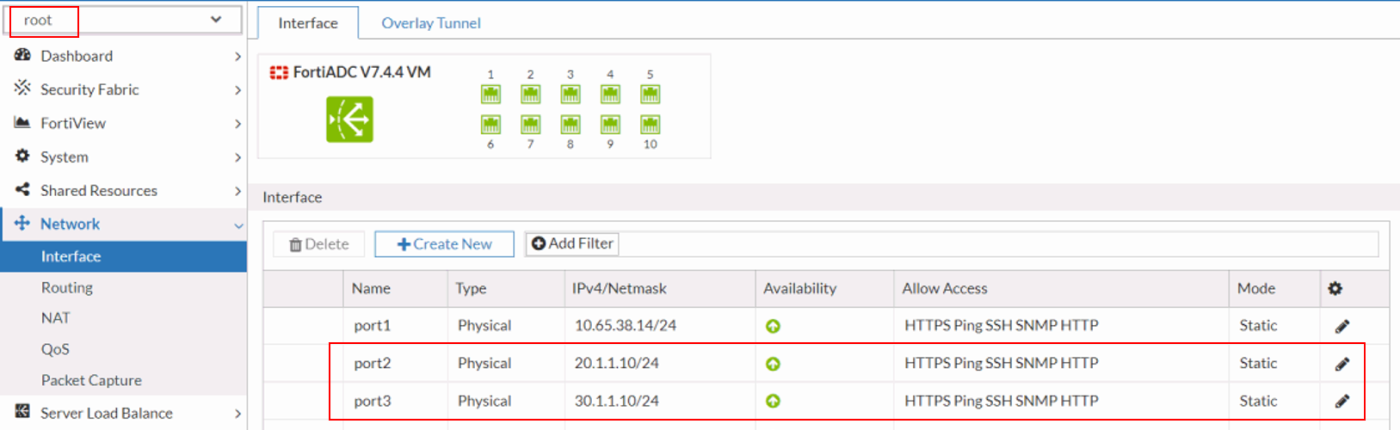
 non-root ADOM (adom1):
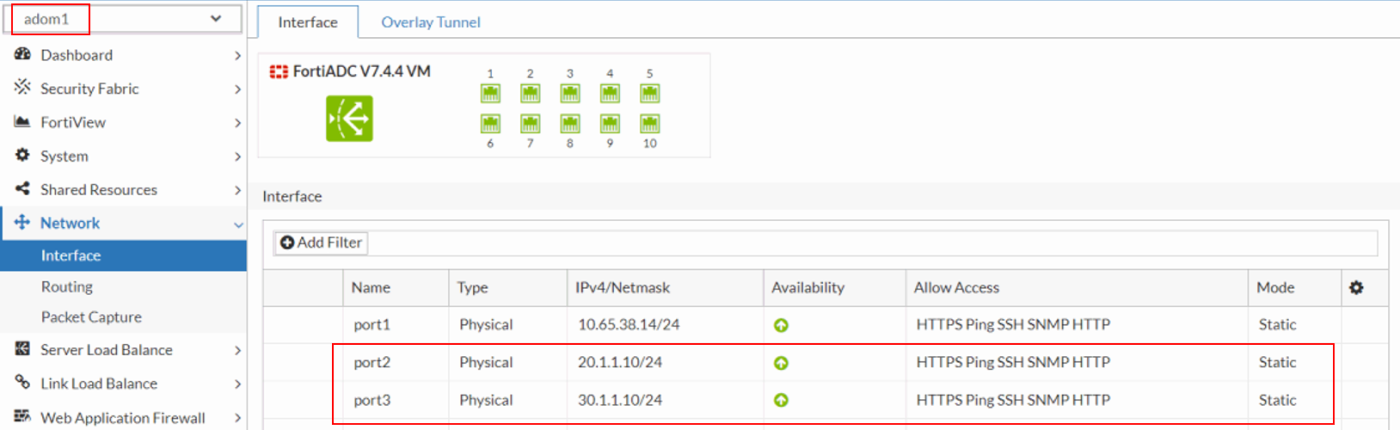
-
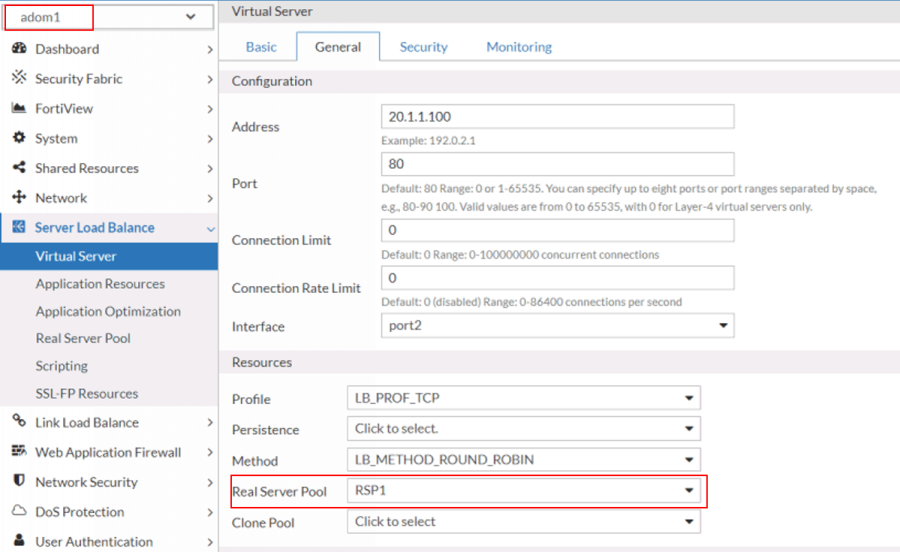
Create a virtual server within the non-root ADOM using the interfaces and routes inherited from the root ADOM. Ensure that the virtual server configuration leverages the correct network resources, including IP addresses, interfaces, and routing paths, to seamlessly integrate with the broader network architecture managed by the root ADOM.
-
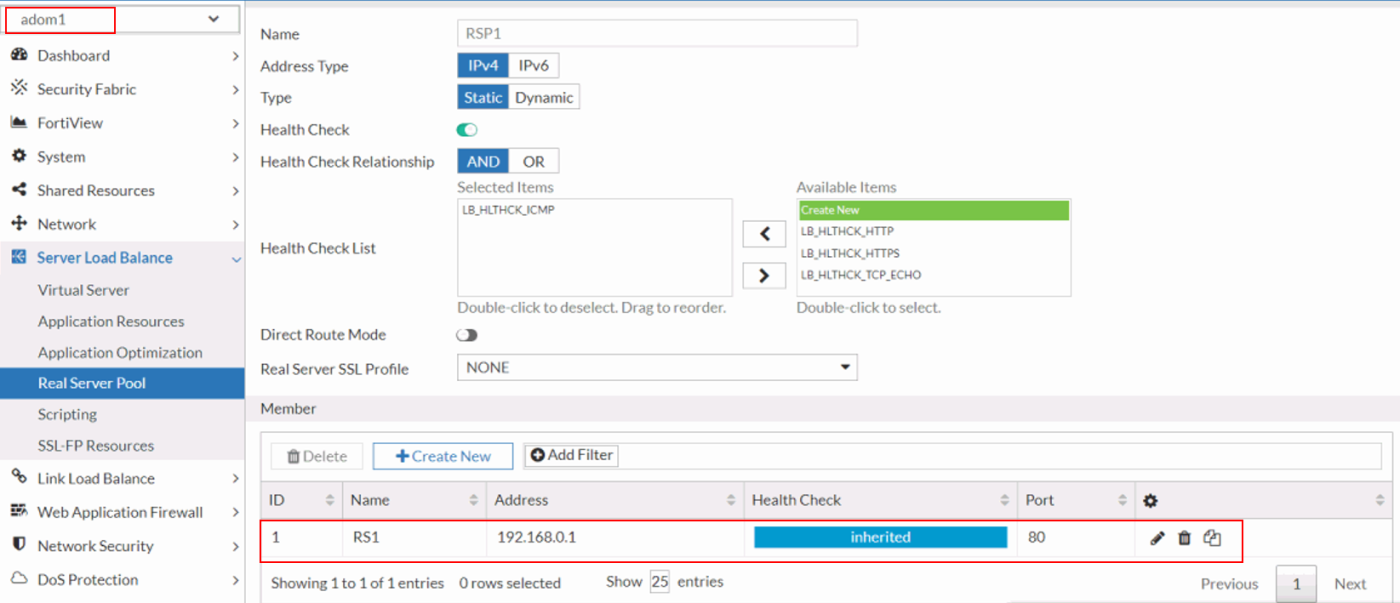
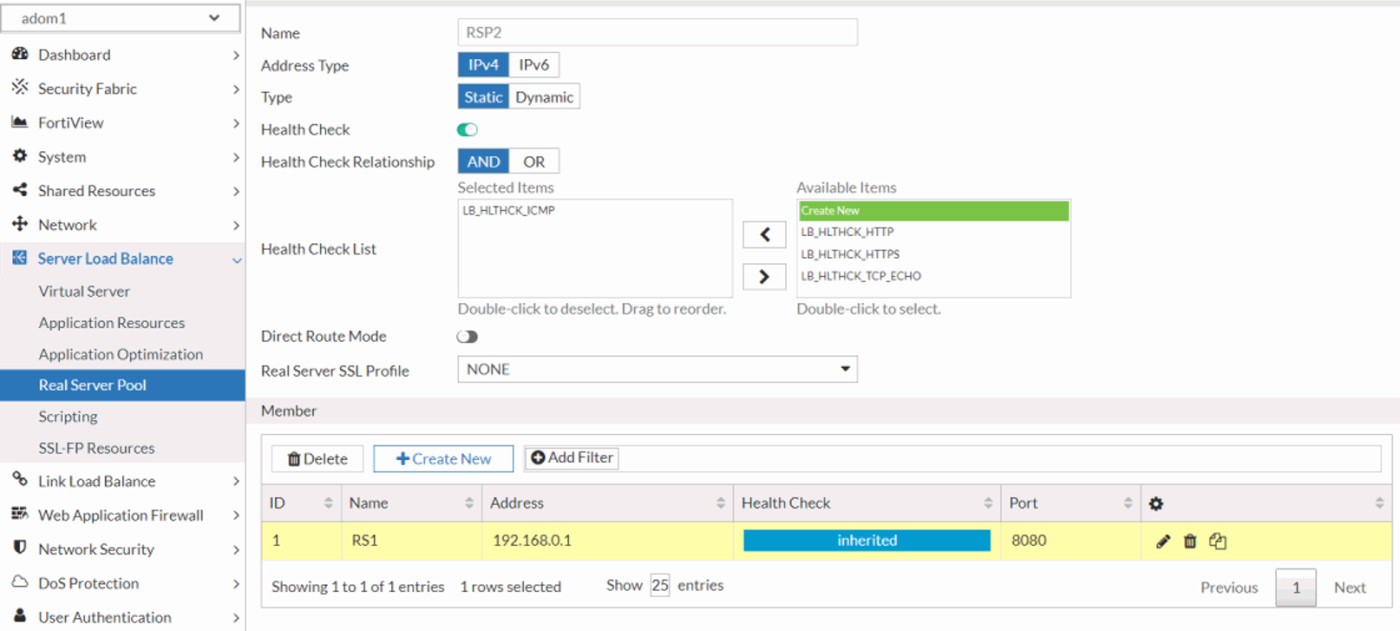
Create the real server by defining its IP address, port, and health check parameters. Ensure that the real server is properly configured to integrate with the load-balancing policies and is linked to the appropriate server pool for efficient traffic distribution.

-
Create and manage the real server pools by aggregating real servers into logical groups for load distribution. Configure load-balancing algorithms and session persistence settings tailored to the application’s needs. In this example, the RS1 real server is added as a member to the RSP1 real server pool.
-
Create the virtual server in the ADOM, mapping them to the appropriate real server pools. Configure virtual servers with necessary IP addresses, ports, and access rules to handle incoming traffic and route it effectively to the designated real servers. In this example, the VS1 virtual server is mapped to the RSP1 real server pool.
-
-
Log in as the non-root ADOM administrator and verify access to the root ADOM’s interfaces and routes. Ensure that the non-root administrator can view and manage the network resources from the root ADOM, confirming that appropriate permissions and visibility settings are correctly configured.
You should expect to see the same interface and routing settings in the root ADOM as those configured in the non-root ADOM (adom1).
-
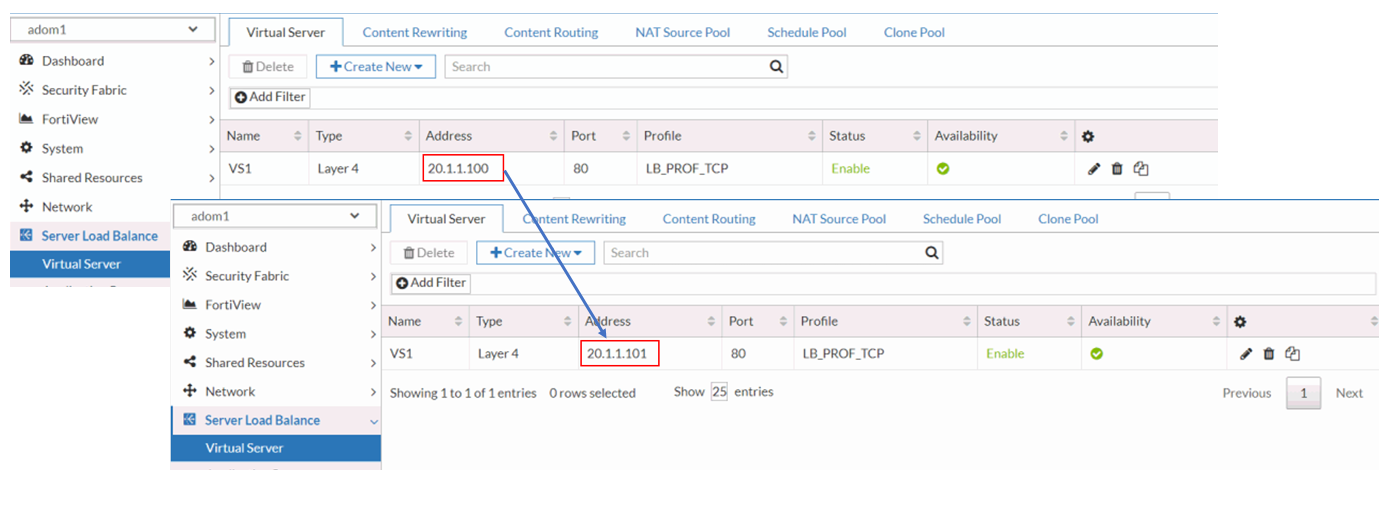
Verify that the non-root ADOM administrator can effectively manage the virtual server created by the super administrator. Ensure that the non-root admin has the appropriate permissions to view, configure, and modify the virtual server settings as necessary. For example, make minor adjustments to the existing virtual server configuration to test whether the system permits these changes.
-
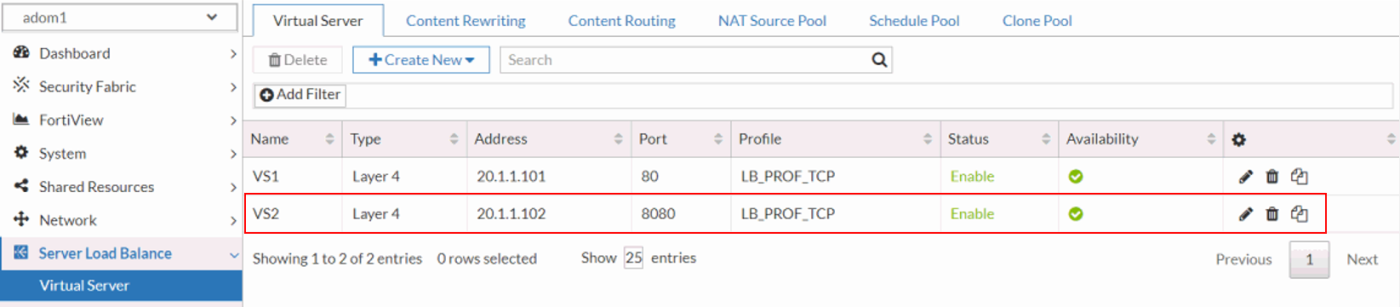
Verify that the non-root ADOM administrator can successfully create a new virtual server using the interfaces and routes inherited from the root ADOM. Ensure that the non-root admin can configure the virtual server with the appropriate network resources and routing parameters as defined in the root ADOM.
By leveraging ADOMs to streamline management, administrators can efficiently allocate resources and segregate responsibilities without compromising the unified network infrastructure. This approach simplifies operational tasks, enhances scalability, and ensures consistent management practices across large-scale deployments.