
Protecting GenAI access using application control
By leveraging FortiGuard’s GenAI application category within security profiles, organizations can monitor and manage AI-related activities, such as ChatGPT usage, ensuring compliance and reducing risk.
This technique offers visibility and insight to AI-related activities with deep packet inspection enabled. Following is a table of log fields available in the CLI and GUI for generative AI monitoring:
|
CLI log field |
GUI log field |
|---|---|
|
aiuser |
AI User |
|
model |
Model |
|
dcgeo |
Data Center's Geographical Location |
|
usecase |
Use Case |
|
prompt |
Prompt |
|
cloudgenai |
Generate AI Application |
The following FortiView widgets are available to support real-time monitoring of AI traffic:
-
AI Applications: Displays top traffic sessions aggregated by AI application, including details such as Risk, AI model, Sessions, and more. Selecting Drill Down on an application reveals specific insights like Users, Use Cases, and Data Center Locations.
-
AI Use Cases: Categorizes AI activity based on business or operational context, showing top traffic sessions by use case along with related Application, Sessions, and other metrics. Drill Down provides further details such as Users, Applications, and Data Center Locations.
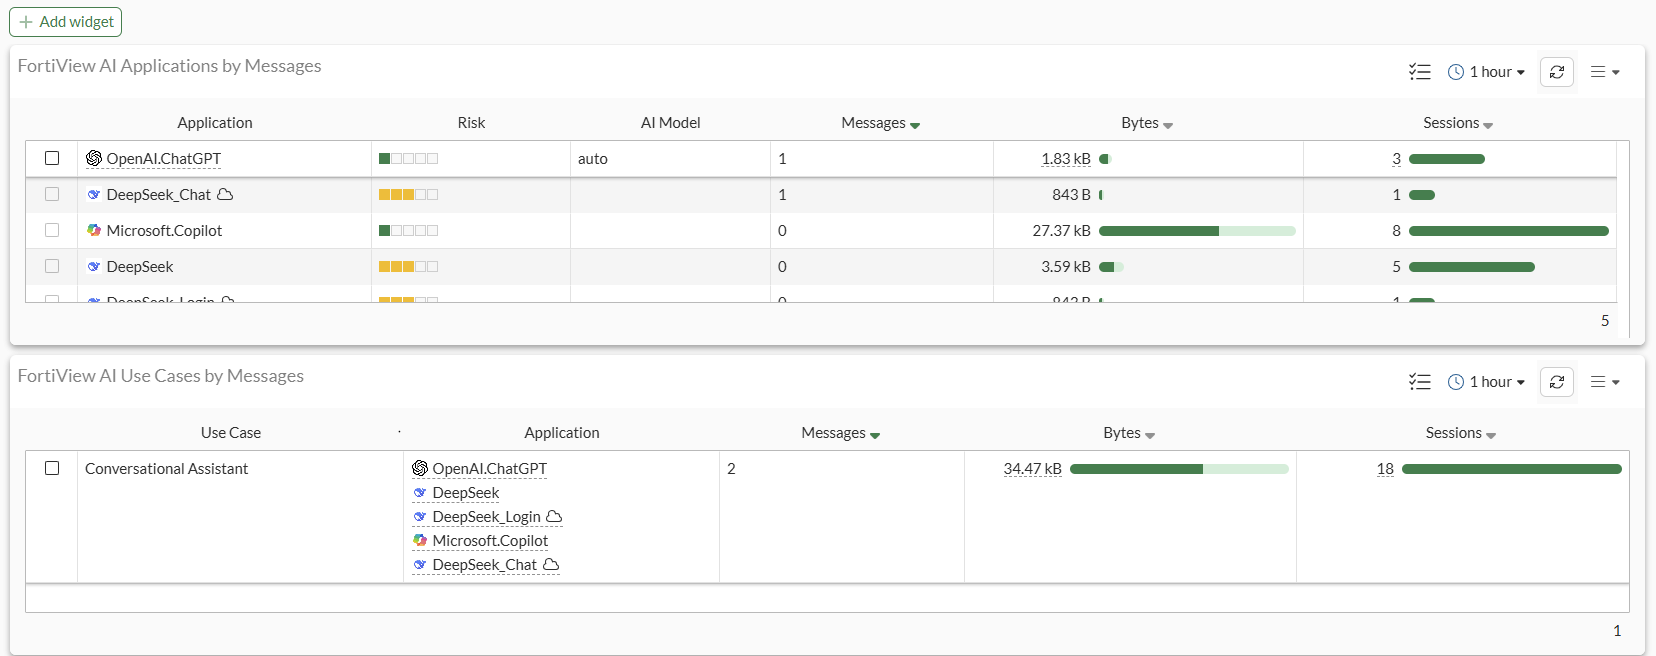
These widgets provide security teams with actionable insights and help enforce governance over AI usage within the network.
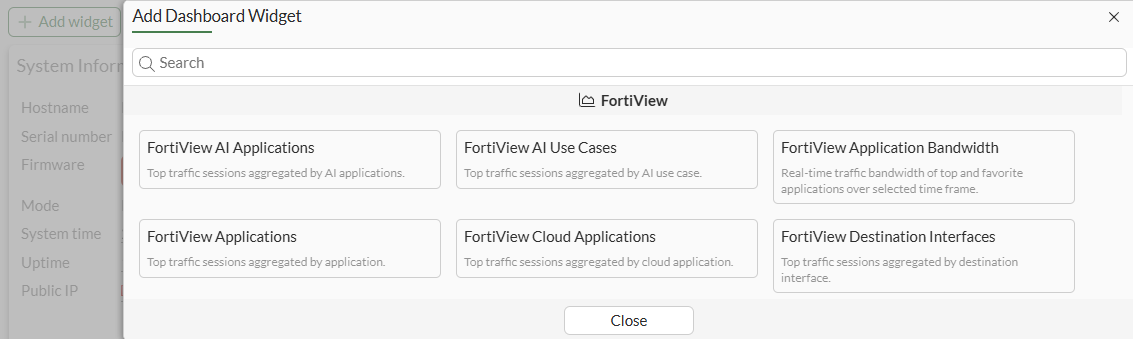
To add the FortiView AI widgets to the Dashboard:
-
Go to Dashboard > Status.
-
Click Add Widget.
-
Select FortiView AI Applications.
-
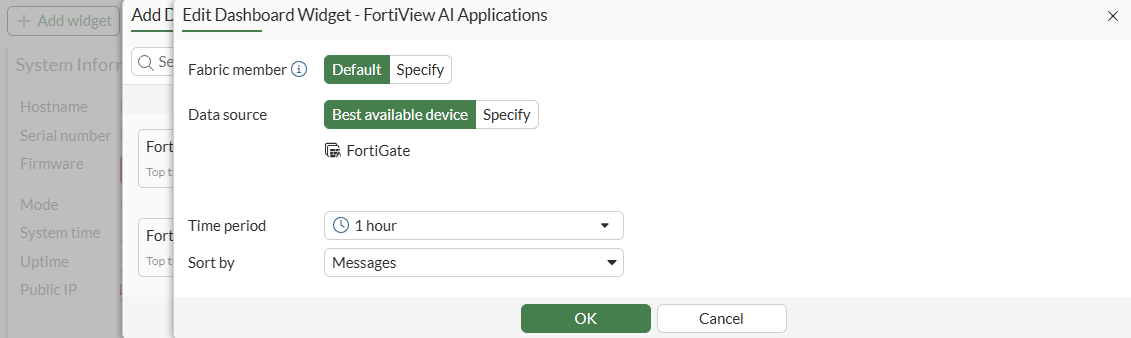
Configure the widget.
-
Click OK. The widget will be added to the Dashboard.
-
Repeat the configuration steps for FortiView AI Use Cases.

-
Click OK. The widget will be added to the Dashboard.
-
Click Close.
To review the generative AI database:
# diagnose autoupdate versions | grep -A 6 GenAI
GenAI Application Definitions
---------
Version: 33.00033 signed
Contract Expiry Date: Thu Jan  3 2030
Last Updated using scheduled update on Tue Jun 24 20:59:43 2025
Last Update Attempt: Tue Jun 24 23:10:03 2025
Result: No Updates
If you see Version: 0.00000, this implies that the AIAP database is not updated yet. For AIAP database to be updated, ensure that at least one firewall policy is utilizing an application control profile. Database updates require FMWR contract.
|
|
The |
Limitations and advanced configurations
Keep the following limitations and advanced configurations in mind when using Generative AI application control:
-
To work with proxy policies while using explicit proxy, for example, inline IPS must be disabled:
config ips settings set proxy-inline-ips disable end -
Some signatures require deep inspection and some do not.
To identify which signatures require deep inspection:
-
Go to Security Profiles > Application Signatures, and locate the Generative AI signature.
-
Hover over the signature to display the popup.
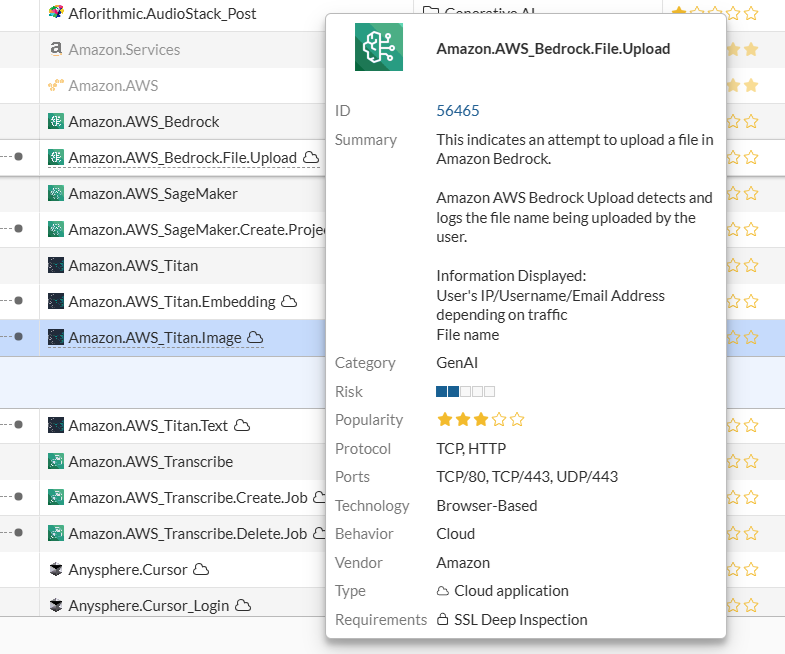
-
Locate the Requirements field to see whether SSL Deep Inspection is required.
-
-
Extended UTM log should be enabled to capture extra information in the log, such as model, message, GenAI user, DC location, and so on. This requires deep inspection.
This topic includes examples that incorporate several application control use cases:
Example 1: monitor access to Generative AI category
In this example, access to all signatures classified under the Generative AI category are monitored using an application control profile.
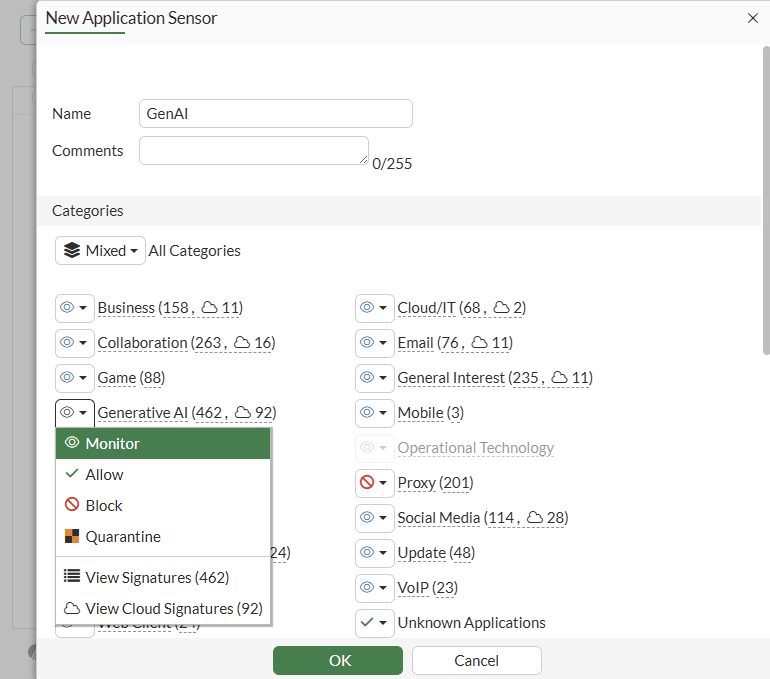
To create an application control sensor to monitor generative AI in the GUI:
-
Monitor generative AI in an application control sensor:
-
Go to Security Profiles > Application Control.
-
Click Create New.
-
Enter a Name.
-
Set the Generative AI category to Monitor.
-
Configure other fields, as needed.
-
Click OK.
-
-
Apply the sensor to a firewall policy with deep inspection:
-
Go to Policy & Objects > Firewall Policy and click Create New.
-
In the Security Profiles section, enable Application control and select the profile that you previously created. In this example, the GenAI profile is selected.
-
Set SSL Inspection to a profile where deep-inspection is enabled. In this example new-deep-inspection is selected.
-
Configure the other settings as needed.
-
Click OK.
-
-
On a Client Windows PC, log in to www.chatgpt.com and enter a test prompt.
-
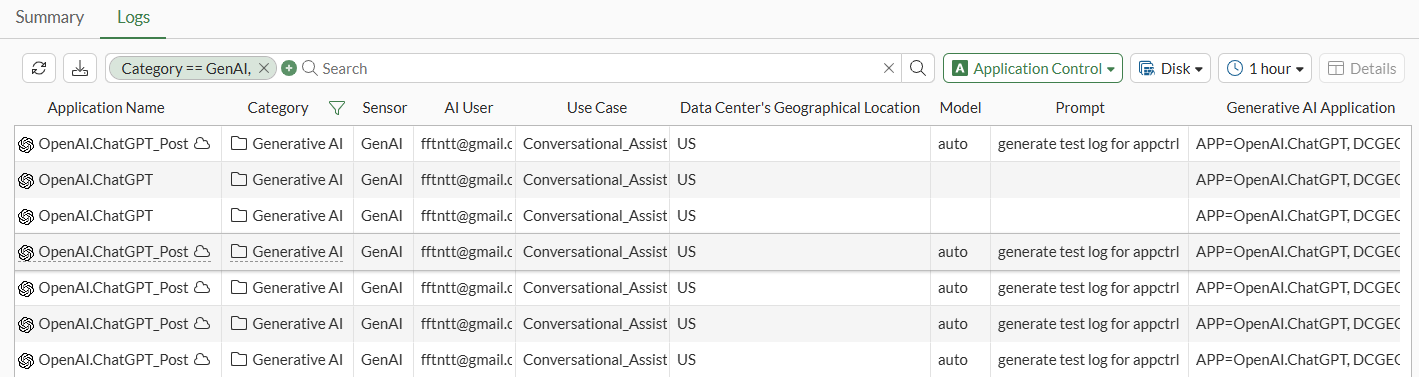
Review the application control UTM log for OpenAI.ChatGPT_Post:
Logs are listed in Log & Report > Security Events.
To implement generative AI application control in the CLI:
-
Monitor generative AI in an application control sensor:
config application list edit "GenAI" config entries edit 1 set category 36 set action pass next end next end -
Apply the sensor to a firewall policy with deep inspection:
config firewall policy edit 1 set name "1" set srcintf "port2" set dstintf "port1" set action accept set srcaddr "all" set dstaddr "all" set schedule "always" set service "ALL" set utm-status enable set ssl-ssh-profile "new-deep-inspection" set application-list "GenAI" set nat enable next end -
On a Client Windows PC, log into www.chatgpt.com and enter a test prompt.
-
Review the application control UTM log for OpenAI.ChatGPT_Post:
# execute log display
1: date=2025-06-25 time=00:13:07 eventtime=1750810387445006017 logid="1059028704" type="utm" subtype="app-ctrl" eventtype="signature" level="information" vd="vd1" appid=53323 srcip=10.1.100.126 srccountry="Reserved" dstip=110.18.32.47 dstcountry="United States" srcport=59001 dstport=443 srcintf="port2" srcintfrole="undefined" dstintf="port1" dstintfrole="undefined" proto=6 service="HTTPS" direction="incoming" policyid=1 policytype="policy" sessionid=1299 applist="GenAI" action="pass" appcat="GenAI" app="OpenAI.ChatGPT_Post" hostname="110.18.32.47" incidentserialno=61866712 url="/" httpmethod="POST" msg="GenAI: OpenAI.ChatGPT_Post" usecase="Conversational_Assistant" aiuser="fftntt@gmail.com" model="auto" dcgeo="US" prompt="generate test log for appctrl" cloudgenai="APP=OpenAI.ChatGPT, DCGEO=US, UseCase=Conversational_Assistant, User=fftntt@gmail.com, UserOrganization=org-F2ZasxjlplRvKPgeVfbXbPeM, HistoryTraining=true, Model=auto, Title='AppCtrl Test Log', Prompt='generate test log for appctrl'" apprisk="low"