


Deploy Kubernetes Agent on Azure AKS
In this tutorial, the fcli command line tool will be downloaded and executed in Azure AKS Cloud Shell for deployment of the Kubernetes agent.
Steps to Deploy Kubernetes Agent on Azure AKS - Part 1
- In Azure portal, click on the Cloud Shell button to launch Azure Cloud Shell.
- In Azure Cloud Shell command line, type
kubectlto enter Kubernetes command line tool to access the Kuberentes cluster. - Download the fcli command line tool:
wget https://forticwp-kubernetes-agent.s3.amazonaws.com/linux/fcli - Change the permission of the fcli command line tool:
chmod +x fcli


Steps to Deploy Kubernetes Agent on Azure AKS - Part 2
- There are two methods to deploy the Kubernetes agent controller. The first method of deployment is execute the fcli command tool in one command while the second method splits the command into multiple consecutive commands.
- Execute the deploy command as shown from Add Kubernetes Cluster page on kubectl command line:
- Execute the deploy command separately:
-
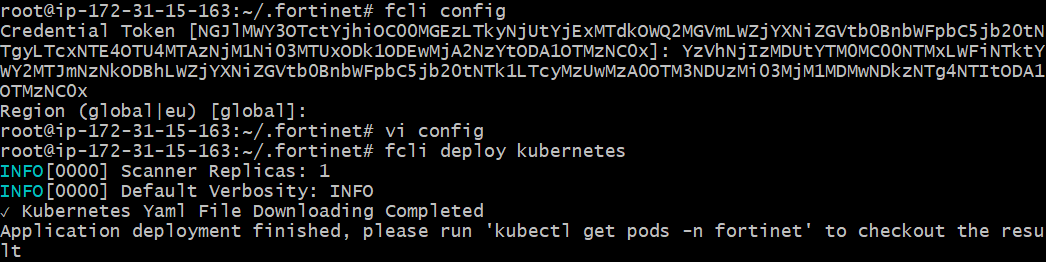
fcli config <Token>Note: The token provided from Add Kubernetes Cluster page. - When prompt for region, enter "
global" for non-European region, and "eu" for European region. fcli deploy kubernetes
-
./fcli deploy kubernetes --token <AccessToken> --region <Region>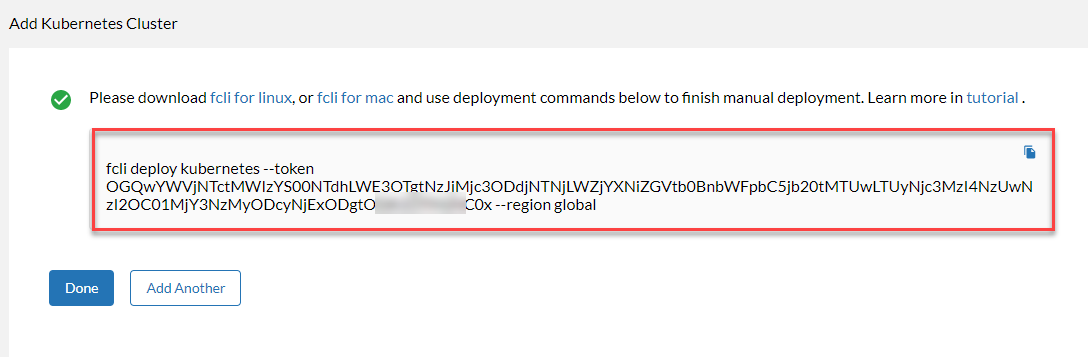
- If the fcli command was executed successfully, run the command below to verify it:
- A successful deployment should look like below with all worker nodes, controller, and scanner in Running status.
kubectl get pods -n fortinet

|
|
Note: Make sure the scanner node has enough space to pull and scan images before deploying the Kubernetes Agent pods. To prevent the Kubernetes Agent pods from being deployed on nodes that are not ready, use the following command: kubectl taint nodes <node name> node.kubernetes.io/not-ready:NoSchedule Example: kubectl taint nodes ip-192-168-51-200.eu-central-1.compute.internal node.kubernetes.io/not-ready:NoSchedule |