Firewall integration
When a firewall connector is set and Playbook policies are configured, automatic incident response actions can include blocking of malicious IP addresses by a firewall upon security event triggering.
Before you start firewall configuration, verify the following:
- You have installed an EDR Core and configured the Core as a Jumpbox with connectivity to the firewall. To request the EDR Core ISO, contact Fortinet Support.
- You have a valid API user with access to the external firewall. See Configuring FortiGate or Configuring FortiManager for detailed instructions about configuring FortiGate or FortiManager for the integration.
Follow the steps below to automatically deny access on the firewall to malicious destination addresses detected by EDR.
The example below describes how to define an address group on FortiGate and associate it with a FortiGate policy rule, such that it blocks connections to the addresses in the group. The address group is then used when configuring the EDR connector so that it is automatically populated with malicious destinations upon detection by EDR.
The same address group can obviously be used for multiple firewall policies in order to cover any VLAN-to-WAN interface in the network.
FortiGate configuration
To set up an address group and policy on FortiGate:
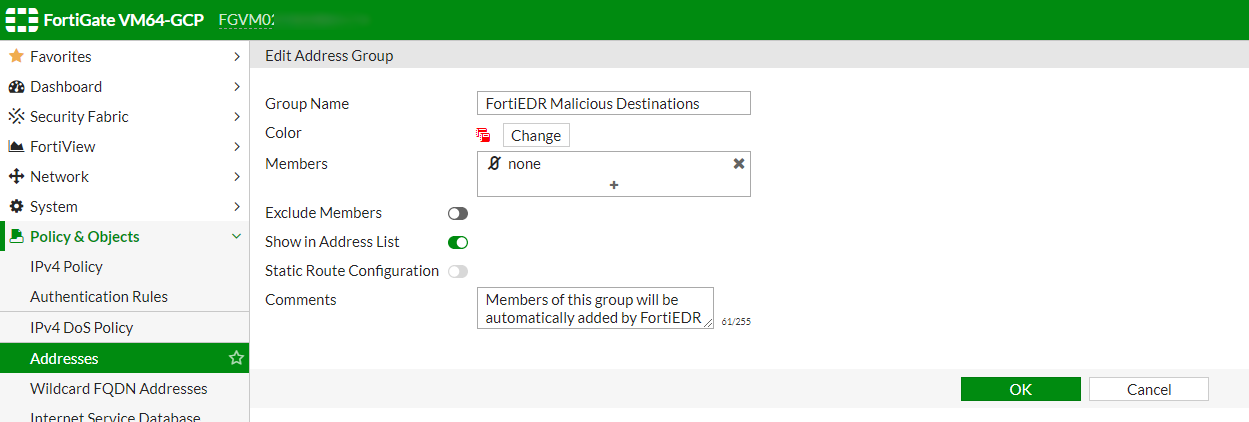
- Go to Policy & Objects > Addresses.
- Create a new address group to be populated by EDR. The new address group now appears in the FortiGate Addresses table.
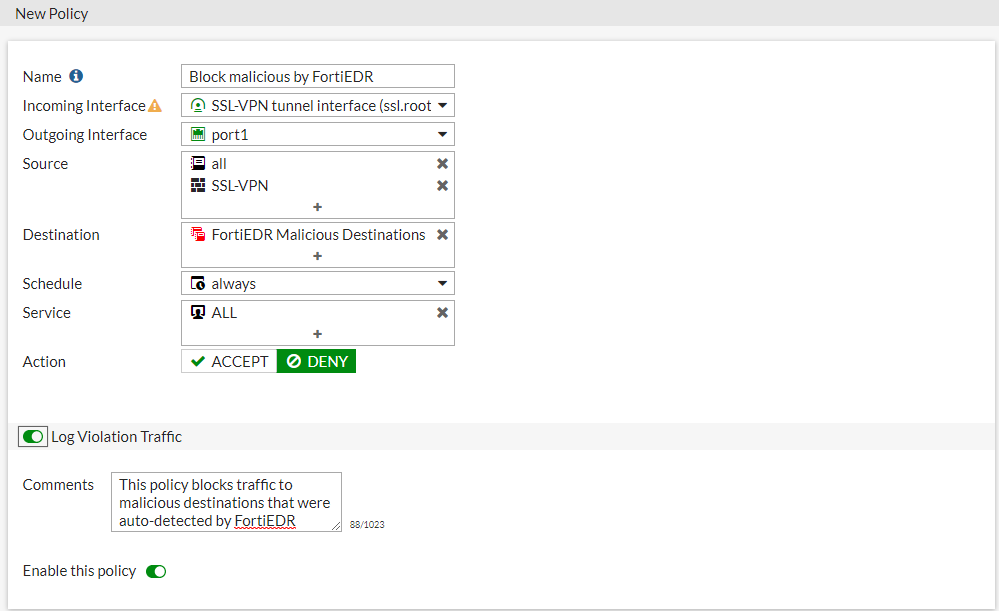
- Go to Policy & Objects > IPv4 Policy.
- Create a new policy to deny traffic to any address in the address group that was created as part of step 2. The new policy now appears in the FortiGate Policies table.
EDR firewall connector configuration
To set up a Firewall connector with EDR:
- Click the Add Connector button and select Firewall in the Connectors dropdown list. The following displays:
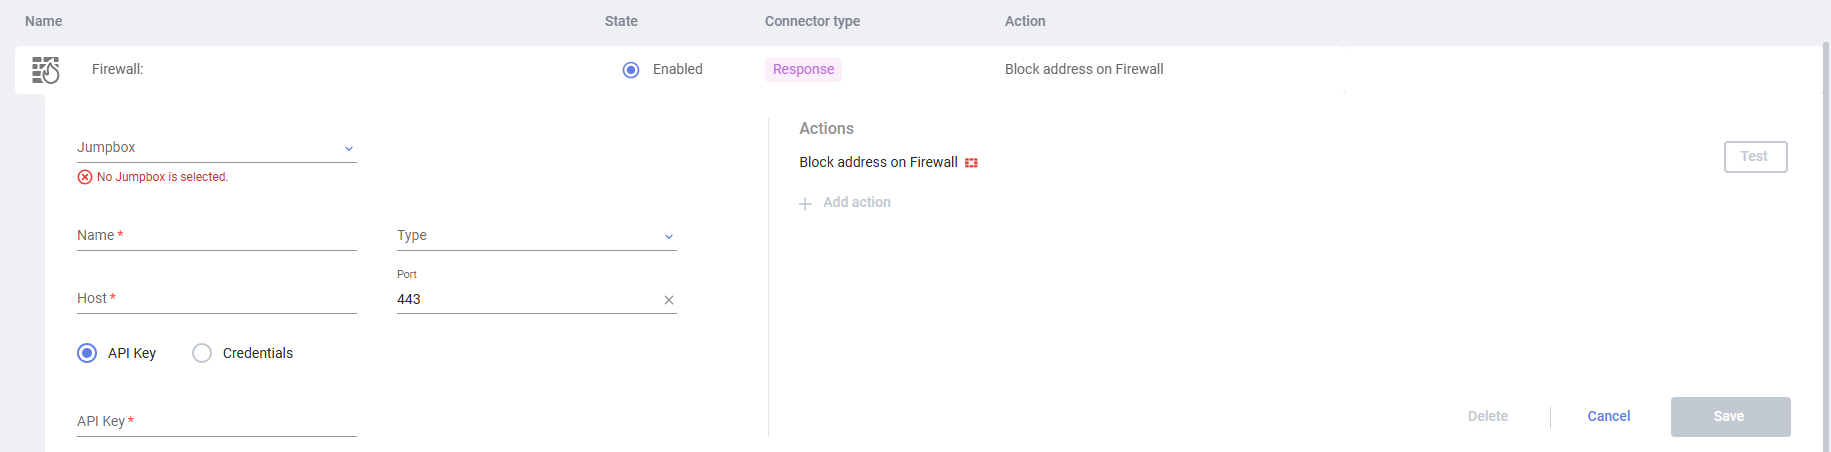
- Fill in the following fields:
Field
Definition
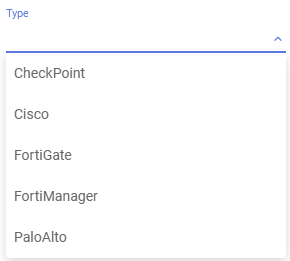
Jumpbox Select the EDR Jumpbox to communicate with the firewall. Name Specify a name of your choice to be used to identify this firewall. Type Select the type of firewall to be used in the dropdown list.
Host Specify the IP or DNS address of your firewall. Port Specify the port that is used for API communication with your firewall. API Key / Credentials Specify authentication details of your firewall. To use an API token, click the API Key radio button and copy the token value into the text box. To use API credentials, click the Credentials radio button and enter the Firewall API username and password. - In the Actions area on the right, define an action to be taken by this connector.
You have the option to either use an action provided out-of-the-box with EDR (for example, Block address on Firewall) or to create and use your own custom actions.
- To block an address on the Firewall, in the Address Group field, specify the name of a previously defined address group on the firewall. For FortiManager and FortiGate integrations, you can optionally specify the name of the VDOM domain in the VDOM field. EDR uses the default root VDOM if the VDOM field is empty.
- OR -
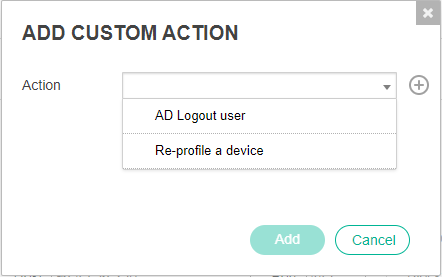
- To trigger a custom action on the Firewall, click the Add Action button to display the following popup window:
- In the Action dropdown menu, select one of the previously defined custom integration actions (which were defined in EDR as described in Custom integration).
– OR –
Click the Create New Action
 button in this popup window to define a new action on the Firewall to be triggered according to the definitions in the Playbook, as described below. The following displays:
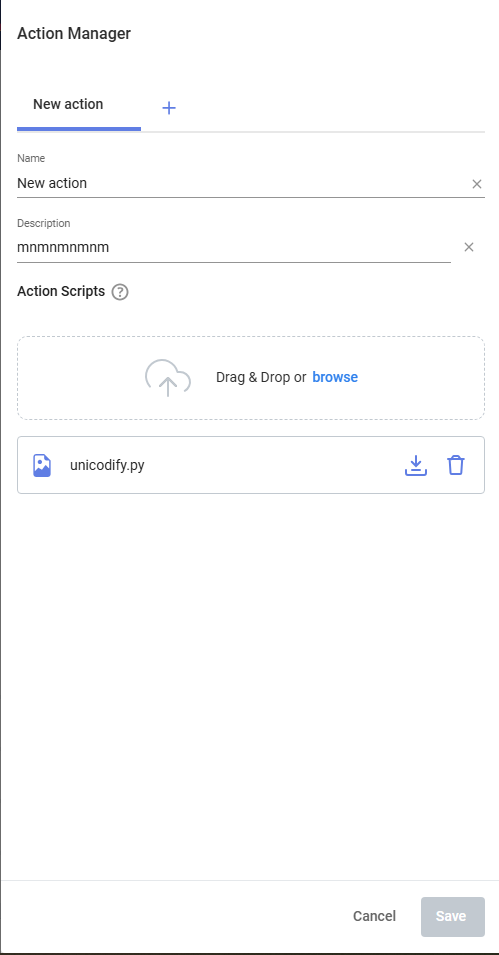
Fill out the fields of this window as follows in order to define a new action to be triggered in response to an incident.

In order to trigger this action, a Playbook policy must be defined that triggers this action to execute the script when a security event is triggered. The definition of this new action here automatically adds this action as an option in a Playbook policy. This action however, is not selected by default in the Playbook policy. Therefore, you must go to the Playbook policy and select it in order for it to be triggered when a security event is triggered.
Field
Definition
Name Enter any name for this action. Description Enter a description of this action. Upload Upload a Python script that calls an API in the third-party system in order to perform the relevant action. Python 2.7 or later is supported. This Python script must be created according to the coding conventions that can be displayed by clicking the icon
 next to the Action Scripts field. The following displays providing an explanation of these coding conventions and provides various links that you can click to see more detail and or/to download sample files.
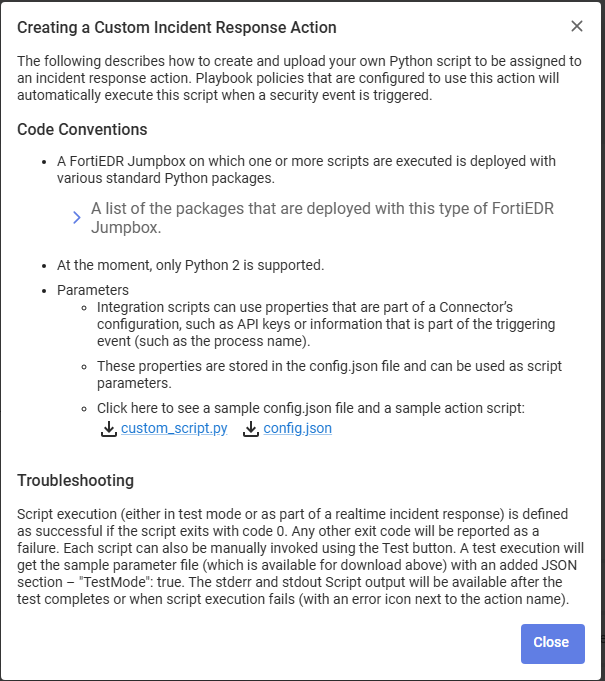
- To block an address on the Firewall, in the Address Group field, specify the name of a previously defined address group on the firewall. For FortiManager and FortiGate integrations, you can optionally specify the name of the VDOM domain in the VDOM field. EDR uses the default root VDOM if the VDOM field is empty.
- Click Save. The new action is then listed in the Actions area.
- You can click the Test button next to an action to execute that action.
|
|
If you are working with a FortiManager in order to manage firewalls, use the same instructions to integrate with the firewall, but select FortiManager as the integrated device Type when configuring the EDR Connector in the Profiles > Integrations > Connectors page. |
Playbooks configuration
To configure an automated incident response that uses a firewall connector to block malicious destinations upon security event triggering:
- Navigate to the Profiles > Playbooks page.
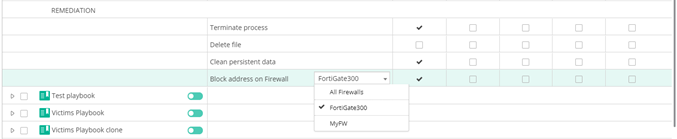
- Open the Playbook policy that is applied on devices for which you want the block IP incident response to apply and place a checkmark in the relevant Classification column next to the Block address on Firewall row that is under the REMEDIATION section. In the dropdown menu next to the action, you can specify which firewalls to use to perform the block or select all of them, as shown below:
EDR is now configured to add malicious IP addresses to the blocking policy on the firewall upon triggering of a security event. You can check that malicious IP addresses are added to the address group that was configured on the firewall following EDR security events.
To configure an automated incident response that uses a firewall connector to perform a custom action upon the triggering of a security event:
- Navigate to the Profiles > Playbooks page.
- Open the Playbook policy that is applied on devices for which you want the custom action (defined above) to apply.
- In the CUSTOM section, place a checkmark in the relevant Classification columns next to the row of the relevant custom action.
- In the dropdown menu next to the relevant custom action, select the relevant firewall connector with which to perform the action, as shown below:

EDR is now configured to trigger this action in the third-party system upon the triggering of a security event.
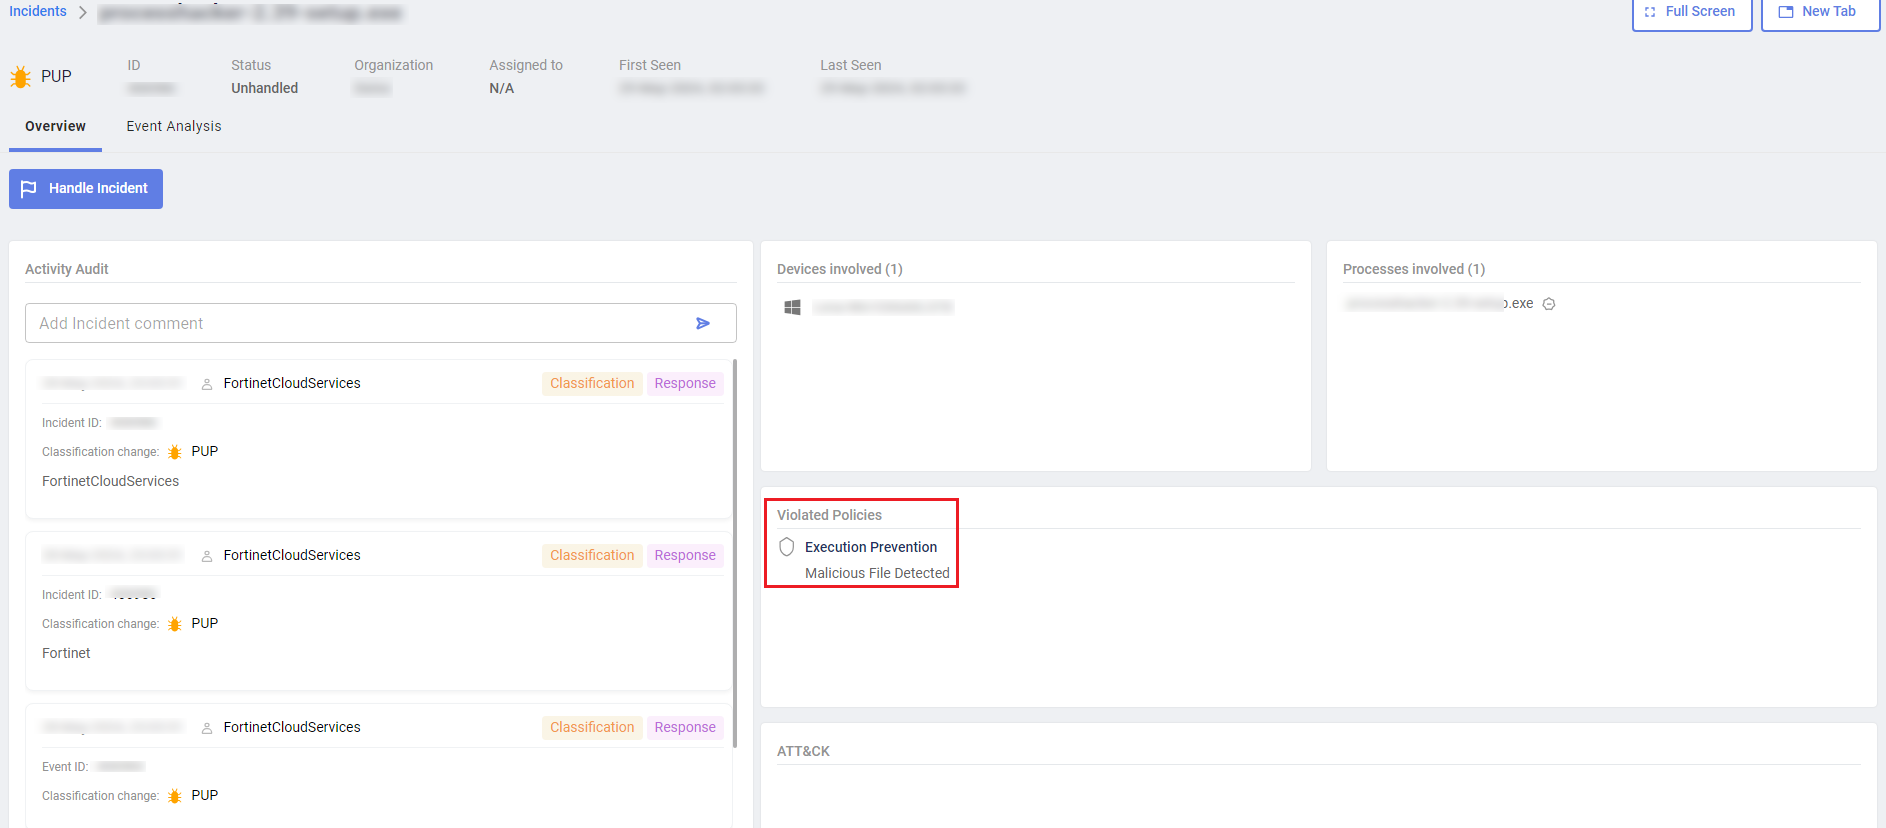
Automatic incident response actions are listed in the Overview tab when you select the incident and click Investigate in the Incidents pane, as shown below: