
Add OT asset visibility and network topology to Asset Identity Center page
Tabs are added in the Asset Identity Center page to view the OT asset list and OT network topology using Purdue Levels. This feature is available regardless of whether a Security Fabric is enabled.
To enable the OT features in the GUI:
- Go to System > Feature Visibility.
- In the Additional Features section, enable Operational Technology (OT).
- Click Apply.
To enable the OT features in the CLI:
config system settings
    set gui-ot enable
end
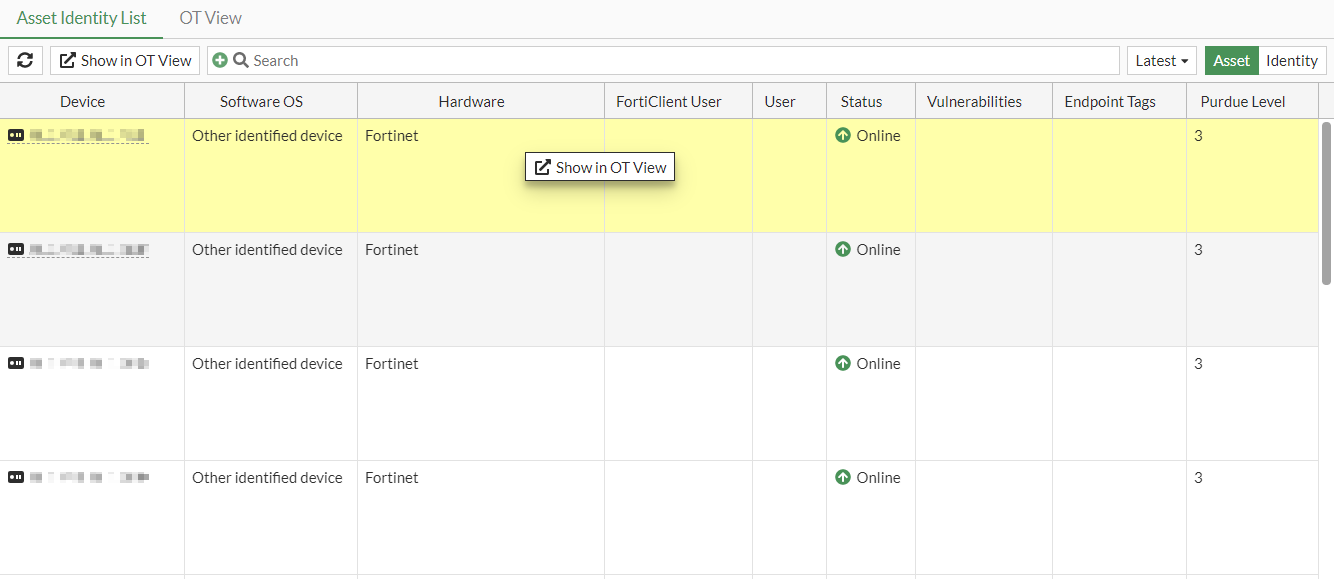
Once enabled, the Security Fabric > Asset Identity Center page displays an Asset Identity List tab and an OT View tab.
- The Asset Identity List tab includes a configurable Purdue Level column and a Show in OT View option for selected devices in the table.
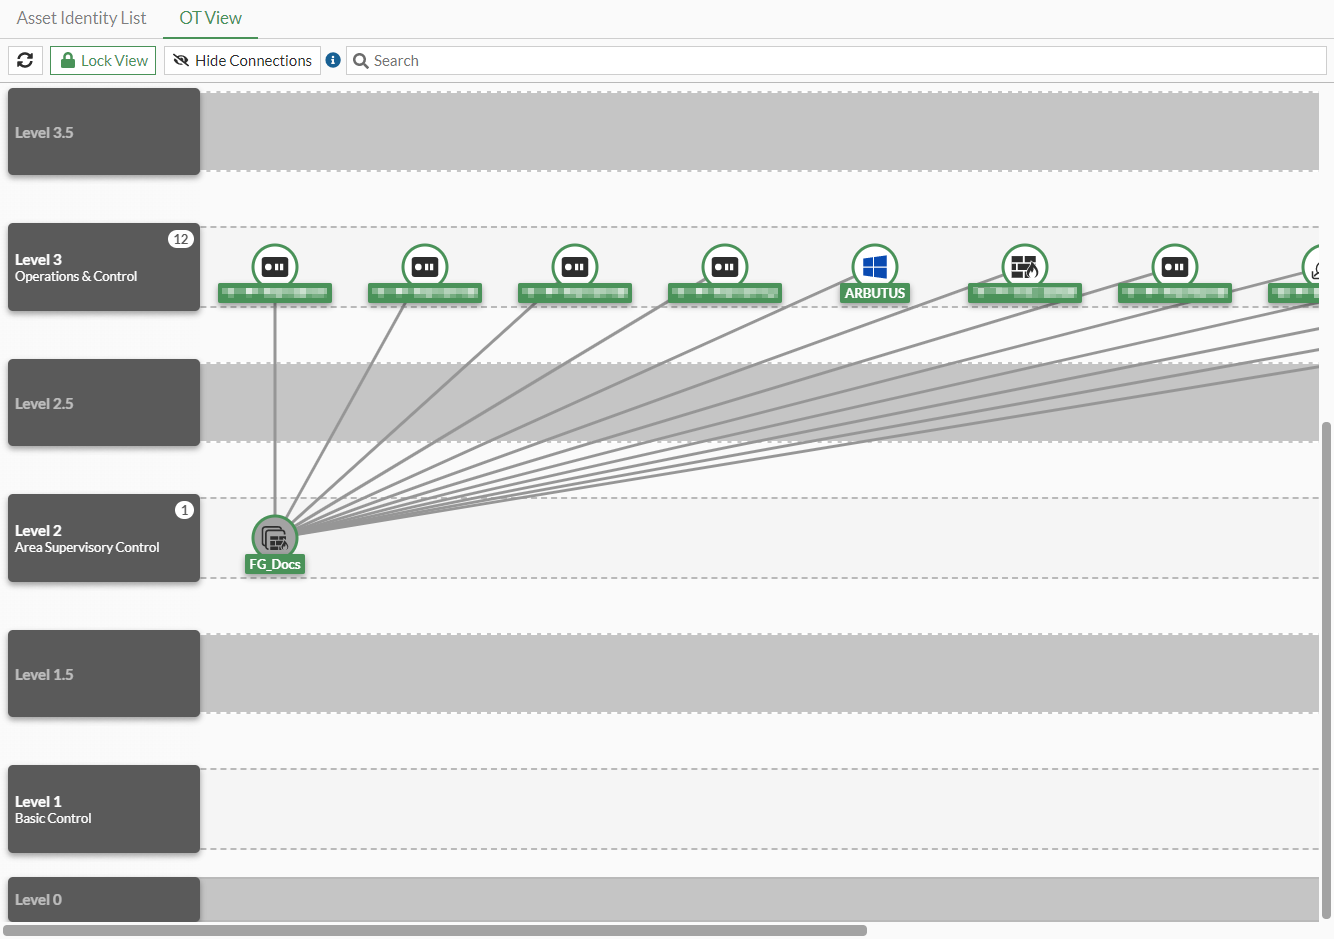
- The OT View tab shows a topology of detected components and connections mapped to Purdue Levels. The default view is locked, but devices can be dragged and dropped to other Purdue Levels if the view is unlocked.
FortiGates and managed FortiSwitches are statically assigned Purdue Level 2 and cannot be changed. Other detected devices are assigned Purdue Level 3 by default and can be changed (except to level S, 0, or external).
The following diagram lists the Purdue Levels based on OT network topologies:

To change the Purdue Level in the Asset Identity List tab:
- Go to Security Fabric > Asset Identity Center and select the Asset Identity List tab.
- Add the Purdue Level column to the table:
- Hover over the table header and click the gear icon (Configure Table).
- Select Purdue Level.
- Click Apply.
- Select a device and hover over the Purdue Level value.
- Click the pencil icon to edit the level.
- Select a value from the dropdown.
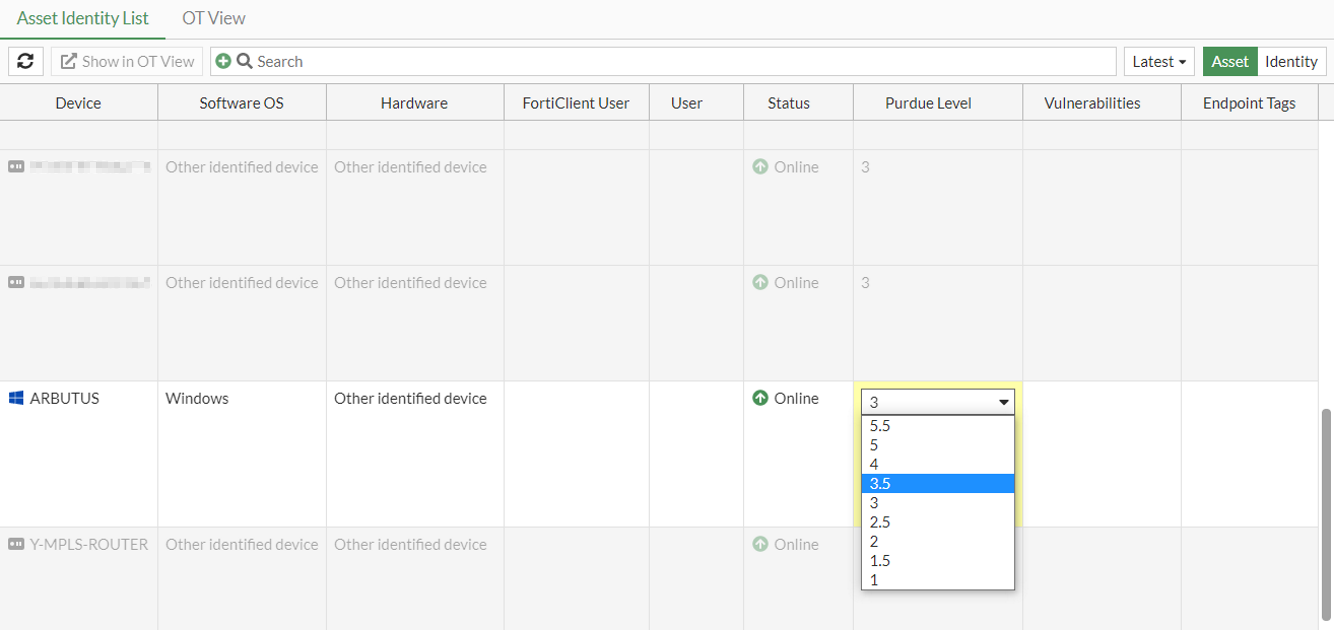
- Click Apply.
To change the Purdue Level in the OT View tab:
- Go to Security Fabric > Asset Identity Center and select the OT View tab.
- Click Unlock View.
- Select a device.
- Drag the device icon to another level row.
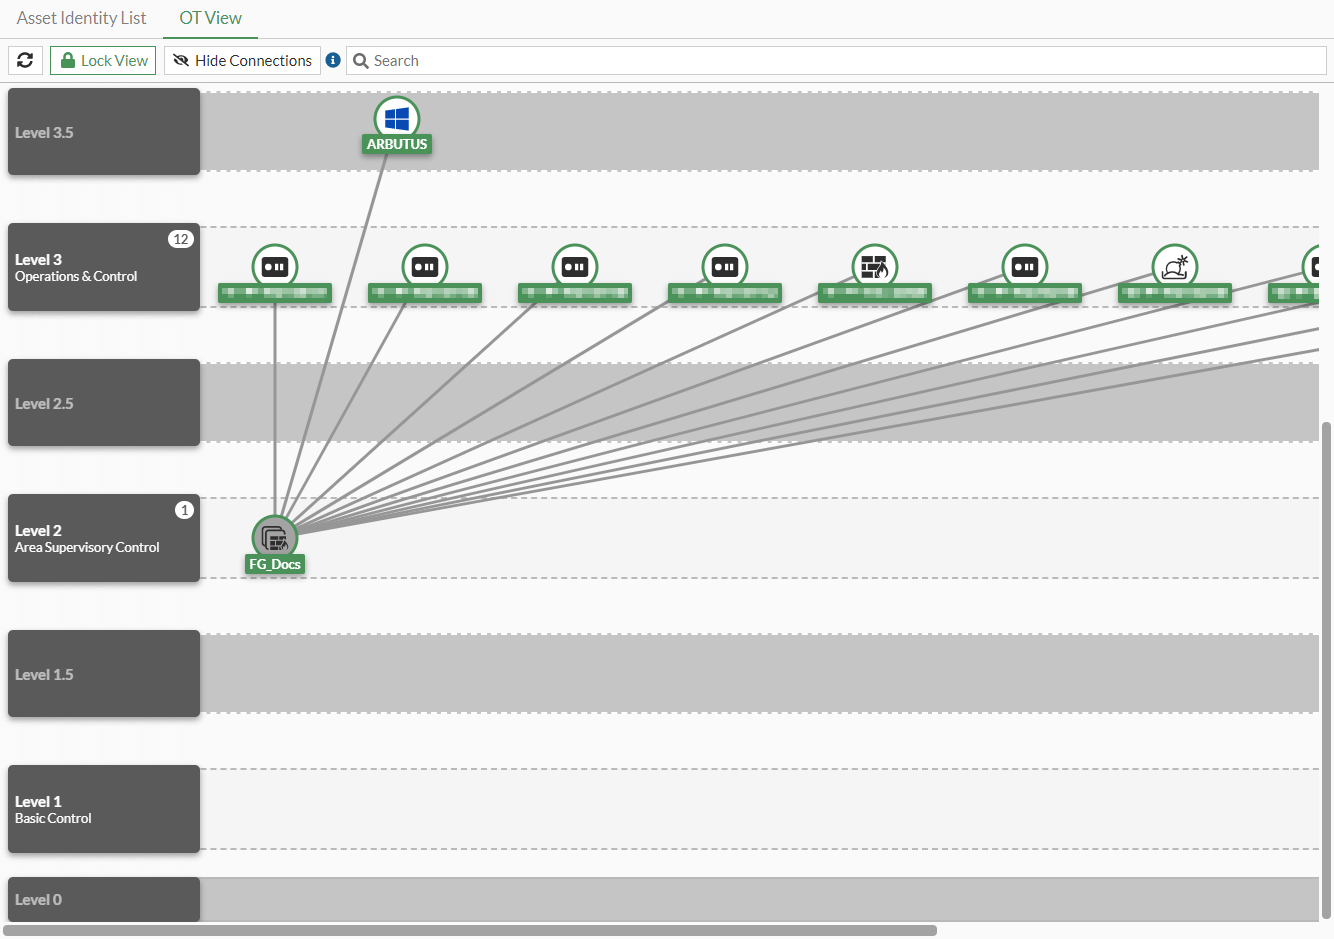
- Optionally, click Lock View to revert to the locked view.
To change the Purdue Level in the CLI:
# diagnose user-device-store device memory ot-purdue-set <mac> <ip> <level>
|
mac |
Enter the MAC address of the device. |
|
ip |
Enter the IPv4 address of the device. |
|
level |
Enter the Purdue Level: 1, 1.5, 2, 2.5, 3, 3.5, 4, 5, 5.5. |