


Add FortiPolicy as Security Fabric device 7.2.4
|
|
This information is also available in the FortiOS 7.2 Administration Guide: |
FortiPolicy can be added to the Security Fabric. When FortiPolicy joins the Security Fabric and is authorized in the Security Fabric widget, it appears in the Fabric topology pages. A FortiGate can grant permission to FortiPolicy to perform firewall address and policy changes. Two security rating tests for FortiPolicy have been added to the Security Posture scorecard.
To add FortiPolicy to the Security Fabric:
-
Enable the Security Fabric (see Configuring the root FortiGate and downstream FortiGates in the FortiOS Administration Guide) with the following settings:
-
Configure the interface to allow other Security Fabric devices to join.
-
Enable Allow downstream device REST API access and select an Administrator profile.
-
-
In FortiPolicy, edit the Security Fabric settings (this example assumes a root FortiGate has already been configured, see Creating a fabric connector in the FortiPolicy Administration Guide):
-
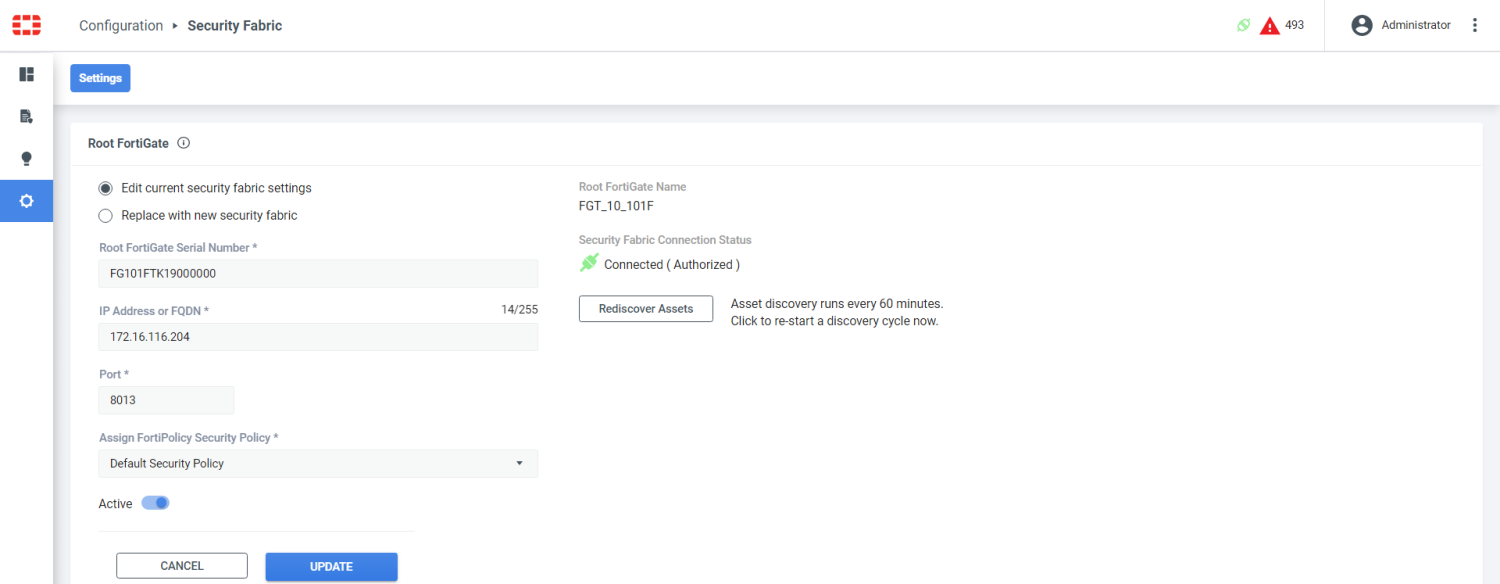
Go to Configuration > Security Fabric and select Edit current security fabric settings.
-
Enter the root FortiGate's IP address.
-
Set the Port (the default is 8013).
-
Select a FortiPolicy security policy.

-
Click UPDATE. The connection status is Not Connected (Authorization Pending).
-
-
Authorize the FortiPolicy in FortiOS:
-
Go to Dashboard > Status and locate the Security Fabric widget.
-
In the topology tree, click the highlighted FortiPolicy and select Authorize. The Device Registration pane opens.
-
Click Authorize.

-
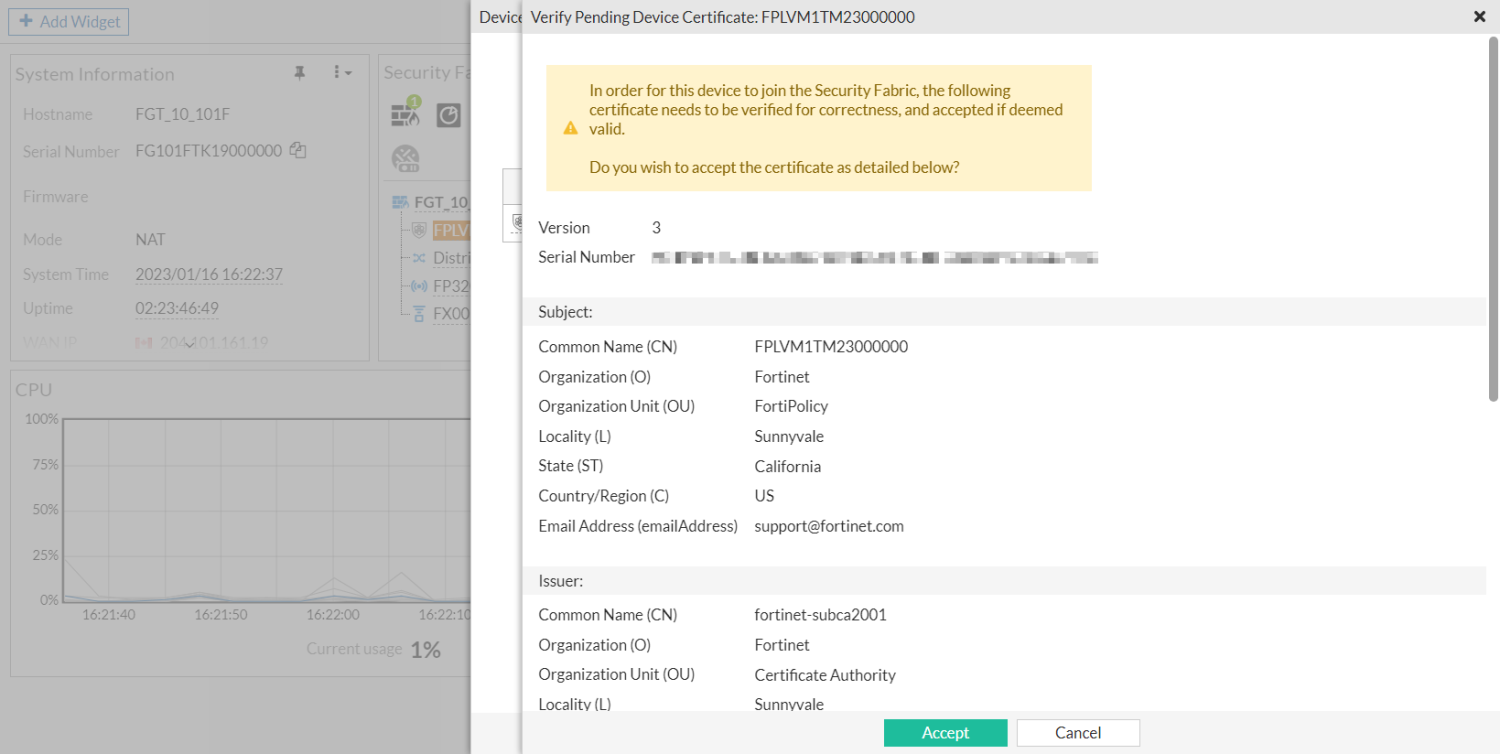
Click Accept to verify the device certificate.
-
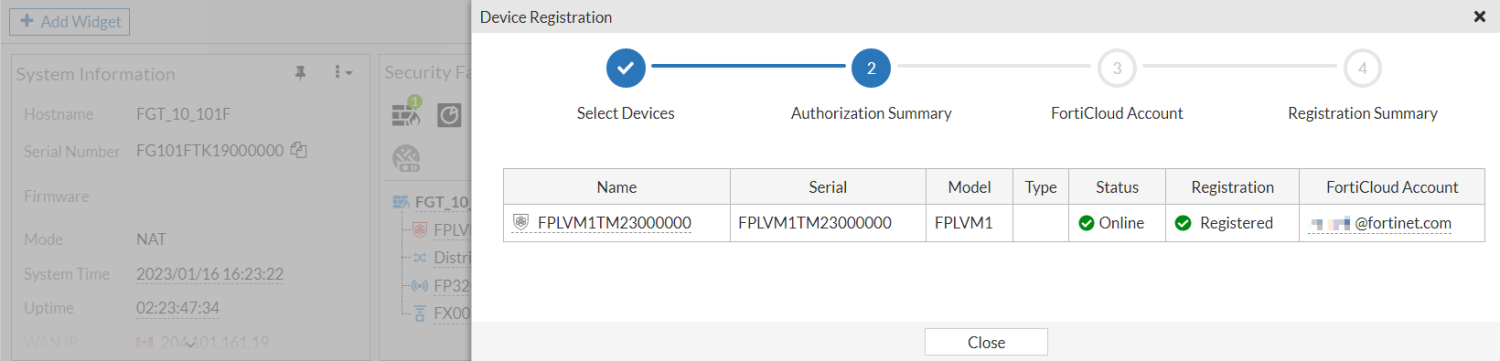
Once the FortiPolicy is registered, click Close.
-
-
In FortiPolicy, refresh the Configuration > Security Fabric page. and verify that the connection status is Connected (Authorized).
-
In FortiOS, grant FortiPolicy write access permission in the CLI:
config system csf config fabric-connector edit "FPLVM1TM23000000" set configuration-write-access enable next end end -
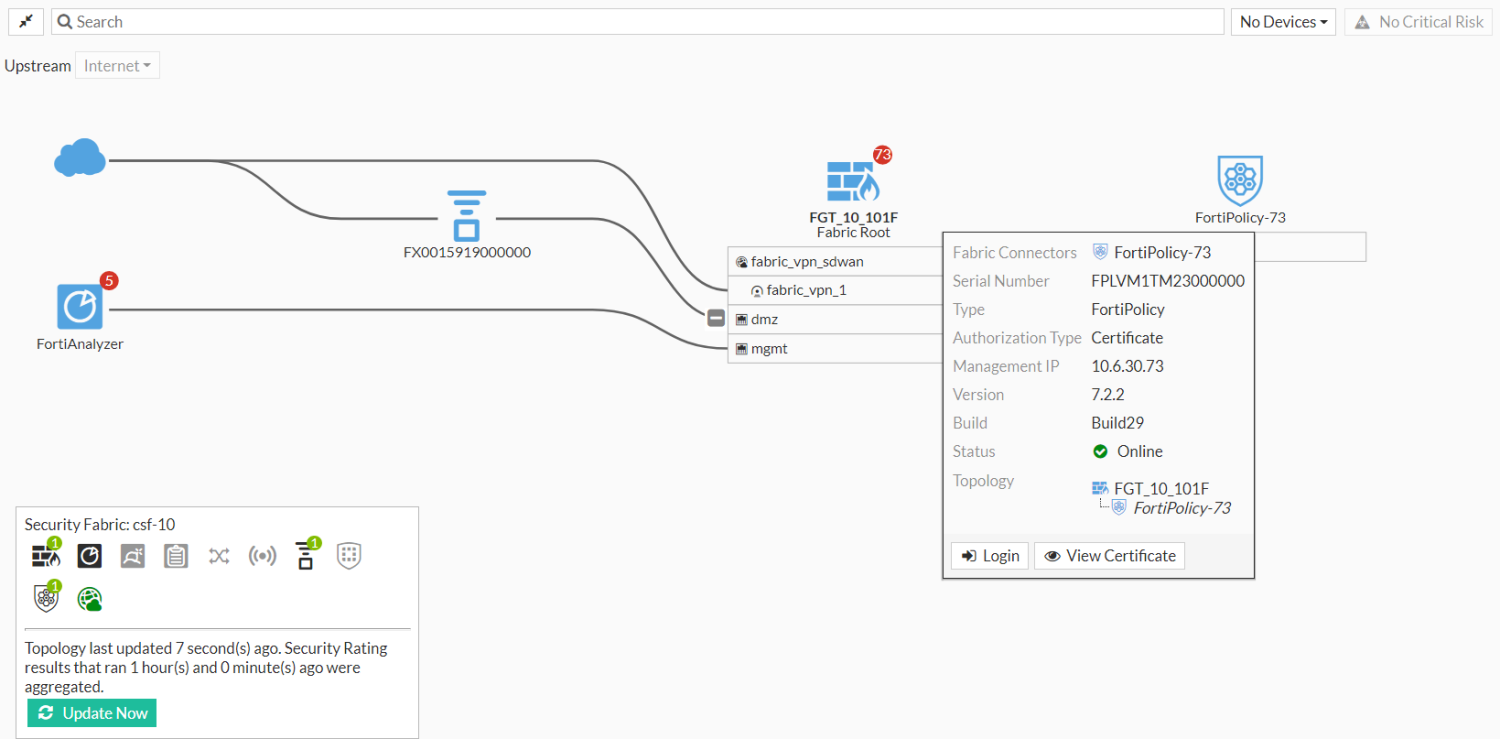
Go to Security Fabric > Physical Topology or Security Fabric > Logical Topology to view more information.
Physical topology view:

Logical topology view:
To deploy firewall policies from FortiPolicy to the root FortiGate:
-
Create a policy in FortiPolicy (see Customizing policies in the FortiPolicy Administration Guide).
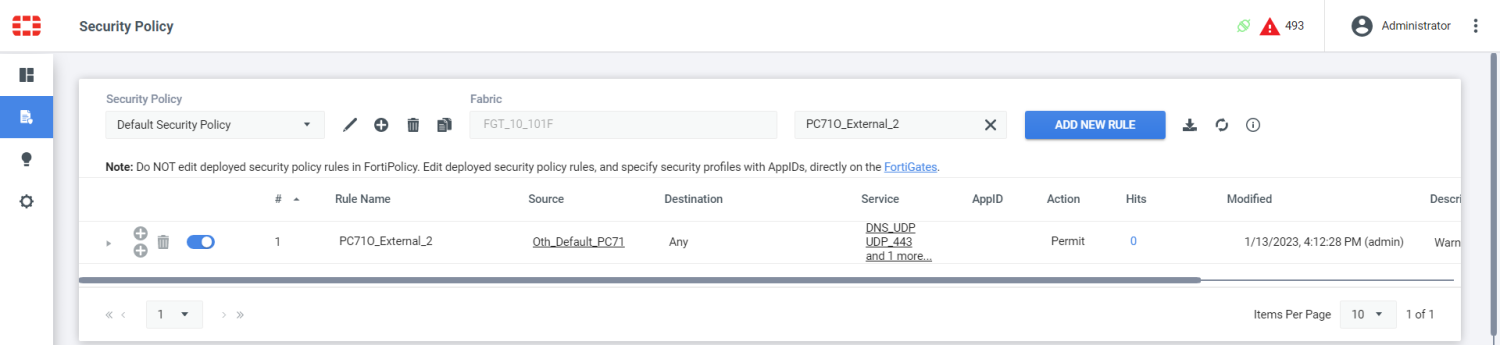
In this example, a default security policy rule called PC71O_External_2 is created. Since the FortiPolicy is integrated in the Security Fabric, it will use the REST API to push the static policy, dynamic firewall objects, and service objects to the root FortiGate.
-
In FortiOS, go to Policy & Objects > Firewall Policy to view the policy named PC71O_External_2.
-
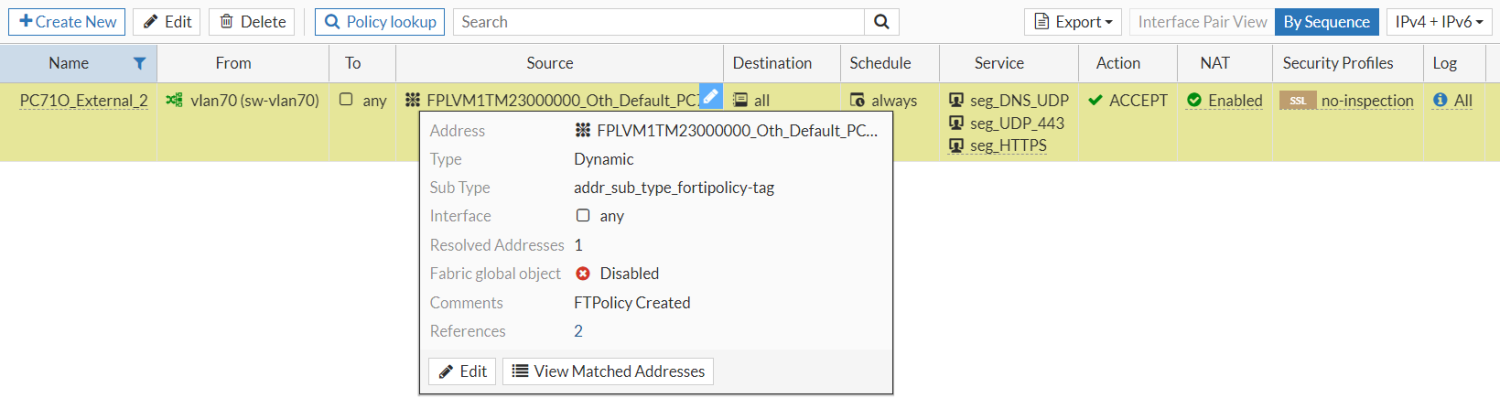
Go to Policy & Objects > Addresses to view the dynamic firewall address associated with the policy (FPLVM1TM23000000_Oth_Default_PC71).

-
Go to Policy & Objects > Services to view the service objects associated with the policy (seg_DNS_UDP, seg_UDP_443, seg_HTTPS, and seg_TCP_8013).

Security rating tests
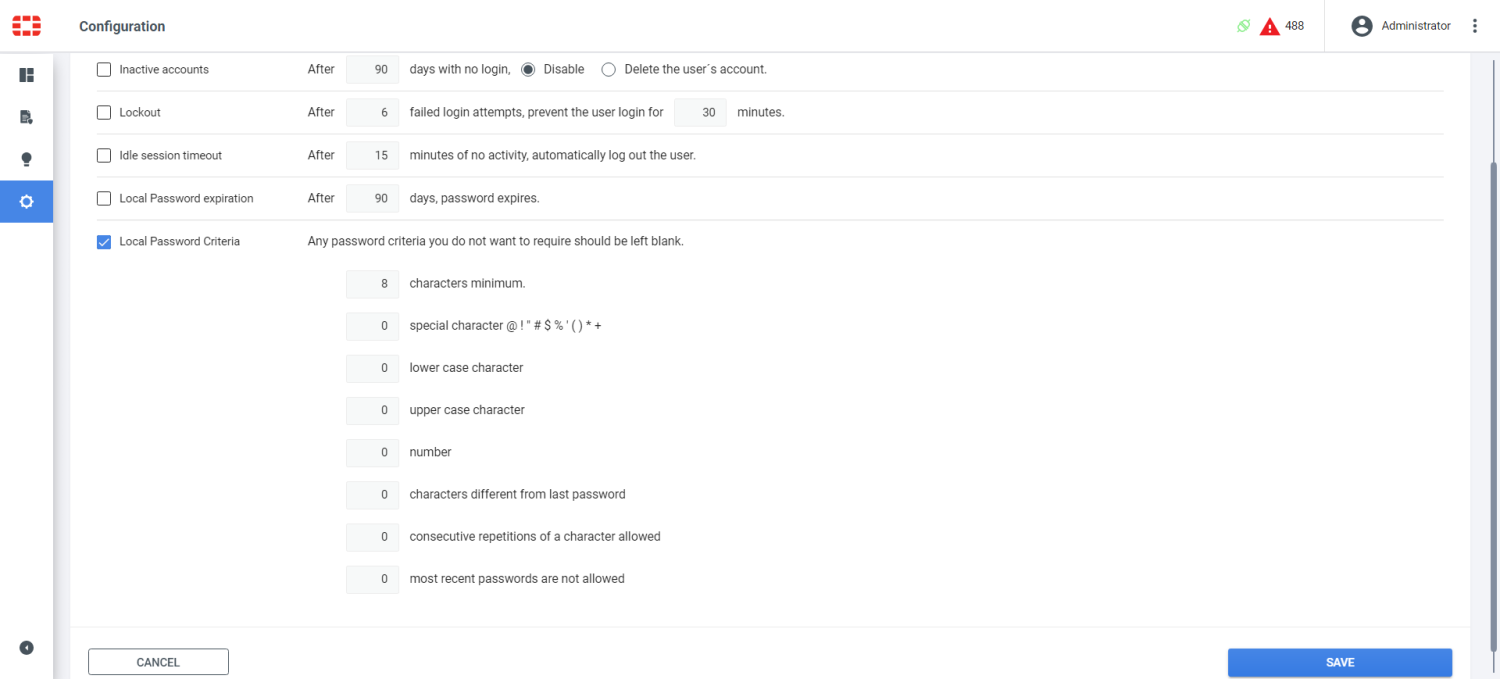
There are two security rating tests pertaining to FortiPolicy available on the Security Posture scorecard:
-
Admin Password Policy ensures that there is password policy in place for system administrators. In this result, the test is marked as Passed because there is a login rule configured in FortiPolicy with Local Password Criteria enabled.
-
Admin Password Security ensures that the password policy enforces secure passwords. In this result, the test is marked as Failed because the password policy does not include set variables for the Local Password Criteria.

See Users in the FortiPolicy Administration Guide for more information about configuring these settings.