
Manage annotations
Annotations help you categorize and enrich entities (such as IP addresses, domains, or usernames) with additional context for easier investigation and filtering.
Viewing annotations in the portal
Annotations appear against a blue background wherever an IP address is displayed. They can also be searched using IQL when the annotations are present in the data. When you hover over an annotation, a tooltip displays the annotation name and description. Clicking the annotation opens a pop-up with full details.

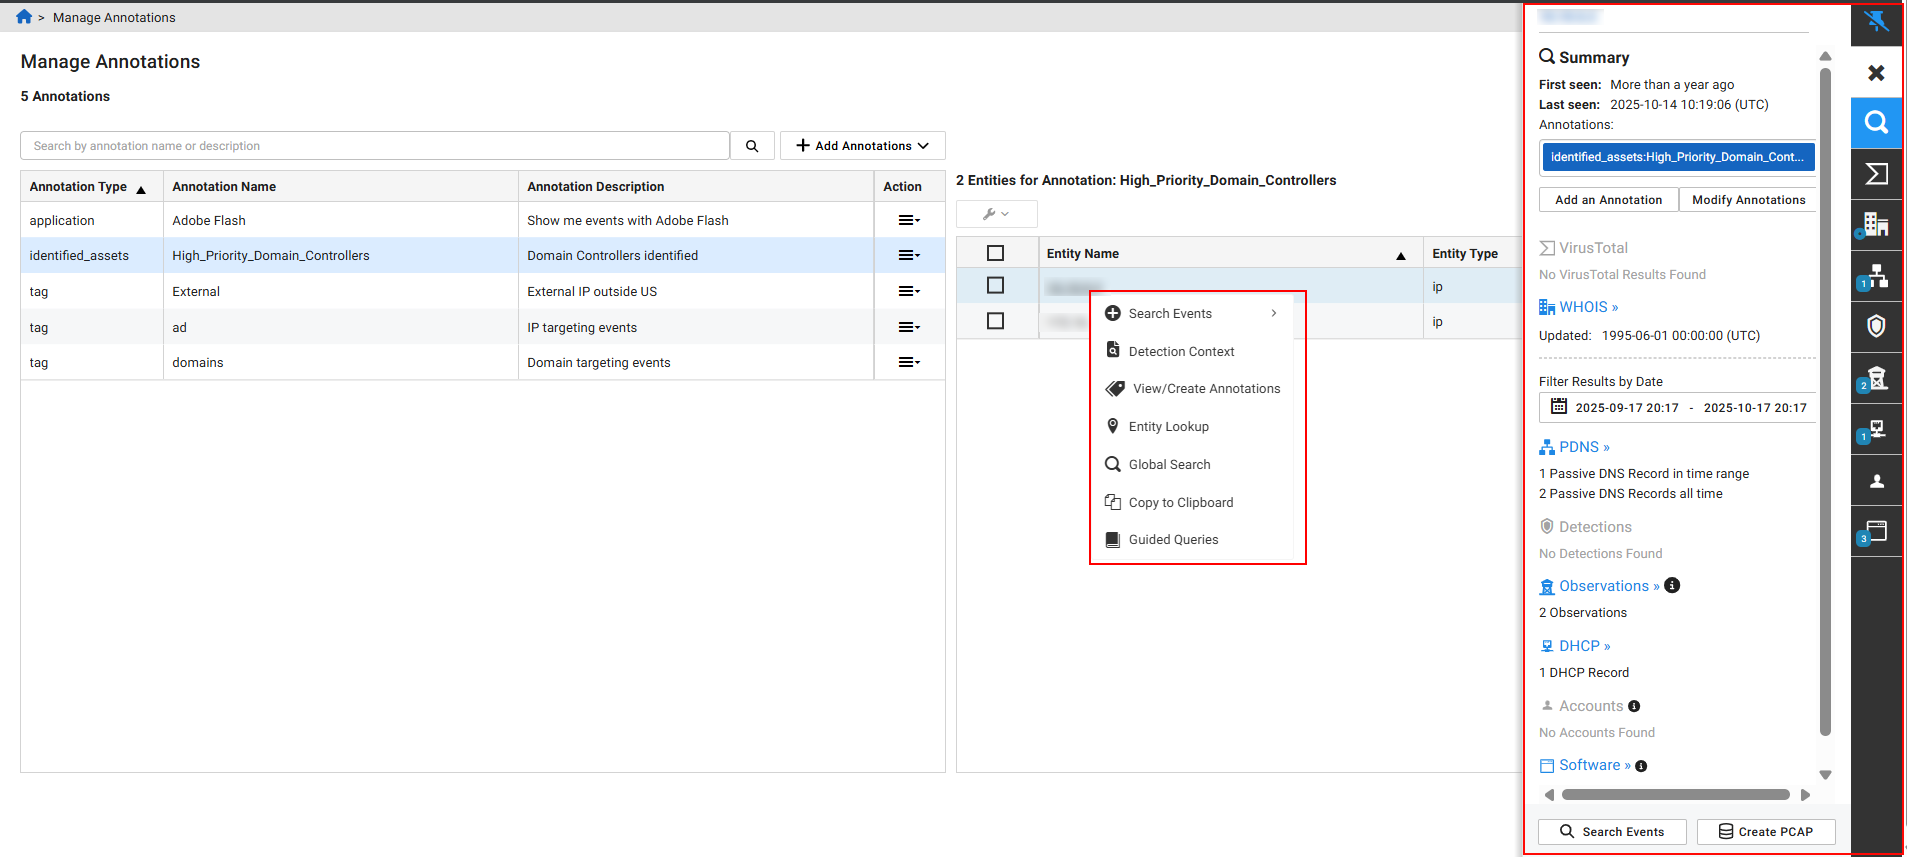
On the Manage Annotations page, you can open the Entity Panel by clicking the Entity Name when it is a valid IP, CIDR, domain, or URL. Right-click an entity with a valid IP to:
- Search Events
- View Detection Context
- View/Create Annotations
- Perform an Entity Lookup
- Perform a Global Search
- Open a Guided Queue
Automatic critical asset identification
FortiGuard ATR uses rich network metadata to automatically discover and classify critical assets across enterprise environments. This process identifies high-value infrastructure components such as Domain Controllers, DNS servers, SSH servers, FTP servers, SMTP servers, and other core services by analyzing behavioral patterns, protocols, and role-based traffic correlations.
Once identified, these assets are annotated within the FortiNDR Cloud platform to enhance network visibility and analytical context. This enrichment helps security teams distinguish routine activity from potential threats targeting essential systems. By adding this layer of asset intelligence, FortiNDR Cloud improves detection accuracy, prioritization, and relevance for high-impact business systems.
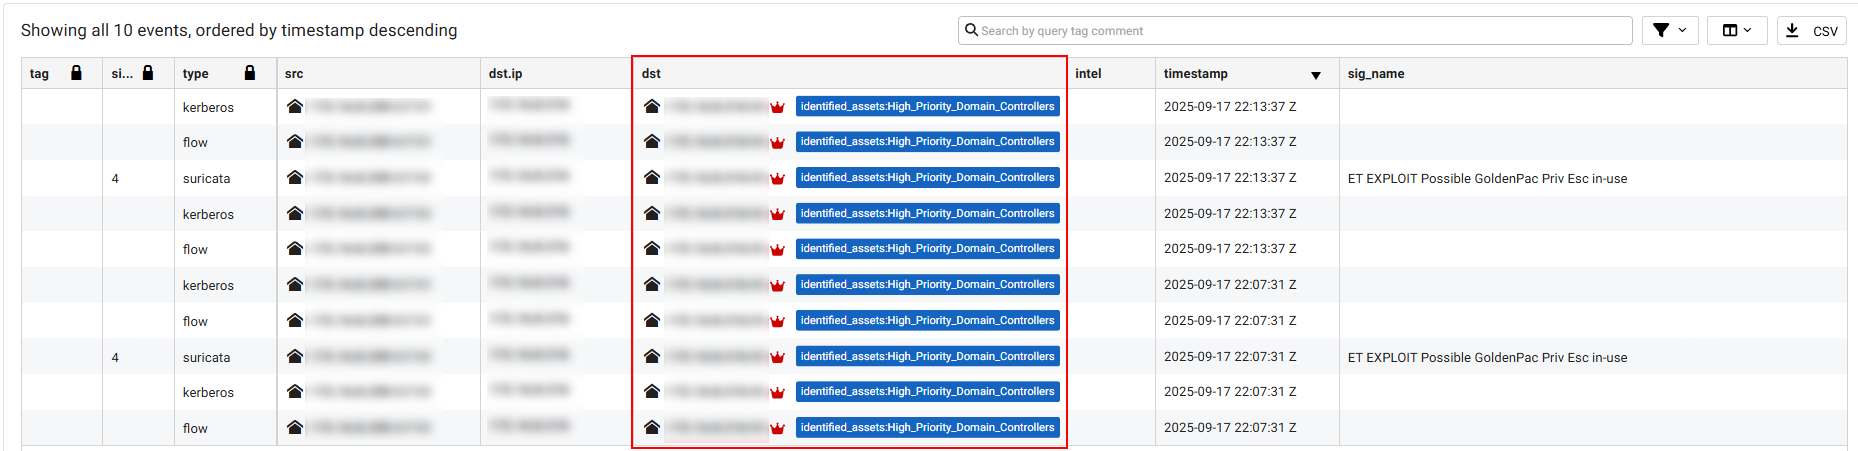
A crown icon appears next assets annotated by FortiGuard ATR in detection tables. The crown is color-coded to indicate its severity level:
- Red for high risk
- Orange for moderate risk
- Yellow for low risk
Managing annotations
To manage annotations, click the gear icon at the top-right of the page and select Manage Annotations. The Manage Annotations page allows you to create, edit, and organize annotations and associate them with specific entities.
The annotations table lists all existing annotations with their type, name, description, and actions, and provides an option to add new annotations. The entities table shows all entities linked to a selected annotation, including their names, types, and management actions. The search function allows you to search for any text in the Annotation Name and Annotation Description columns.
You can create the following annotation types: Application, Environment, Location, Owner, Role, Tag and Identified Assets (system-generated). Identified Assets annotations are automatically created by FortiGuard ATR and cannot be manually added.
To create an annotation:
- Click Add Annotations > Create Annotation.
- Configure the annotation settings:
Select an annotation type Select Application, Environment, Location, Owner, Role, Tag, or Identified Assets.

Identified Assets only applies to FortiGuard ATR. See, Automatic critical asset identification.
A color-coded crown icon will appear only on assets annotated by FortiGuard ATR in the events and detections tables. See Detections table.
Enter an annotation name Enter a name for the annotation. Enter a description Enter the annotation. - Click Save.
To add annotations with a CSV file:
-
Create the CSV file. The file must contain the following : annotation type, annotation name, description, entity, entity_type.
The annotation type must begin with a lower case letter, and the annotation name must be unique within the same type.

-
Click Add Annotations > Upload CSV.
-
Upload the CSV file.
-
Click Save.
To edit an annotation:
- Click the Actions menu at the right side of the annotation and select Edit Annotation.

- Update the annotation and click Save.
To delete an annotation:
- Click the Actions menu at the right side of the annotation and select Remove Annotation.
- Click Confirm.
To add entities:
- Click +Add Entity. The Add Entities dialog opens.

-
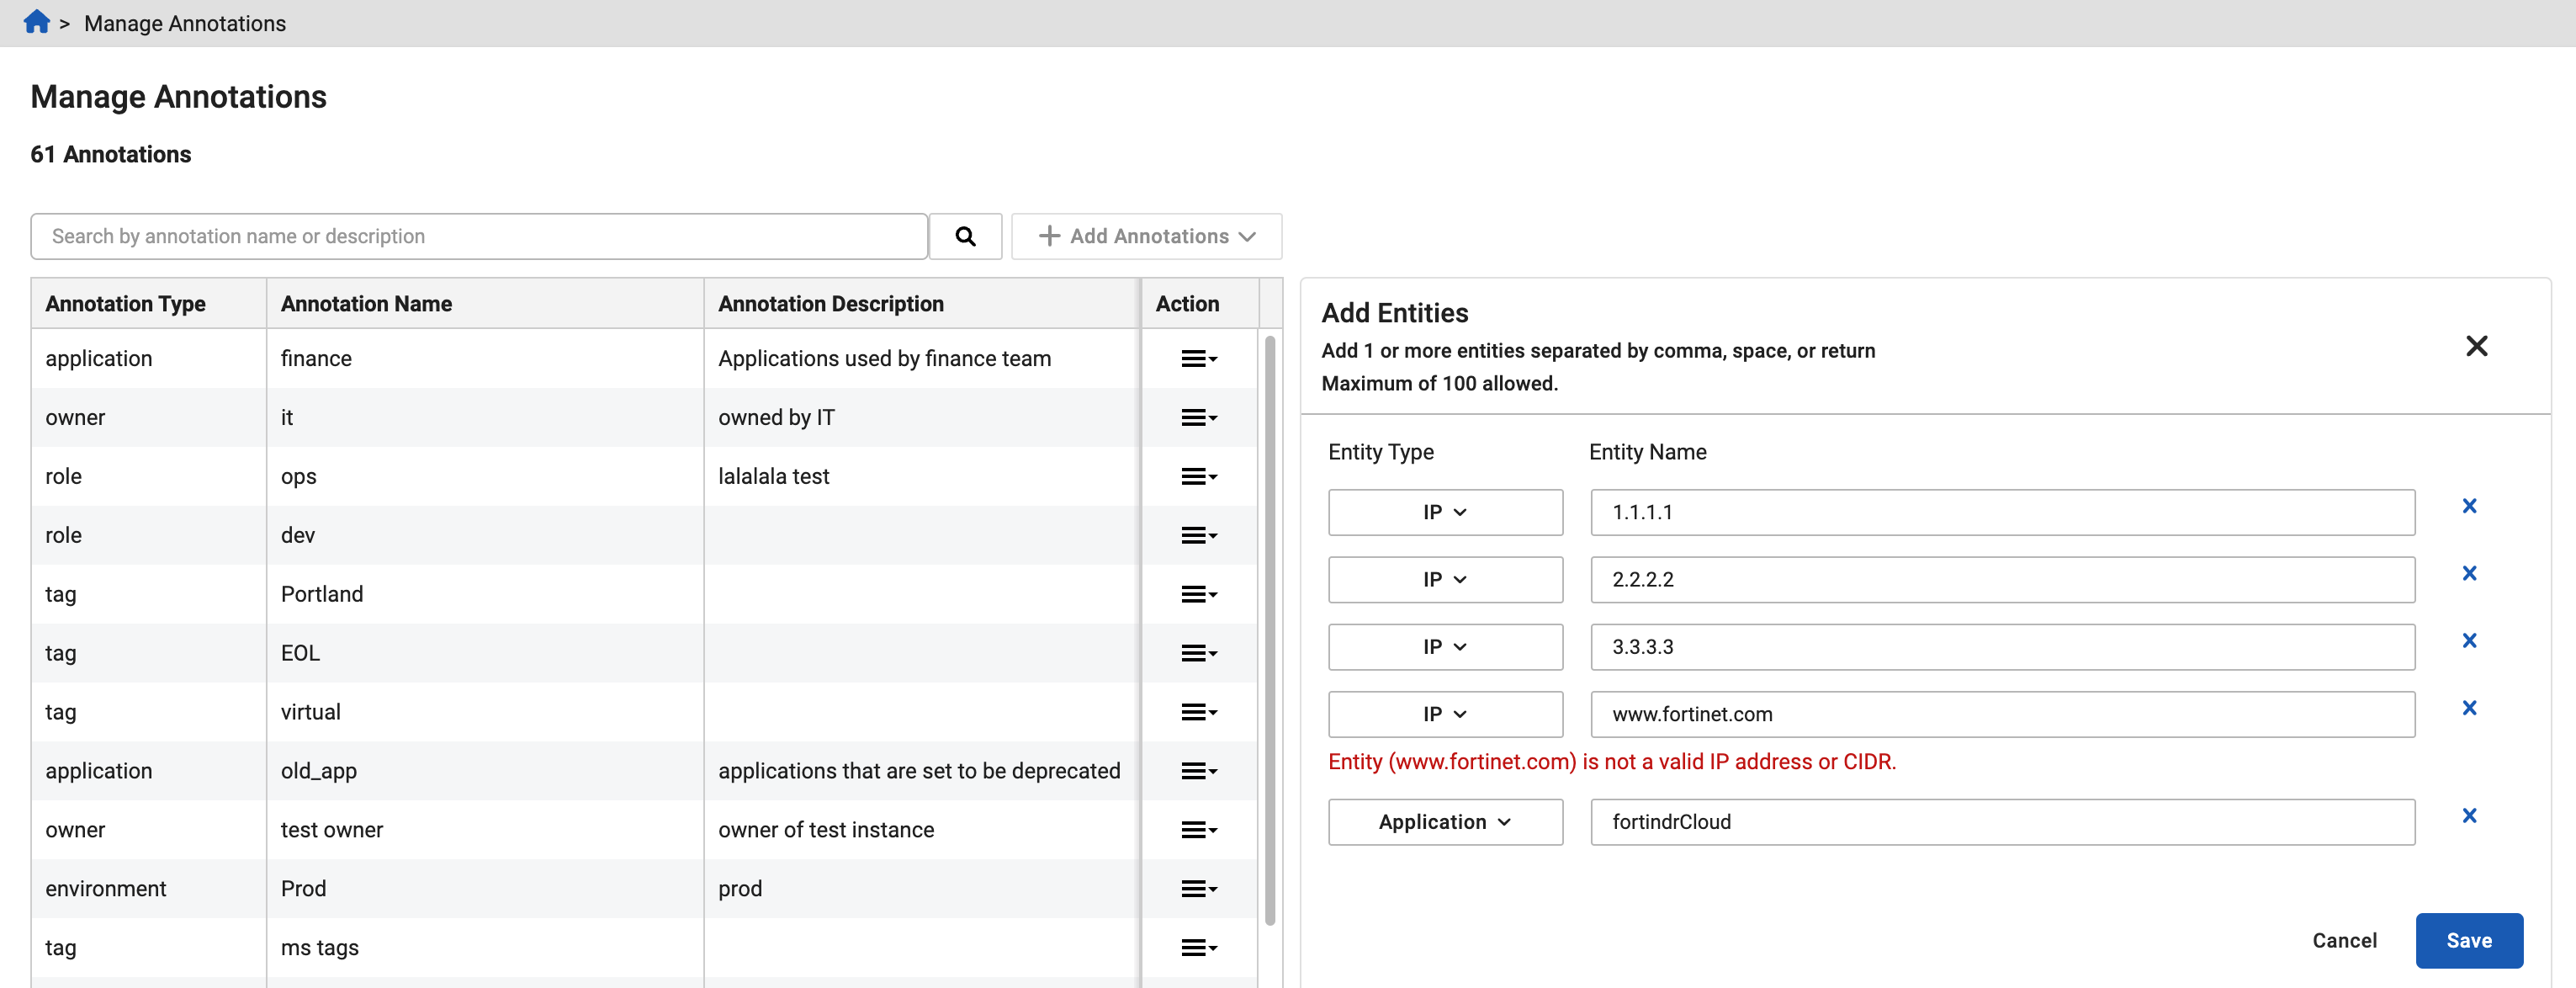
Enter one or more entities (IP Address, CIDR, domain or username) separated by a comma, space, or return.
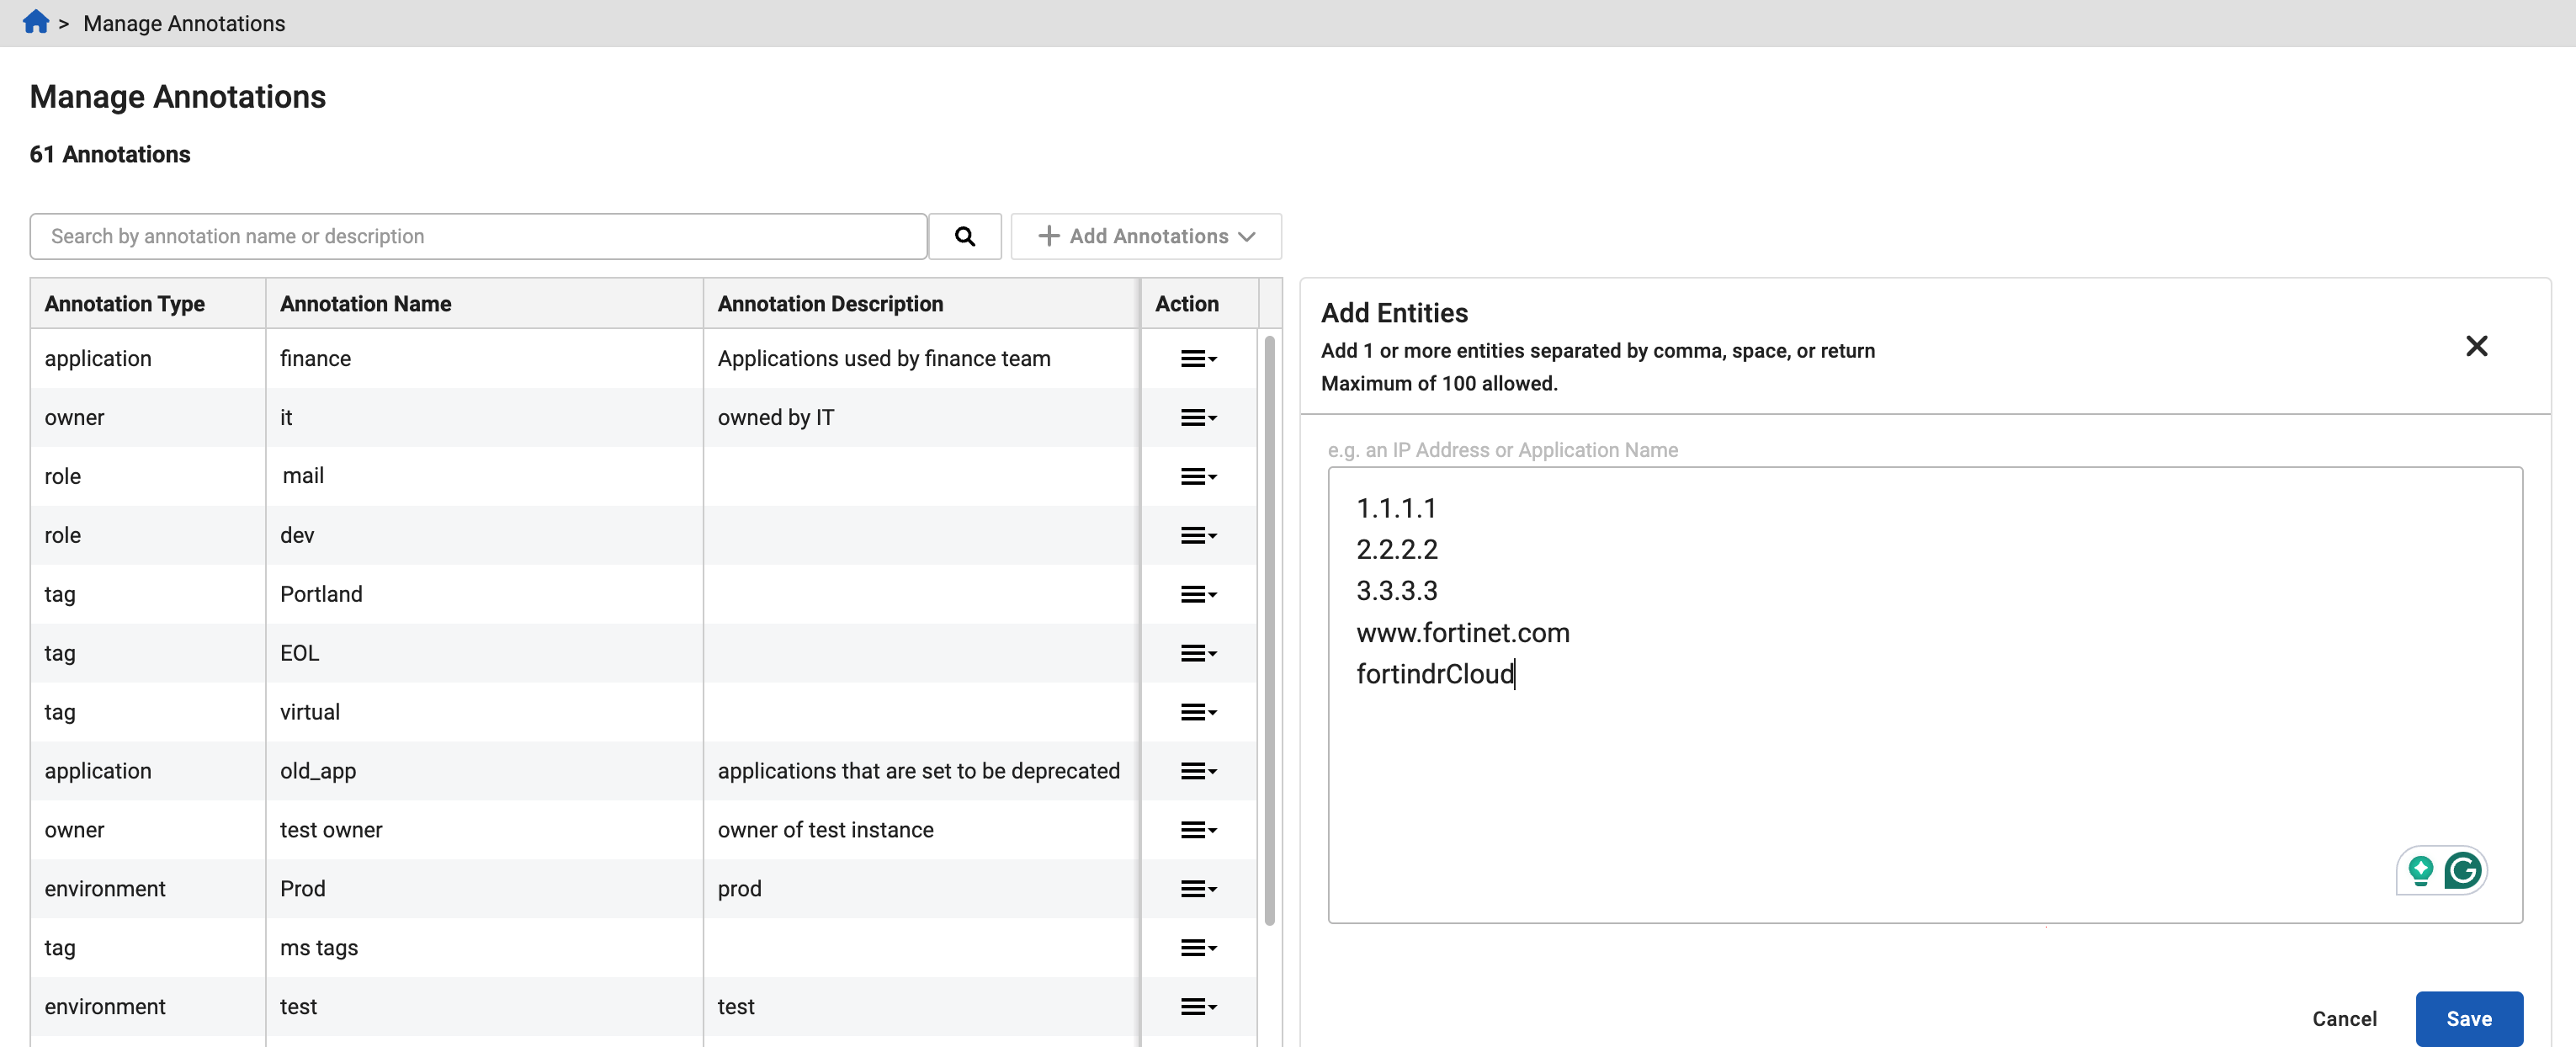
- Click Save. FortiNDR Cloud validates the fields and identifies any errors.
To bulk remove entities:
- Above the entities table, Click Remove bulk entities.

- Click Confirm.