
Customizing waiting room display page
Now you have the option to customize the message displayed to users when they are placed in the waiting room. This feature allows you to tailor the text to better align with your brand or provide specific instructions to users during their wait.
To customize the waiting room display page:
- Go to Application Delivery > Waiting Room.
- Select Waiting Room Custom Page.
- Click Create New.
- Customize the page as desired.
You can customize the style of the elements on the page. Refer to the following for the default style of each element:
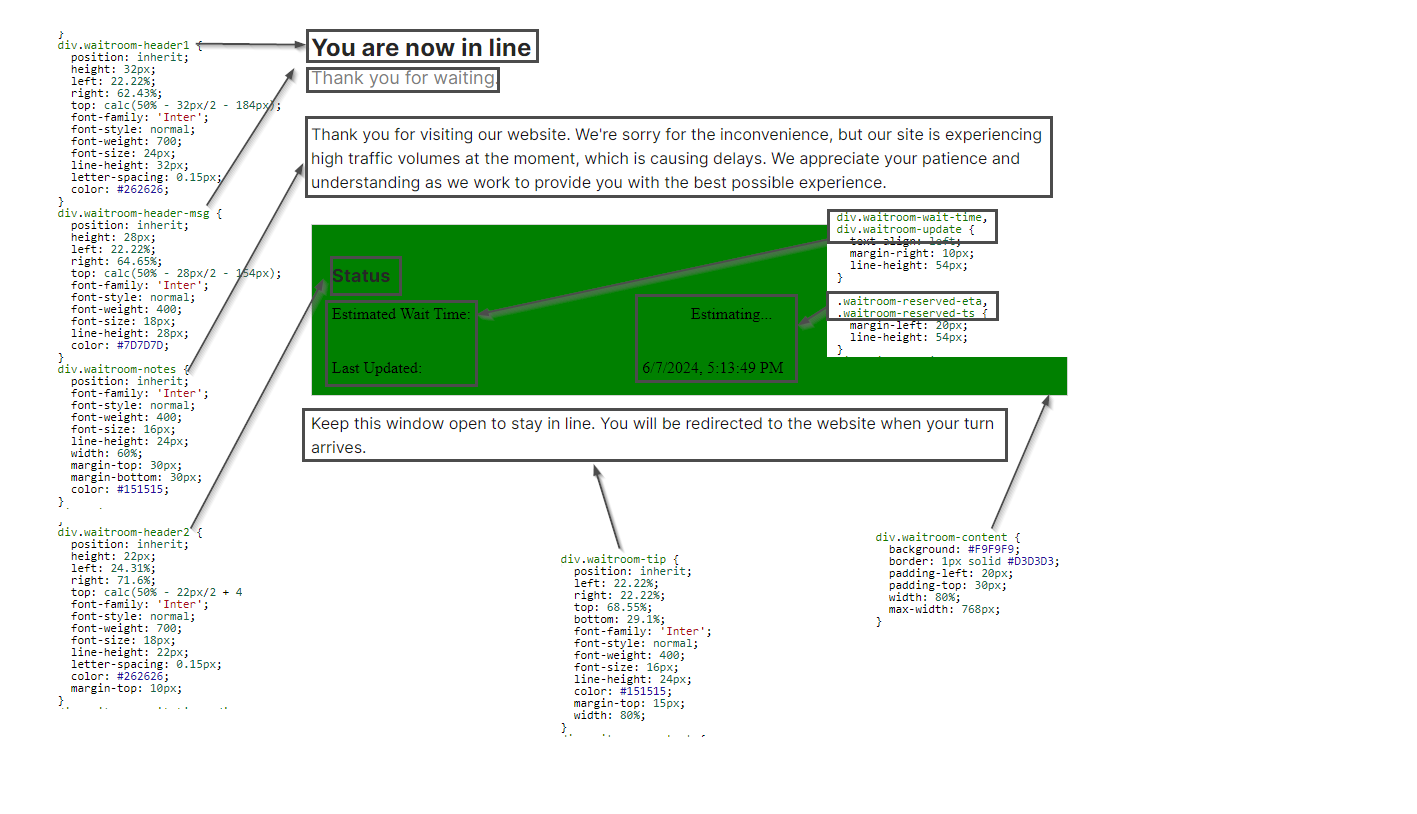
- You can replace the text as shown in the following screenshot. Please note the two variables
%%WR_ETA%%and%%WR_TS%%must remain as they are.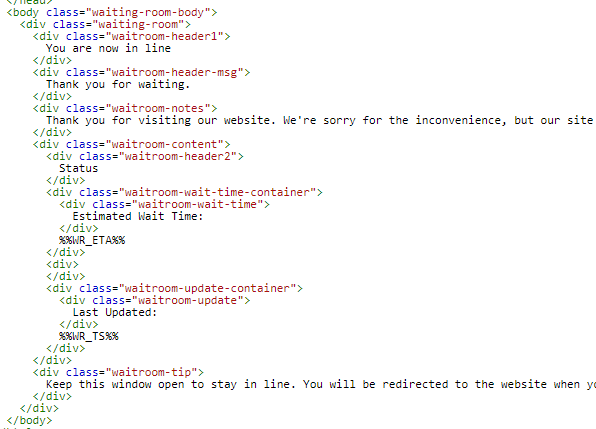
- Background image is supported. You can upload images to the Manage Images tab in System > Config > Replacement Message, then reference them on the Waiting Room Custom Page. See the scripts inline in red:
div.waitroom-headerl {position: inherit;
height:32px;
left: 22.22%;
right: 62.43%;
top: calc (50%-32px/2 -184px);
font-family: "Inter';
font-style: normal;
font-weight: 700;
font-size: 24px;
line-height: 32px;
letter-spacing: 8.15px;
color: #262626;
background: url(%%IMAGE:block_image%%) 0 repeat-x;
height: 102px;
}
You can also reference an image from the internet. For instance:
background: url(https://1etsenhance.io/static/example.jpg)
- Click Save to save the page.
You can later reference the page in the Waiting Room Policy settings. See Waiting room.