Detections device timeline
Go to Detections > Detections Device Timeline to view all detections sorted by device risk score.
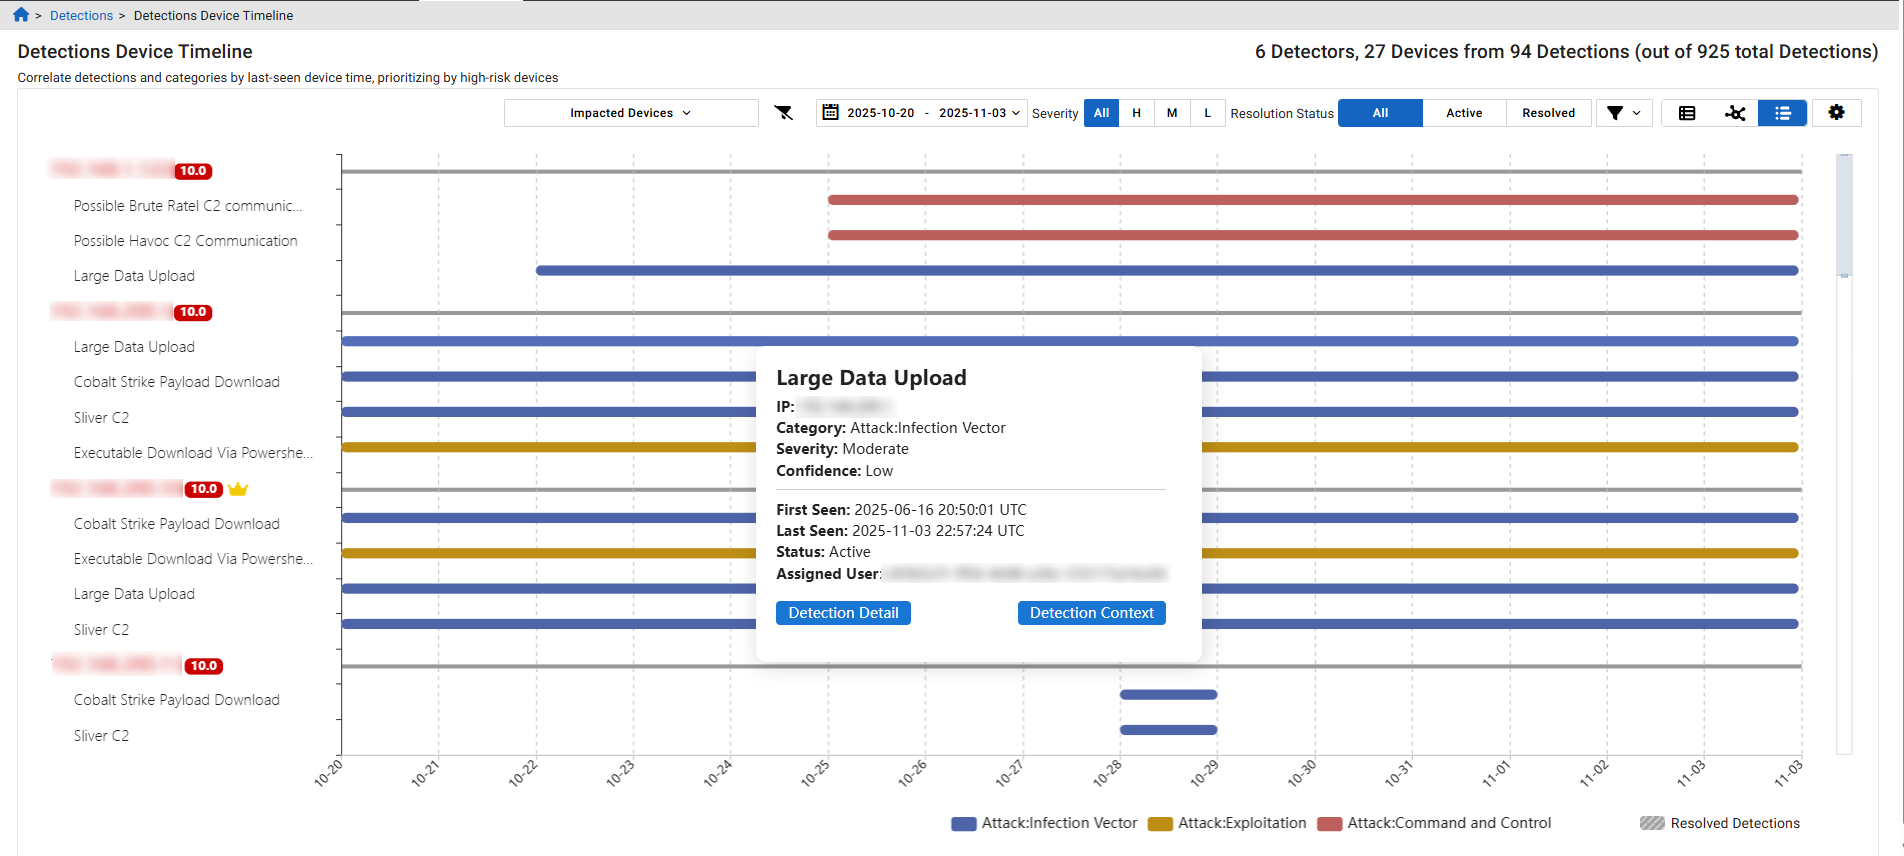
A solid background color in each bar on the chart represents a detection category, as indicated in the legend at the bottom of the page. If a bar is striped, it means all detections within that range have been resolved. A single bar does not correspond to one detection; instead, it may represent multiple detections that occurred within the same time range.
Hover over a bar in the chart to view details about the detection. Click the Detection Context button to view the detections and observations related to this IP on the Detection Context page. Click the Detection Detail button to quickly navigate to the detection detail page for the selected detector.
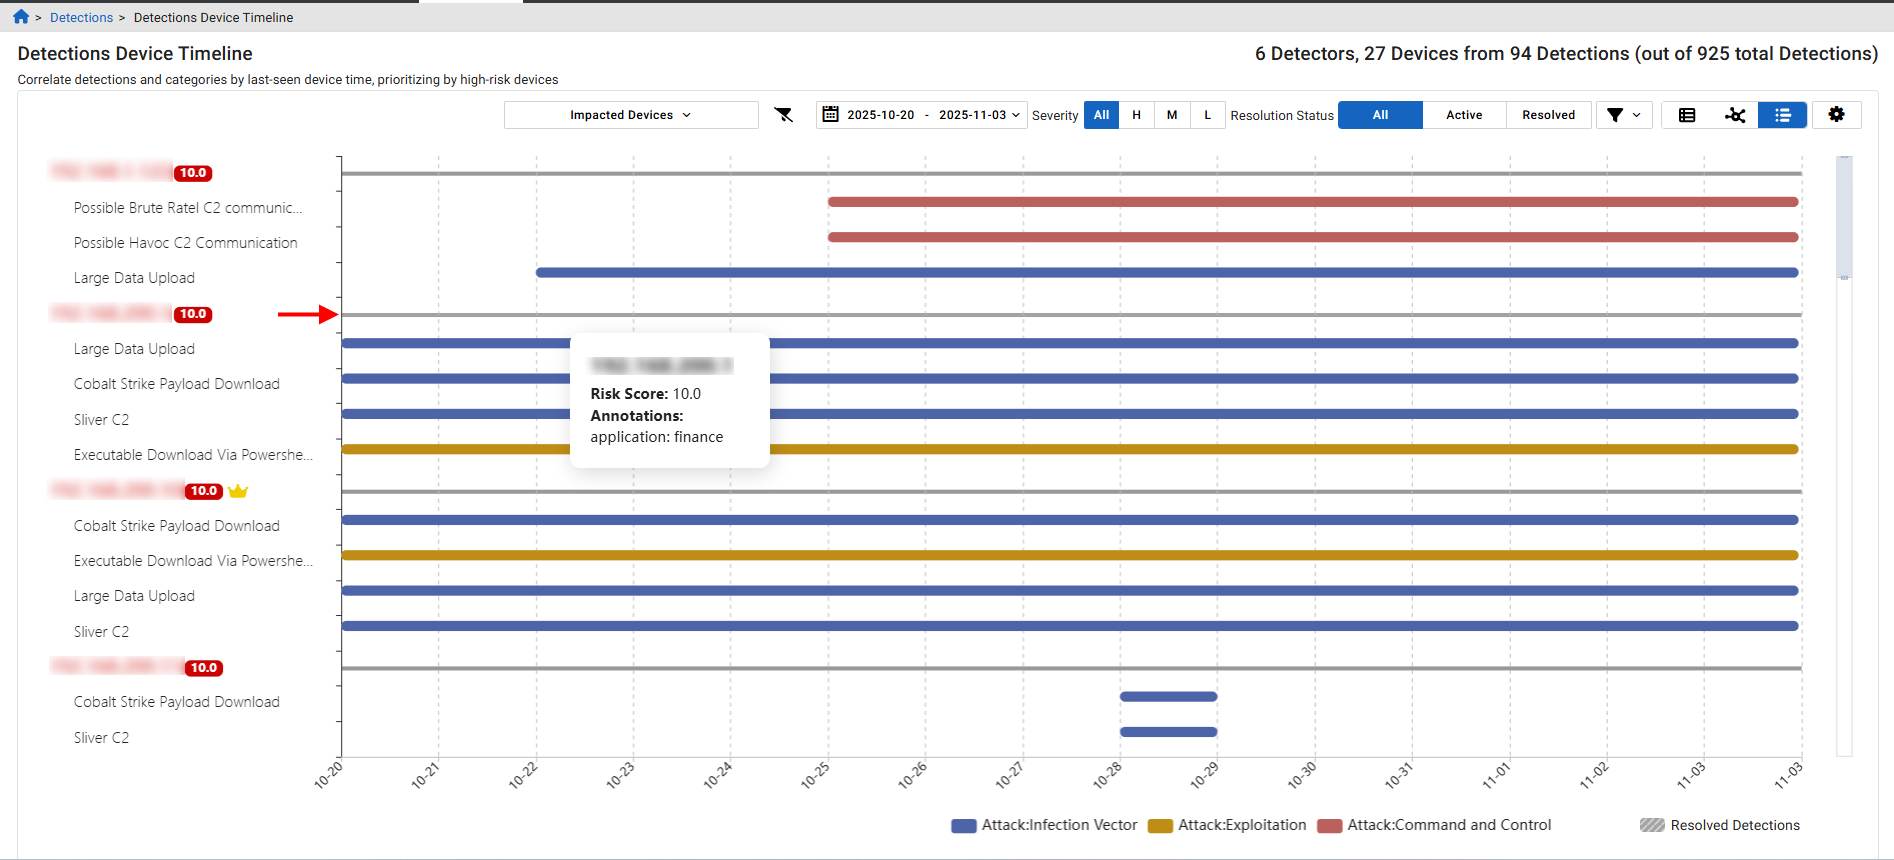
Hover over the line next to the IP label to view its risk score. Any annotations related to the IP will be displayed here. The risk score is also displayed next to the IP label.
Click the IP label to open the Entity Panel. Right-click the IP label to open the context menu.

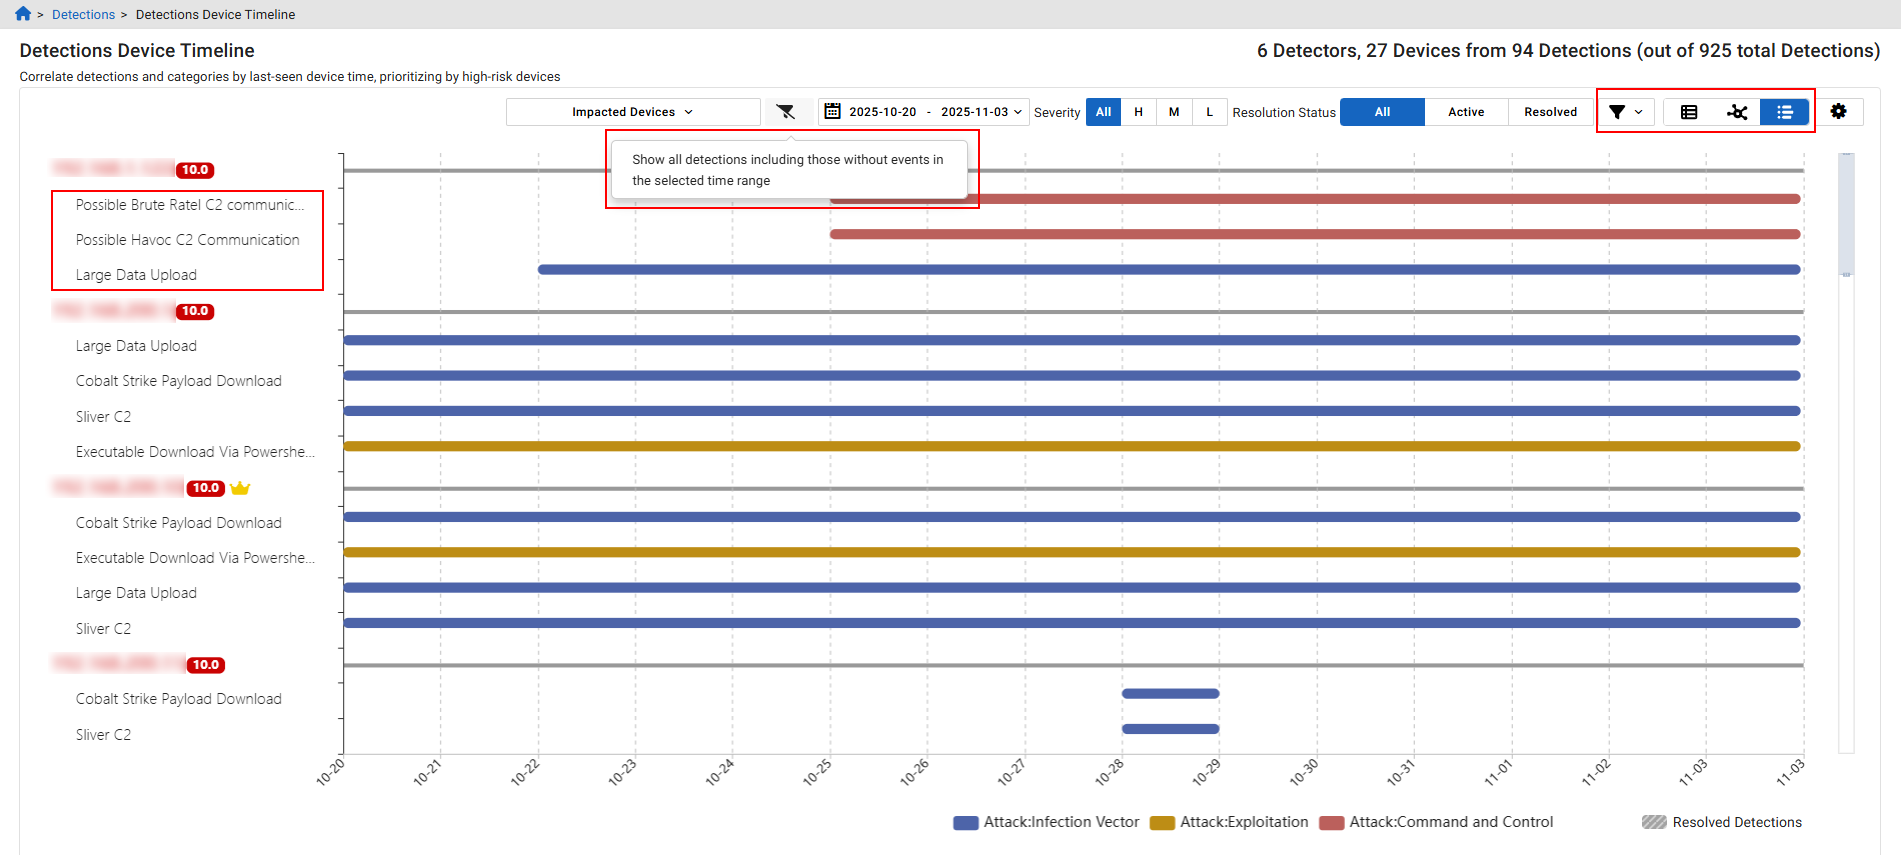
You can filter the view to hide detections that have no associated events during the selected time range. Use the toggles on the right side of the page to switch between the Detections Table and Detections Visualizer views. Both views also support the Detections Device Timeline toggle. To filter the table by a specific detector, click its name below the IP label.
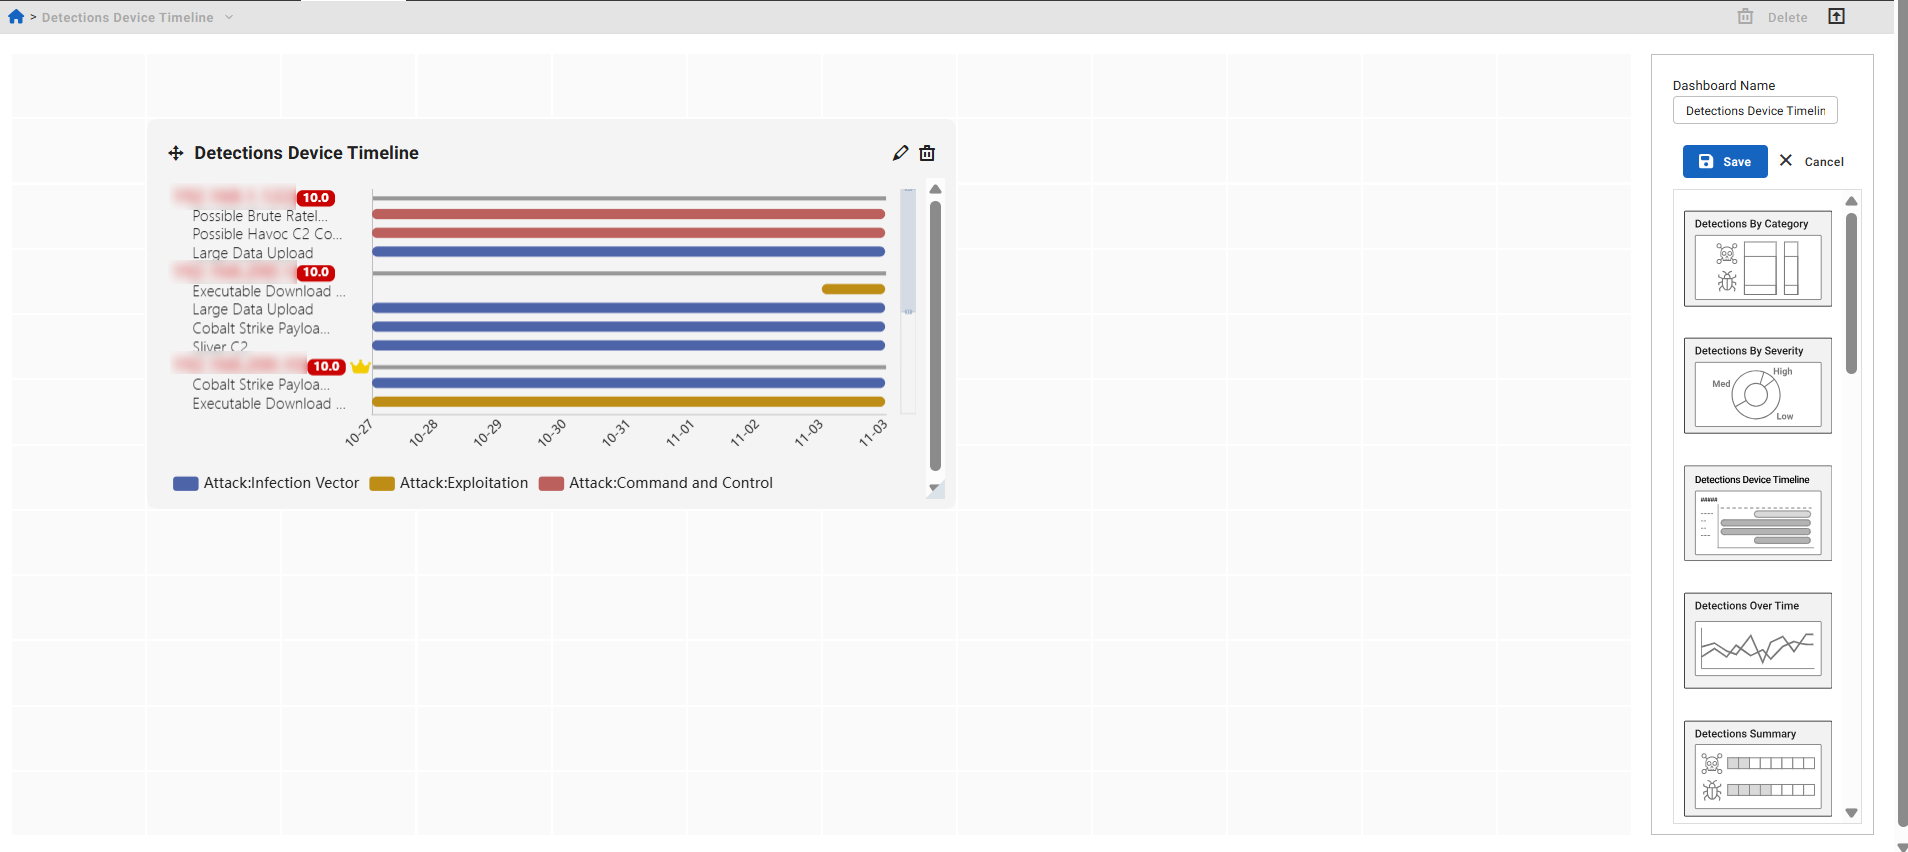
The Detections Device Timeline is available as a dedicated dashboard widget. By default, it displays the top five IPs with the highest risk scores from the past seven days. These settings are customizable.