
Creating IQL queries in Private Search
IQL queries provide a high level of precision and control over investigations. They support detailed filtering, complex logic, and advanced operators, making them ideal for handling large datasets and intricate conditions. IQL queries can be saved, reused, added to investigations, and used to create detectors.
FortiNDR Cloud also supports Natural Language (NL) queries that allow analysts to write queries in plain language without learning specialized syntax. For more information, see Natural Language queries
To perform a Private Search with IQL queries:
-
Go to Investigations > Private Search.
- In the Search tab, enter the query string in the search field. For example queries see, IQL query examples.
- Configure the search settings.
Date range Use the date picker to configure the date range or select Last Hour, Last 24 Hours, or Last 7 days and click Apply.
You can select any time period within the last 365 days as long as it is limited to seven days.
Sort by timestamp Select Ascending or Descending.
Retrieve up to xxx Rows Select 100, 500 or 1,000 rows.
Enable Facets Select to return the panel that allows narrowing the search. This may make the query longer to complete. For more information, see Facet Search. -
Click Search.
To move Private Search queries to Investigations:
-
Click Investigations > Private Search.
- Click the Private Search tab.
To move a query Click the Actions menu
 at the end of the row and select Move to an Investigation.
To move multiple queries - Click the Edit icon
 and select the queries to be moved.
 Click Actions > Move to an Investigation .
- Click the Edit icon
- In the Move Query to Investigation dialog, create a new investigation or add the query to an existing investigation.
Create a New Investigation Select this option to create a new investigation. Enter the Investigation Name and Description.
The default name for new investigations is the first and last name of the user creating the investigation as well as a date stamp of when the investigation was created.
Add to Existing Investigation
From the Choose Investigation dropdown, select and investigation.
-
Click Move Query.
To delete queries in the Private Search tab:
- Click Investigations > Private Search.
- Click the Private Search tab.
To delete a query Click the Actions menu
at the end of the row and select Delete Query.To delete multiple queries - Click the Edit icon and select the queries to be deleted.
Click Actions > Delete Query .
- Click the Edit icon
- In the confirmation dialog, click Confirm.
To create a detection from an adhoc query:
-
Click the Private Search tab.
-
Click the Actions
menu at the end of the row and click Create Detection.The Create A Detector page opens.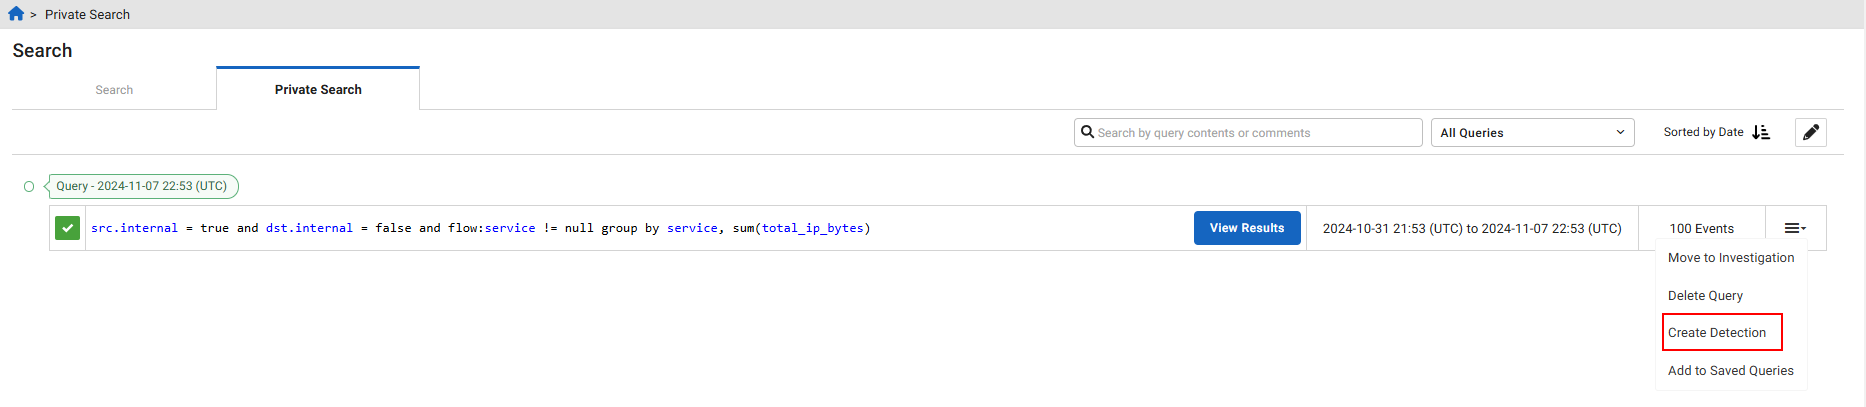
- Configure the detector and click Save Detector.
Detector Query You have the option of selecting a new query or using the query parameters the results are based on.
- The query field displays the facet filters used in the query.
- Click Select a new Query to select a saved query or a query from your history.
Impacted Device IP can appear in the fields Click Change Fields to select the specific fields you want to use to generate a detection. By default, any internal IP address in the src.ip or dst.ip fields will be used to generate detections.
Indicators are captured in the fields Click Change Fields to add or remove an Indicator Field for a detector. You can choose up to five fields.
Name Enter a name for the detector query. Severity Select High, Moderate or Low from the dropdown list. Confidence Select High, Moderate or Low from the dropdown list. Category Select the detector category from the dropdown list. Primary Technique Select the Primary Technique from the dropdown list. Secondary Technique Select the Secondary Technique from the dropdown list. Specificity Select Campaign, Tool Implementation, Procedure, Technique, or Tactic from the dropdown. Description Enter a description of the new detector. Run on Accounts Click Manage Run List to choose which accounts the new detector should run in. In the dialog that opens, choose an account and click Save.
This is applicable only if you have access to multiple accounts. For example, if your organization acquired another organization, once you deploy sensors in their network, it might be easier to ingest that data into a separate account and give your team access to it. If you were to write a detector targeting specific subnets in your account, that detector wouldn't be applicable to the acquired company's network, so you would only want to deploy it in your account.
Data Sources
Enable Zeek, Fortinet, Suricata, or Zscaler.
Resolution Settings Resolution Style Select Auto or Manual. Automatic Resolution Period Select between 6 hours and 1 Month. The default is 1 Week.
To save a query:
- Click the Private Search tab.
-
Click the Actions menu at the end of the row and click Add to Saved Queries.The Save Query dialog opens.
- Enter the query details and click Save.
Query Name Enter a name for the query. Search Query This field cannot be edited. Description Enter a description of the query.
|
|
You can use a saved query when you create a new detector or investigation. |