Legacy Threat Hunting
FortiEDR’s Legacy Threat Hunting is available in FortiEDR environments that have been upgraded to 5.0 and above from previous versions. This feature enables you to hunt for files and hashes that were collected before the upgrade to 5.0.
Use the Legacy Threat Hunting feature when there are Collectors in your system that have not been upgraded to FortiEDR 5.0 in order to search for files or hashes on those Collectors. After all Collectors have been upgraded to 5.0 or above, you can use FortiEDR’s Threat Hunting feature instead, which has more extensive collected data. For more details, seeThreat Hunting
Access the Threat Hunting Legacy page under the Forensics tab.
Click the Threat Hunting option under the Forensics tab. This action opens the Threat Hunting page. In this case, the Hash/Process field is empty.

To search for malware using Threat Hunting (legacy):
- Select the basis for the search by clicking the Hash (
 ) or File Name (
 ) button. When you select the Hash button, the search results represent matching HASH values. When you select the File Name button, the search results represent matching filenames.
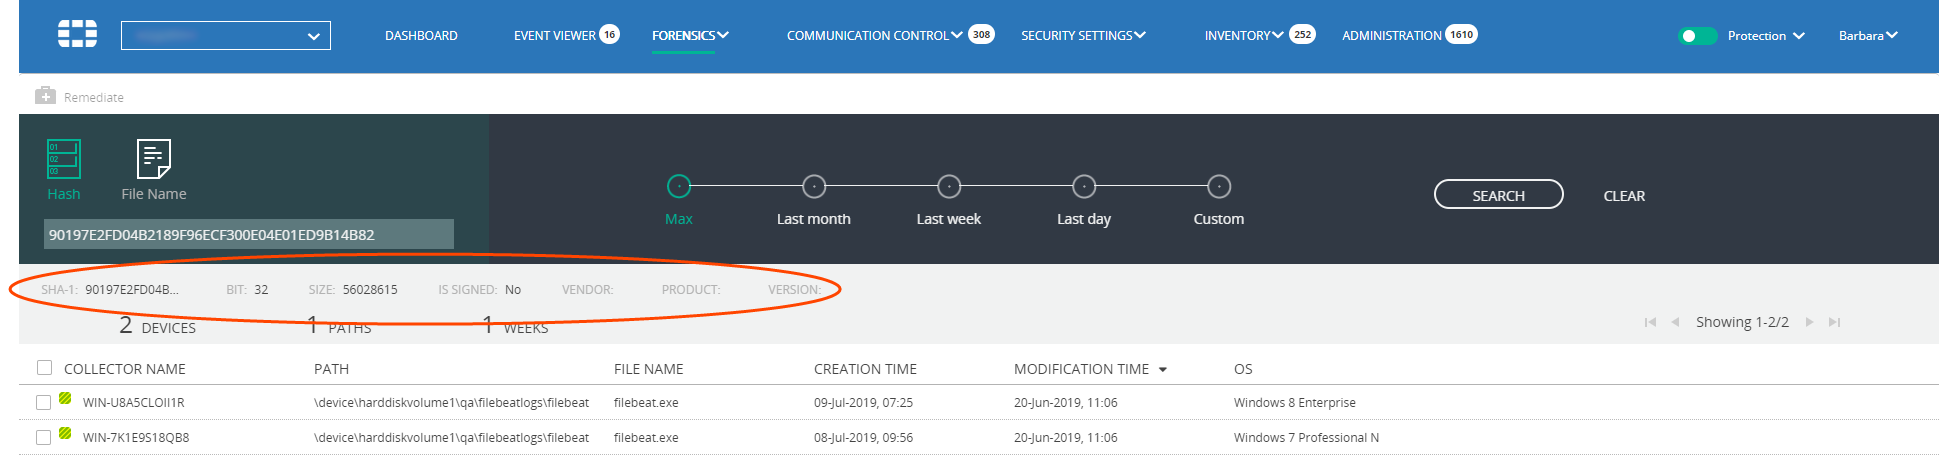
When accessing the Threat Hunting page using Method 1, the relevant HASH value appears in the field adjacent to the Hash button, as shown below.
When accessing the Threat Hunting page using Method 2, the field adjacent to the Hash and File Name buttons is empty.
- If the field adjacent to the Hash and File Name buttons is empty, copy and paste the applicable filename or HASH value into the empty field.
- Specify the time range for the search using the timeline buttons at the top of the window.

- Click the Search button. The system searches for matching files in all devices in your environment. When the search completes, the search results display in the window. The example below shows a search by process.
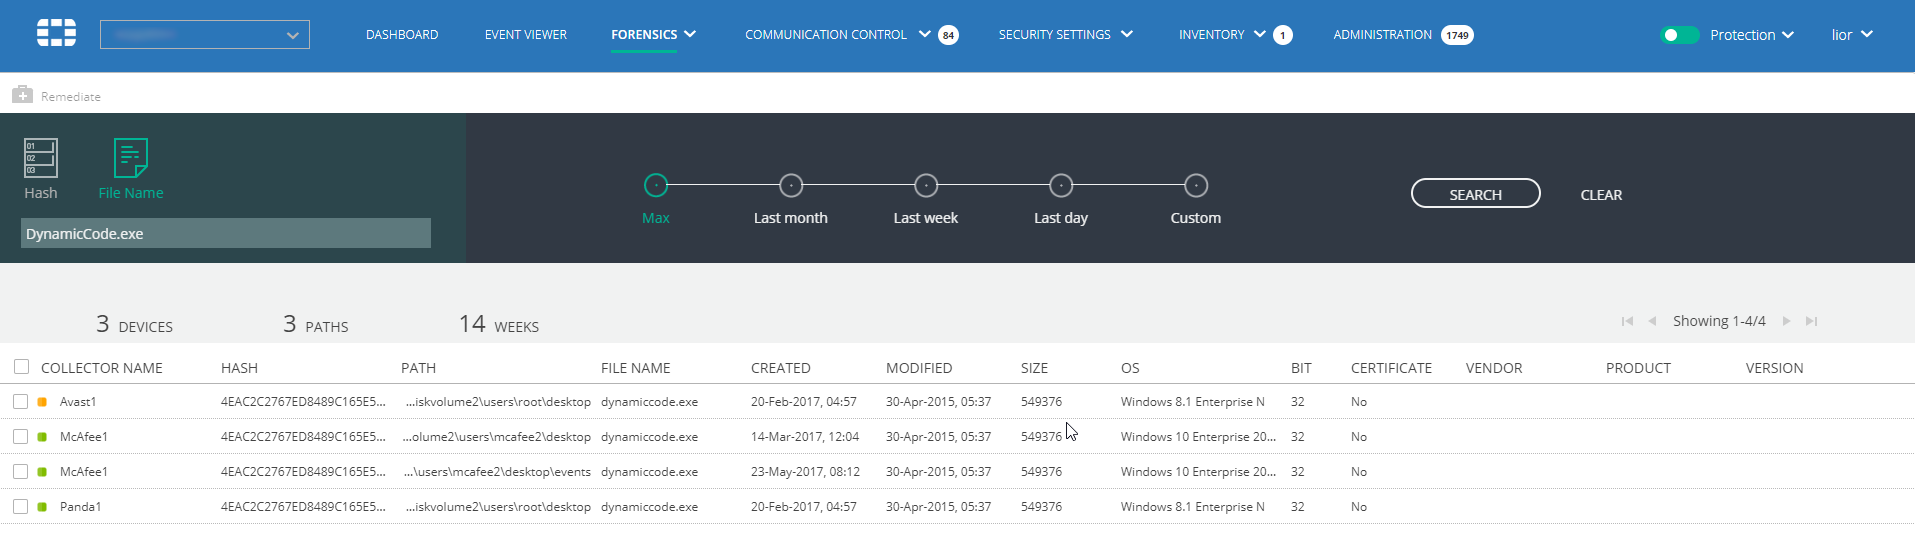
The row directly above the results table summarizes the results of the search. For example, in the window above, the system found 2 unique devices and one unique path created in the same one week. The example below shows the results of a search by HASH.

The labels row directly above the summary row identifies common, shared data elements. For example, Sha-1, vendor, and so on. The identified elements are shared by all files. Note that typically you see more common data elements when searching by HASH than by process.