


Defining exclusions
All exclusions must belong to an exclusion list. Select an exclusion list on the left to display the exclusions that are defined in it.
The following describes how to define a Process Exclusion and then how to define an Execution Prevention Exclusion.
Adding a Process Exclusion
- In the left pane, click the Exclusion List to which to add the exclusion.
- In the right pane, click the + Add Exclusion button. The following displays providing a choice of the two types of exclusions that you can define.
- Select Process. The following displays:

- The Operating system dropdown menu specifies Windows, which is currently the only operating system supported for exclusions.
- Define the processes to be excluded using one of the following options: Hash or any combination of File Name / Path / Signer, as follows:
- Hash: Mark the Hash radio button and specify the Hash that uniquely identifies this process.

- File Name / Path / Signer: Mark the Attributes radio button and check at least one of the File Name / Path / Signer fields checkboxes and fill the relevant values, as follows:

Specify the file and/or directory to be excluded by filling in the File name field, the Path field or both. If you fill in both fields, then that file is only excluded in that path. If you only fill in the File name field, then that file is excluded wherever it appears. Refer to the Defining an exclusion path section for more details about defining an exclusion path.
If you want to specify a signer, select Signer, then either upload the Signer’s Certificate, provide its thumbprint or provide the Signer’s name.
When a process is identified by file name and/or path only (which means Signer is not selected), you can disable monitoring of the process completely, including actions applied on the process, by selecting Do not monitor also actions applied on the process, in addition to activities done by the process under Advanced.

This option significantly reduces FortiEDR protection on the process and lowers the security level of the process. Use this option only for issues that regular exclusions cannot solve, such as VDI freezes or other application malfunctions due to basic monitoring of the process by the FortiEDR Collector.
- Hash: Mark the Hash radio button and specify the Hash that uniquely identifies this process.
- The Exclusion List field specifies the Exclusion List that was selected, when the Add Exclusion option was selected. This field is not editable.
- Click the Add button. This new exclusion is then listed in the Exclusion Manager page, as shown below:
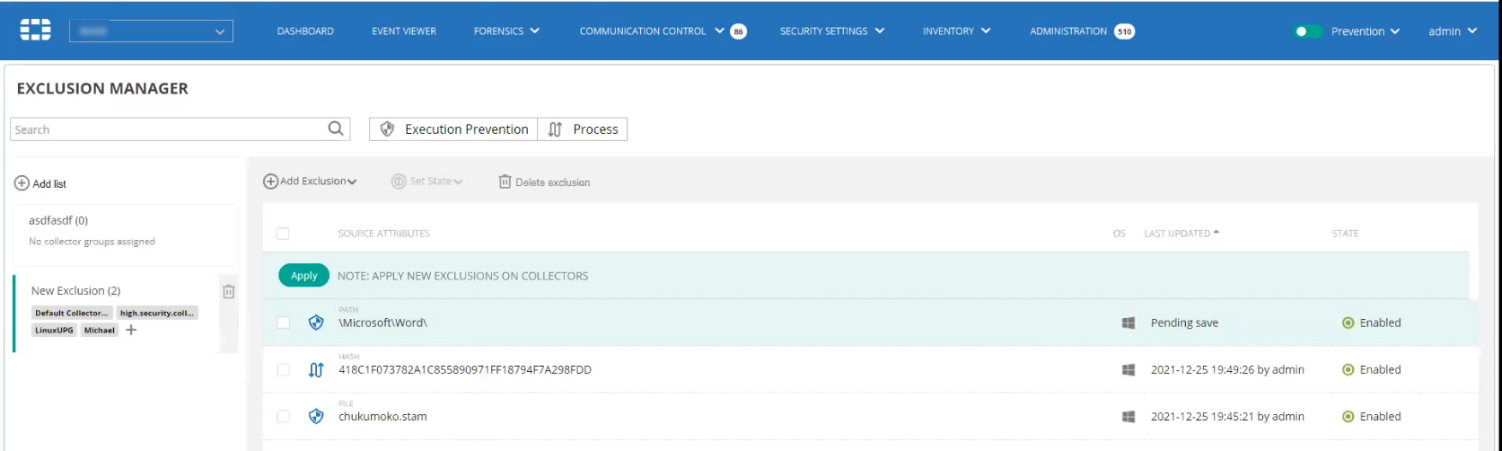
- The newly defined exclusions appear with a green background and the words Pending save appear in their LAST UPDATED column. To define that these exclusions take effect, you must click the Apply button and then click the Save button in the window that pops up. Their LAST UPDATED column then shows the timestamp when they were saved.

Adding an Execution Prevention Exclusion
- In the left pane, click the Exclusion List to which to add the exclusion.
- In the right pane, click the + Add Exclusion button. The following displays providing a choice of the two types of exclusions that you can define.
- Select Execution Prevention. The following displays:

- The Operating system dropdown menu specifies Windows, which is currently the only operating system supported for exclusions.
- Specify the file and/or directory to be excluded by filling in the File name field, the Path field or both. If you fill in both fields, then that file is only excluded in that path. If you only fill in the File name field, then that file is excluded wherever it appears. Refer to the Defining an exclusion path section for more details about defining an exclusion path.

- Under Advanced, you can select Do not monitor the files for other functionalities as well to disable monitoring of the file/directory completely, including backup of the files for Ransomware protection.
This option significantly reduces FortiEDR protection on the files and lowers the security level of the files. Use this option only for issues that regular exclusions cannot solve, such as VDI freezes or other application malfunctions due to basic monitoring of the files by the FortiEDR Collector.

- The Exclusion List field specifies the Exclusion List that was selected, when the Add Exclusion option was selected. This field is not editable.
- Click the Add button. This new exclusion is then listed in the Exclusion Manager page, as shown below:
- The newly defined exclusion appears with a green background and the words Pending save appear in its LAST UPDATED column. To define that these exclusions take effect, you must click the Apply button and then click the Save button in the window that pops up. Their LAST UPDATED column then shows the timestamp when they were saved.
Defining an exclusion path
The table below provides examples of exclusion paths with explanations of which folders apply or do not apply:
|
Exclusion path |
Folders that apply |
Folders that do not apply |
||
|---|---|---|---|---|
\Documents\Personal\
|
\Documents\Personal
|
|
||
|
|
|
|
||
|
|
|
\Documents
|
||
|
|
|
|
||
|
|
|
|
||
|
||||
Setting the state of an exclusion
The Set State button enables you to enable or disable the selected exclusion(s). By default, an exclusion is enabled.
For changing the state of multiple Exclusions, check the checkboxes of all relevant exclusions and then select the state from the Set State dropdown under the toolbar.
Deleting an exclusion
The Delete Exclusion button enables you to delete the selected exclusion(s).
To delete multiple Exclusions, check the checkboxes of all relevant exclusions and then select the Delete option in the toolbar.