


SAML IdP configuration with Azure
|
|
Azure may require a license to support SAML integration with their Enterprise Application. Contact Microsoft’s support for further information. |
To configure general SAML IdP portal settings:
- Before you start configuring SAML on Azure, download and save SP data from the FortiEDR SAML configuration page (
fortiEDR.sp.metedata.id.1.xml), as described in SAML authentication. - Sign in to the Azure Dashboard.
- In the Azure services, select and navigate to the Azure Active Directory.
- From the left menu, select Enterprise applications.
- Click New Application and then Create your own application.
- In the window that appears, leave the default and click Create.

- Click Assign users and groups to configure the users and groups to grant access to the FortiEDR application.
- Click Set up single sign on.

- When prompted to select a single sign-on method, select SAML.

- Select Users and groups and then + Add user/group to create a new user group.
- Add users to the group so that they will be eligible to authenticate with FortiEDR Manager.

- Go to the groups properties and note down the object Id which will be used in later steps.
- Click Edit in the Basic SAML Configuration box.

- Click Upload metadata file and browse to select the FortiEDR SP metadata file (
fortiEDR.sp.metedata.id.1.xml) that was downloaded from FortiEDR SAML configuration page during SAML authentication. Alternatively, you can manually copy the entityID and the Reply URL values from FortiEDR metadata file and paste them to the relevant input text boxes. - Click Save. The required SAML configuration fields displays populated with details, as shown below:

- Click Edit in the User Attributes & Claims box.
- In the User Attributes & Claims window, click Add a group claim.
- In the window that appears, select the groups to be added to the claim sent to the FortiEDR application. These specific groups should be specified in the Role/Group mapping on the SAML configuration page of the FortiEDR console in order to determine the permissions of the signed in user.
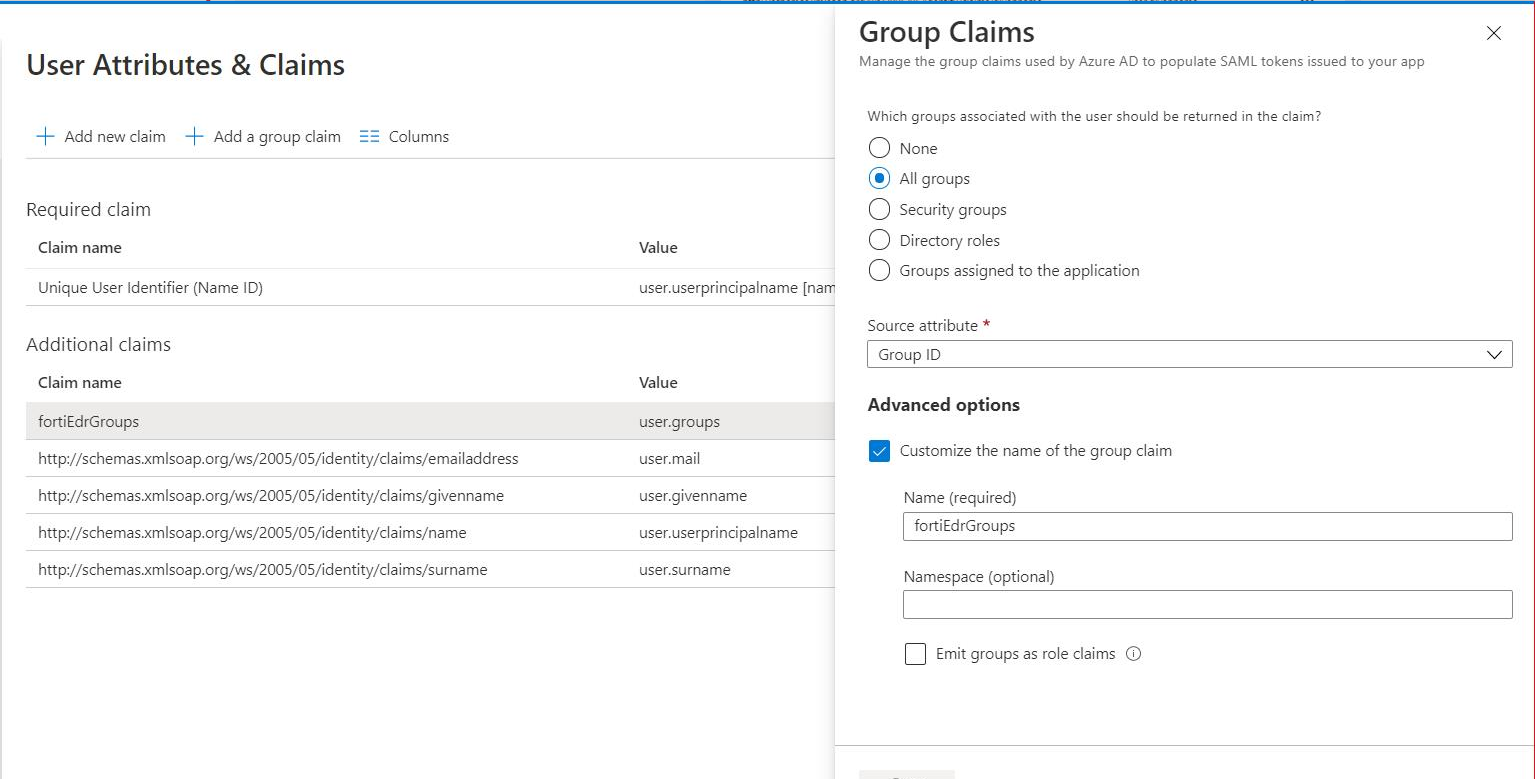
- Select the Customize the name of the group claim checkbox.
- In the Name field, enter the attribute name that was specified on the SAML configuration page of the FortiEDR console during SAML authentication. In our example, it is fortiEdrGroups, as shown below:

- Click Save.
- Download the Federation Metadata XML file from the SAML Signing Certificate section on Azure, as shown below:

- Verify that the newly defined attribute is included in the assertion of the Federation Metadata XML file, as shown in the following example:

- Select and upload the XML file into the FortiEDR Central Manager, as follows:
Alternatively, you can use the App Federation Metadata URL from Azure, select the URL radio button in the IDP Metadata configuration on the FortiEDR console and paste it to the same location:

Azure can now be used as an IdP that awards authorization and authentication to users trying to access the FortiEDR Central Manager console. When logging into the FortiEDR console via an SSO URL that is specified under the SAML settings page, an Azure user is awarded access rights to the FortiEDR Central Manager according to the User Groups to which that user was added in Azure.