
Registering FortiGate
The FortiGate, and then its service contract, must be registered to have full access to Fortinet Customer Service and Support, and FortiGuard services. The FortiGate can be registered in either the FortiGate GUI or the FortiCloud support portal. The service contract can be registered from the FortiCloud support portal.
|
|
The service contract number is needed to complete registrations on the FortiCloud support portal. You can find this 12-digit number in the email that contains your service registration document (sent from do-not-reply-contract@fortinet.com) in the service entitlement summary. |
Recent FortiGate models include a new BIOS version with a security enhancement that requires you to register your FortiGate and download the registration information to your FortiGate before you have complete access to the GUI or CLI. You must also register your FortiGate before you can upgrade its firmware.
Although it is recommended to register all FortiGate models to FortiCare, it is not required for older FortiGate models without the latest BIOS version.
This topic contains the following sections:
Registering recent FortiGate models
For recent FortiGate models with the new BIOS version, FortiCare registration is required after new GUI login. When logging in to the FortiOS GUI for the first time on a new FortiGate installation, you are directed to the FortiCare registration dialog box to register your device with FortiCare. You must register the FortiGate to FortiCare before you can access the GUI for further device configuration.
For the list of affected devices, see Registration before device configuration FAQ.
Until the device is registered with FortiCare, the FortiOS CLI is read-only, except for the following commands:
-
config firewall
-
config ftp-proxy
-
config router
-
config system
-
config web-proxy
Only a subset of settings related to network configurations are supported.
To register recent FortiGate models with FortiCare:
-
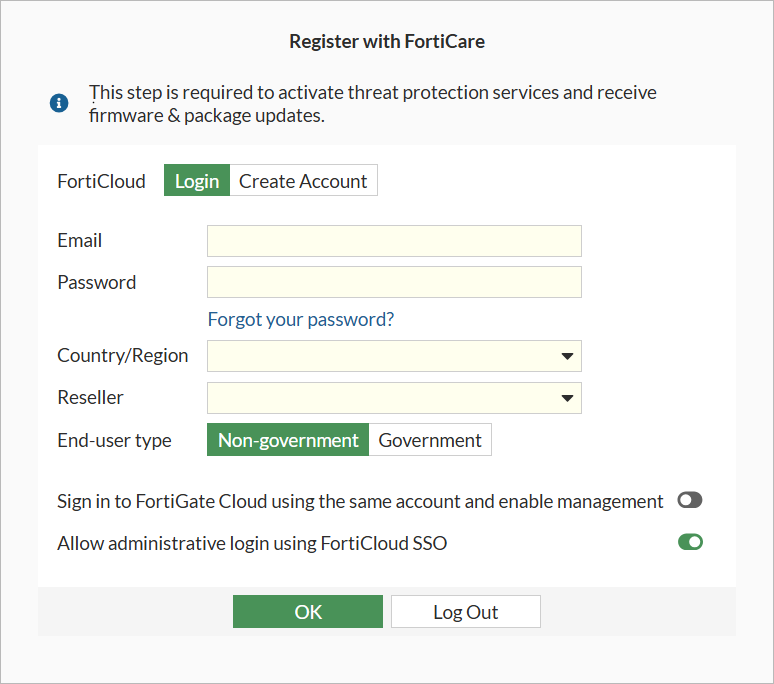
Log in to the FortiOS GUI. The Register with FortiCare dialog box is displayed:
-
With FortiCloud set to Login, complete the fields, and click OK to register with FortiCare.
If you do not want to register the device now, click Log Out, and register the device another time. However, you will be unable to access the GUI for further device configuration.
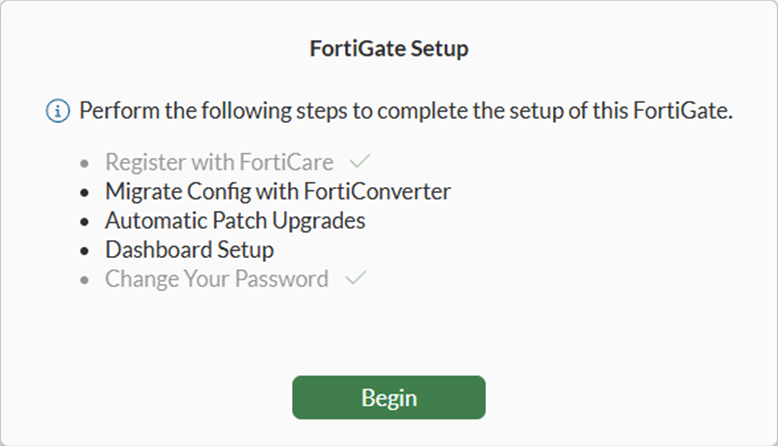
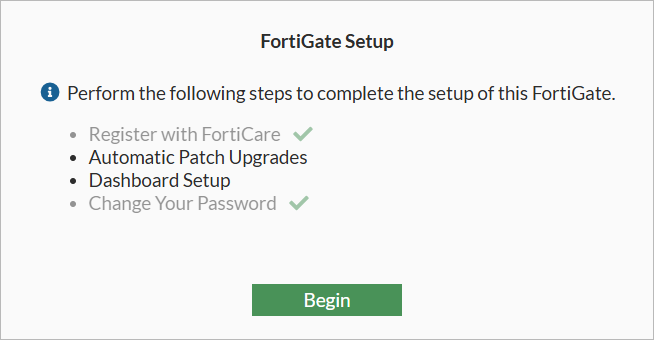
The FortiGate Setup wizard is displayed.
-
Click Begin to continue. See Completing the FortiGate Setup wizard.
Registering FortiGate models
This section applies to older FortiGate models without the latest BIOS version.
For FortiGate models connected to the internet, you have the option of registering the device with FortiCare using the Setup wizard.
To register FortiGate models in the GUI:
-
Connect to the FortiGate GUI. The FortiGate Setup wizard appears.
-
Click Begin. The Register with FortiCare step is displayed.

-
Register the FortiGate to FortiCare, and click OK. The next step in the wizard is displayed.
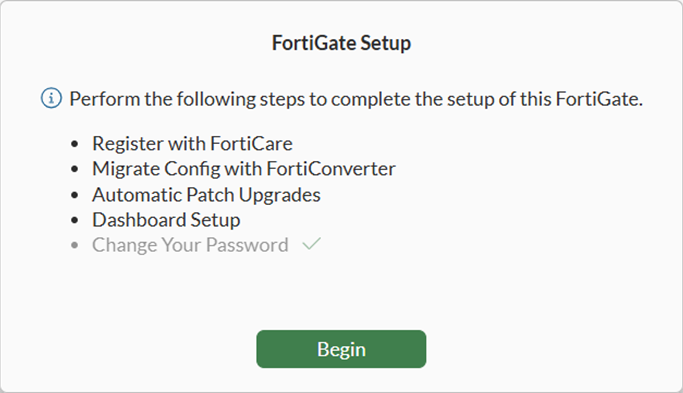
Complete the wizard, or click Later to complete the wizard later. See Completing the FortiGate Setup wizard for details.
-
Go to System > FortiGuard and click Enter Registration Code.

-
Enter the contract registration code from your service registration document.
-
Click OK.
Registering on the FortiCloud support portal
To register the FortiGate on the FortiCloud support portal:
FortiGates can be registered with the Register More button in the Products views. For details, see Registering assets in the FortiCloud Account Services Asset Management guide.
Bypassing FortiCare registration
By default, FortiGates with new BIOS are set to FortiCare registration level 2 in the BIOS, and you must register the device to FortiCare before you can access the GUI. However, you can use the BIOS menu to manually set the FortiCare registration level to 1, and then you can bypass FortiCare registration in the GUI.
To change the FortiCare registration level:
-
Using the console cable, connect the FortiGate unit’s console port to the serial communications (COM) port on your management computer. See Connecting to the CLI.
-
Hard reboot the FortiGate.
-
Press a key to interrupt the boot process when prompted:
Boot up, boot device capacity: 28626MB.
Press any key to display configuration menu...
-
Enter
Ito accessSystem configuration and information.[C]: Configure TFTP parameters. [R]: Review TFTP parameters. [T]: Initiate TFTP firmware transfer. [F]: Format boot device. [B]: Boot with backup firmware and set as default. [I]: System configuration and information. [Q]: Quit menu and continue to boot. [H]: Display this list of options.
-
Enter
Cto accessSet FortiCare registration.Enter C,R,T,F,B,I,Q,or H: [S]: Set serial port baudrate (will take effect on next boot). [R]: Set restricted mode. [T]: Set menu timeout. [U]: Set security level. [C]: Set FortiCare registration. [I]: Display system information. [E]: Reset system configuration. [M]: Display SPD information. [Q]: Quit menu and continue to boot. [H]: Display this list of options.
-
Enter
1to setNot Enforce.Enter S,R,T,U,C,I,E,M,Q,or H: [1]: Not Enforce [2]: Enforce Enter FortiCare registration setting [2]: 1
To bypass FortiCare registration in the GUI after setting FortiCare registration Level to 1 in the BIOS:
-
Ensure the FortiGate has the correct networking configuration to reach the Internet, such as receiving IP and gateway addresses from DHCP. See Configuring basic settings.
-
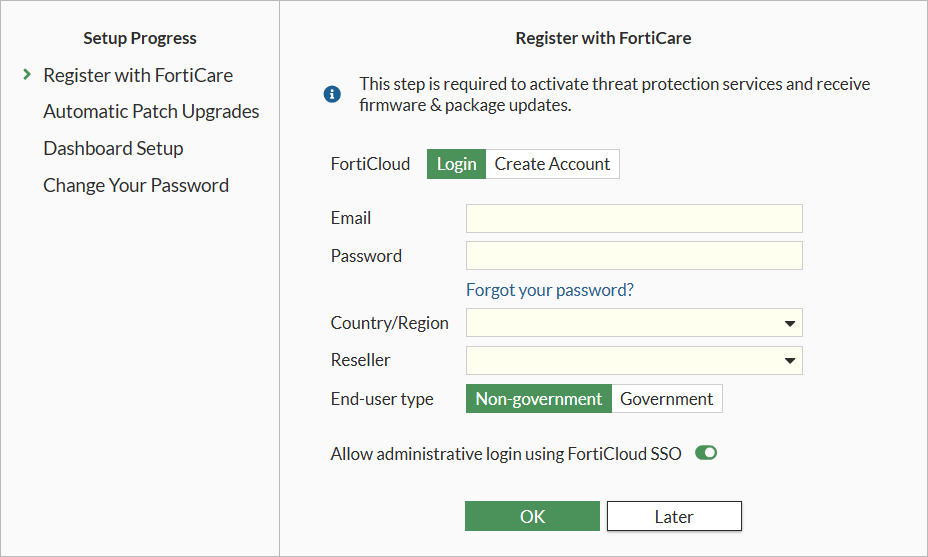
Log in to the FortiOS GUI. The Register with FortiCare dialog box is displayed:
-
Click Later to proceed without registering the FortiGate to FortiCare.
The FortiGate Setup wizard is displayed.
-
Click Begin to continue. See also Completing the FortiGate Setup wizard.