
SAML authentication
Security Assertion Markup Language (SAML) is an XML-based open standard for exchanging authentication and authorization data between parties, particularly between an identity provider (IdP) and a service provider (SP).
FortiEDR can act as an SP to authenticate users with a third-party IdP, enabling transparent user sign-in to the FortiEDR Central Manager Console.
To set up SAML authentication in FortiEDR:
-
For multi-tenancy environments, in the Organization dropdown list at the top left, verify the selected organization is the one that you want to grant the SAML users access to. To grant the SAML users access to all organizations, select Hoster View.
- In the Administration > Users page, go to the SAML Authentication tab.
The following window displays:
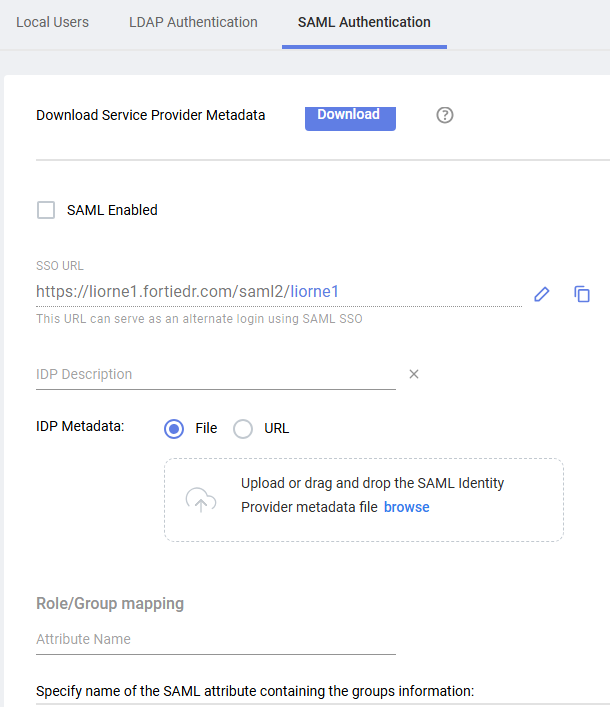
- Click the Download button to download and save SP data from FortiEDR, which is used by your IdP server during SAML authentication. Then, upload this FortiEDR data as is to your IdP server using a standard method.
If your IdP requires manual configuration, you can extract the following fields from the XML file that you downloaded and use them for manual configuration:
Field
Description
Entity ID Located under the md:EntityDescriptortag, in theentityIDattribute.Logout Address Value Located under the md:SingleLogoutServicetag, in theLocationattribute.Login Address Value Located under the md:AssertionConsumerServicetag, in theLocationattribute.Certificate Value (Public) Located under the ds:X509Certificatetag. - Fill in the following fields:
Field
Definition
SAML Enabled Check this checkbox to enable SAML authentication in FortiEDR. SSO URL Specify the URL to be used by users to log in to FortiEDR. If necessary, you can edit the suffix of this URL (shown in green) by clicking the Edit button
 and then modifying it as needed. You can also copy the URL to the clipboard using the Copy button
  (for example, in order to email the FortiEDR SAML login page to your users).
Make sure that the suffix does not include any spaces and is comprised of only letters, numbers and underscores.
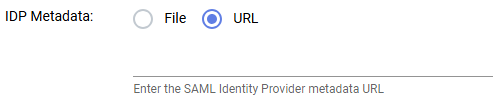
IDP Description Specify a free-text description. For example, you may want to specify the IdP server that you are using here. IDP Metadata Upload the IdP metadata to FortiEDR. You can either upload an XML file or a URL. To upload a file, click the File radio button and then click the Select File button to navigate to and select the applicable *.XML file. To upload a URL, click the URL radio button and then specify the requisite URL.
Role/Group mapping Specify the attribute name and define group/role mapping and permissions of the group:

- In Attribute Name, specify the name of the attribute to be read by FortiEDR, in order to determine the permissions and role to be assigned to that user in FortiEDR. This attribute must be included as part of the response from the identify provider server to FortiEDR when a user attempts to log in to FortiEDR.
- Click Add group.
- Define group/role mapping and permissions of the group:
- In the Group field, specify an attribute value to be granted FortiEDR permissions.
- Under Role, select a role from the list. See Users for more information about the roles.
- Under Advanced, enable any additional privileges for the group. Some options are role-dependent.

- Click Add group and repeat step 2 for each role you want to map to an attribute value.

If more than a single role is mapped to the user, FortiEDR expects to get multiple roles as a list of values and not in bulk in the SAML assertion that is sent by IdP. - Click Save.
The examples below describe how the Azure, Okta or FortiAuthenticator SSO services can be used as an IdP that provides authorization and authentication for users attempting to access the FortiEDR Central Manager console. It demonstrates how to exchange metadata between the two entities, how to define group attributes and how to associate them with SAML users so that user permissions are dictated by the Group/Roles mapping in FortiEDR SAML configuration.