
Filtering Records
You can filter records on the listing view by typing the filter term, tag, or selecting the option on which you want to filter records based on the column headers. You can also specify complex conditional filters on the records in the module listing page using the 'Advanced Filter'.
Users can quickly and easily switch between saved filters since filters are directly exposed on the grid, making it easy for you to select and apply available saved filters without having to open the filter editing mode. In the filter editing mode, you can easily view and modify the filter definitions of a saved filter, without having to save that particular filter (you can save the modified filter if you want). You can also easily clear all or a particular filter applied on the grid.
To filter records, you can use two types of filters:
- Simple Filters: Used for filtering of records using a combination of columns.
- Advanced Filters: Used for complex sorting and filtering of records.
Simple Filters
You can use simple filters on the module records grid to filter records based on a combination of columns.
The following example explains how to filter alert records based on Severity, i.e., it only displays records whose Severity is set to Critical. In this example, you are setting a filter criterion from the UI, i.e., selecting a column (field) based on which you are filtering records.
Open the Incidents Response > Alerts. From the Severity column select Critical and click Apply.
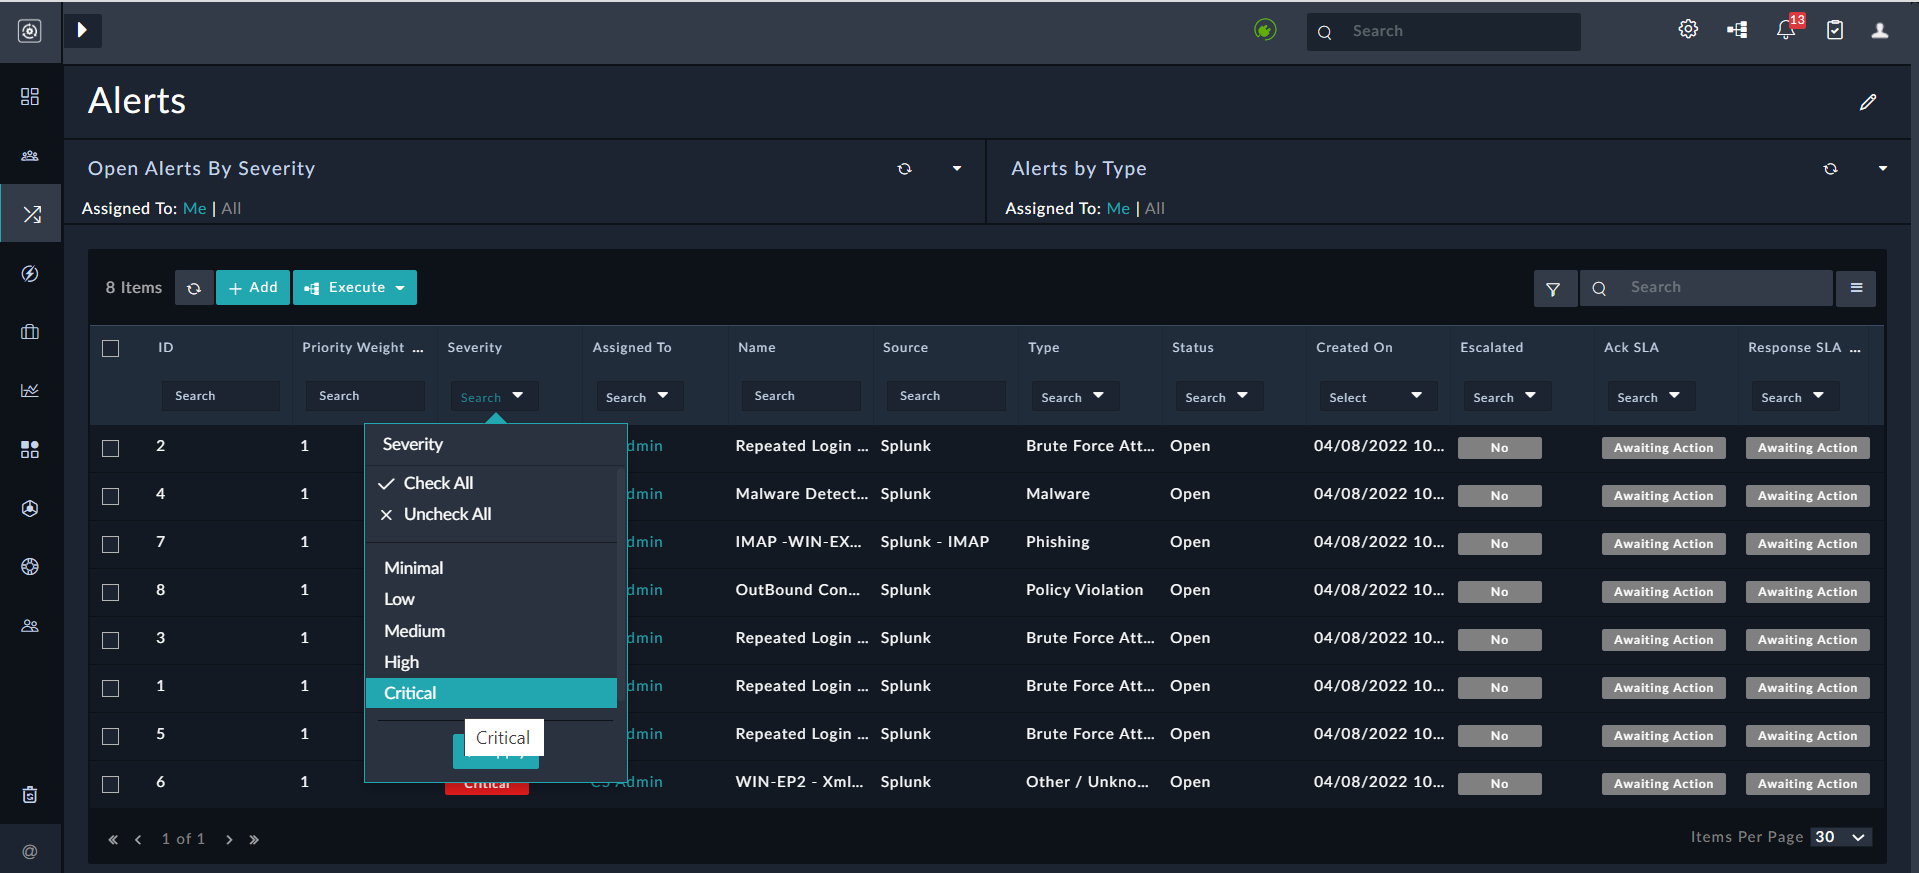
Once you click Critical as shown in the above image and click Apply, a filter is set on the Severity column, and the value of the filter is set to Critical. Therefore, based on the set filter criterion, only records whose Severity is Critical are displayed in the list of records as shown in the following image:
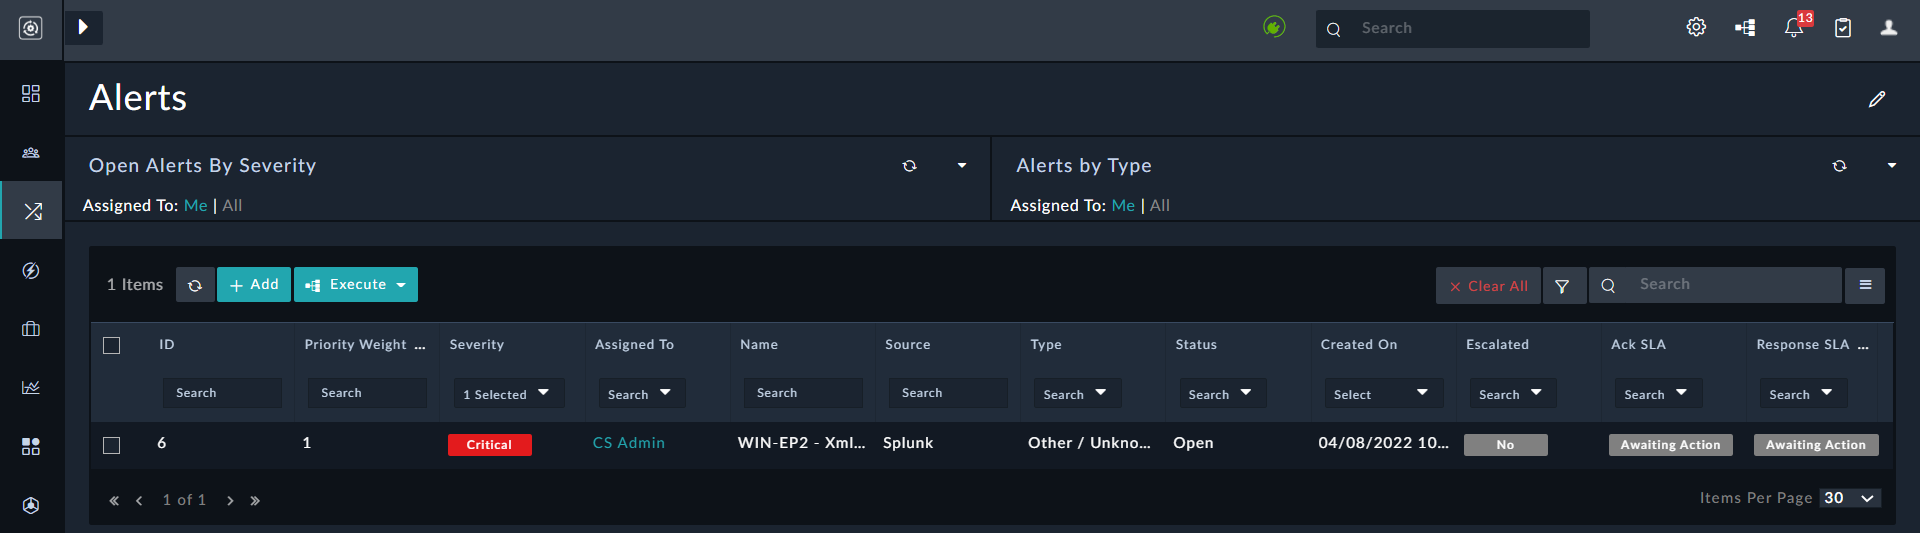
To clear all the filters applied on the grid, click Clear All.
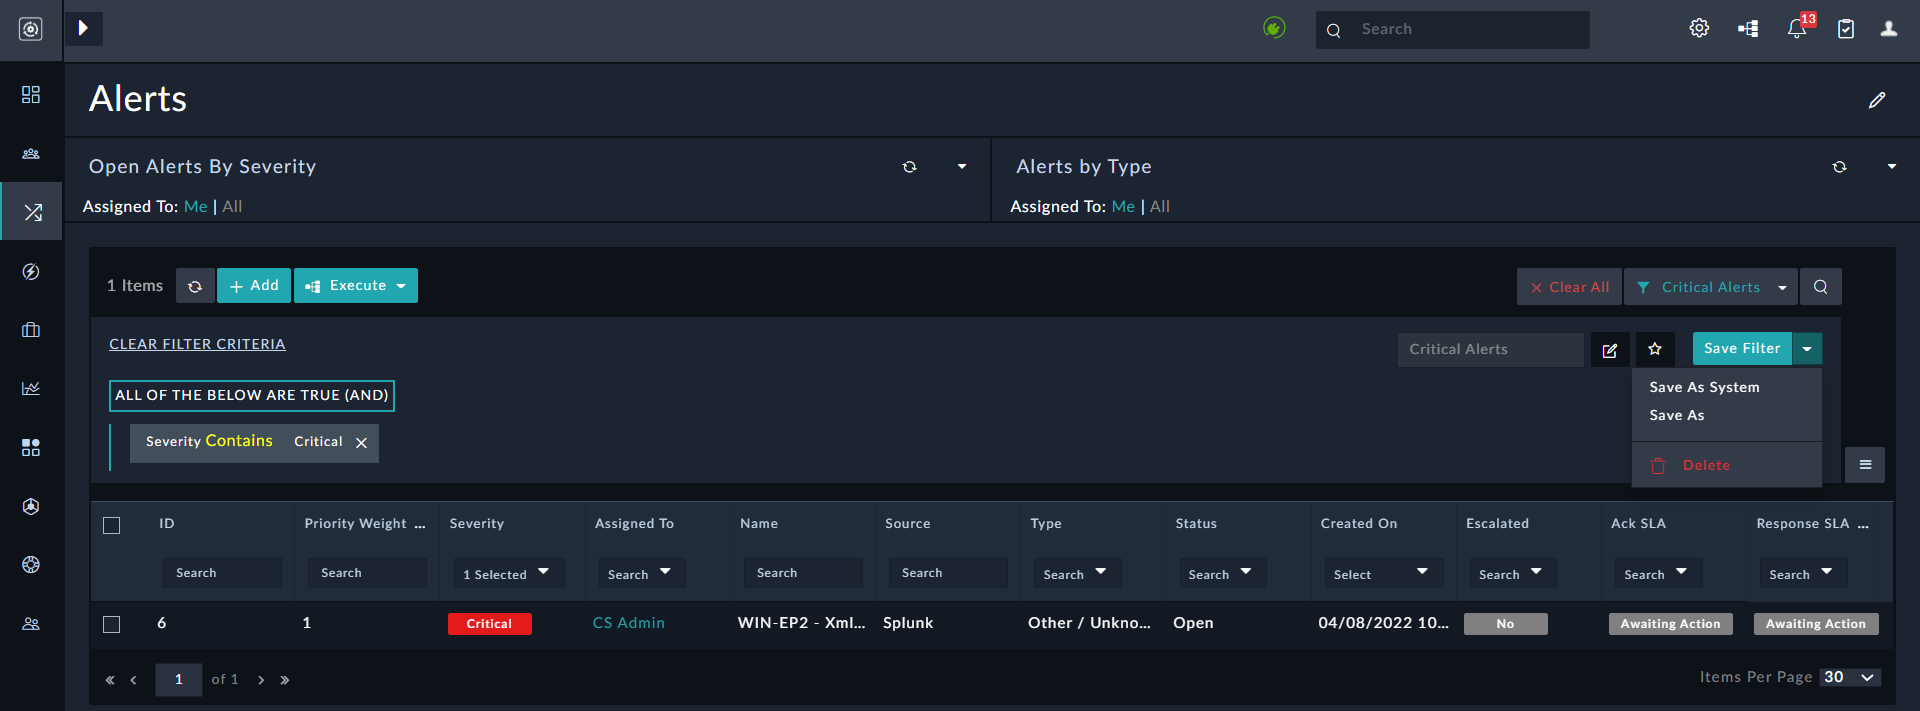
To edit a filter, click the Filter icon to see the filter criteria. You can save the filter for future use by clicking the Save Filter button. When you click the Save Filter button, the Save New Filter dialog is displayed. In this dialog, type the name of the filter in the Name field and click Save. For example, type the filter name as Critical Alerts and click Save. If you are an administrator, then you can also save a filter as a System Filter by clicking Save Filter > Save As System. System Filters are displayed to all users of the system:
In the filter editing mode, you can perform the following operations:
- Save a filter (user-specific or system).
- Edit the name of an existing filter by clicking the Edit Name icon
- Mark an existing filter as a default filter by clicking the Set Default Filter (star) icon.
- Delete an existing filter by clicking the Save Filter drop-down list and selecting the Delete option.
Note: Users can delete configured filters that they have created; however to delete 'System' filters, users must be assigned the 'Delete' permission on the 'Application' module. - To remove a particular filter criterion that has been applied to the grid, click the Clear Filter Criteria link.
Click the Filters icon to view a list of all existing filters that have been defined for the grid or record, as shown in the following image:
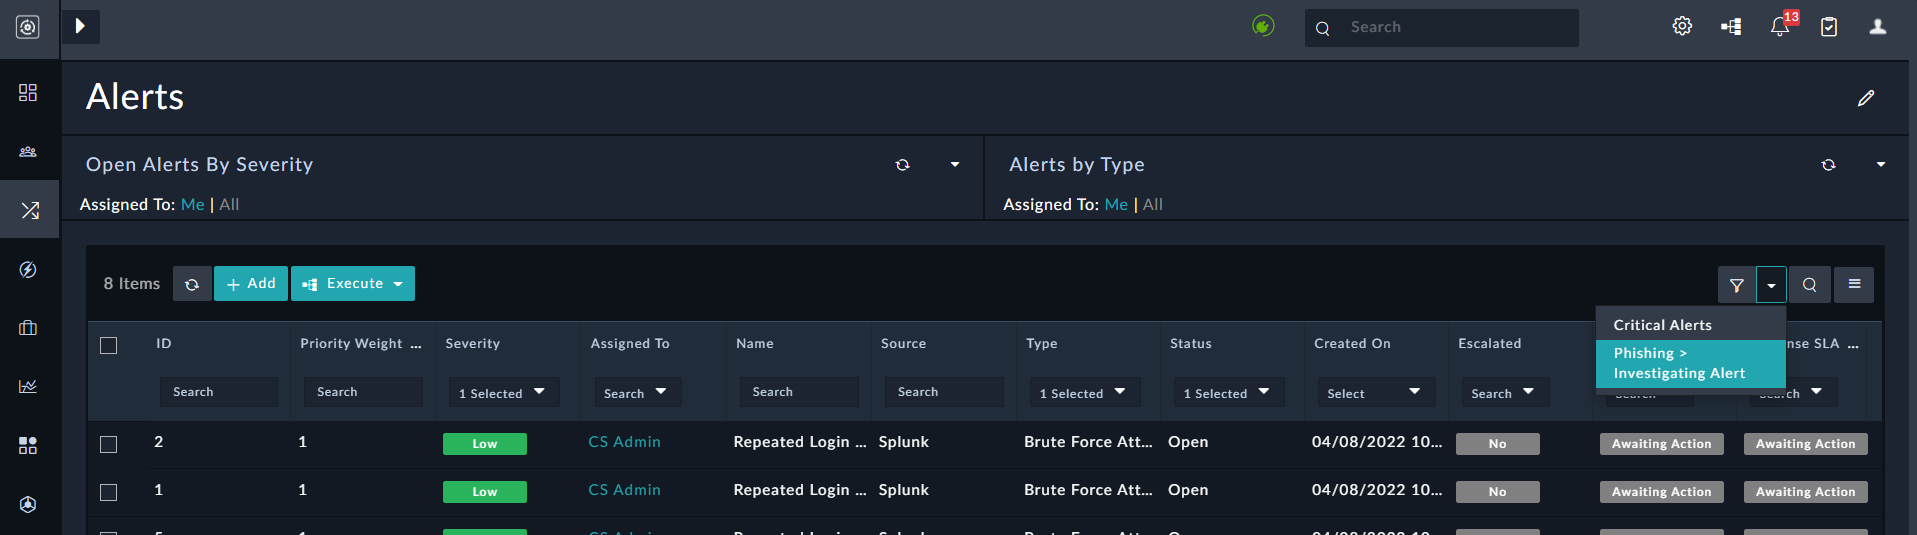
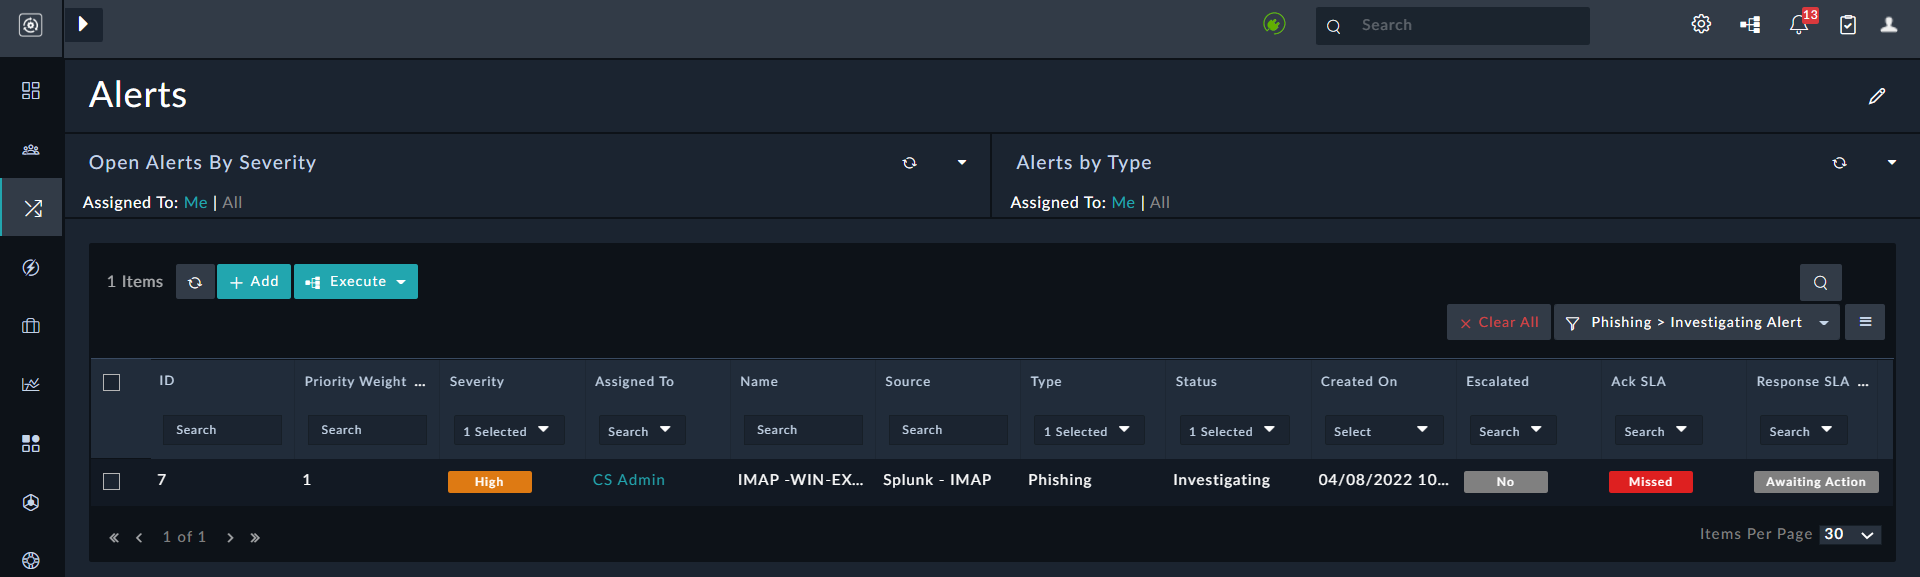
Using this filtering option, you can filter records using only the AND condition; for example, you can filter records whose Type is Phishing AND Status is Investigating. When you apply this filter, in our example, only one record is displayed, as shown in the following image:
|
|
You cannot use the OR condition to filter records using this method. |
You can also filter records displayed in the module's grid while defining the grid (using the 'Grid' widget) in the listing view using the Nested Filters component. The Nested Filters component allows you to filter group conditions at varying levels and use AND and OR logical operators. See the Dashboards, Templates, and Widgets chapter for information on the Grid widget and the Nested Filters component.
|
|
The filter condition defined on the listing view will override the filter condition defined in the grid widget. |
The filter operator for date fields includes many pre-defined options such as Last Year, Last 7 days, Next 24 hours, etc., making it easier for you to filter records for a relative time range of your choice. You can also now specify static custom date ranges for filters. For information on what defines a time range in a filter, see the Nested Filters section in the Dashboards, Templates, and Widgets chapter.
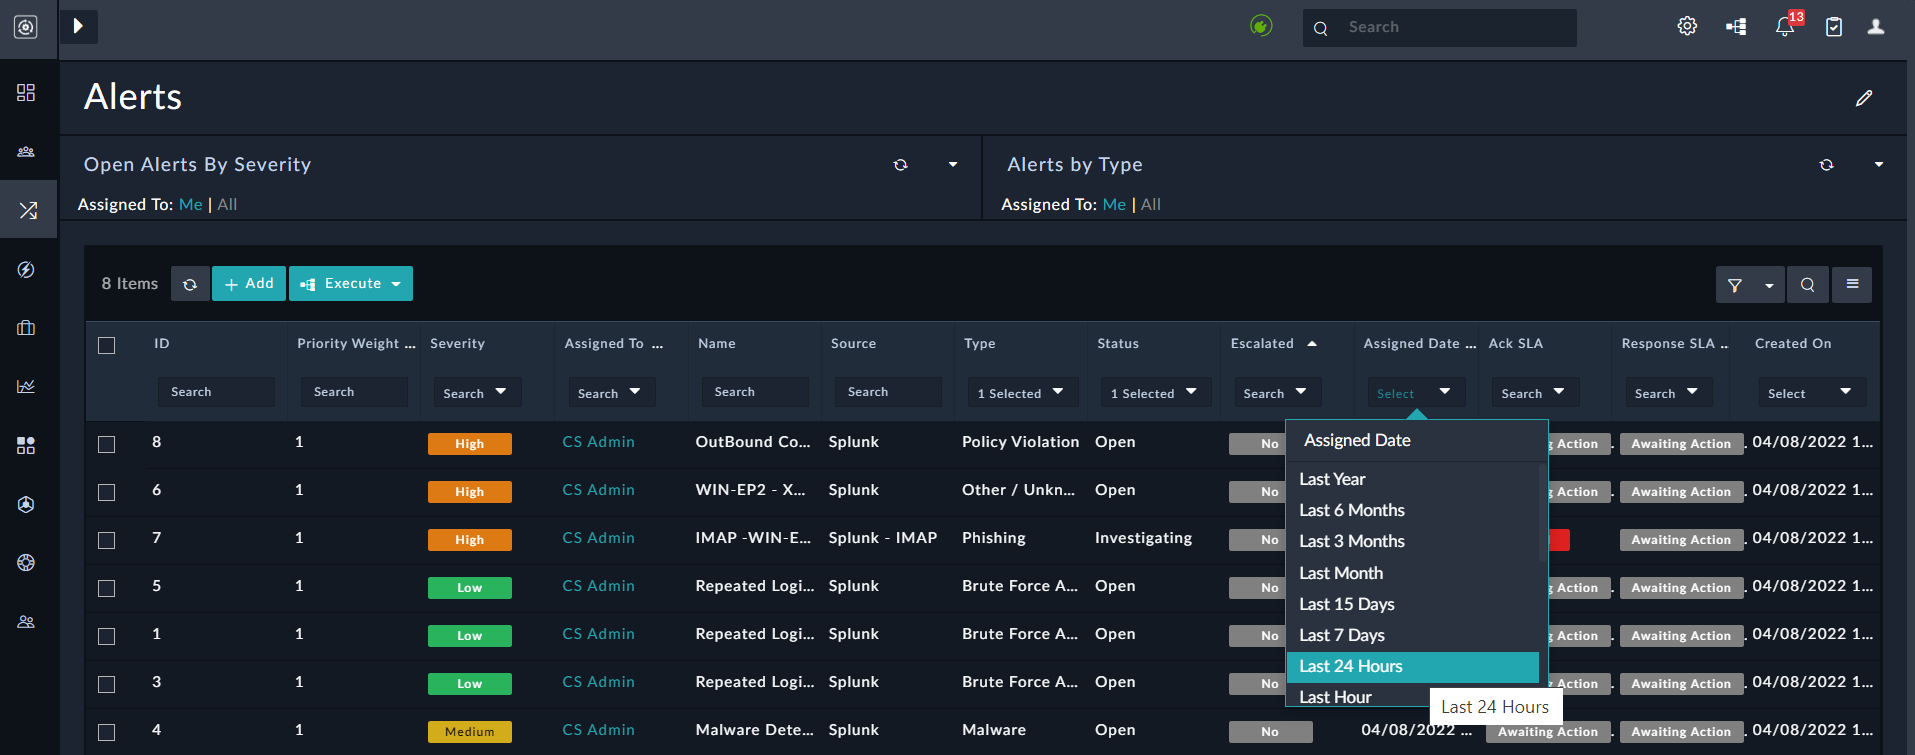
For example, if you want to filter alerts that were assigned in the last 24 hours and whose severity is High, do the following:
Click High in the Severity column and then in the Search box in the Assigned Date column and select Last 24 Hours:
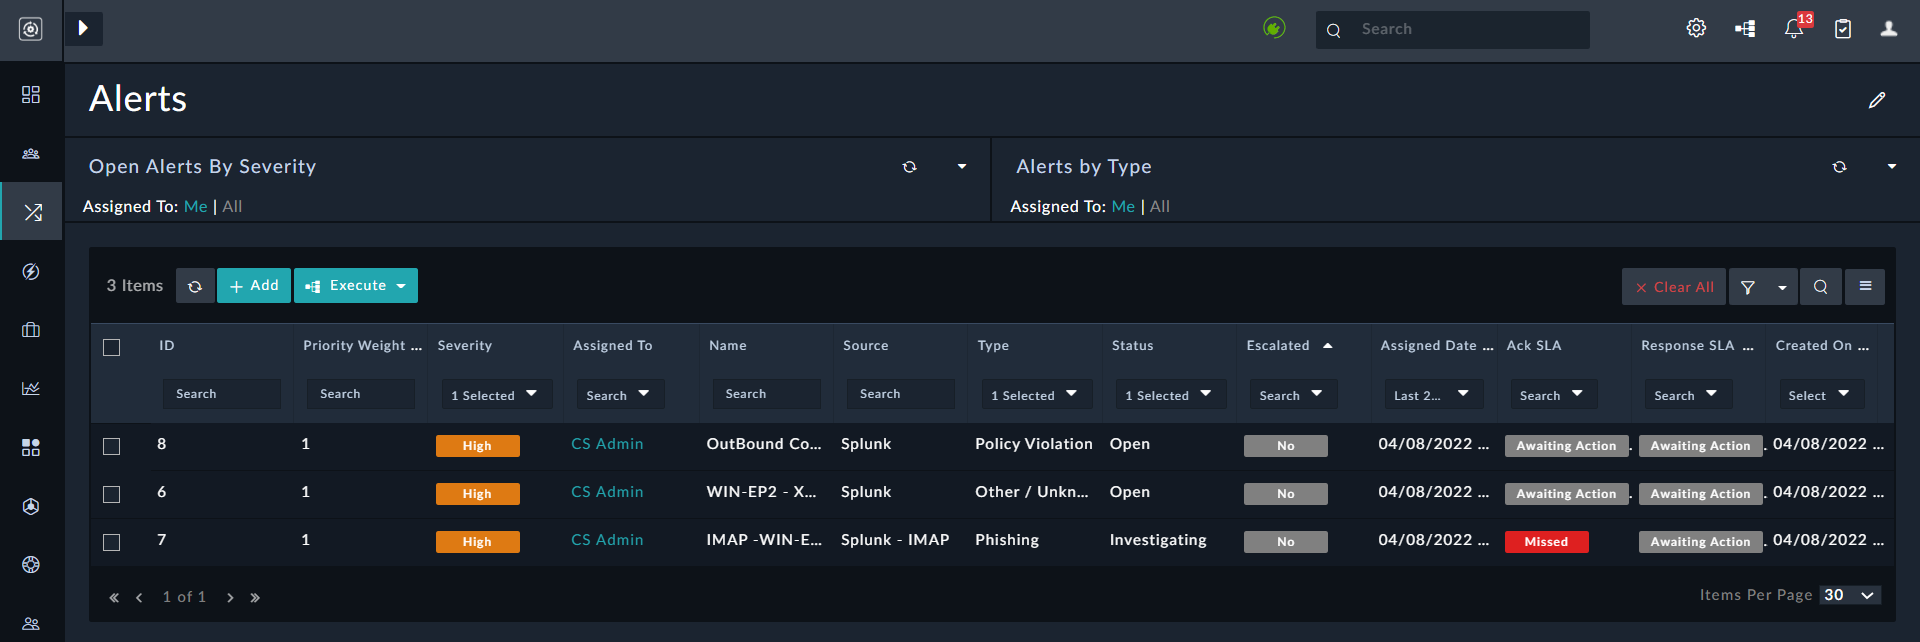
Filtered alerts are displayed as shown in the following image:
Select the Custom option to filter records according to custom static date ranges. For example, select Custom, and in the Define Custom Date Range dialog, from the From date field, select the date and time from the Calendar, from when you want to filter records, for example, 01/01/2022 02:00 PM, and in the To field, select the date and time till when you want to filter records, for example, 04/01/2022 09:00 AM:
Advanced Filters
You can use the 'Advanced Filter' to apply conditional filters to the grid columns on the module listing page. You can achieve complex sorting and filtering of records as well as setting a default view per user using the advanced filter.
To create an advanced filter, navigate to the module's listing page, for example, the 'Alerts' page. Click the Filter icon to display the 'Create Advanced Filter' button. Click Create Advanced Filter button to display the Created Advanced Grid Filter dialog, in which you can define complex filter conditions. An example of complex conditions used to filter alert records on the grid view could be the filtering of 'High' or 'Critical' alert records whose type is either 'Other / Unknown' or 'Suspicious Email' and whose status is set to 'Investigating'. To create this filter in the Created Advanced Grid Filter dialog, enter a name for the filter and the complex conditions as shown in the following image: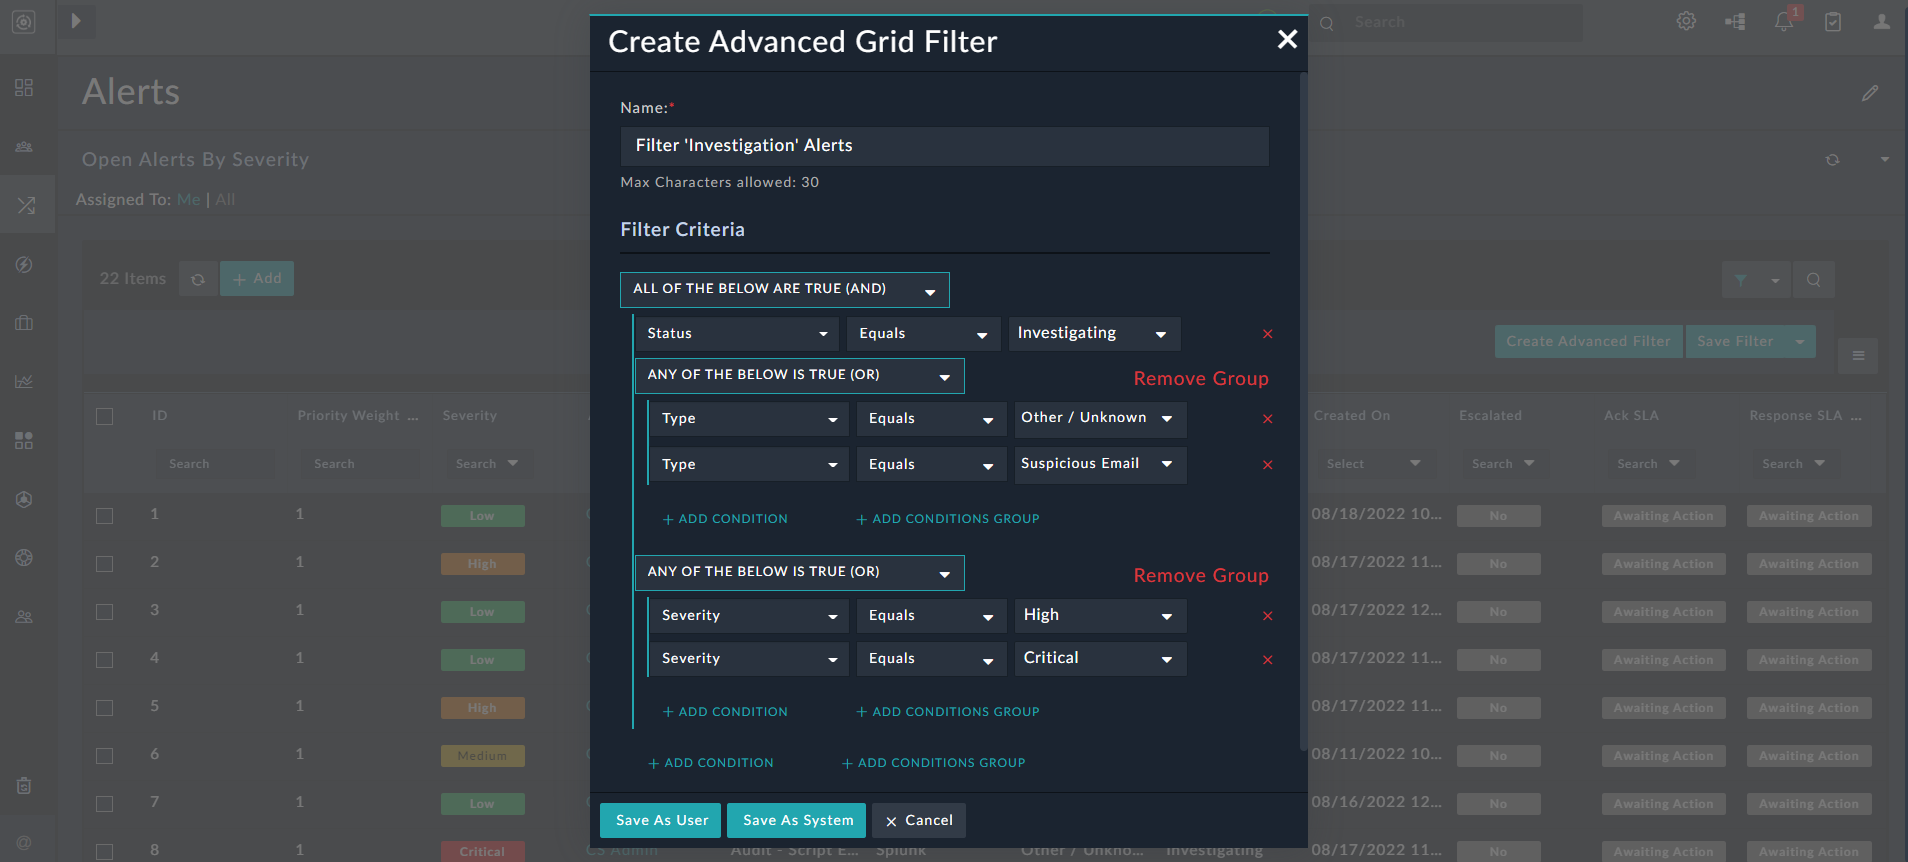
You can save this filter as a 'User' filter, i.e., this filter will be visible only to that particular user by clicking Save as User. Or, if you are an administrator, then you can also save this filter as a 'System' filter, i.e., this filter will be visible to all users of the system by clicking Save As System. For our example, we have saved the filter as a 'User' filter. Once the advanced filter is applied, the 'Alerts' page displays a filtered list of alerts in the grid. To clear all the filters applied on the grid, click Clear All.
If you have refreshed the browser and want to reapply a created filter on the grid, click the 'Filter' drop-down list and then select the filter that you want to apply, for example, the 'Filter 'Investigation' Alerts' filter. To edit this filter, click Filter 'Investigation' Alerts again to display the filter editing mode: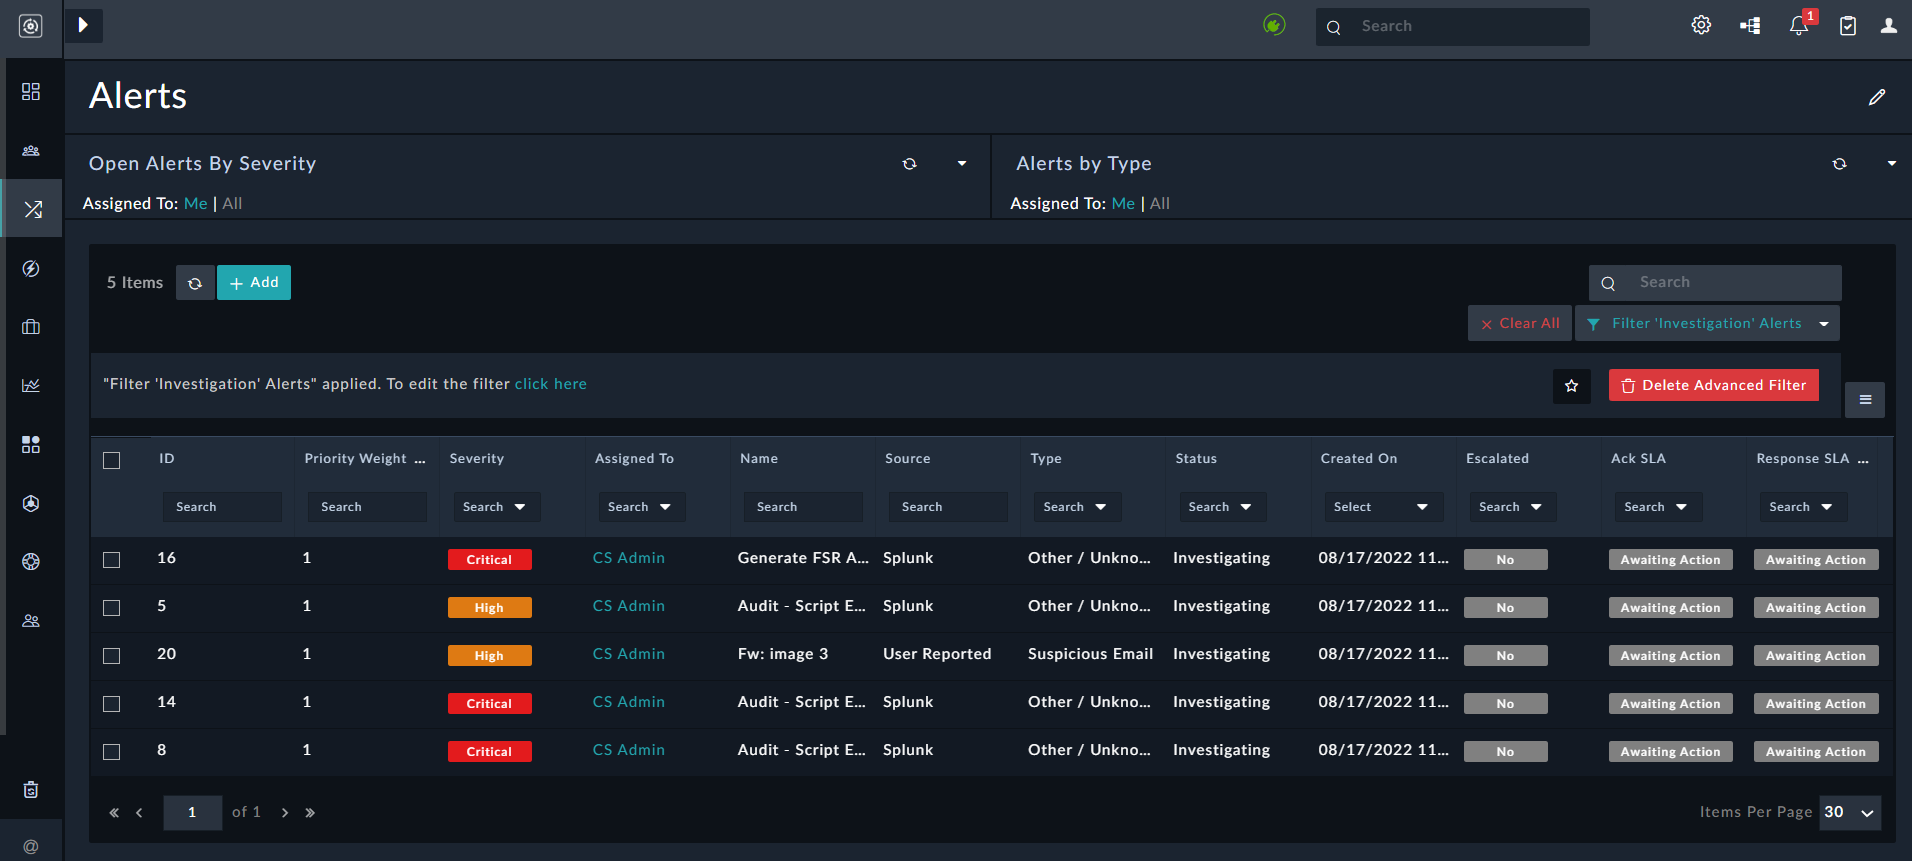
In the filter editing mode, you can perform the following operations:
- Edit the existing filter, including updating the name and/or conditions of the filter by clicking 'click here' to open the
Update Advanced Grid Filterdialog. - Mark the existing filter as a default filter by clicking the Set Default Filter (star) icon.
- Delete the existing filter by clicking Delete Advanced Filter.
Note: Users can delete configured filters that they have created; however to delete 'System' filters, users must be assigned the 'Delete' permission on the 'Application' module.
You can apply column filters on top of the selected advanced filters. For example, further filtering the records based on the 'Source column':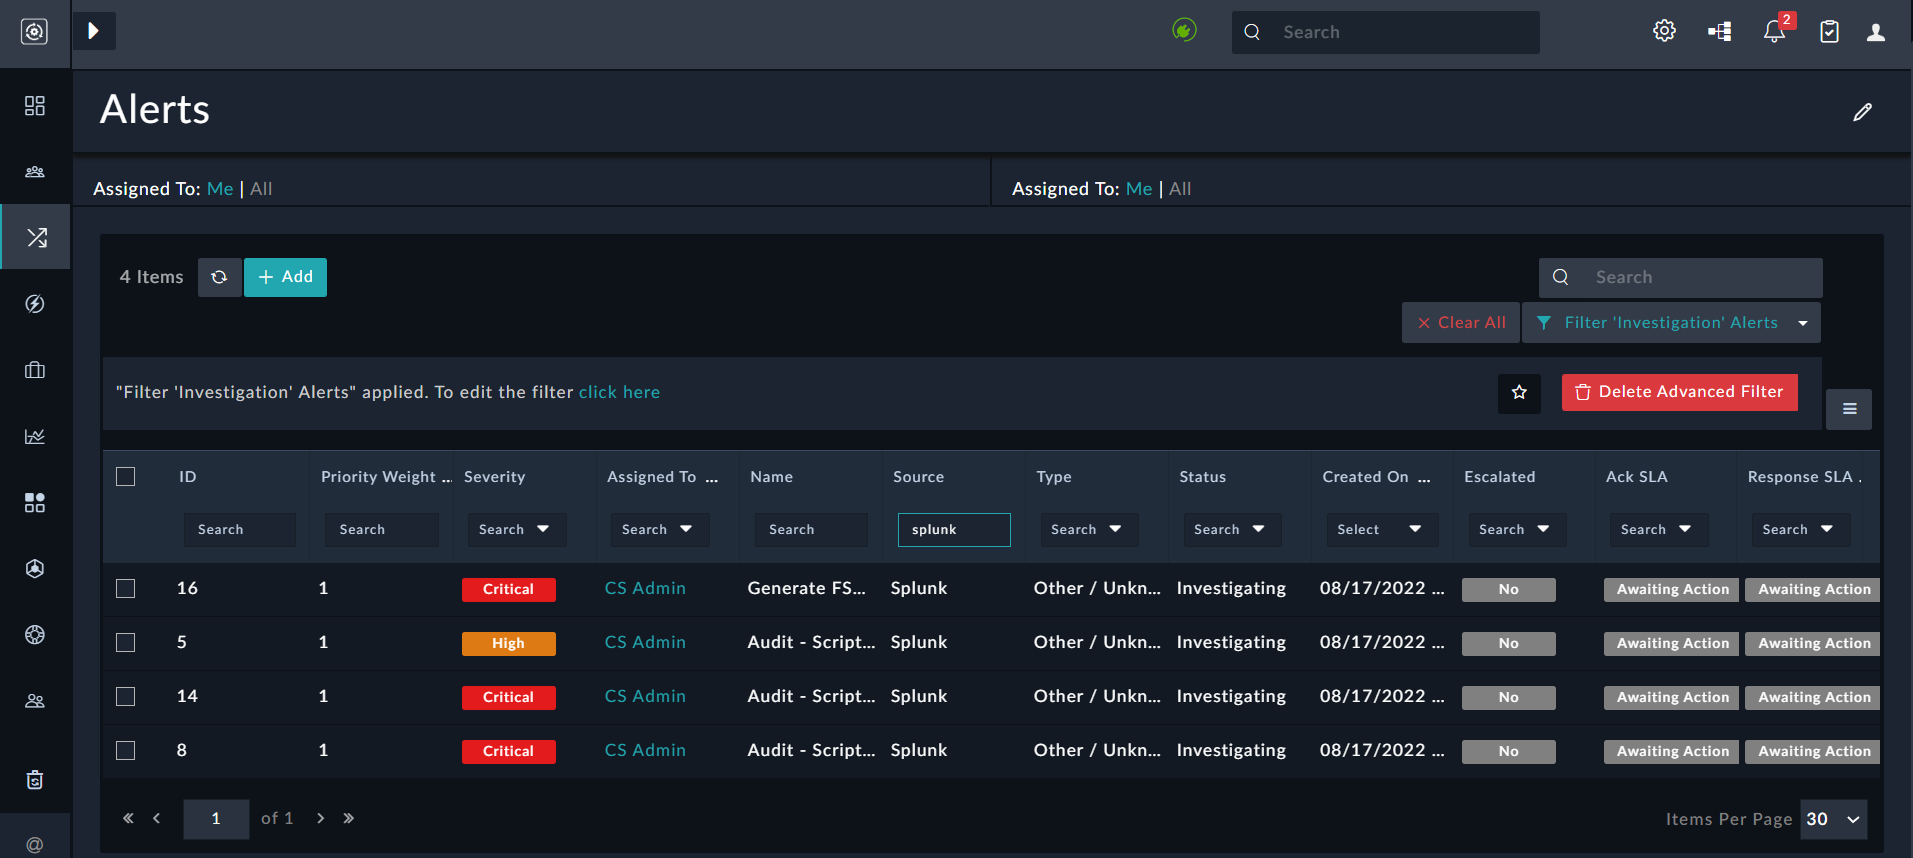
However, the column filters do not get appended to the advanced filter, i.e., the applied column filters are not reflected when you edit the advanced filter.