
Dialup IPsec VPN using custom TCP port
Dialup IPsec VPN traditionally relies on UDP but can now operate over TCP. This enhancement enables VPN traffic from FortiClient to traverse restrictive firewalls that only permit TCP-based traffic. You can configure an IPsec VPN tunnel to exclusively use UDP or TCP, or you can configure the tunnel automatically switch to TCP mode when the firewall blocks UDP.
In high-latency or congested networks, UDP-based VPN connections may suffer from packet loss or performance degradation. TCP, with its built-in error correction and retransmission mechanisms, enhances the reliability and stability of VPN connections in such environments.
Dialup IPsec over TCP is particularly advantageous in mobile or dynamic settings such as public WiFi, hotel networks, or cellular data where network conditions and restrictions often vary. This feature ensures more seamless and dependable VPN connectivity across a broader range of scenarios.
|
|
The custom TCP port functionality for IPsec is exclusively supported with IKE version 2 (IKEv2), and does not support NPU offloading. |
Example
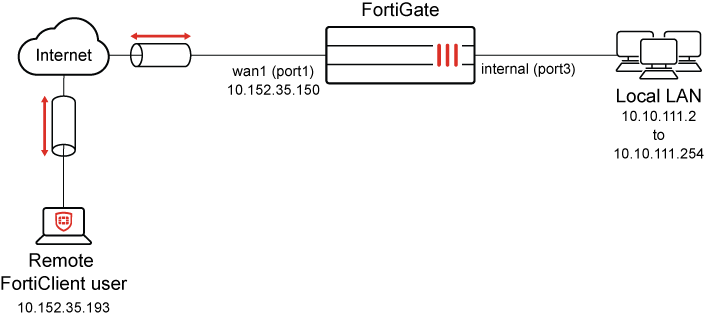
In this example, FortiGate is configured as a dialup IPsec server utilizing IKE version 2 (IKEv2) and operating on a custom TCP port (5500). IKEv2 uses EAP for user authentication. The initial setup leverages the IPsec wizard to create the dialup IPsec tunnel. By default, the wizard configures the tunnel to use IKE version 1 (IKEv1). Once the wizard completes the setup, the configuration is customized to use to IKE version 2 using the GUI. EAP user authentication is used by using user group named IPSEC, and IKE is configured to use a custom TCP port 5500 using the CLI.
On the client side, FortiClient is managed by FortiClient EMS and configured to act as the dialup IPsec client. The client is configured to connect to the FortiGate server over the custom TCP port 5500. This feature requires FortiClient 7.4.1 or later.
For a detailed description of the steps to configure FortiClient EMS to use the custom TCP port 5500 for IPsec VPN connections, see IPsec VPN over TCP.
To configure FortiGate as IPsec dialup server using IPsec Wizard:
-
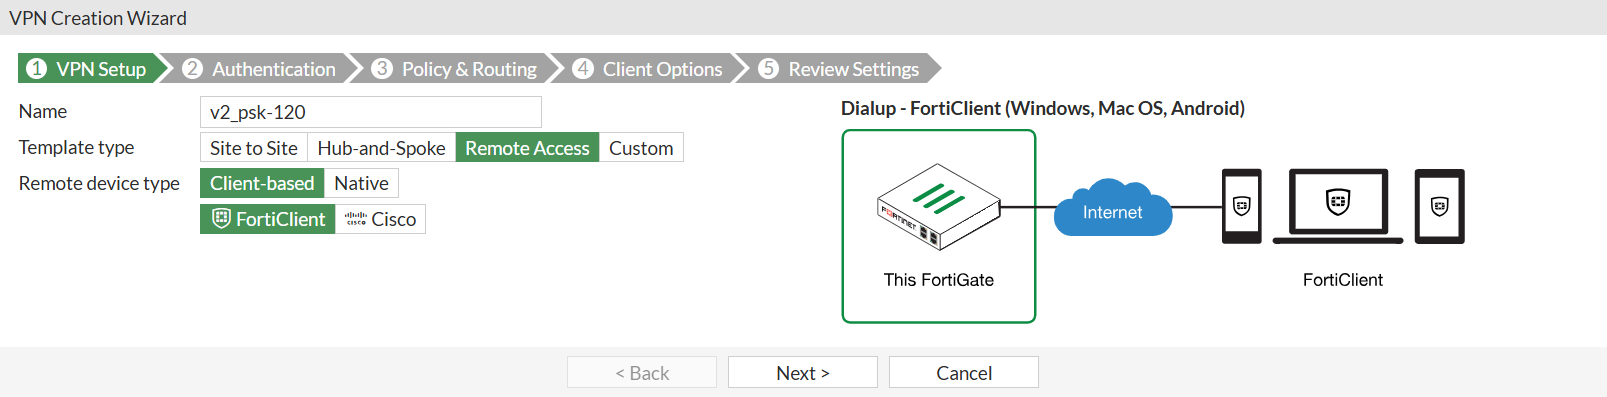
Go to VPN > IPsec Wizard, and enter the following:
Field
Value
Tunnel name
v2_psk-120
Template type
Remote Access
Remote device type
Client-based
FortiClient
-
Click Next.
-
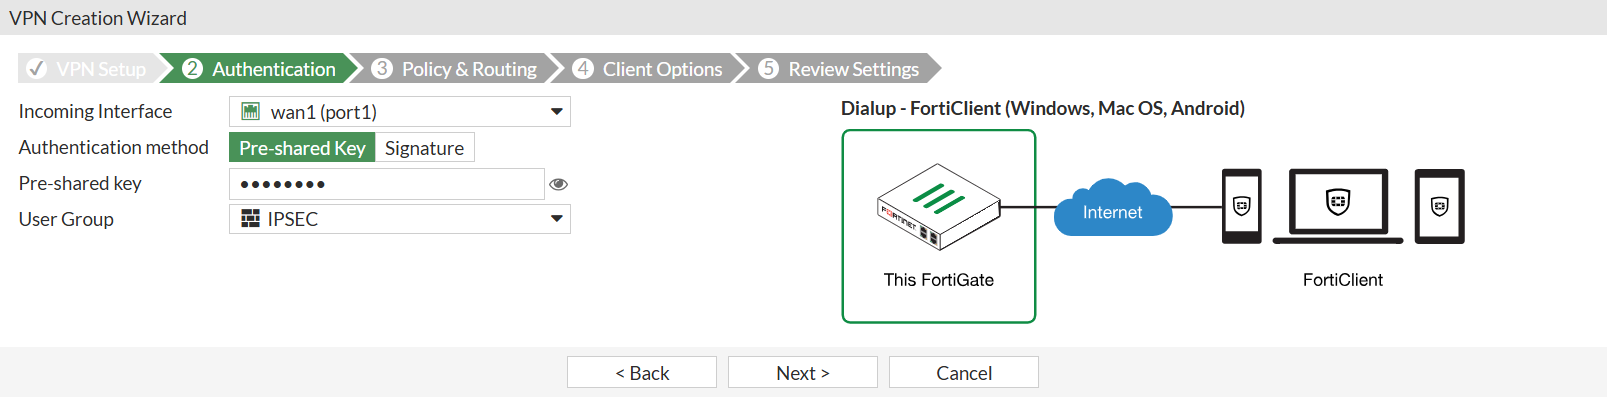
Under Authentication section, enter the following:
Field
Value
Incoming interface
wan1(port1)
Authentication method
Pre-shared key
Pre-shared key
Enter suitable key of at least six characters long
User Group
IPSEC
To configure user groups for authentication, see User groups.
One or more user groups for user authentication can be configured under a single IPsec VPN tunnel. See Using single or multiple user groups for user authentication for details.
-
Click Next.
-
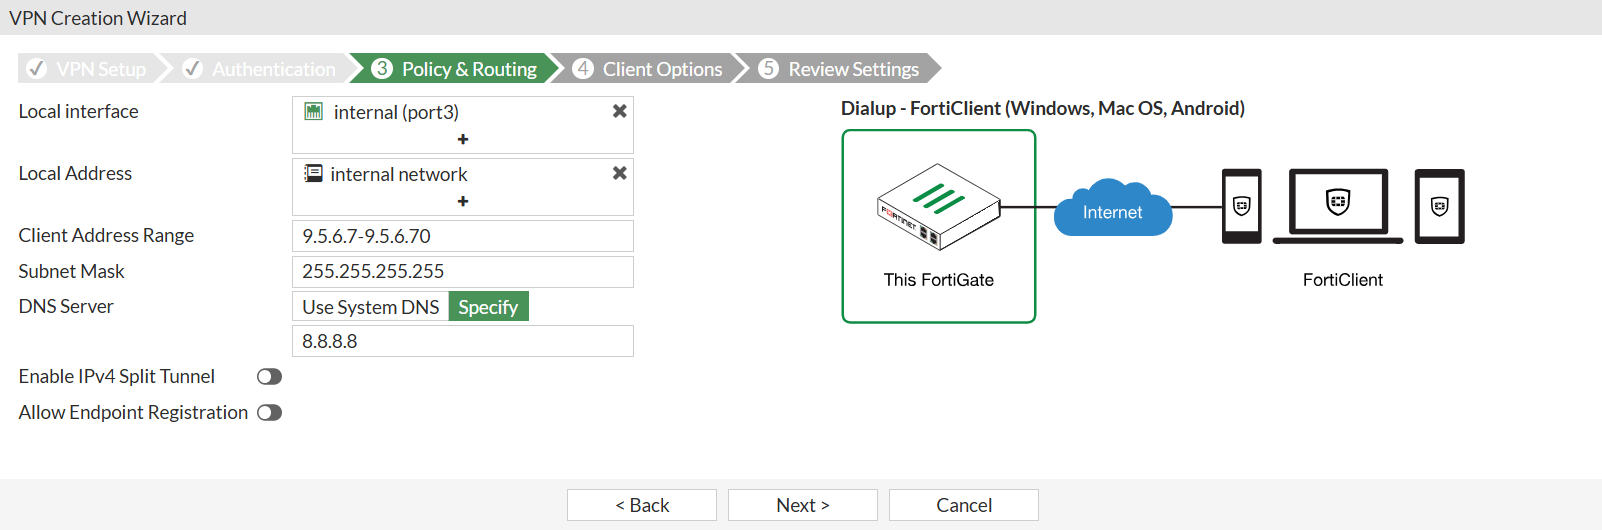
Under Policy & Routing section, enter the following:
Field
Value
Local interface
internal (port3)
Local address
internal network
Client Address Range
9.5.6.7-9.5.6.70
Subnet mask
255.255.255.255
DNS Server
Specify
8.8.8.8
Enable IPv4 Split Tunnel
Disable
Allow Endpoint Registration
Disable
-
Click Next.
-
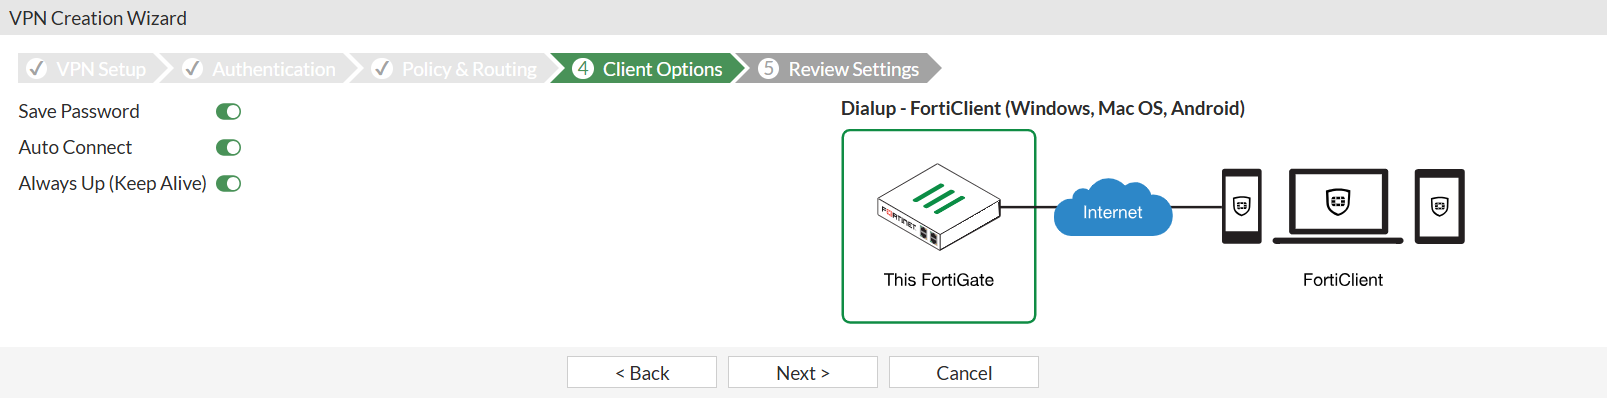
Under Client Options section, enter the following:
Field
Value
Save Password
Enable
Auto Connect
Enable
Always Up (Keep Alive)
Enable
-
Click Next.
-
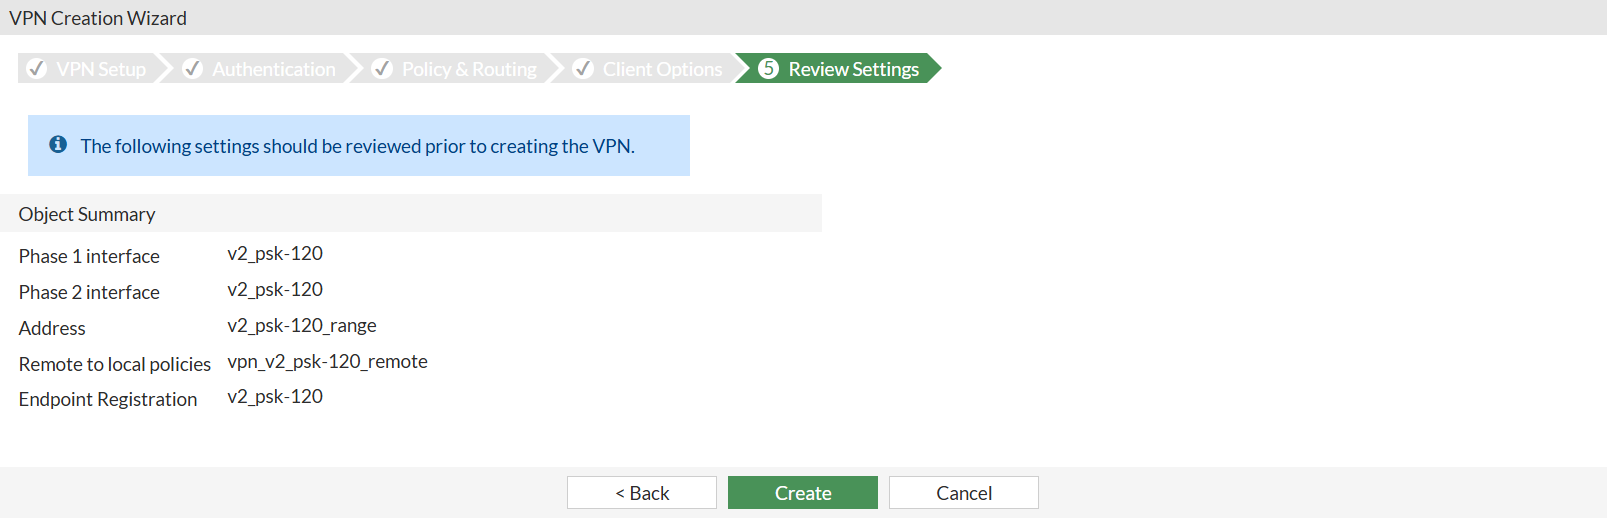
Under Review Settings section, review the configuration pending configuration by the wizard.
-
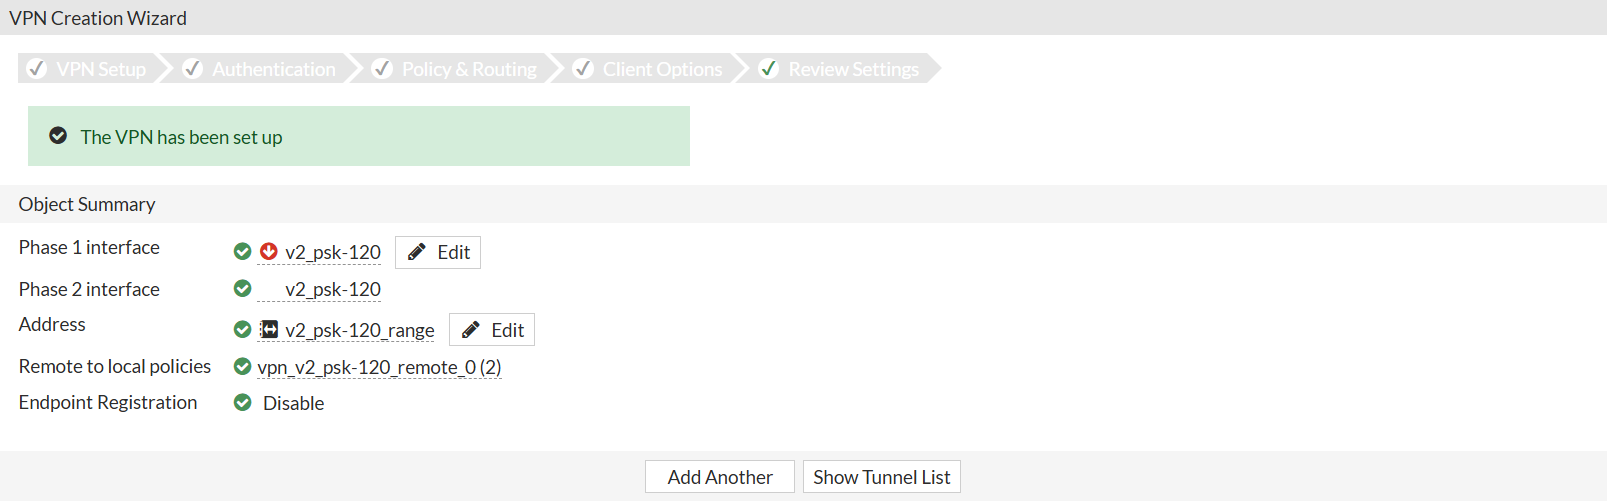
Click Create.
A message is displayed: The VPN has been set up.
To configure the IPsec tunnel’s method as TCP:
-
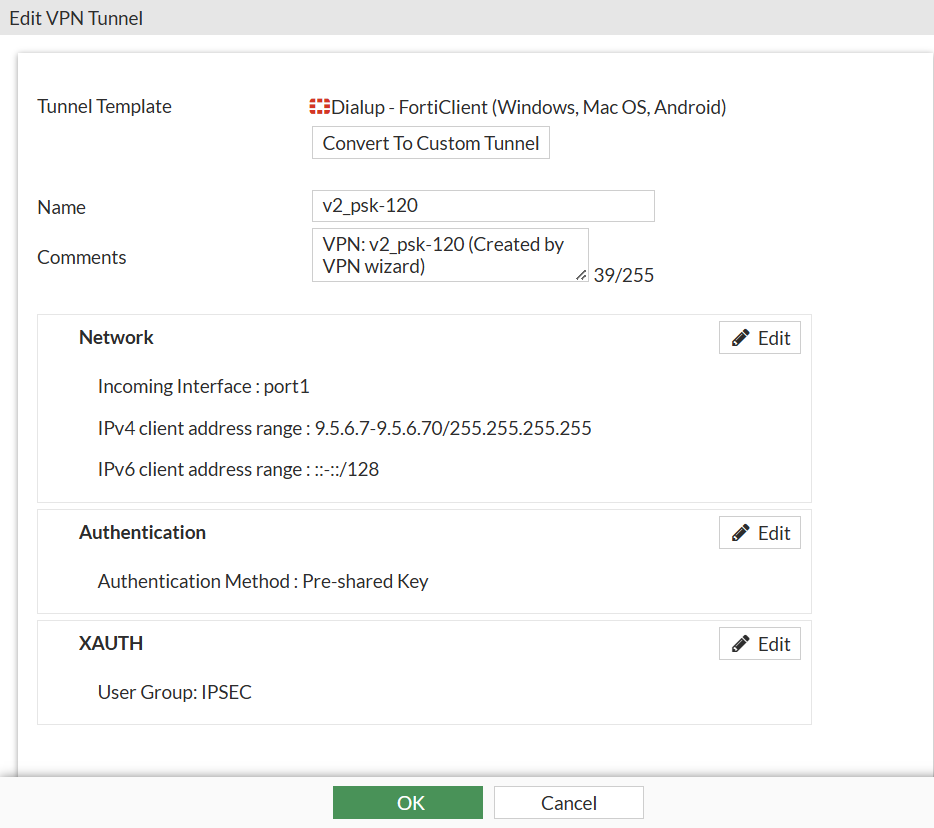
On FortiGate, go to VPN > IPsec Tunnels, select the tunnel v2_psk-120, and click Edit.
-
Under Tunnel Template, click Convert to Custom Tunnel.
-
Under Authentication section, click Edit, and change the IKE Version to 2:
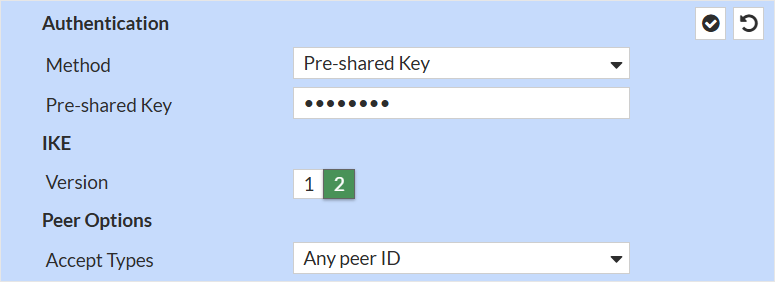
-
Click the checkmark box in the top-right corner of Authentication section to save the IKE settings.
-
Click OK to apply the settings to the IPsec tunnel.
To configure FortiGate IPsec tunnel to use EAP for user authentication and TCP as transport:
-
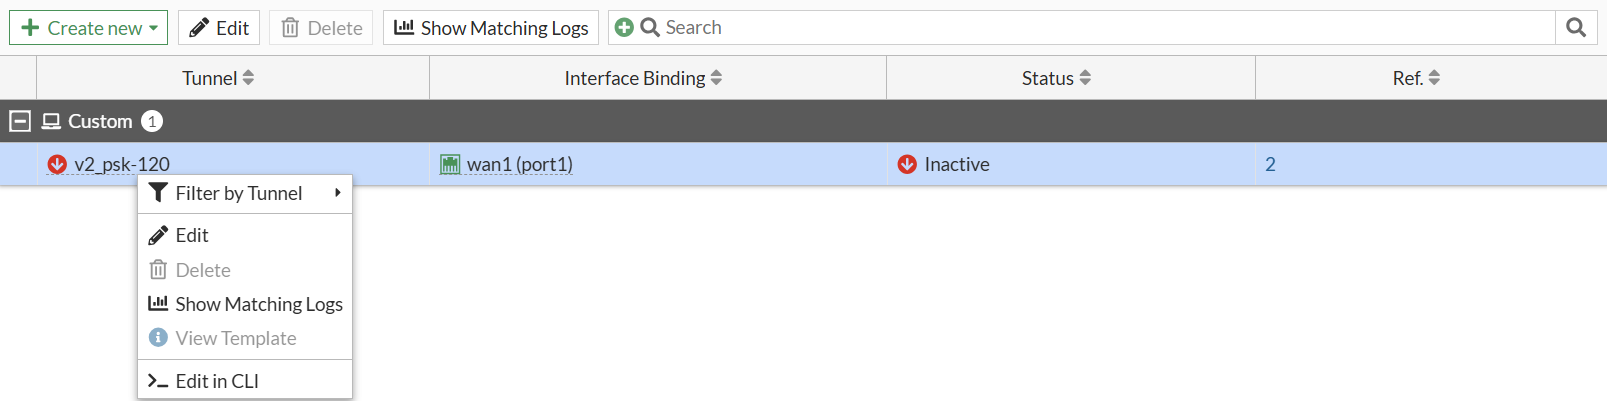
Go to VPN > IPsec Tunnels, right-click IPsec tunnel v2_psk-120 created by IPsec Wizard, and select Edit in CLI.
-
IPsec IKEv2 uses EAP for user authentication. You must enable the following CLI settings to enable EAP to perform user authentication. These settings can only be enabled using CLI.
config vpn ipsec phase1-interface
    edit v2_psk-120
        set eap enable
        set eap-identity send-request
        set authusrgrp IPSEC
    next
end
EAP is now to authenticate users in user group IPSEC. To configure user groups, see .
-
Set
transportto usetcpunder Phase 1 configuration:config vpn ipsec phase1-interface edit v2_psk-120 set transport tcp next end
To view and modify TCP port used by IKEv2 using CLI:
-
On the top-right corner of the FortiGate GUI, click the _> icon to open a CLI console.
For other methods to connect to CLI, see Connecting to the CLI.
-
Enter the following command to see the default TCP IKE port used by FortiGate:
show full-configuration system settings | grep ike-tcp
    set ike-tcp-port 4500
Notice that the setting
ike-tcp-portis set to4500by default. -
Use the following commands to modify the default TCP port to use a custom port 5500:
config system settings
    set ike-tcp-port 5500
end
ike-tcp-port <port>
Set the TCP port for IKE/IPsec traffic (1 - 65535, default = 4500).

When using TCP port 443 for IKE/IPsec traffic, GUI access can be affected for interfaces that are bound to an IPsec tunnel when the GUI admin port is also using port 443. To ensure continued functionality, change either the IKE/IPsec port or the administrative access port.
To change the administrative access port:
config system global
    set admin-sport <port>
end
admin-sport <port>
Set the administrative access port for HTTPS (1 - 65535, default = 443).
For port conflicts with ZTNA and SSL VPN, ZTNA and SSL VPN will take precedence. To avoid any port conflicts with other services, review the FortiOS Ports guide for other incoming ports used on the FortiGate.
To verify the VPN connection:
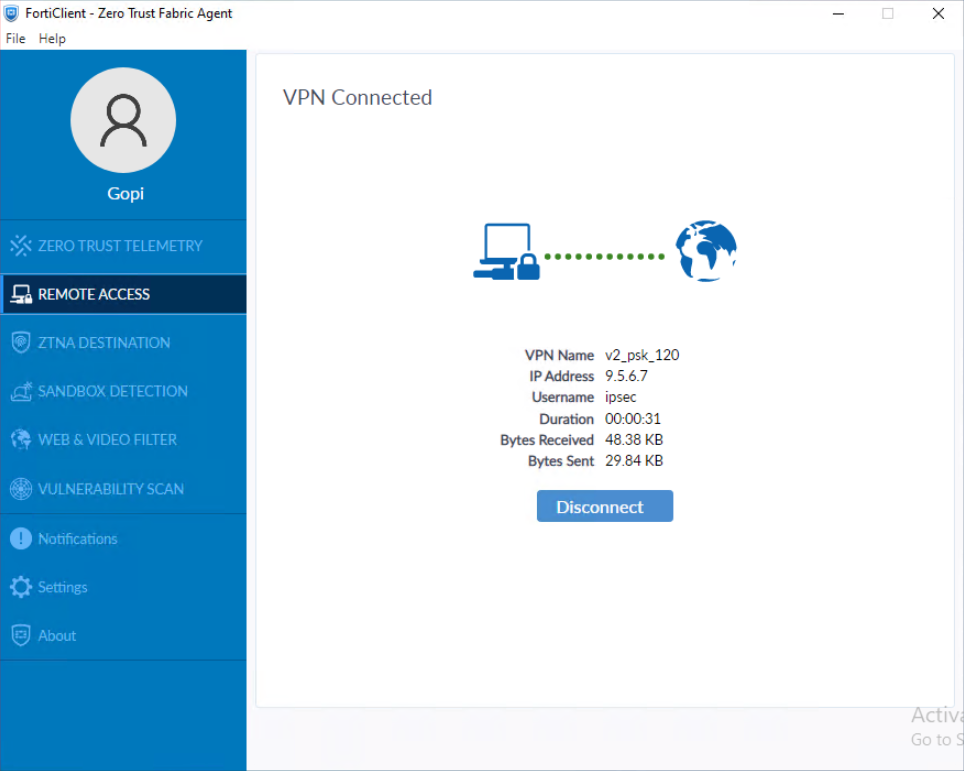
-
Using FortiClient, connect to the IPsec VPN gateway.
-
On FortiGate, run
diagnose vpn ike gateway listto verify the IPsec VPN tunnel status.Note that
addrshows the custom TCP port value, andtransportshowsTCP:vd: root/0 name: v2_psk-120_0 version: 2 interface: port1 3 addr: 10.152.35.150:5500 -> 10.152.35.193:54854 tun_id: 9.5.6.7/::10.0.0.23 remote_location: 0.0.0.0 network-id: 0 transport: TCP virtual-interface-addr: 169.254.1.1 -> 169.254.1.1 created: 592s ago eap-user: ipsec 2FA: no peer-id: 120 peer-id-auth: no FortiClient UID: B70BAD123010487E86DB102969115E99 assigned IPv4 address: 9.5.6.7/255.255.255.255 nat: me peer pending-queue: 0 PPK: no IKE SA: created 1/1 established 1/1 time 80/80/80 ms IPsec SA: created 1/1 established 1/1 time 0/0/0 ms id/spi: 23 93b6803bff7cff00/f89d6f9965fbf3a7 direction: responder status: established 592-592s ago = 80ms proposal: aes256-sha256 child: no SK_ei: f93108f3f8d9a94e-3e0a78289defb329-4d1ae67365f2cb56-e0d471a57ccb4f8d SK_er: 58b37cf4d2e96cb3-cb7e334a48905459-ac8e4ff743c86e5c-630454f2e35b97e6 SK_ai: fc83b139808121a2-1dd68396d804e28d-bd619c0c4778dbda-9a1eb9e6fdf13808 SK_ar: edad89ee56bf9ecc-81443426c00c78f5-0574d6b71163a43b-d9ebf04c3ae4b87f PPK: no message-id sent/recv: 0/124 QKD: no lifetime/rekey: 86400/85537 DPD sent/recv: 00000000/00000000 peer-id: 120
-
Run a packet capture using the packet capture tool on FortiGate GUI under Network > Diagnostic tab for wan1(port1) interface with TCP port number 5500.
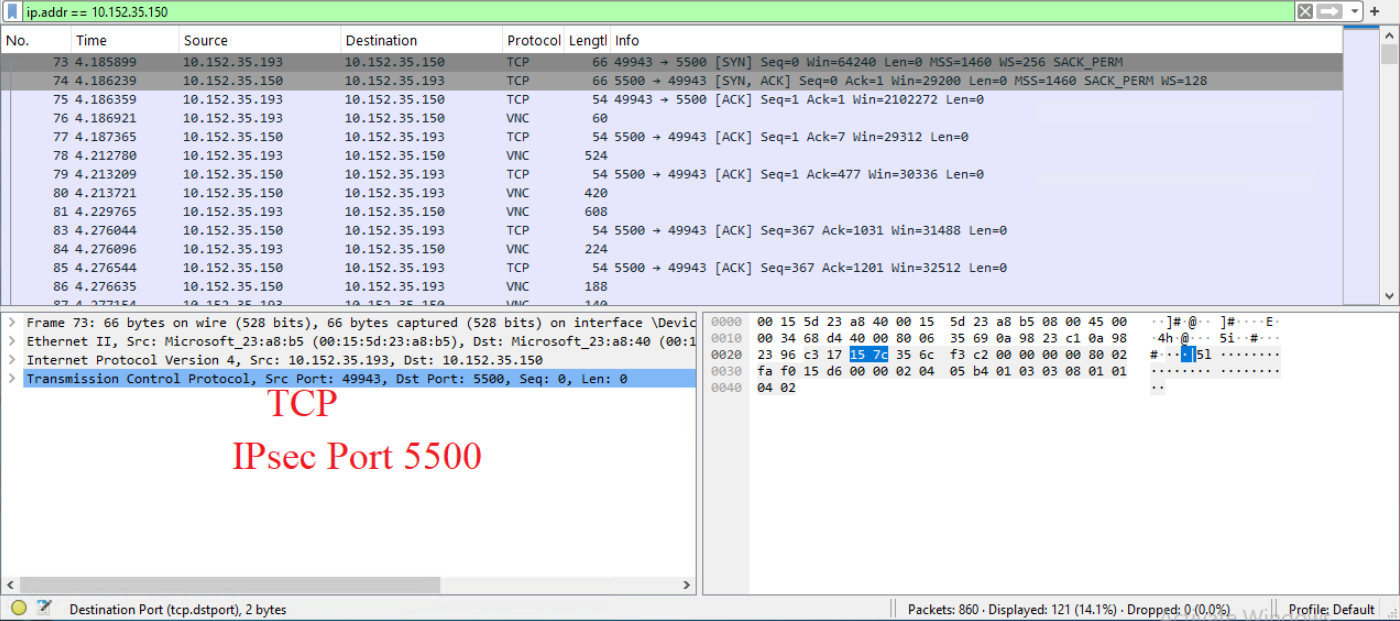
For more information, see Using the packet capture tool.
-
(Optional) Run the packet capture using the following command:
diagnose sniffer packet wan1 “port 5500” 4 0 l.
For more information, see Performing a sniffer trace or packet capture.