
Configuring FortiAnalyzer
FortiAnalyzer allows the Security Fabric to show historical data for the Security Fabric topology and logs for the entire Security Fabric. For more information about using FortiAnalyzer, see the FortiAnalyzer Administration Guide.
To authorize a FortiAnalyzer in the Security Fabric:
- In FortiAnalyzer, configure the authorization address and port:
- Go to System Settings > Admin > Admin Settings.
- In the Fabric Authorization section, enter an Authorization Address and Authorization Port. This is used to access the FortiAnalyzer login screen.

- Click Apply.
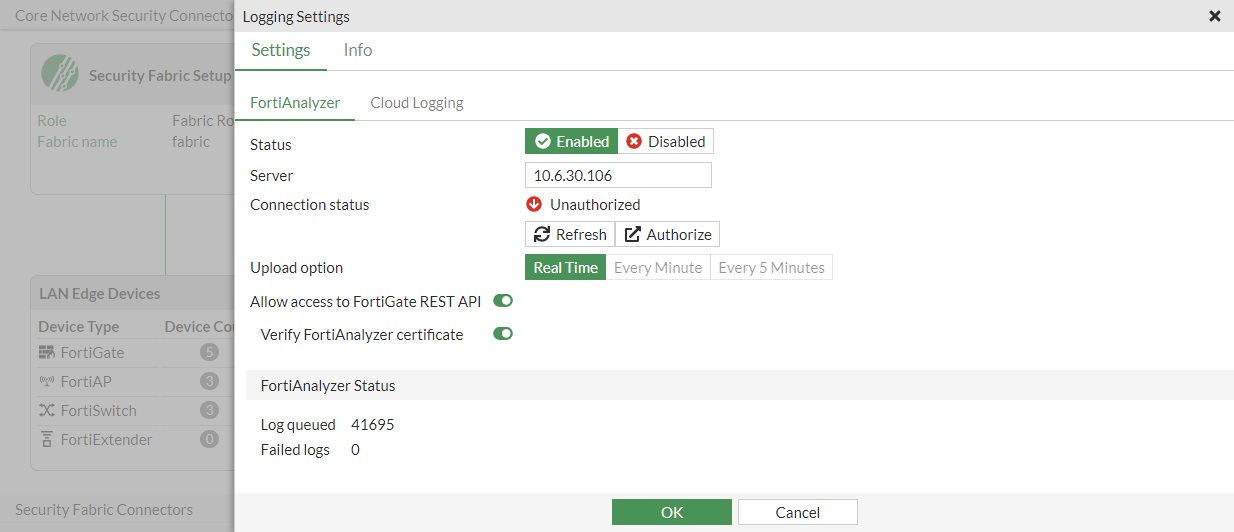
- In FortiOS, go to Security Fabric > Fabric Connectors and double-click the Logging & Analytics card.
- Select the Settings tab, select the FortiAnalyzer tab, and set the Status to Enabled.
- Enter the FortiAnalyzer IP in the Server field.
- Optionally, configure the remaining log settings:
Upload option
Select the frequency of log uploads to the remote device:
Real Time: logs are sent to the remote device in real time.
Every Minute: logs are sent to the remote device once every minute. This option is unavailable if the Security Fabric connection is configured.
Every 5 Minutes: logs are sent to the remote device once every five minutes. This is the default option. This option is unavailable if the Security Fabric connection is configured.
store-and-upload: store logs to a local disk before uploading to FortiAnalyzer or FortiManager at a scheduled time. This option is only available in the CLI.
Allow access to FortiGate REST API
Define access to FortiGate REST API:
Enable: the REST API accesses the FortiGate topology and shares data and results.
Disable: the REST API does not share data and results.
Verify FortiAnalyzer certificate
Define the FortiAnalyzer certificate verification process:
Enable: the FortiGate will verify the FortiAnalyzer serial number against the FortiAnalyzer certificate. When verified, the serial number is stored in the FortiGate configuration.
Disable: the FortiGate will not verify the FortiAnalyzer certificate against the serial number.
- Click OK. The FortiAnalyzer Connection status is Unauthorized.
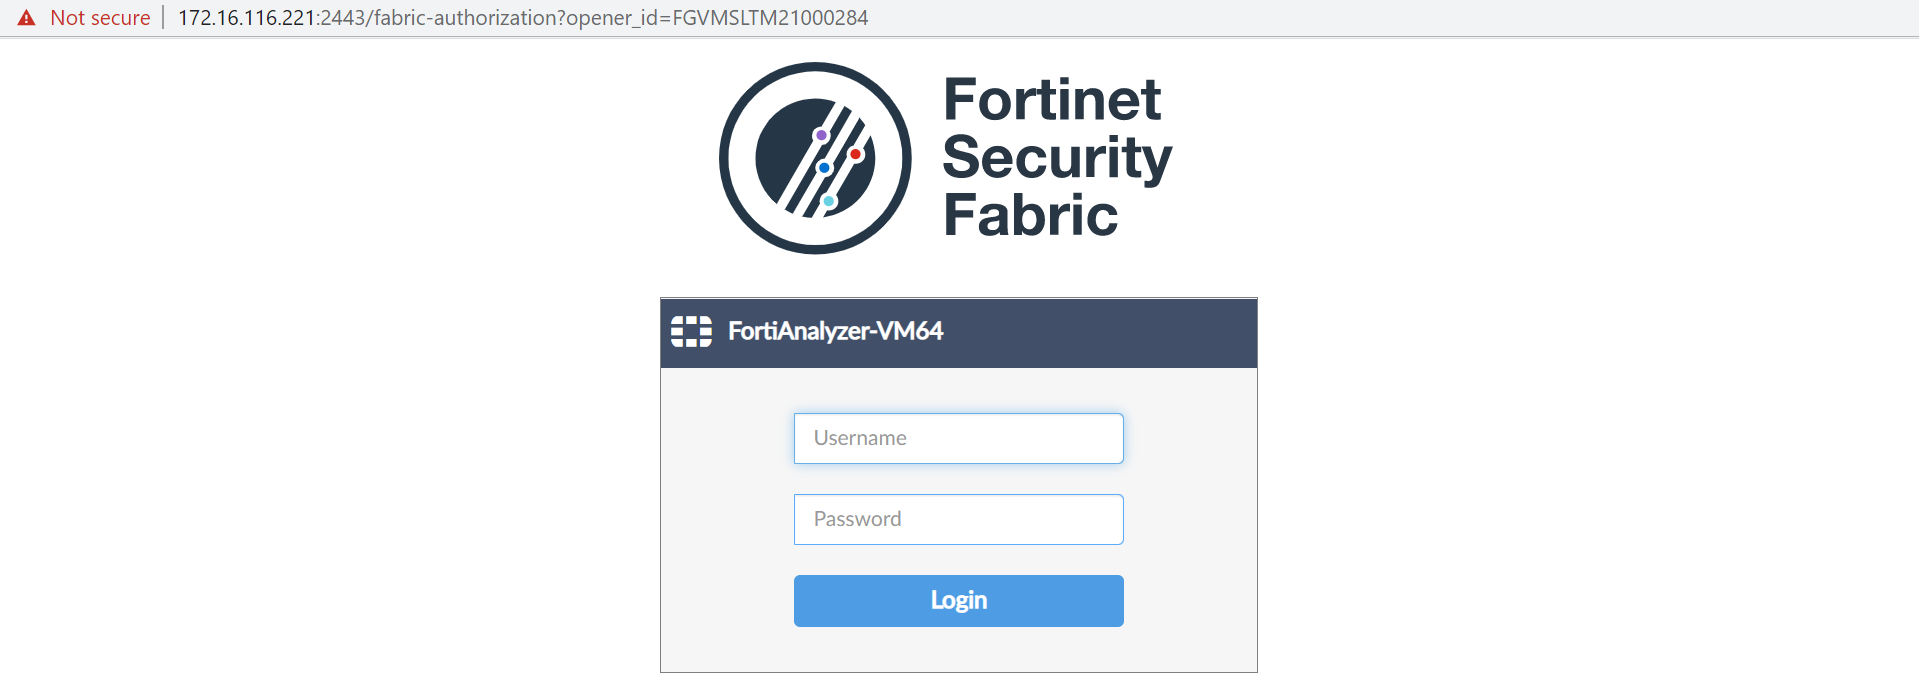
- Click Authorize. You are redirected to a login screen.
- Enter the username and password, then click Login.
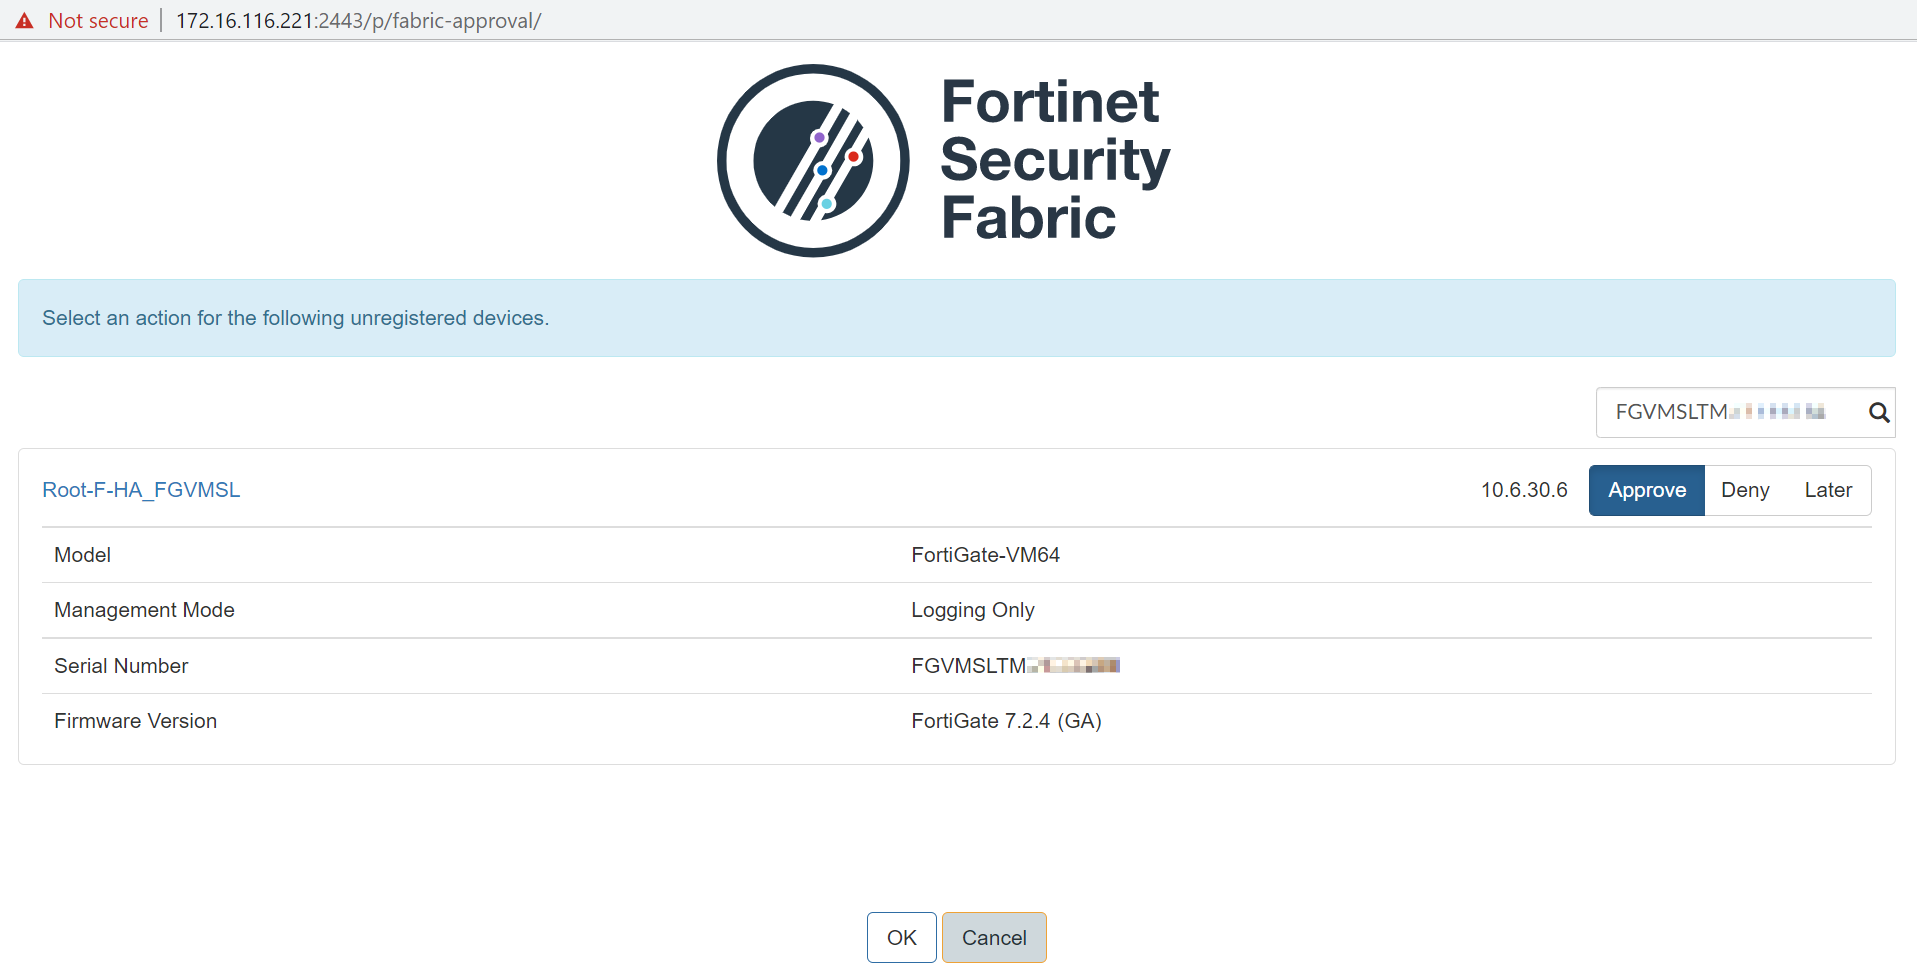
The authorization dialog opens.
- Select Approve and click OK to authorize the FortiGate.
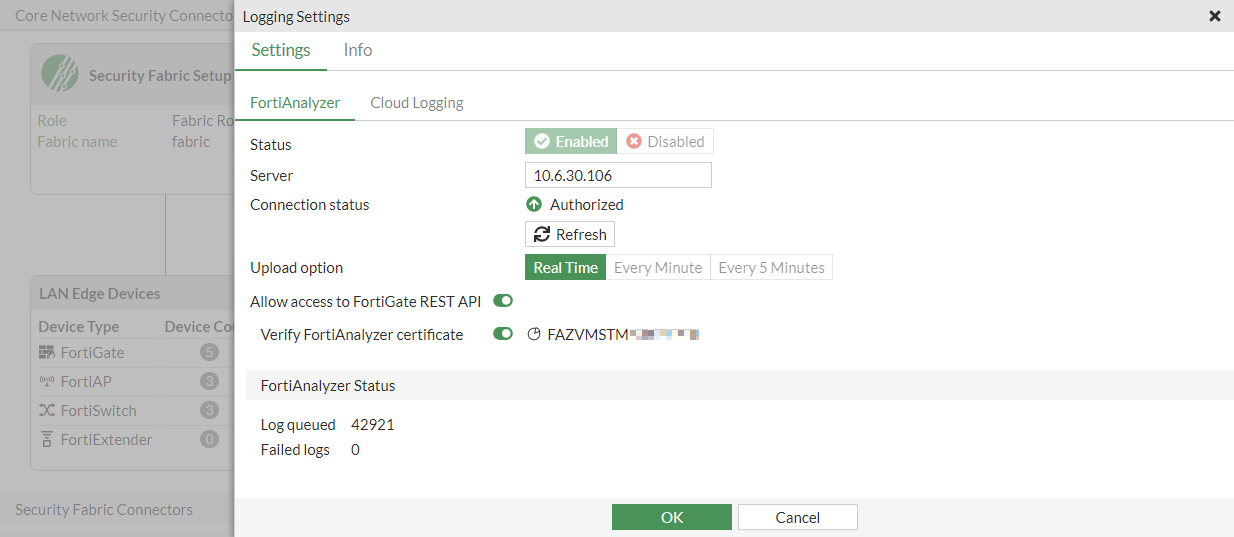
- In FortiOS, refresh the FortiAnalyzer page. The Connection status is Authorized.
|
|
FortiGates with a FortiAnalyzer Cloud license can send all logs to FortiAnalyzer Cloud. |