
FQDN-based ZTNA TCP forwarding services
FortiClient supports using fully qualified domain names (FQDN) as destination hosts in zero trust network access (ZTNA) TCP forwarding destinations. This allows you to avoid exposing private/internal IP addresses to end users by using FQDNs instead.
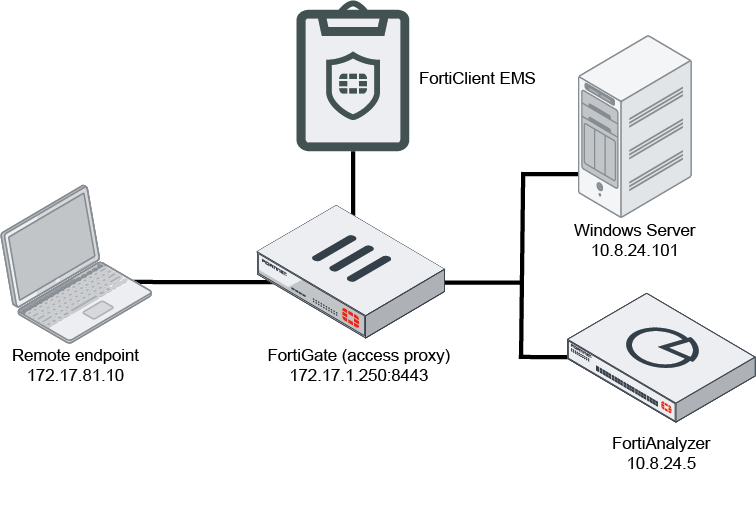
The following shows the topology for this example. This example uses two FQDNs, rdp.win.test and ssh.win.test, in place of the Windows server IP address, 10.8.24.100. This hides the internal IP address, 10.8.24.100, from end users.
To configure FortiOS:
- In FortiOS, go to Policy & Objects > ZTNA > ZTNA Servers.
- Click Create New.
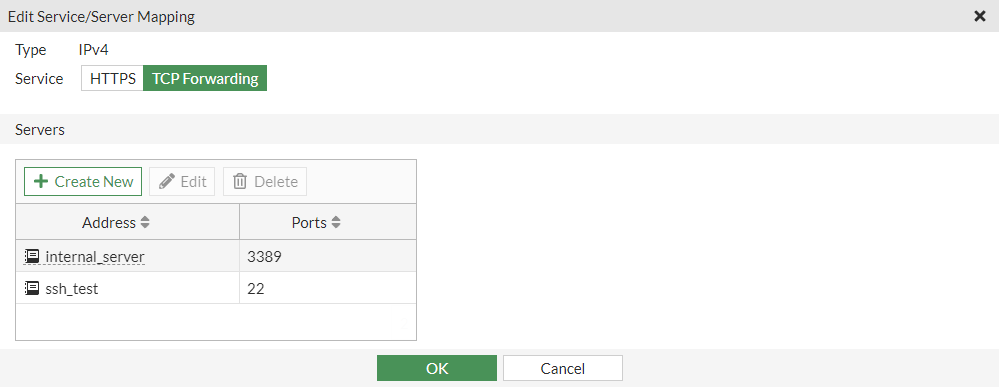
- For Type, select IPv4.
- For Service, select TCP Forwarding.
- Under Servers, configure RDP and SSH services.
- Click OK.
- In the CLI, add the rdp.win.test FQDN to RDP and SSH services as the domain:
config firewall access-proxy edit "ZTNA-test" set vip "ZTNA-test" set client-cert enable config api-gateway edit 2 set url-map "/tcp" set service tcp-forwarding config realservers edit 1 set address "internal_server" set domain "rdp.win.test" set mappedport 3389 next edit 2 set address "ssh_test" set domain "ssh.win.test" set mappedport 22 next end next end next end - Ensure that you have configured the ZTNA policy rule and firewall policy as desired.
To configure ZTNA destinations:
You can configure ZTNA destinations from EMS or FortiClient. Using EMS is the recommended method. If using FortiClient, connect to the EMS that is connected to the FortiGate acting as the TCP forwarding server.
- Go to Fabric & Connectors > ZTNA Applications Catalog.
- Create the RDP ZTNA application:
- Click Add.
- Select FQDN, then enter rdp.win.test. This field does not support entering a hostname.
- Select Port, then enter the desired port number.
- Click Add Gateway.
- In the Address and Port fields, enter the FortiGate IP address and port number. In this example, it is 172.17.81.250:8443.
- Click Create.
- Configure other fields as desired, then click Finish.
- Create the SSH server rule:
- Click Add.
- Select FQDN, then enter ssh.win.test. This field does not support entering a hostname.
- Select Port, then enter the desired port number.
- Click Add Gateway.
- In the Address and Port fields, enter the FortiGate IP address and port number. In this example, it is 172.17.81.250:8443.
- Click Create.
- Configure other fields as desired, then click Finish.
- Go to Endpoint Profiles > ZTNA Destinations.
- Create a new profile or edit an existing one.
- Under Rules, click Add.
- Select the applications that you configured. Click Finish.
- Configure the profile as desired, and click Save.