
Adding an Entra ID server
|
|
Entra ID integration with EMS has the following limitations:
|
To create an enterprise application for FortiClient:
- In the Azure portal, go to Microsoft Entra ID > Enterprise applications > New application.
- Click Create your own application.
- In the What's the name of your app? field, enter the desired name.
- Under What are you looking to do with your application?, select Register an application to integrate with Azure AD (App you're developing).
- Click Create.
To add Microsoft Graph API application permissions required for searching user groups:
- In the left menu, click App registrations, then click the All applications tab.
- Click your FortiClient enterprise application.
- In the left menu, click API permissions, and click Add a permission.
- In the Request API permissions slide-in, click Microsoft Graph.
- Select Application permissions.
- In the Select permissions section, search for and select the following permissions:
- Device.Read.All
- Domain.Read.All
- Group.Read.All
- GroupMember.Read.All
- User.Read
- User.Read.All
- Click Add permissions.
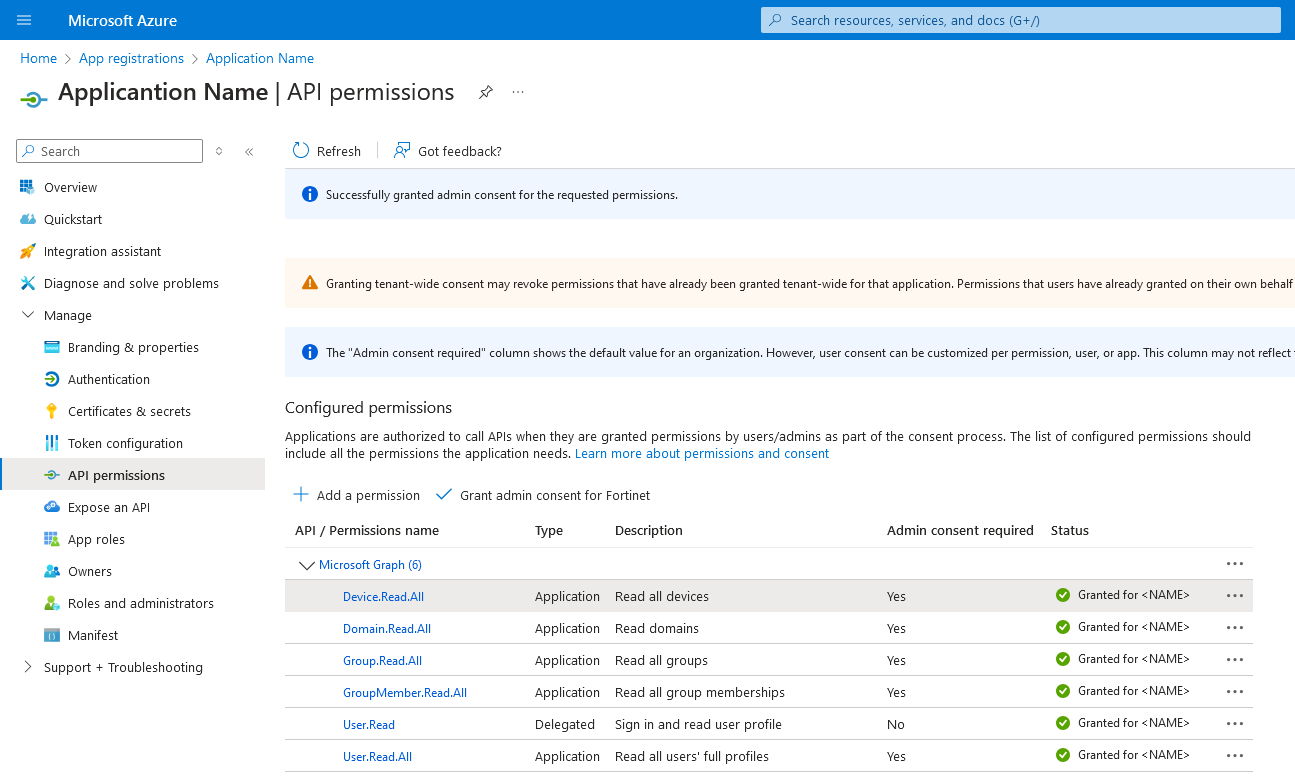
- In API permissions, click Grant admin consent for Default Directory. If this option is grayed out, you must log into an Azure admin account to perform this step.
To add a client secret string and determine its value:
This only applies if you use client secret authentication.
- In the left menu, click App registrations, then click the All applications tab.
- Click your FortiClient enterprise application.
- In the left menu, click Certificates & secrets, and click New client secret.
- In the Add a Client Secret slide-in, add a Description and select the desired Expires option. Click Add.
- Observe that a new client secret has been created. Immediately after creation, copy the Value of the client secret string, which EMS uses as the Azure Client Secret. This value is not visible after this initial creation step and moving to another page.
To upload a CA-signed certificate to Azure:
This only applies if you use certificate authentication. The following assumes that you have a certificate authority (CA)-signed certificate.
- In the left menu, click App registrations, then click the All applications tab.
- Click your FortiClient enterprise application.
- In the left menu, click Certificates & secrets, and click Certificates.
- Click Upload certificate, and select the desired certificate.
To configure an Entra ID server in EMS:
- Configure the Entra ID server as an authentication server in EMS:
- Go to Administration > Authentication Servers.
- Click Add > Microsoft Entra.
In the Tenant ID and Client ID fields, enter the tenant ID and client ID that you collected from the Azure management console.
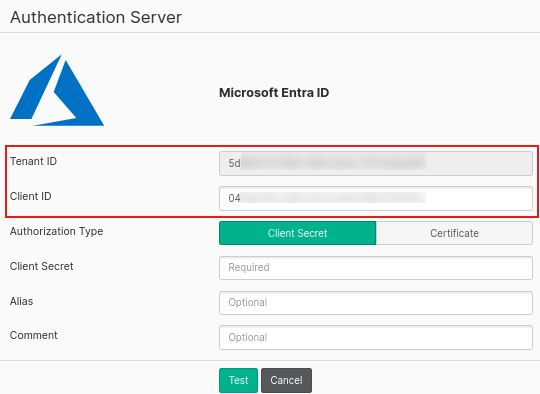
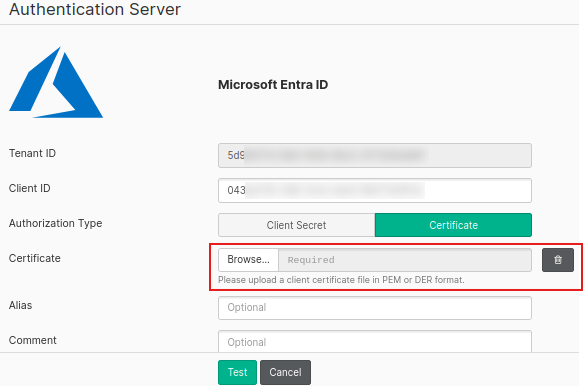
- In Authorization Type, select Client Secret or Certificate as needed:
- To use client secret authentication, select Client Secret and enter the client secret that you collected from the Azure management console in the Client Secret field.
To use certificate authentication, select Certificate and browse to select the CA-signed certificate that you uploaded to Azure in To upload a CA-signed certificate to Azure:.
- Configure other fields as desired.
- Click Test.
- After the test succeeds, click Save.
- Go to Endpoints > Manage Domains.
- Click Add, then Microsoft Entra.
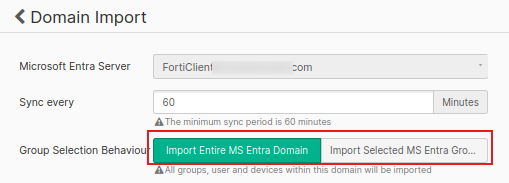
- From the Microsoft Entra Server dropdown list, select the desired server.
- In the Sync every field, enter the number of minutes after which EMS syncs with the Microsoft Entra server.
-
For Group Selection Behaviour, select Import Entire MS Entra Domain or Import Selected MS Entra Groups.
Option
Description
Import Entire MS Entra Domain All enabled devices, users, and groups from the Microsoft Entra server will be imported. Import Selected MS Entra Groups Only the enabled devices, users, and groups from the selected Microsoft Entra groups will be imported. -
When Import Selected MS Entra Groups is selected, enable Import as Base Group for the desired groups as needed.
Note that subgroups are listed flat without preserving the hierarchy from the Microsoft Entra server.
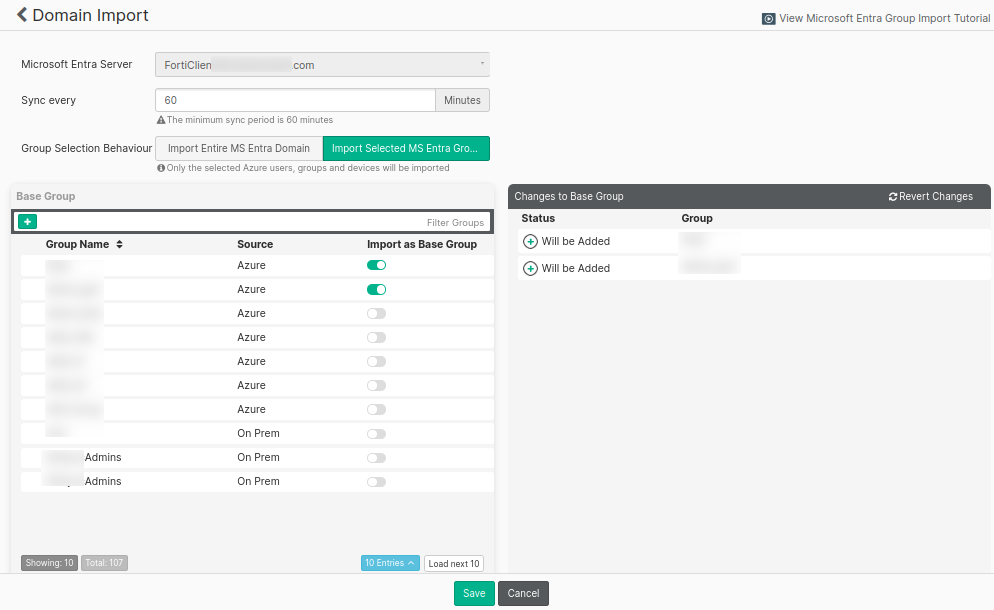
-
Click Save. EMS then syncs all enabled devices, users, and groups from all or selected Microsoft Entra groups in the Microsoft Entra server. Disabled devices, users, and groups are excluded.
When using user management, Entra ID users can register their FortiClient to EMS using an invitation code or with SAML.
To configure the Azure tenant app for initiating passthrough (domain):
This is necessary for registering an Entra ID endpoint to EMS using an invitation code. This only applies for Entra ID-joined endpoints.
- Configure the redirect URL:
- In the Azure portal, go to App registration. Copy the application/client ID of the application used to connect with EMS.
- Click the application, then click the Redirect URIs link.
- Click Add a Platform > Select Mobile and Desktop applications.
- Add the following URL:
ms-appx-web://microsoft.aad.brokerplugin/<application client ID>. - Under Allow public client flows, toggle to Yes for Enable the following mobile and desktop flows.
- Save the configuration.
- Go to Roles and administrators.
- Search for and select Directory Readers.
- Click Add assignments.
- Select the application used to connect with EMS.
- Add desired users to the application in Entra ID:
- Go to Enterprise applications, and select the application used to connect with EMS.
- Go to Users and groups.
- Click Add user/group, and select the users that you will invite to EMS using an invitation code.