Change password
FortiPAM allows you to manually change the password in a secret.
|
|
You can only manually change the passwords every 30 seconds. |
|
|
You can also set up a secret to automatically change the password by enabling Automatic Password Changing when creating or editing a secret. |
To change the password:
- Go to Secrets> Secrets.
- In Secrets, select a secret, and select Edit.
Alternatively, in Secrets > Personal Folder/Public Folder, select the folder where the secret is located, and double-click the secret.
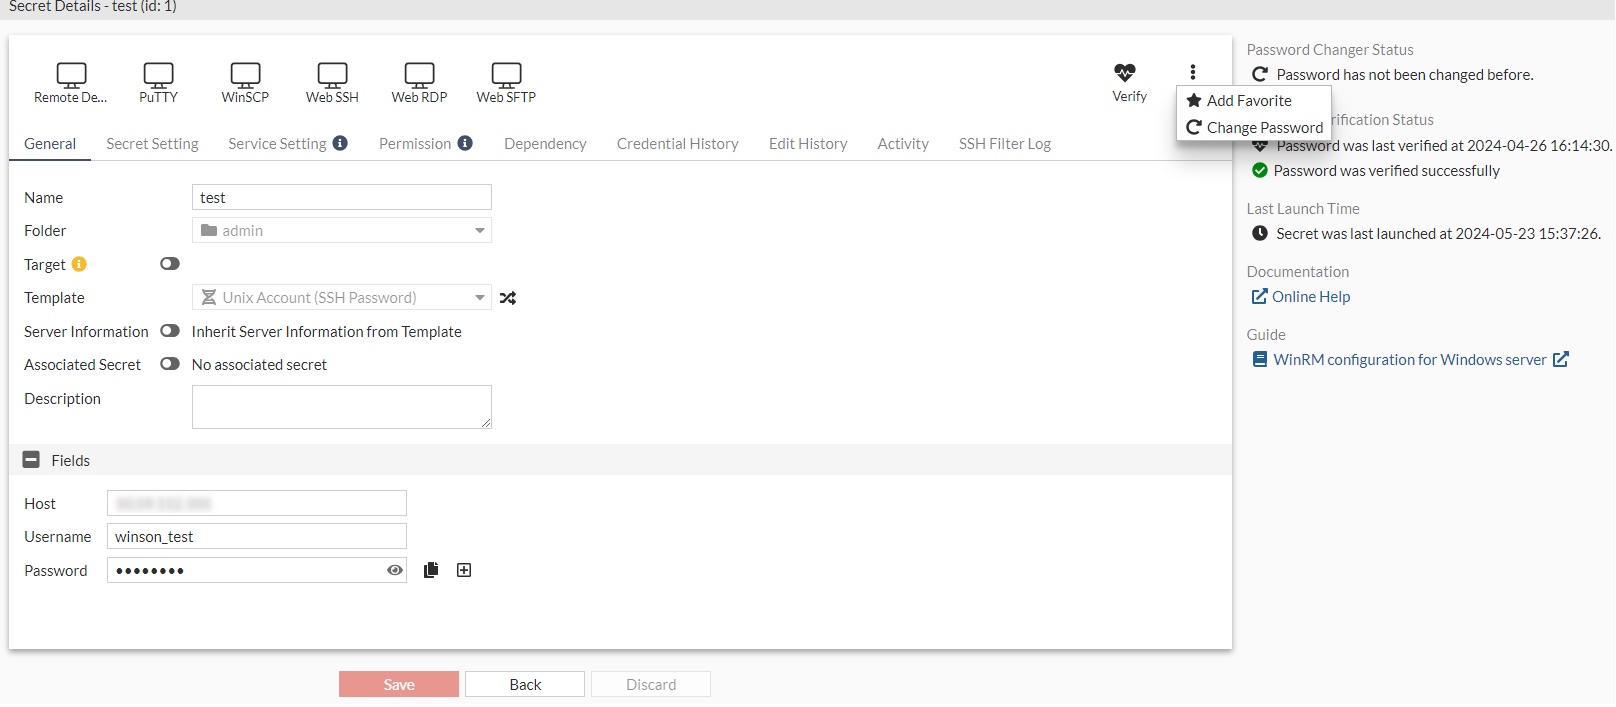
The Secret Details window opens.

- From More options, select Change Password.

- In Generate next password, select from the following two options:
Randomly: automatically change the password.
Customized: enter a new password manually.
Note: The Customized option may be disabled if the secret template does not use password for authentication.

To be able to successfully change the password manually, the password must follow password requirements set in Password policies.
-
If the password changer failed to change the password last time, it reuses the previously attempted password if it has not been reset.
In Reuse attempted password, select Yes to reuse the last attempted password that failed or select No to generate a new password.
If you selected No in Reuse attempted password, select Randomly to generate a new password automatically or select Customized to enter the password manually.
- Click OK.
Once the password has changed, Password Changer Status shows the date and time when the password was changed and its status.

When using a password changer on Windows AD by LDAPs, it is required to enable both Change password and Reset password for the user on Windows AD.
For example, in the screenshot below, Change password and Reset password are allowed for SELF, i.e., the user.

Credential History
FortiPAM retains recent five credentials that have been used by the secret before. These credentials appear in the Credential History tab in the secret page. If the last password change failed, FortiPAM retains the last credential that was tried. You can use the credential history to restore the secret password if the credential on the remote server and FortiPAM are out of sync.
When editing a secret, go to the Credential History tab to see a history of changes made to the password.

To view previous credentials:
- Go to Secrets > Secrets.
- In Secrets, select a secret, and select Edit.
Alternatively, in Secrets > Personal Folder/Public Folder, select the folder where the secret is located, and double-click the secret.
The Secret Details window opens.
- Go to the Credential History tab.
- To view the last credential used from a failed password change, click View Last Credential to show the password/private key in clear text.
To view the credentials that have previously been successful, click the entry row to view and then click View to show the password/private key in clear text.
To clear the last credential used in a failed password change, click Clear Last Credential. The last credential used is removed from the credential history.
To restore password using credential history:
- Go to Secrets > Secrets.
- In Secrets, select a secret, and select Edit.
Alternatively, in Secrets > Personal Folder/Public Folder, select the folder where the secret is located, and double-click the secret.
The Secret Details window opens.
- Go to the Credential History tab.
- To use the last credential from a failed password change, click Verify Last Credential.
If the password change is successful, a message shows up asking if you want to restore the credential. Click Yes to restore the credential.
To use a previous entry, click the entry row to use and click Verify Password. A message appears if the password change is successful.
To configure Windows to allow FortiPAM to change its local user password by SAMBA:
- On Windows, open Local Security Policy.
- Go to Local Policies > Security Options > Network access: Restrict clients allowed to make remote calls to SAM.
- Right-click Network access: Restrict clients allowed to make remote calls to SAM and select Properties.
- Select Edit Security....
- Add users to Group or user names: in the Security Settings for Remote Access to SAM window.
- Click OK.
- Click OK.

