
Creating users and assigning roles
Go to Account Management > Users to add users and assign roles. You also have the option of creating API Only users. The User Management table displays all the users with access to the portal.
The Account Management > Users page displays the following information:
| Column | Description | ||||||
|---|---|---|---|---|---|---|---|
|
The user's email address
|
|||||||
| Full Name | The user's full name. | ||||||
| First Name | The user's first name. | ||||||
| Last Name | The user's last name. | ||||||
| UUID | The user's unique ID. | ||||||
| Last Login | The date and time the user last logged into the account. | ||||||
| Created | The date the user was crated. | ||||||
| Updated | The date and time the user's details were updated. | ||||||
| Status | The user's current status (Enabled/Disabled). | ||||||
| Locked Out | Indicates the user has been locked out of the account. | ||||||
| MFA | Indicates Mufti-Factor Authentication is enabled or disabled. | ||||||
| Roles |
The user role. This column is not displayed by default. |
||||||
| Actions |
Use the menu in this column to:
|


To create a new user:
- Click the gear icon at the top-right of the page and select Account Management. (Click the Users tab if it is not already open.)

- Click Create User. The Create New User dialog opens.
- Enter the user's details.
Required fields are indicated with an asterisk (*).
Email Enter the user's email address. First name Enter the user's first name. Last name Enter the user's last name. Assign role Select the user role. The following descriptions are also displayed in the portal when you hover over the role name.
Role
Description
User This role grants permission to perform all non-administrative functions within the portal, including the ability to manage all features for the Detections function of the product
Most users will utilize this role for their duties within the product.
Limited User This role grants permissions to perform the most basic functions within the portal, however it limits a user's ability to manage Detectors, Mutes, and Exclusions within Detections.
This role is primarily designed for teams utilizing a multi-teir SOC in which lower-tier analysts should not be able to prevent future detections from firing without review from an upper-tier analyst.
Admin This role has permissions to configure account-level settings (such as PCAP encryption, enforcing MFA requirements, and so on) and allows grantees the ability to manage users within the account.
Note: Admins must also have a User permission to perform actions in the portal such as viewing Detections or running queries.
When the Admin role is selected, the system automatically checks for the User role. This is because Admins need the User role for full functionality. If the User role is not selected, a warning will appear. You can still create the user if you choose to ignore the warning.
API Only API-only users are primarily designed for integration configurations. They cannot have passwords or multi-factor authentication enabled, they do not receive emails, and their keys are managed entirely by those with Admin privileges for the account.
API-only users do not appear in the user list by default, but can be displayed by adjusting the page filters. See, To filter the user list.

API Only is the user role when mandatory SSO is enabled. See Account management settings.
- Click Create.
|
|
New users are automatically assigned the Training User role on the Training Modern account, even if the administrator has not assigned any roles to the user. If the account is a parent account, and the administrator has access to child accounts, then a checkbox is available to include child accounts. |
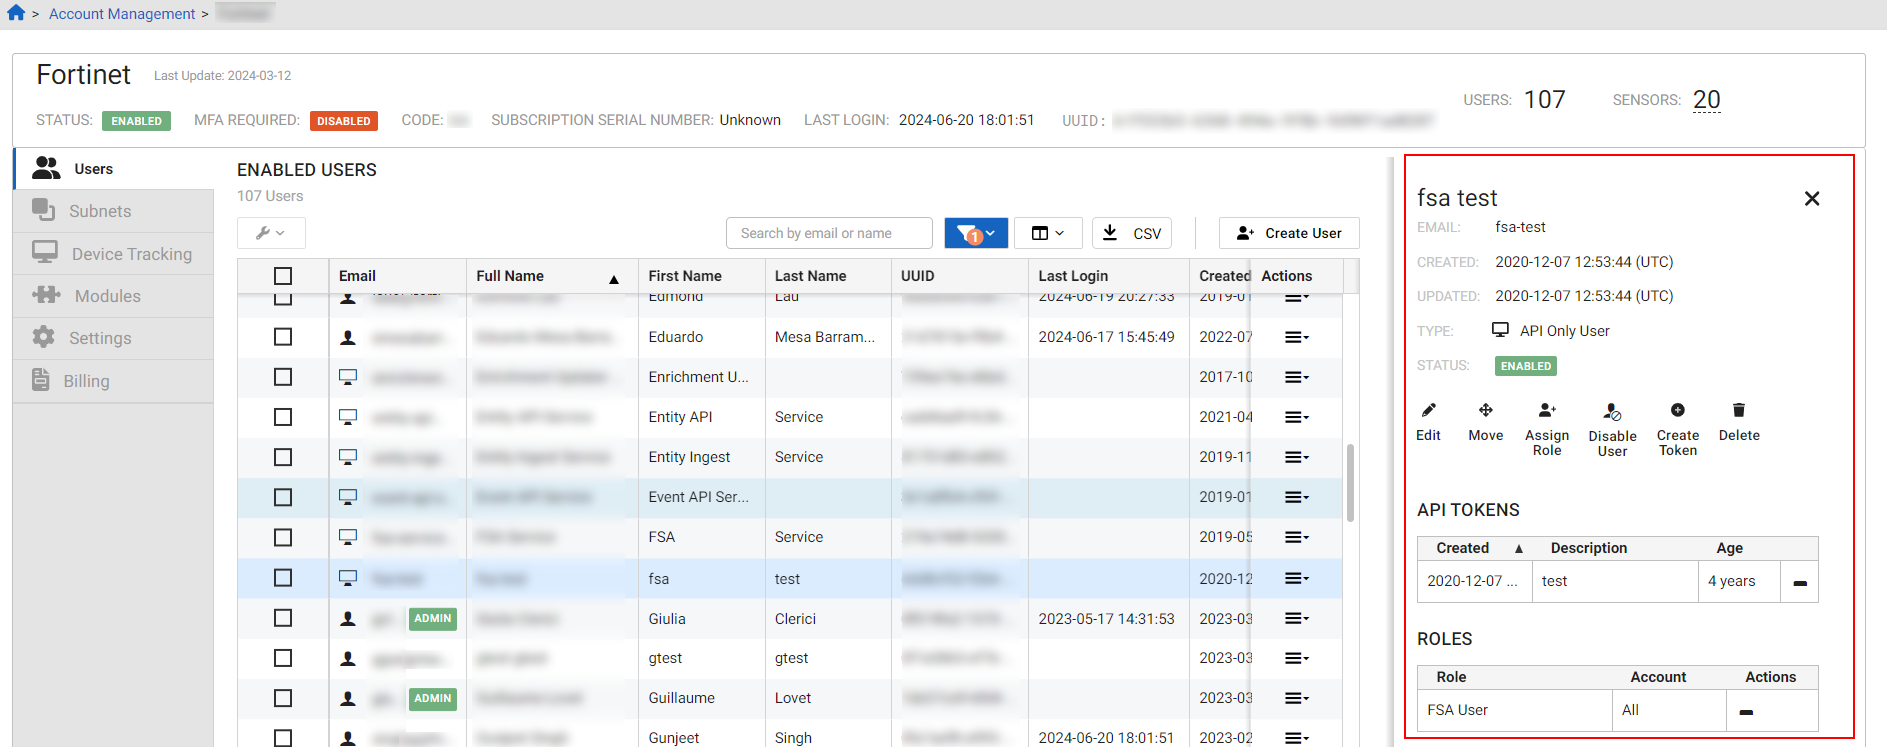
To view user details:
Double-click a user in the list. The user details pane opens.
|
|
|
 icon indicates the role assigned to the user also belongs to child accounts.
 To filter the user list:
-
Click the Filter icon.

-
Select the filter type.
Status Select All, Enabled or Disabled. User Type Select All, Portal or API Only. Account Access
Select an account from the dropdown list.
User Role
Select a user role from the dropdown list.
Oldest API Tokens Age
Select Any Token Age, No Token or a value between 3 - 12 months.
To update a user's details:
-
Click a user in the list. The User Details pane opens.
Option Purpose Edit Modify the email or name for the user account. Assign the user to a different account.
Assign Role Assign a role to a user.
- User
- Limited User
- Admin
Reset Password Send an email with a password reset link to the user. Disable MFA Disable the requirement for an MFA token for the user. If Require MFA is enabled for the account, the user will be required to re-establish an MFA token on next log in. Unlock Unlock the user account. User accounts are locked after five failed password attempts in 10 minutes. Disable User Disable log in access to the user account and any of its API tokens. 
Optionally, you can use the menu in the Actions column to quickly Edit User, Move User, Email Password Reset or Disable User.
The Edit Userand Email Password Reset are disabled when mandatory SSO is enabled. See Account management settings.
-
Click close (X) to close the pane.
To perform bulk actions:
- Select the users in the lists or select all. The tools icon is activated.

- Click the tool icon and select Move Users, Enable Users, Disable Users, Assign Role or Revoke Role.
To export the user list as a CSV file:
- In the toolbar, click the CSV button. The list is saved to your device.

|
|
In the user_role column, if the user has:
|