
Configuring a DNS filter profile
Once a DNS filter is configured, it can be applied to a firewall policy.
To configure DNS Filter profile in the GUI:
- Go to Security Profiles > DNS Filter and click Create New, or edit an existing profile.
- Configure the settings as needed.
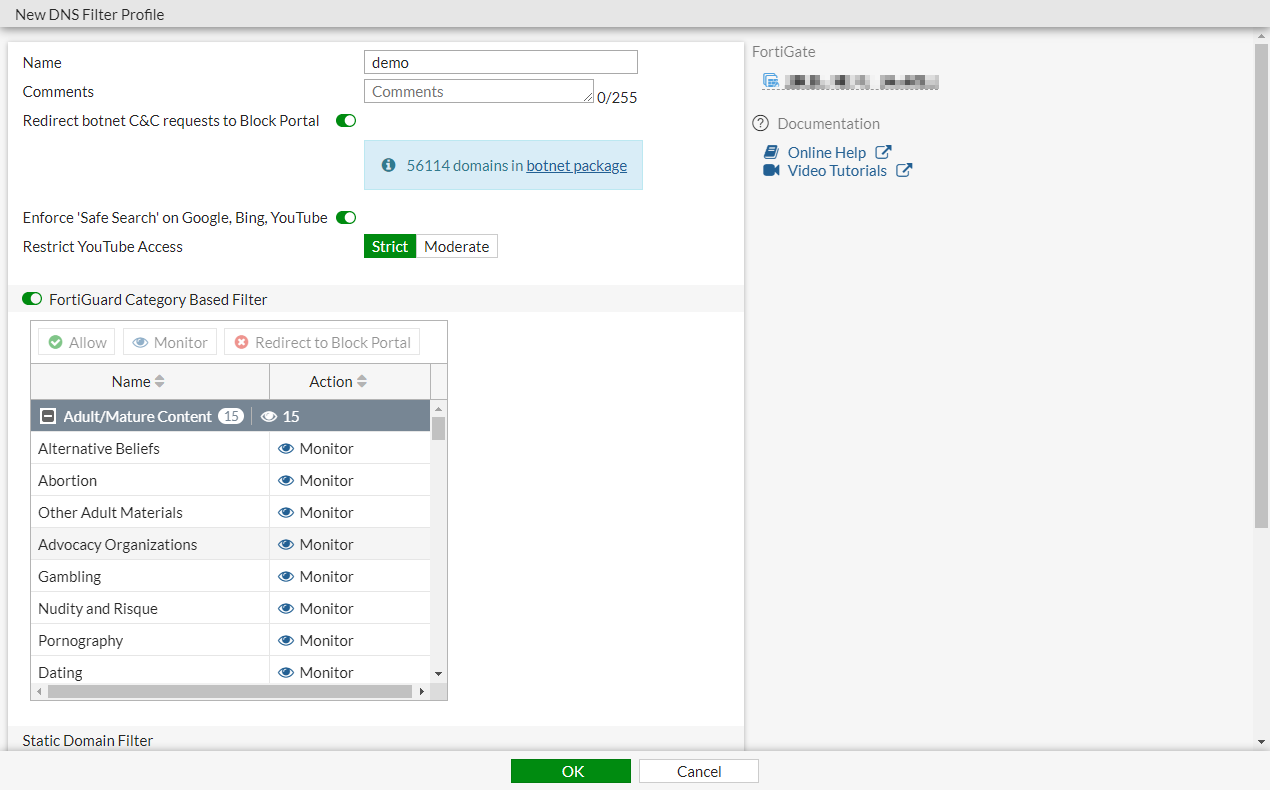
- Click OK.
To create or configure DNS Filter profile in the CLI:
config dnsfilter profile
    edit "demo"
        set comment ''
        config domain-filter
            unset domain-filter-table
        end
        config ftgd-dns
            set options error-allow
            config filters
                edit 2
                    set category 2
                    set action monitor
                next
                edit 7
                    set category 7
                    set action block
                next
                ...
                edit 22
                    set category 0
                    set action monitor
                next
            end
        end
        set log-all-domain enable
        set sdns-ftgd-err-log enable
        set sdns-domain-log enable
        set block-action redirect
        set block-botnet enable
        set safe-search enable
        set redirect-portal 93.184.216.34
        set youtube-restrict strict
    next
end
To apply DNS Filter profile to the policy in the GUI:
- Go to Policy & Objects > Firewall Policy and click Create New, or edit an existing policy.
- In the Security Profiles section, enable DNS Filter and select the DNS filter.
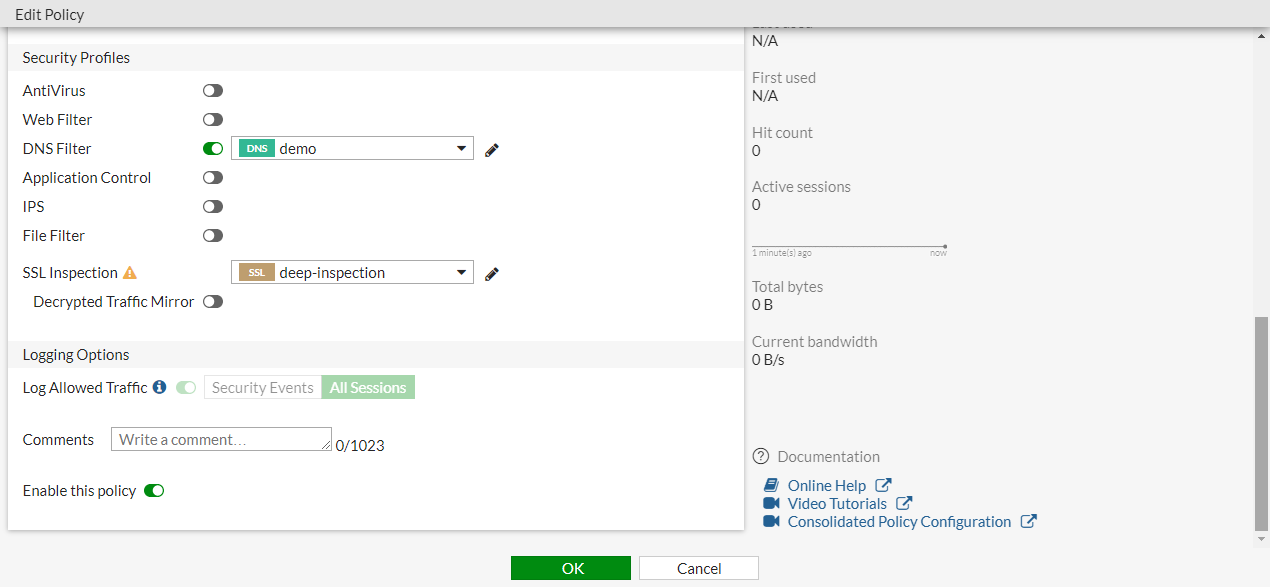
- Configure the other settings as needed.
- Click OK.
To apply DNS Filter profile to the policy in the CLI:
config firewall policy
    edit 1
        set name "Demo"
        set srcintf "port10"
        set dstintf "port9"
        set srcaddr "all"
        set dstaddr "all"
        set action accept
        set schedule "always"
        set service "ALL"
        set utm-status enable
        set inspection-mode proxy
        set logtraffic all
        set fsso disable
        set dnsfilter-profile "demo"
        set profile-protocol-options "default"
        set ssl-ssh-profile "deep-inspection"
        set nat enable
    next
end