
Host-Based Global Load Balancing (GLB)
Global Load Balancing (GLB) allows you to distribute traffic across multiple application servers or FortiADC instances under a single Fully Qualified Domain Name (FQDN). This scenario demonstrates the Simple Host setup, where FortiADC uses DNS-based logic to return the most appropriate IP address to a client.
Setup the GLB settings
Before starting to deploy GLB-related CRDs, we need to make sure that the GLB function in FortiADC is operational.
-
Enable the Global DNS Configuration
-
Go to Global Load Balance > Zone Tools. In the General Settings tab, enable Global DNS Configuration.
-
-
Create two virtual servers
-
Go to Server Load Balance > Virtual Server. In the Virtual Server tab, create two new virtual servers named v1 and v2.
-
Deploy the Servers
You can download the server example and change part of the definition based on your environment. Especially the RemoteServer annotation if you want to define the FortiADC with fortiadc-ip, fortiadc-admin-port, etc.
curl -k https://raw.githubusercontent.com/fortinet/fortiadc-kubernetes-controller/main/customResource/glb/remoteserver_slb.yaml -o remoteserver_slb.yaml
curl -k https://raw.githubusercontent.com/fortinet/fortiadc-kubernetes-controller/main/customResource/glb/remoteserver_host.yaml -o remoteserver_host.yaml
Deploy it with the kubectl command:
kubectl apply -f remoteserver_slb.yaml
remoteserver.fadk8sctrl.fortinet.com/fortiadc-rs1 created
kubectl apply -f remoteserver_host.yaml
remoteserver.fadk8sctrl.fortinet.com/generic-rs1 created
Deploy the Host
You can download the host example and modify parts of the definition to match your environment, especially the Host annotations used to define the FortiADC settings such as fortiadc-ip and fortiadc-admin-port.
curl -k https://raw.githubusercontent.com/fortinet/fortiadc-kubernetes-controller/main/customResource/glb/host.yaml -o host.yaml
Deploy it with the kubectl command:
kubectl apply -f host.yaml

host.fadk8sctrl.fortinet.com/simple-host created
Get the information of the simple-host by using the kubectl describe command:
# kubectl describe host simple-host

Name:         simple-host

Namespace:    default

Labels:       fadcr=true

Annotations:  fortiadc-admin-port: 443

              fortiadc-ctrl-log: enable

              fortiadc-ip: 172.31.5.197

              fortiadc-login: fad-login

API Version:  fadk8sctrl.fortinet.com/v1alpha1

Kind:         Host

Metadata:

  Creation Timestamp:  2025-11-24T09:52:50Z

  Generation:          1

  Resource Version:    1797237

  UID:                 54fd070f-c353-4e7f-9a32-1797a289382b

Spec:

  Domain:        host1.com.

  feedbackIPv4:  0.0.0.1

Events:                      <none>
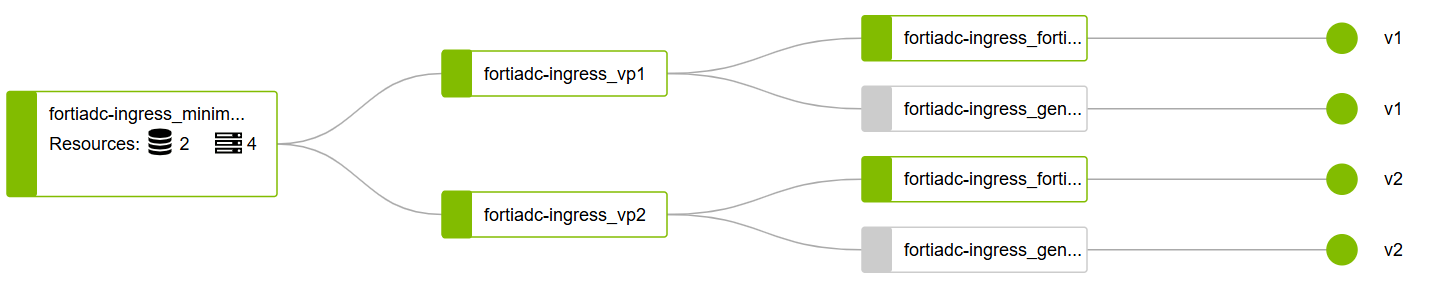
FortiView
Check the deployed Host and RemoteServer with FortiView.
To access the FQDN www.host1.com using the dig tool:
dig @192.168.1.108 www.host1.com +short
20.20.20.2
Update or delete the Host
To update a host resource:
You can edit the host.yaml. and use kubectl apply or use the kubectl edit command.
kubectl edit host simple-host
To delete the host resource:
kubectl delete host/simple-host