Azure SSO
You can use Single Sign-On (SSO) to log in to FortiWeb with Azure credentials by configuring administrator login to FortiWEB using the SAML standard for authentication and authorization. SAML has been introduced as a new administrator authentication method in FortiWEB, allowing it to act as a Service Provider (SP) and utilize other IdPs.
This article provides an example of basic integration with Microsoft Entra ID (formerly known as Azure Active Directory (AD)) acting as the IdP.
Configuration instructions
-
Create a new Enterprise application in Entra ID.
-
Log into the Microsoft Azure portal.
-
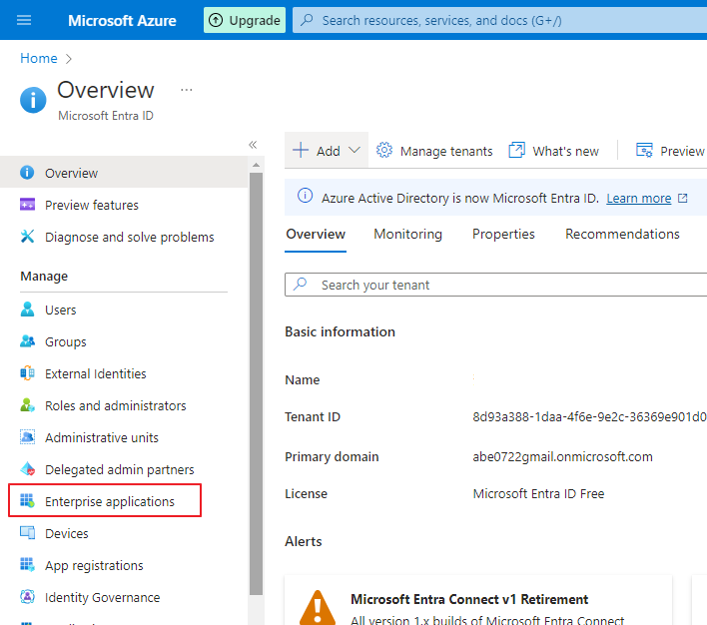
Go to MicrosoftEntra ID.

-
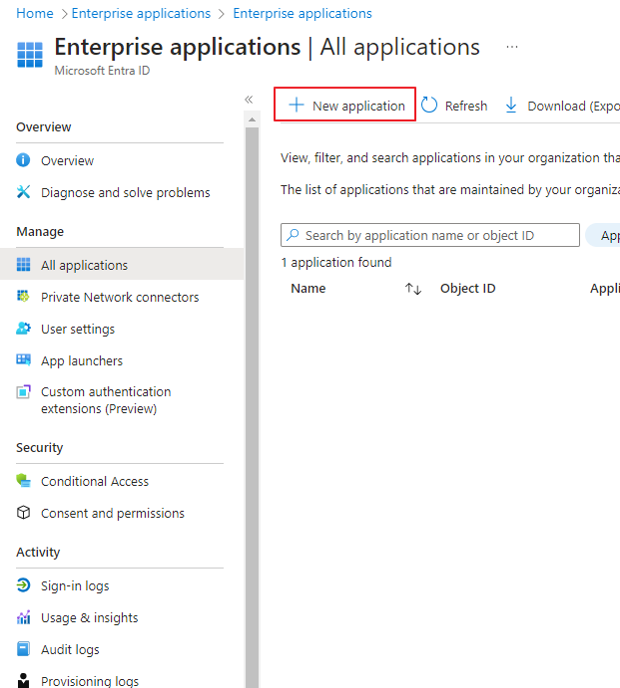
Go to Enterprise applications.
-
Click New application.
-
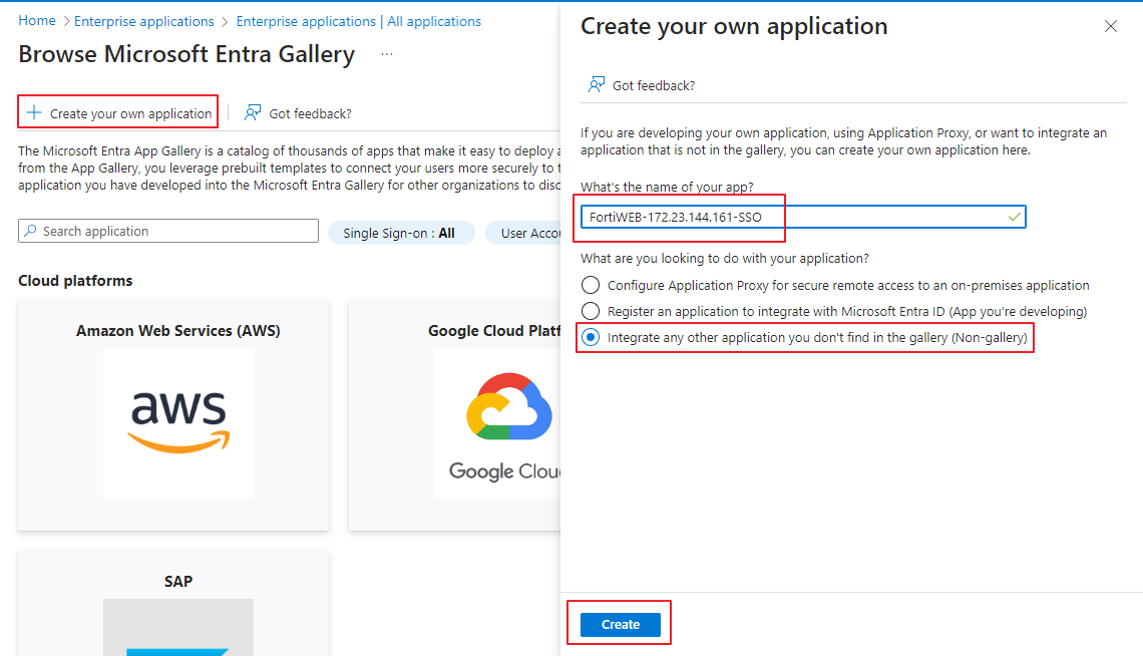
Click Create your own application. This opens a modal window.
Enter the name of your application. We recommend using a name that you will recognize as linked to your FortiWeb device.
Select Integrate any other application you don't find in the gallery (Non-Gallery).
-
-
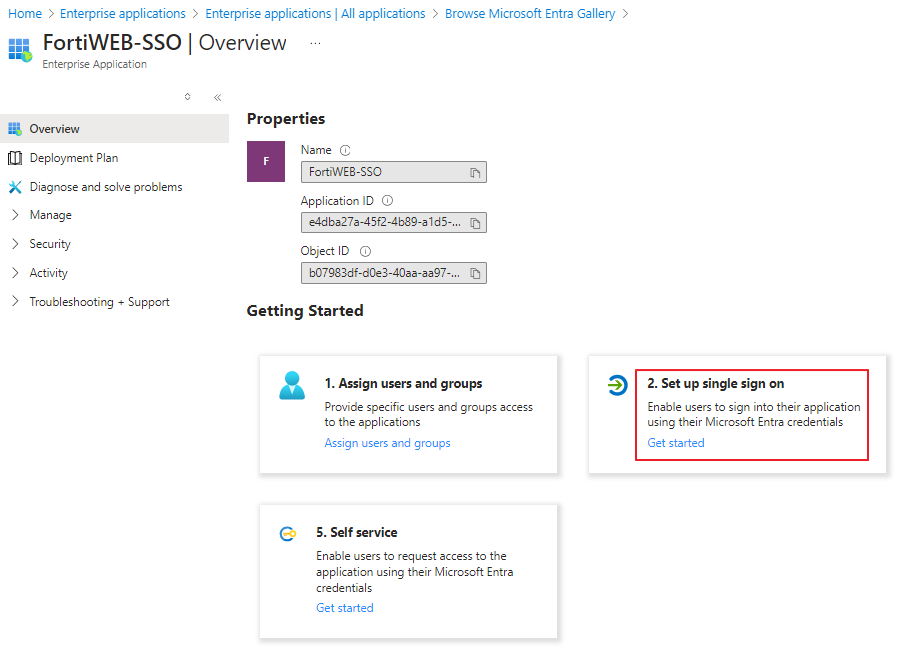
Set up single sign-on
-
In the newly created application, select Set up a single sign on.
-
Under Select a single sign-on method, click SAML.
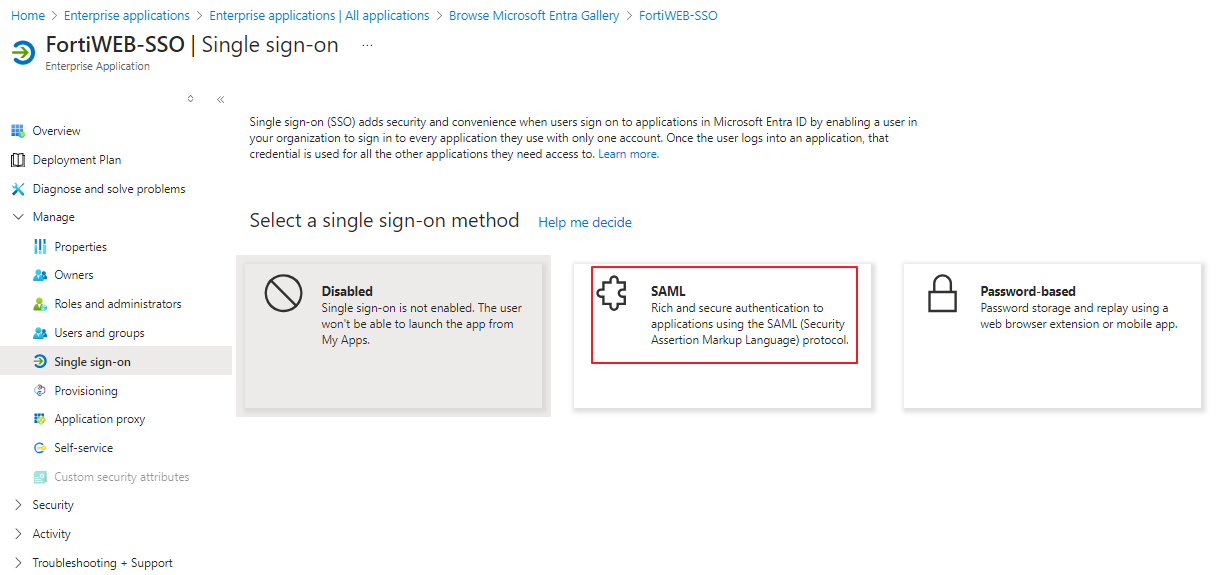
There are five sections on the SAML settings page.

-
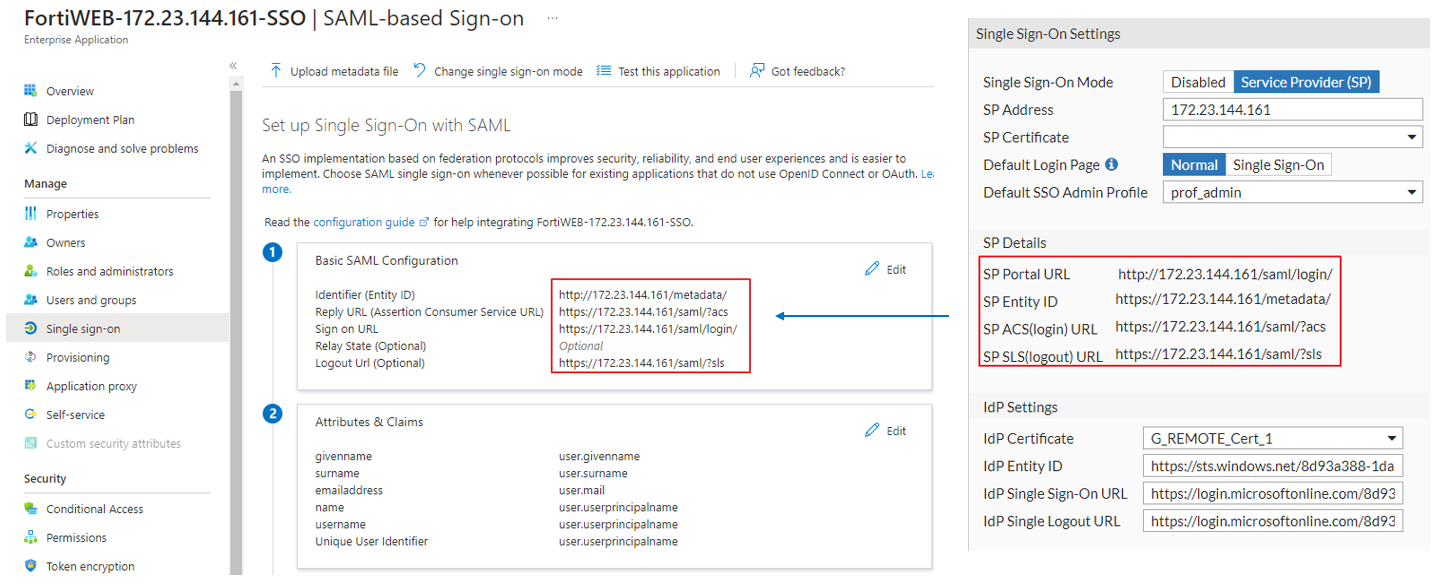
In a different tab, log into FortiWeb to retrieve the Service Provider (SP) related information.
Navigate to Security Fabric > Fabric Connectors > Security Fabric Setup > Single Sign-On Settings
In the SP Address field, enter your FortiWeb IP address. The required SP information should appear under SP Details.

-
Return to the Azure Portal tab. We recommend keeping your FortiWeb tab open, as we will return to it in a later step.
-
Edit the Basic SAML Configuration, filling the required fields with SP details from FortiWeb. Please note the relationships between each field in the table below:
Azure Basic SAML Configuration field
FortiWeb SP Details field
Identifier (Entity ID)
SP Entity ID
Reply URL (Assertion Consumer Service URL)
SP ACS(login) URL
Sign on URL
SP Portal URL
Relay State
N/A
Logout Url
SP SLS(logout) URL
-
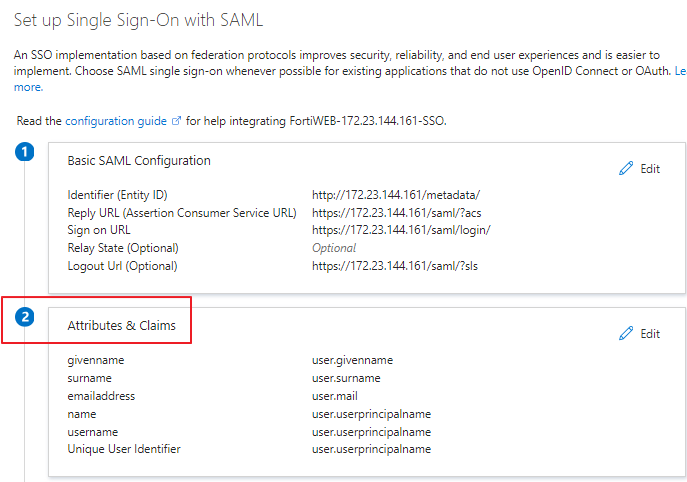
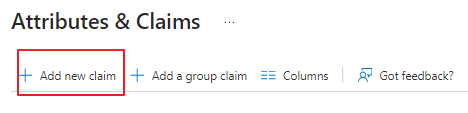
Edit Attributes & Claims.
-
Click Add new Claim
 '
' -
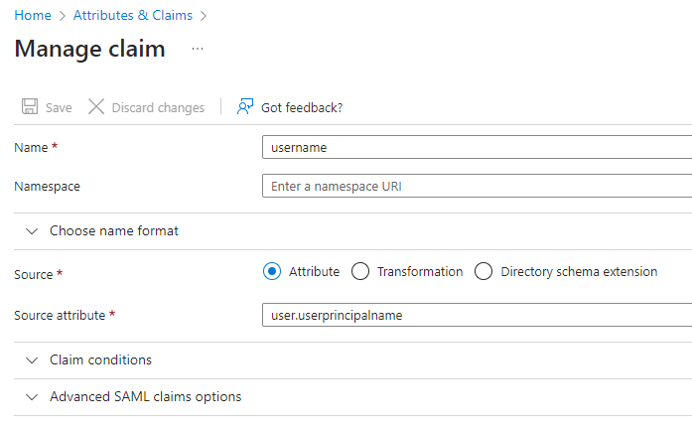
Enter the following values:
Setting
Description
Name
Enter the string "username" (without quotation marks).
Namespace
Leave this field blank.
Source
Select Attribute.
Source attribute
Enter the string "user.userprincipalname" (without quotation marks).
-
Click Save.
-
-
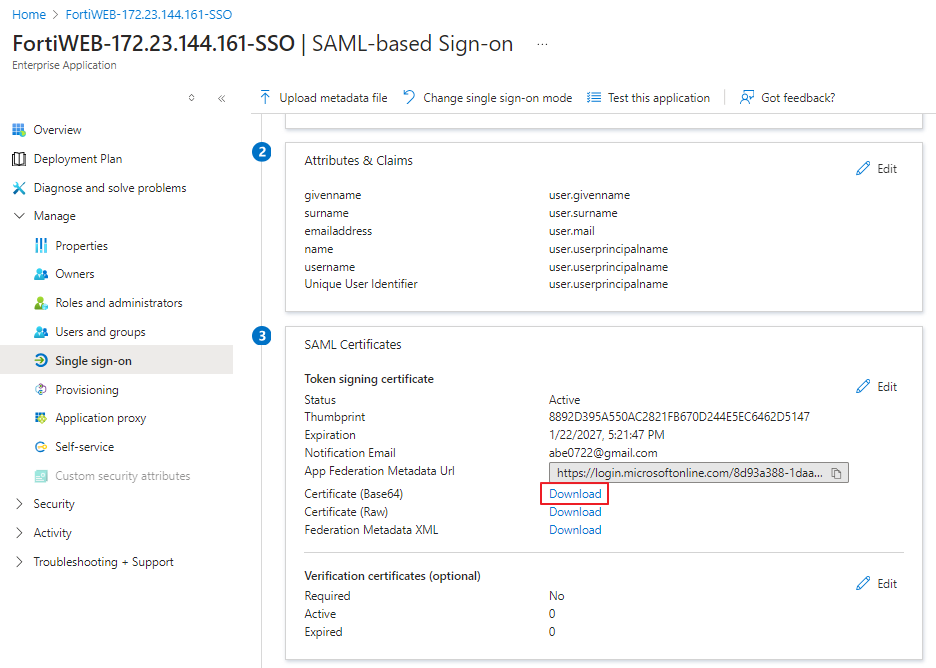
Go to the SAML Certificates section.
Download Certificate (Base64).
-
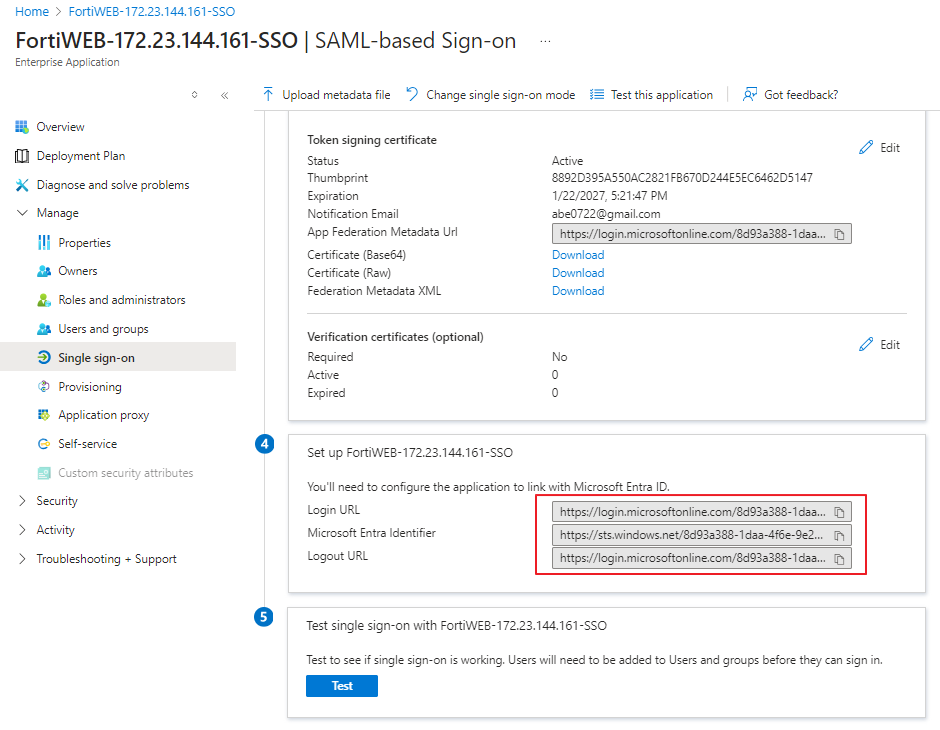
In the Set up FortiWEB-SSO section, take note of the following values, as you will need to copy and paste them into FortiWeb in a later step.
-
Login URL
-
Microsoft Entra Identifier
-
Logout URL
-
-
Switch back to the FortiWeb tab. We recommend keeping the Azure tab open.
-
Navigate to System > Certificates > Admin Cert ReEmote > Import, and import the Azure SAML certificate with the downloaded Certificate from step i.
-
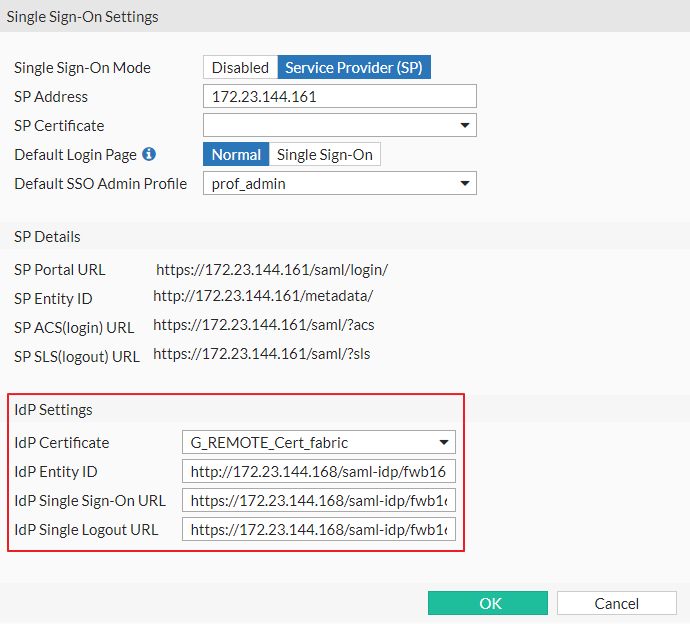
Navigate to Security Fabric > Fabric Connectors > Security Fabric Setup > Single Sign-On Settings and configure the following:
Setting
Description
Single Sign-On Mode
Select Service Provider (SP)
SP Address
This is the address that will be used to process the SAML login and serve as the SAML SP identity. You can use either an FQDN or an IP address.
Important Note: Since the redirects during the SAML authentication flow will go through this address, ensure that the administrators attempting to log in can reach this address.
SP Certificate
Leave empty. Azure does not check this field.
Default Login Page
Normal presents the standard login screen with an option to continue via SAML.
Single Sign-On automatically redirects all GUI logins to SAML.
For initial configuration and testing, we recommend leaving this set to Normal.
Default SSO Admin Profile
This option controls which admin profile is assigned to newly created SAML SSO administrators.
Note: There is a special virtual profile available called 'admin_no_access'. This profile blocks access to the FortiGate GUI until a different administrator assigns a real profile to the new administrator. This is useful for first-time logins, allowing you to decide what profile to assign to a new administrator before granting them access.
IdP Settings
IdP Certificate
Select the certificate imported in the previous step.
IdP Entity ID
Copy and paste the Microsoft Entra Identifier from the open Azure tab. For instructions on accessing this value, please refer to step h.
IdP Single Sign-on URL
Copy and paste the Login URL from the open Azure tab. For instructions on accessing this value, please refer to step h.
IdP Single Logout URL
Copy and paste the Logout URL from the open Azure tab. For instructions on accessing this value, please refer to step h.
-
Click OK.
-
-
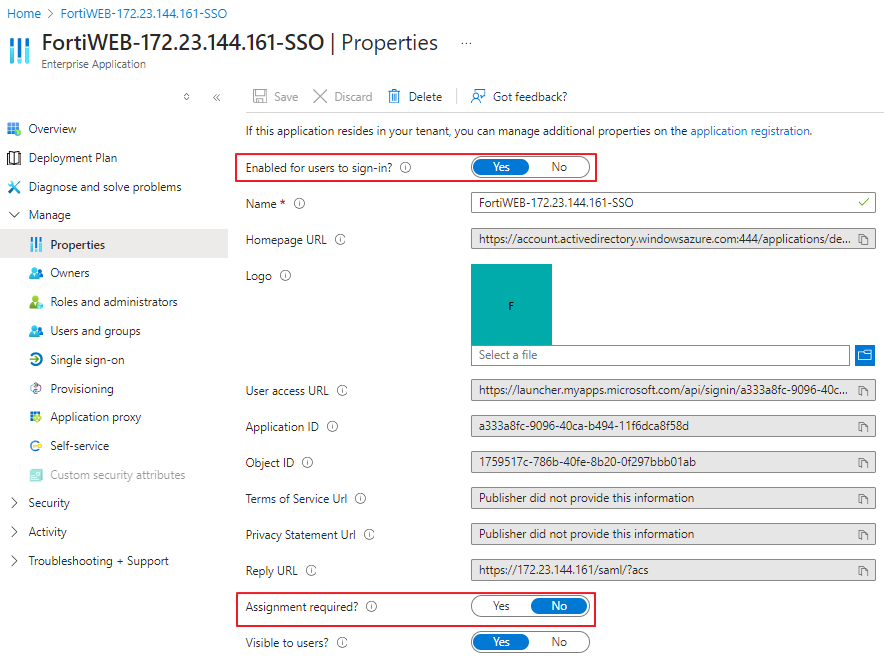
Access Authorization
There are several options that control access to a SAML SP (FortiGate) on the Azure side.
In Azure, navigate to the Properties section of the SAML application.
Setting Description Enabled for users to sign in Set to Yes.
If set to No, access is completely disabled for everyone.
Assignment required Set to No to allow any valid user from this directory to use this SAML SP and authenticate to the FortiWEB admin GUI.
When set to Yes, only users/groups configured in the Users and groups section are allowed access.
-
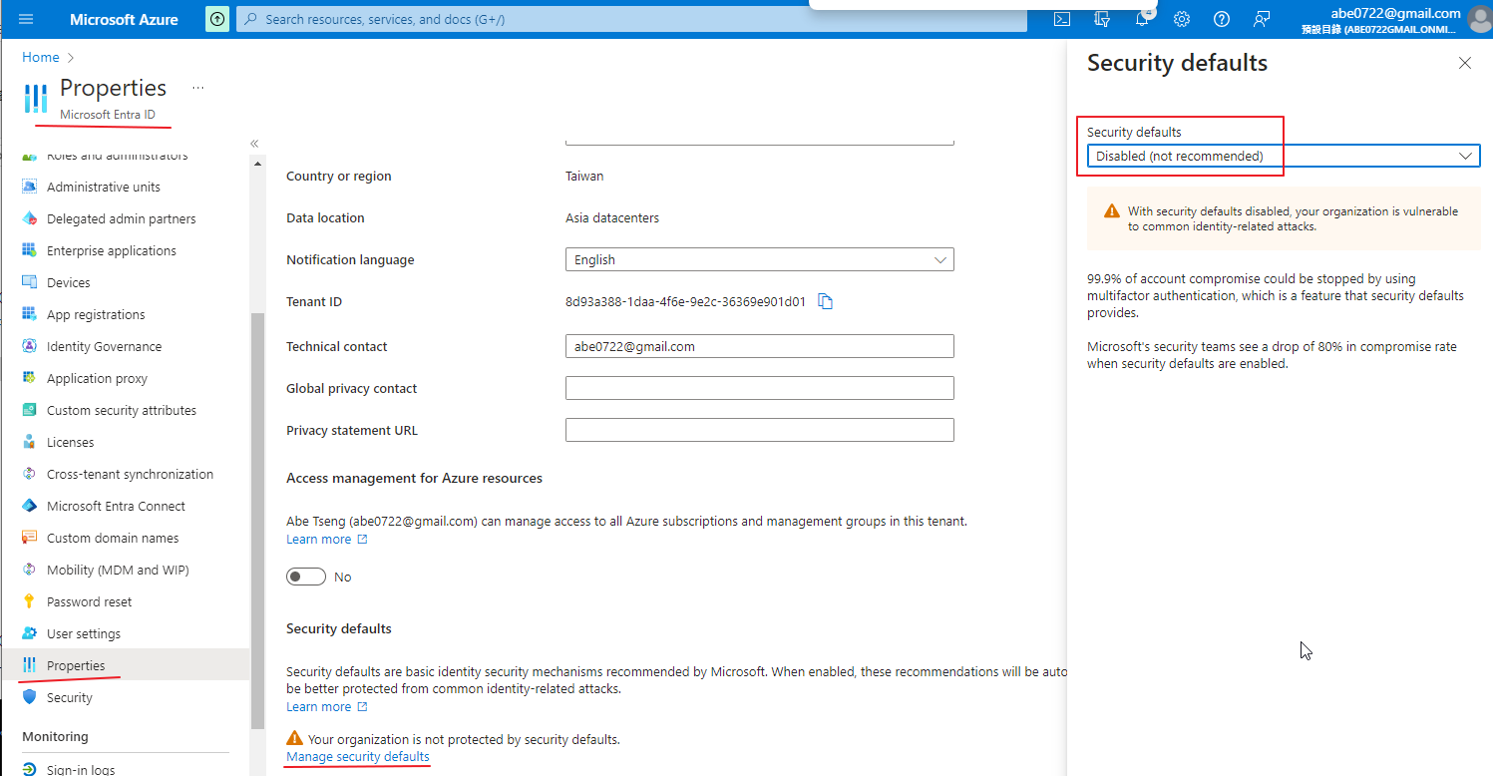
Multi-factor Authentication
Currently, FortiWeb does not support Azure SSO with MFA, so Azure MFA needs to be disabled.
Navigate to Properties > Manage security defaults > Security defaults and set it to Disabled.