


Azure AD Server
Connect FortiPhish to your organization's Azure AD tenant to import users and groups to create new recipients.
Configuring Azure AD for FortiPhish
Generate a Application ID and Secret in Azure AD to allow access for FortiPhish service.
To generate a Application ID and Secret in Azure AD:
- In Azure or O365 portal, switch to Azure Active Directory page.
- Create a new application that can be associated with FortiPhish. In azure portal:
- Go to App Registrations > New Registration.
- Provide a name for App. Ex. FortiPhish-AD-Proxy.
- Select the tenant.
- Leave Redirect URI blank.
- Record the Application ID and Tenant ID.
- Go to App Registrations > New Registration.
- Create an Access key.
- Under App Registrations select the created application.
- Go to Certificates & Secrets > New Client Secret.
- Record the Client Secret (named value in the GUI).
- Provide permissions to Graph API.
- Under App Registrations select the created application.
- Go to API Permissions > Add permission.
- Select Microsoft Graph” and then Application Permissions.
- Provide Permissions to the list of users and groups such as Directory ReadAll and Group ReadAll.

After permissions are added, you should grant them using Grant admin consent to xxx in permission overview page.
Adding an Azure AD server
To add an Azure AD server:
-
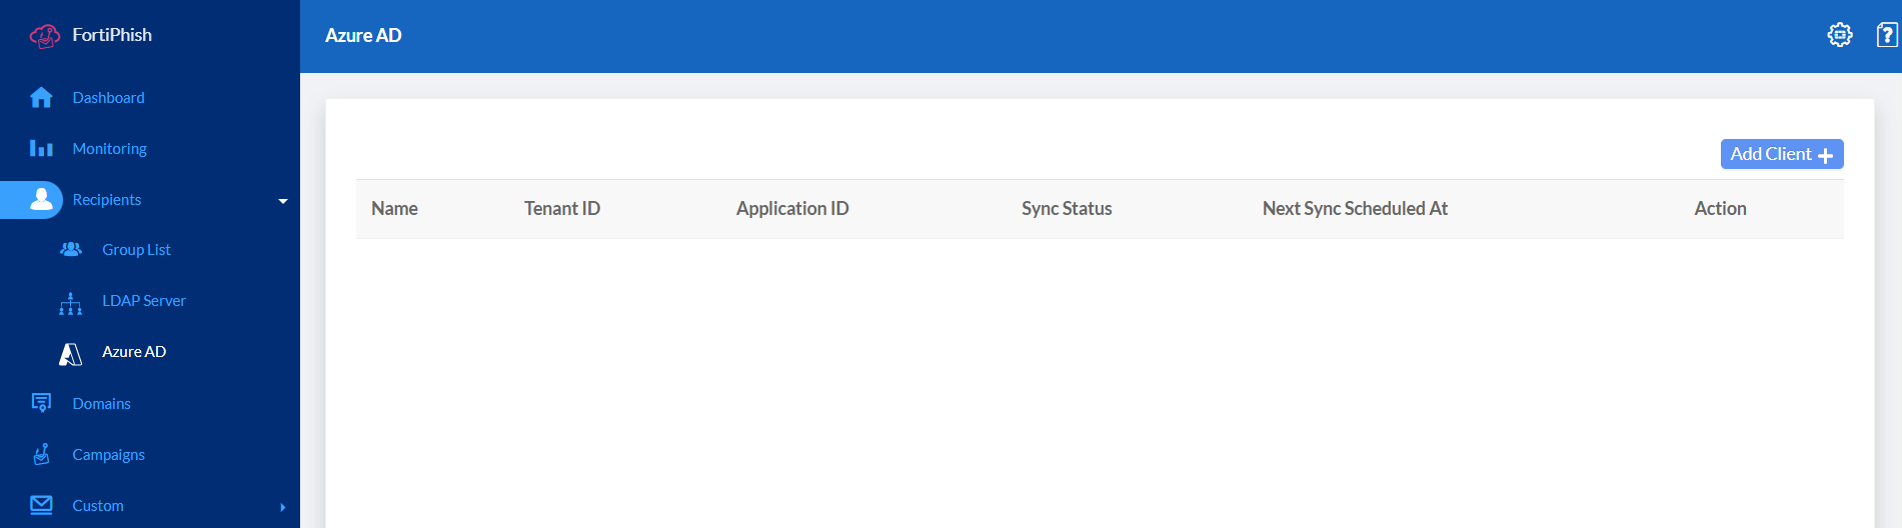
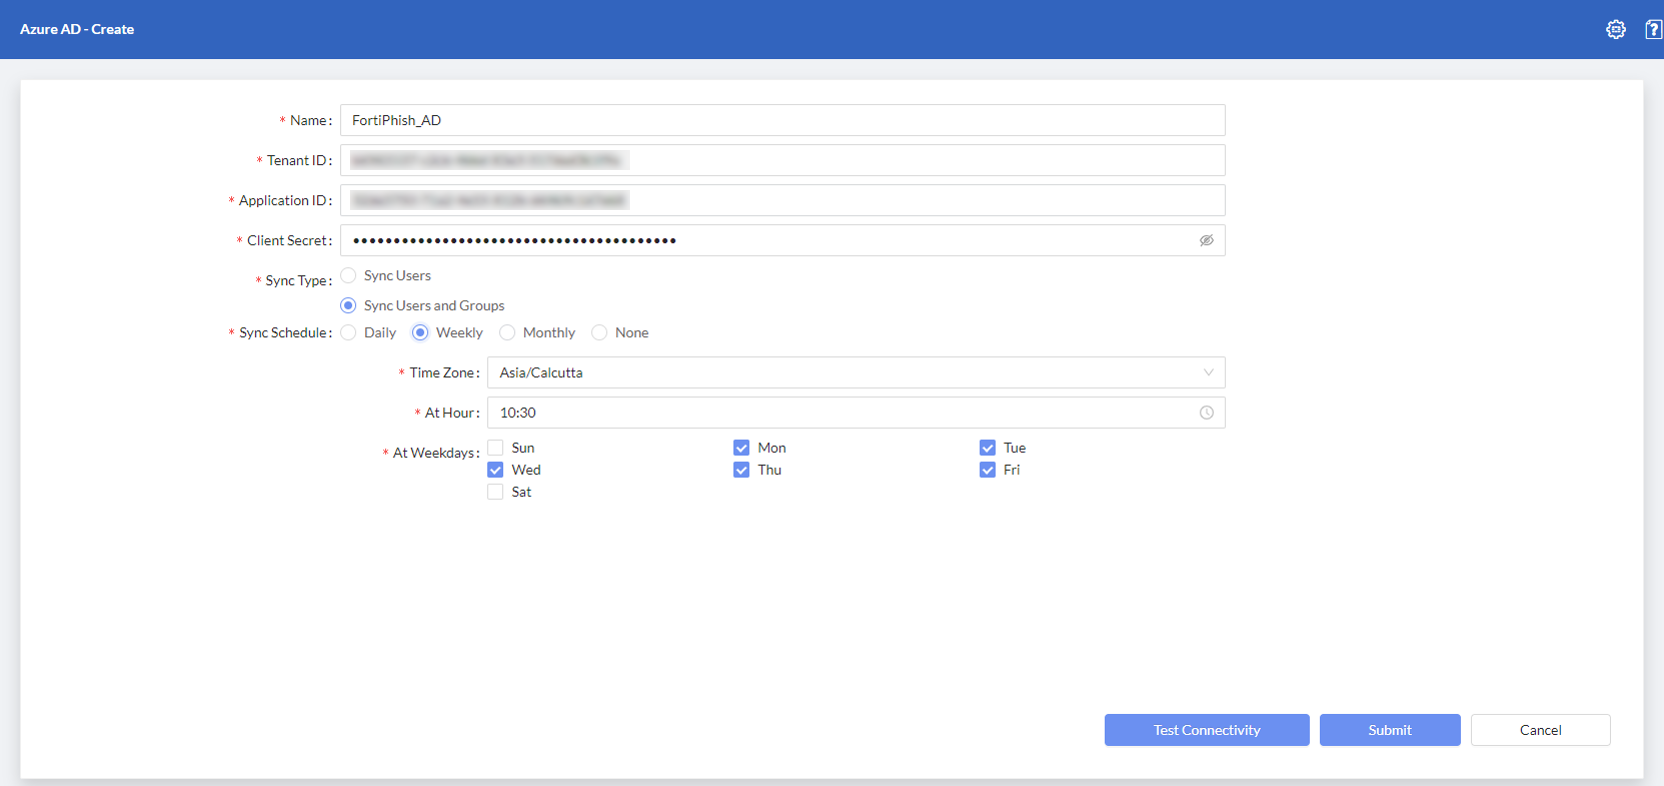
Go to Recipients > Azure AD and click Add Client+. The Azure AD-Create page opens.
-
Configure the Azure AD server settings.
-
Enter a Name for Azure AD.
-
- Enter the Tenant ID, Application AD, and Client Secret information gathered during Configuring Azure AD for FortiPhish.
-
Select Sync Users to import only the users or select Sync Users and Groups to import both users and groups from Azure AD.
-
Set synchronization schedule to automatically sync users or users and groups.
-
Select the frequency of the synchronization, Daily , Weekly, or Monthly. Select None to disable automatic syncing.
-
Select the desired time zone from the drop down menu.
-
Set the time of synchronization by selecting hours and minutes.
-
If Weekly or Monthly is set as the frequency, select the days on which the synchronization must be performed. When configuring the synchronization frequency to Monthly, select 31 from At day drop down to schedule synchronization on the last day of each month.
If both the Sync Schedule and Campaign Schedule which includes Azure AD users as recipients, are configured for the same time, the schedule that is executed first will delay the execution of the other until it is completed.
-
-
-
To test the connectivity, click Test Connectivity.
-
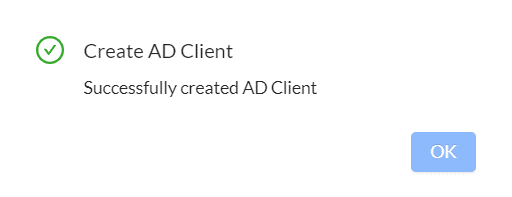
Click Submit. A confirmation message is displayed.
|
|
|
Syncing the Azure AD server
You can sync the Azure AD server when members join or leave your organization.
To sync the server:
- In FortiPhish, go to Recipients > Azure AD .
- (Optional) In the Sync Status column, hover over the status column to view the latest sync date and time. If Sync Users and Groups option is selected while adding Azure AD, number of users and groups fetched is displayed else if Sync Users is selected, only the number of users fetched is displayed.

The Next Sync Scheduled At column, displays date and time of the next synchronization schedule. If sync schedule is not configured, NA is displayed.
- In the Action column, click the sync button. During the sync process, clicking the sync button will display the number of users or users and groups fetched information.
- When the sync is complete, a confirmation message is displayed. Once the sync process is completed, if you click the sync button, sync process will start again.

Deleting an Azure AD server
To delete an Azure AD server:
-
Go to Recipients > Azure AD Server.
-
In the Actions column of the desired Azure AD client click the delete button. A confirmation window is displayed.

-
Click Yes.
|
|
|