


Connect branch FortiGates to FortiManager
With the FortiManager fully prepared for the branch devices, it is time to direct the branch FortiGates to the FortiManager. This involves configuring the FortiGates to FortiManager’s IP address for registration.
You may do this manually on the branch FortiGate using the GUI or CLI, or you may leverage FortiDeploy, which is a product built into FortiGate Cloud. FortiDeploy allows you to push the FortiManager settings to your branch devices so they will automatically join your FortiManager.
Using FortiZTP
FortiZTP is used to direct FortiGates which are able to reach the FortiGuard network to a FortiManager for configuration and management. For more details on FortiZTP, including requirements, please see the FortiZTP Admin Guide. In this example, we will use FortiZTP to direct the Branch FortiGates to the on-premise FortiManager. The FortiGate VMs have already been registered in the FortiCloud Asset Management.
To connect the branch FortiGate(s) to FortiManager using FortiZTP:
-
Log in to fortiztp.forticloud.com.
-
Select one or more FortiGates to provision.
-
Select Setting in the top right of the device pane.
-
In the window which pops up, enable REMOTE: FortiManager, and disable FortiGate Cloud and FortiManager Cloud.
-
Provide the FortiManager serial number and IP address or FQDN, then select Update.
-
Select one or more branch FortiGates to provision by checking the respective box in the device pane.
-
Select Provision from the top right of the device pane.
-
The FortiManager settings entered in step 5 should be listed under TARGET LOCATION.
-
Select PROVISION NOW to complete the provisioning.
If the FortiGate is able to communicate with FortiGuard, it will receive the configuration required to direct it to your FortiManager for registration, configuration, and management.
Using the GUI
To connect the branch FortiGate(s) to FortiManager using the GUI:
-
Log into your branch FortiGate and navigate to Security Fabric > Fabric Connectors.
-
Under Security Fabric Connectors, double click Central Management. The Central Management Settings menu opens.
-
Adjust Status to Enabled and configure your FortiManager settings.
-
Click OK to finalize the settings. A dialog appears indicating the request has been sent and received. Select OK.

-
A new menu will open indicating the FortiGate is not authorized on FortiManager. Close this as the device will automatically be accepted due to matching the model device.
-
Check on the FortiManager that Br1 is online.
-
Check that the config has been pushed to the device.
Using the CLI
To connect the branch FortiGate(s) to FortiManager using the CLI:
From the FortiGate CLI, or built-in CLI from the FortiGate GUI.
config system central-management
set type fortimanager
set fmg <IP_address_of_FMG>
end
Installation
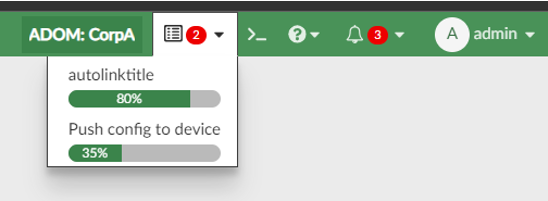
Once the FortiGate has been connected to FortiManager, FortiManager will install the configuration contained in the matching model device. You can see the progress in the top-right corner of the FortiManager GUI. Expanding this window will show you Autolinking Device, and Push config to device.
When this completes, the branches will show as synchronized for their policy package, config status, and provisioning template. The Pre-run CLI template (if used) will no longer be listed under provisioning templates – it only runs once on the first install.