Using public IP addresses
Azure does not publicly route IP addresses within a VNet, so you cannot assign a public IP address to another VM and still filter that traffic through a FortiGate-VM on Azure. Instead, you must assign the public IP addresses to the vNICs associated with the FortiGate-VM, then configure the FortiGate-VM to forward that traffic. Further, in most cases, Azure provides 1:1 NAT between the assigned public IP address and the assigned local IP address. Thus, the FortiGate-VM must forward packets using the local IP address.
A single FortiGate-VM deployment from the Azure marketplace includes one Azure IP address configuration containing a public IP address and a local IP address. Azure performs 1:1 NAT between the two as traffic enters and exits the VNet. This configuration is called an instance-level public IP address. All types of protocols are forwarded using NAT from an external public IP address to the FortiGate private IP address that is linked to it in the network interface on Azure.
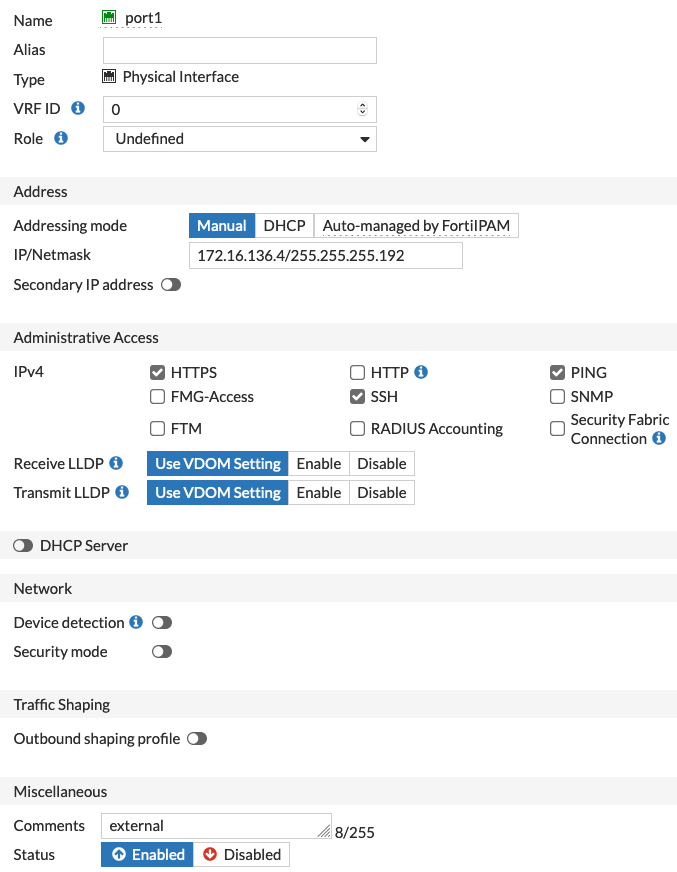
The following shows the default Azure vNIC and FortiOS configurations:
To use this public IP address for public access to an internal server, you must configure a virtual IP address, which enables a DNAT conversion of packets, and a policy to allow the traffic.

The external IP address matches the local IP address assigned to port1. The mapped IP address in this case is the internal web server's IP address, and only TCP port 80 is set to forward. You can also use PAT here to modify the original destination port in cases where there is a mismatch with the internal server's destination port. Using this feature, you can configure multiple virtual IP addresses to internal web servers using TCP port 80 by using custom external ports (8080 in this example). However, for each assigned local IP address, you can only use any given external TCP port once.

Here the policy is set to allow traffic coming in port1 to exit port2 if it is destined to the previously created virtual IP address.
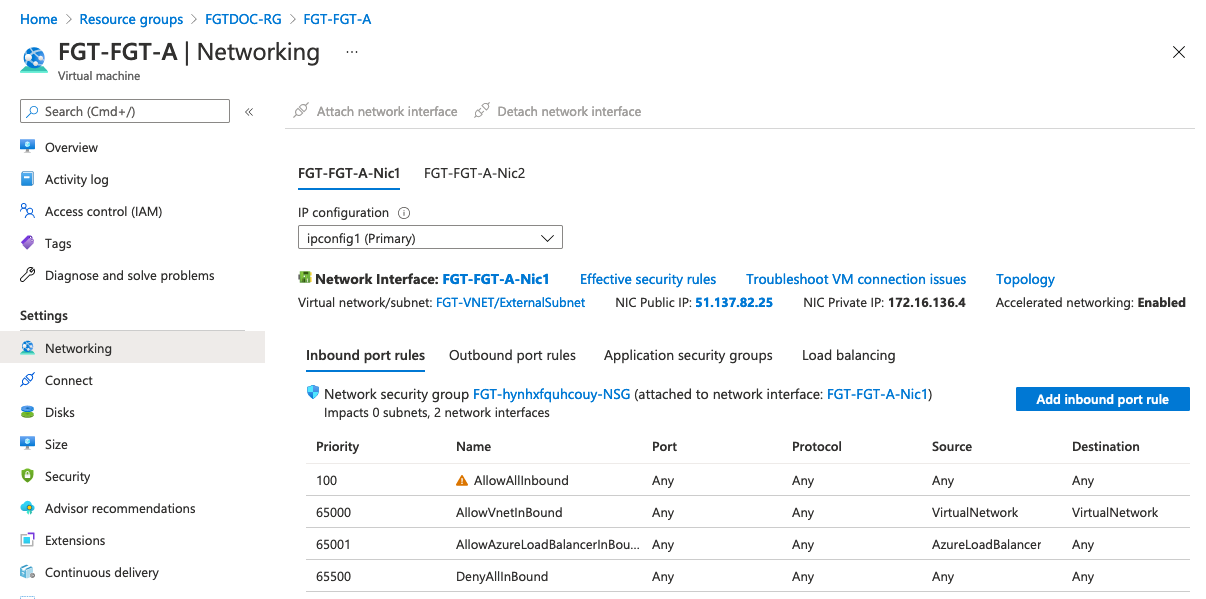
To add a public IP address, create a new IP address configuration for the vNIC in the Azure portal. Click the Add button in IP configurations in the vNIC resource view.
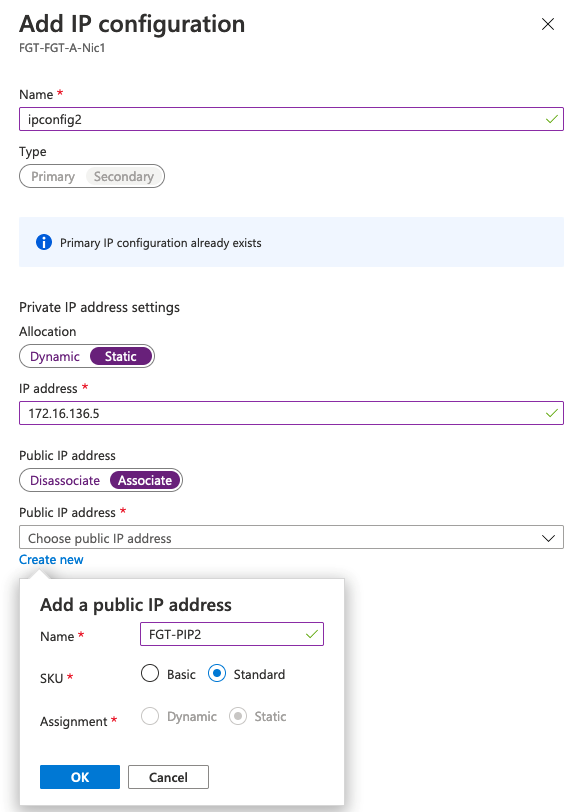
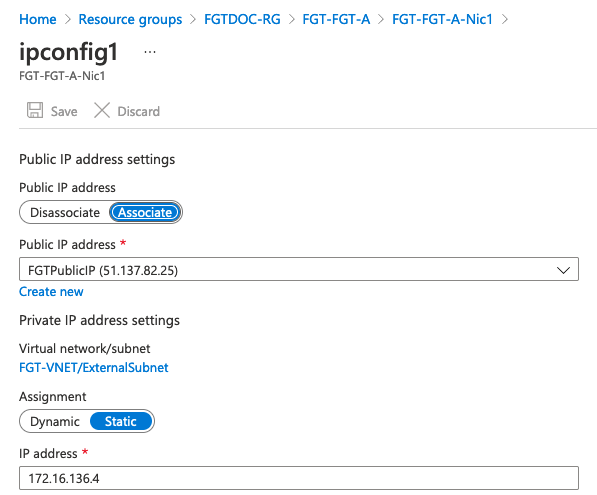
The new local address should be static and must be in the same subnet as the primary IP address configuration. Enable the public IP address and create a new public IP address resource or select an existing one. If you have an existing public IP address assigned to an internal server, you can first dissociate it from that vNIC, then assign it here.
Once you have configured both IP addresses on the Azure side, you can create an additional virtual IP address on the FortiGate-VM. You do not need to modify the interface configuration on the FortiGate-VM.
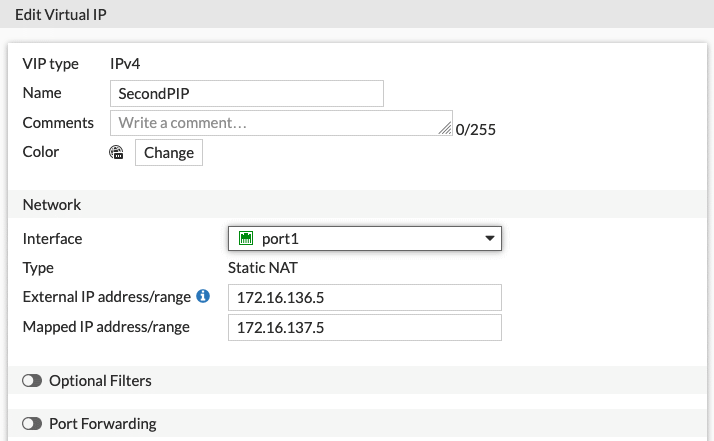
In this example, port forwarding is disabled. You can enable port forwarding if you want to forward only a specific TCP or UDP port or port range. If you do not enable port forwarding, this enables forwarding of all ports designated to the new public IP address to the internal server, in this case at 172.16.137.5
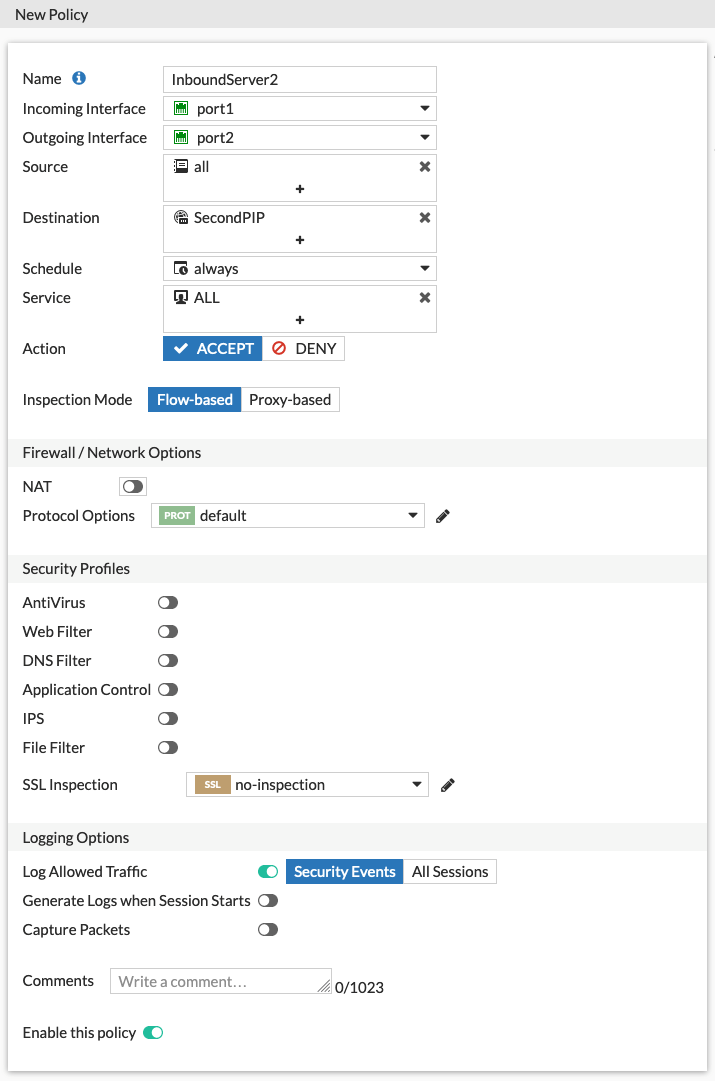
This policy matches the new virtual IP address destination and also allows all services to be forwarded. You can repeat this process for adding as many public IP addresses as needed, although you may run into Azure quota limitations.
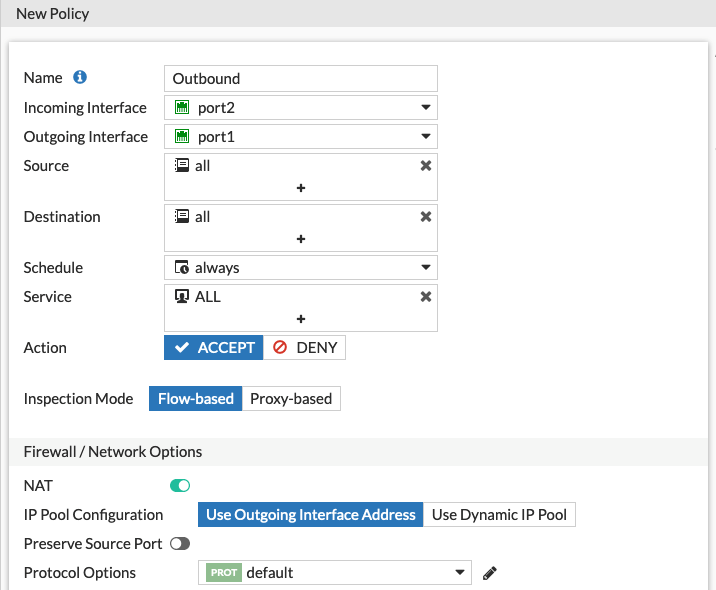
When configuring an outbound rule for your server, you can create a general rule. All traffic is NATed behind the external interface private IP address. Azure SNATs these packets subsequently to the linked instance-level public IP address.
Outgoing traffic for the secondary server behind the secondary VIP, without the port configuration, automatically SNATs behind the external IP address in the VIP.