
FortiGate Security Fabric Connector
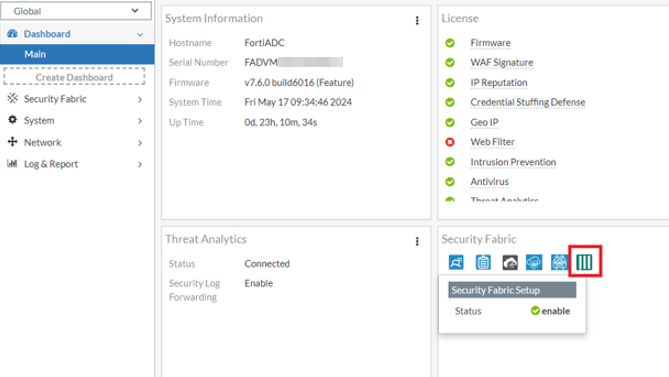
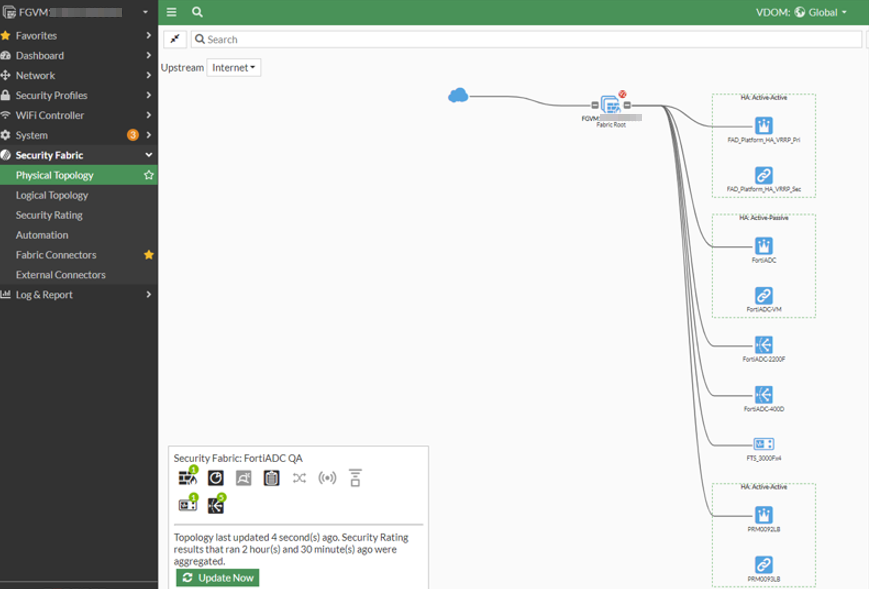
The FortiGate Security Fabric Setup connector facilitates the seamless integration of FortiADC into the FortiGate Security Fabric through the root FortiGate unit. Upon successful integration, the FortiADC device becomes a visible and interactive element within the Security Fabric topology views on the FortiGate interface. Furthermore, administrators can leverage the Fabric Device widget on the FortiGate dashboard to monitor FortiADC statuses, ensuring a comprehensive and unified security posture across the network.
After configuring the Security Fabric Setup connector and successfully connecting to the FortiGate Security Fabric, from the FortiGate, you will be able to view the FortiADC on topology pages, and create a dashboard Fabric Device widget to view FortiADC data.

Before you begin:
-
You must have Read-Write access permission for FortiADC Systems settings
To configure a FortiGate Security Fabric Setup connector:
- Go to Security Fabric > Fabric Connectors.
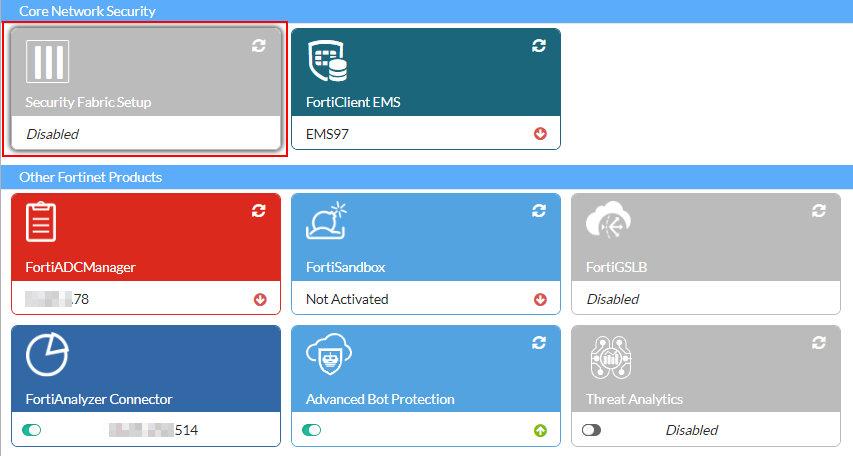
- Under the Core Network Security section, double-click Security Fabric Setup to display the configuration editor.
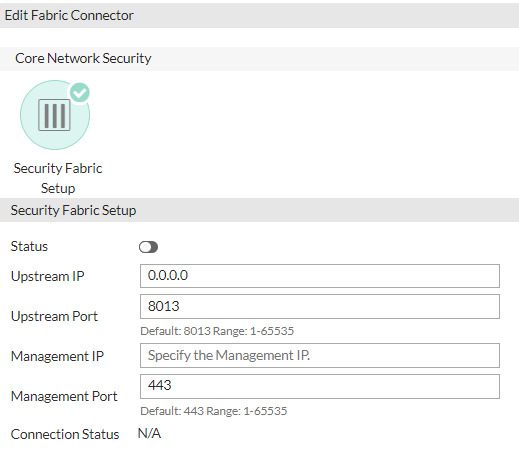
- Configure the following settings:
Setting
Description
Status Enable the FortiGate Security Fabric Setup connector. This is disabled by default. Upstream IP Specify the Upstream FortiGate IP address. Upstream Port Specify the Upstream port for the FortiGate. The default port is 8013. The valid range is 1-65535. Management IP Specify the Management IP address of this FortiADC appliance to join the Security Fabric. Management Port Specify the Management port of this FortiADC appliance to join the Security Fabric. The default port is 443. The valid range is 1-65535. - Click Save.
The newly enabled Security Fabric Setup connector will display a Connection Status of Pending Authorization. The Security Fabric Setup connector will not be connected until the FortiADC has been authorized as a Fabric Device in FortiGate.
To authorize the FortiADC as a Fabric Device in FortiGate:
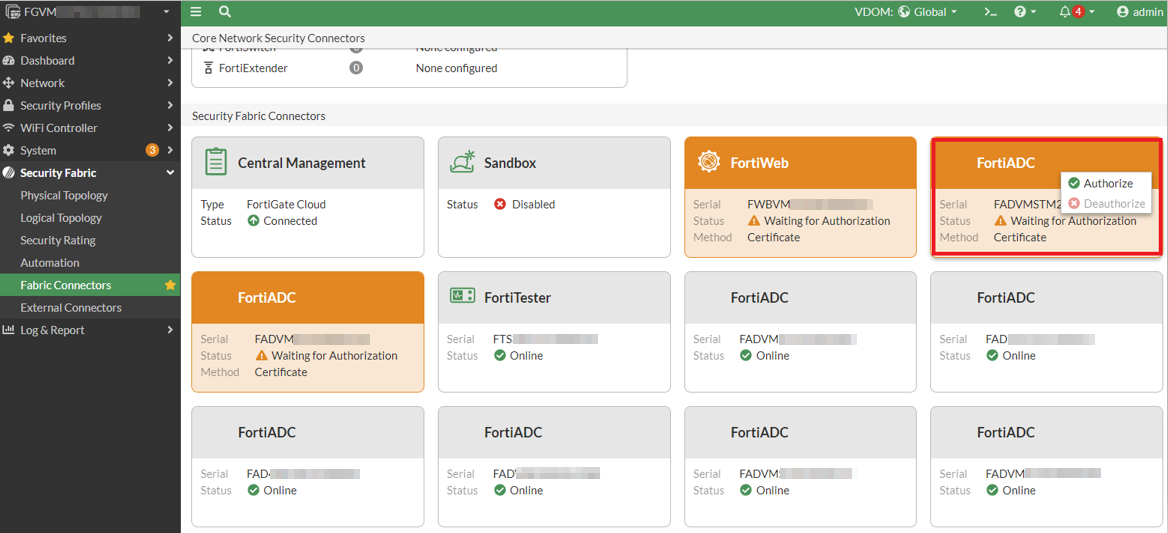
- Login to FortiGate.
- Navigate to Security Fabric > Fabric Connectors and select the Fabric device you want to authorize.
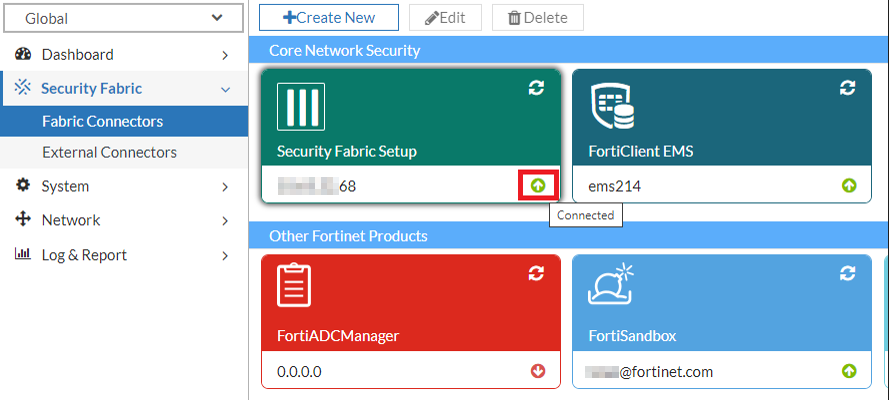
To check and troubleshoot the FortiGate Security Fabric Setup connector connection:
- Go to Security Fabric > Fabric Connectors.
- Under the Core Network Security section, locate the FortiGate Security Fabric Setup connector configuration.
- The
 and
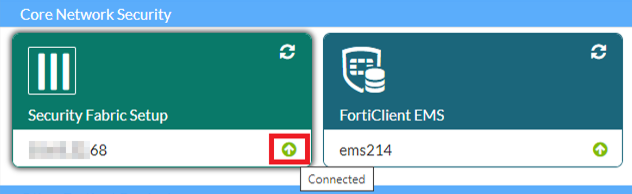
and  icons indicate whether FortiGate has successfully authorized the FortiADC Fabric Device. Hover over the FortiGate Security Fabric Setup connector to see the status details. The table below lists the possible connection statuses for the FortiGate Security Fabric Setup connector.
Icon
EMS Status
Description
Connected The FortiADC has been successfully authorized as a Fabric Device through FortiGate. Pending Authorization The FortiADC is waiting to be authorized as a Fabric Device in the FortiGate Security Fabric. Connecting The FortiADC has successfully connected to the FortiGate server, but has not yet been authorized as a Fabric Device in the FortiGate Security Fabric. Authorization Rejected The FortiADC has been Deauthorized as a Fabric Device in the FortiGate Security Fabric. Not Available The FortiGate server was not reachable. Ensure the Upstream IP and system router is properly configured.
Not Connected The connection failed with unknown issue. If the status is not Connected, edit the FortiGate Security Fabric Setup connector accordingly to troubleshoot the connection issue.
|
|
To further troubleshoot the FortiGate Security Fabric Setup connector issues, you can use the |