


Deploying FortiSOAR Cloud
This section explains how to deploy FortiSOAR Cloud.
To deploy FortiSOAR Cloud:
- In the FortiCloud portal, ensure that you have a product entitlement for FortiSOAR Cloud, and note your account ID number:


After creating a FortiCloud account, wait for 30 minutes before moving to the next step.
- On FortiCare portal, click the FortiSOAR icon in the upper-left corner to access the FortiSOAR Cloud instance.

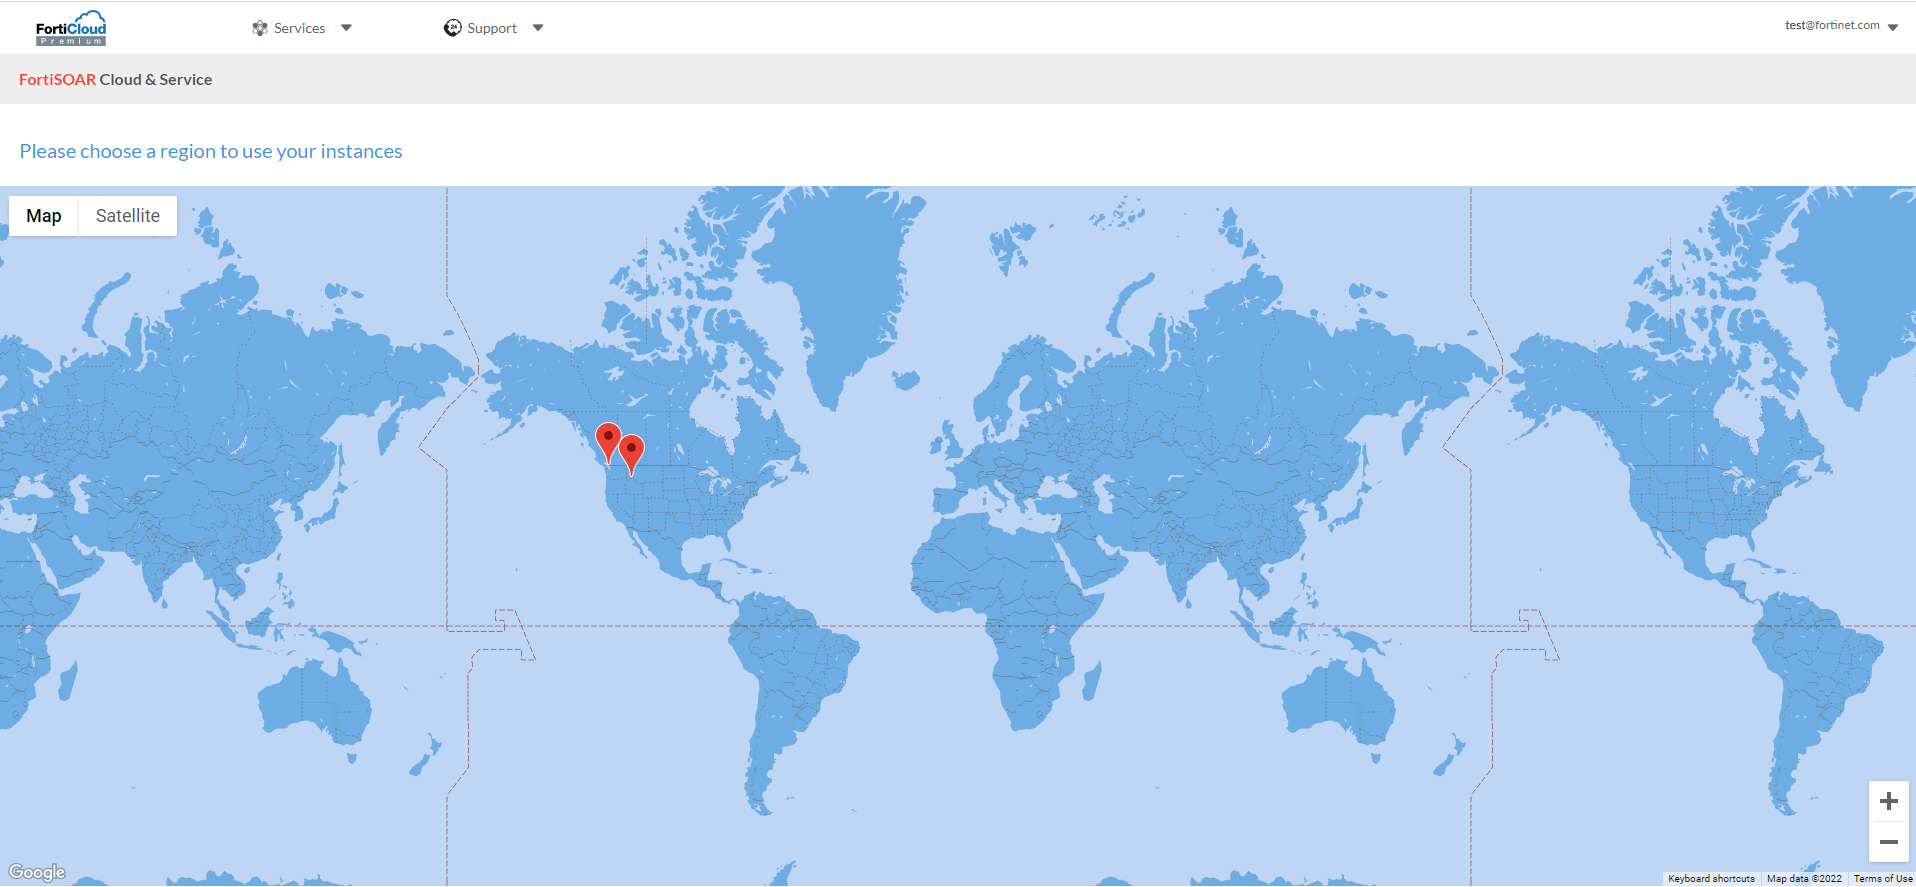
- Once you log onto FortiSOAR Cloud, you require to select your region for FortiSOAR Cloud:
- Once you select the region and expand the option, select the account which includes the FortiSOAR entitlement to open the menu drawer, then click Provision Instance.

The Account ID on the FortiSOAR portal represents the dedicated instance. Clicking Provision Instance displays the following confirmation dialog: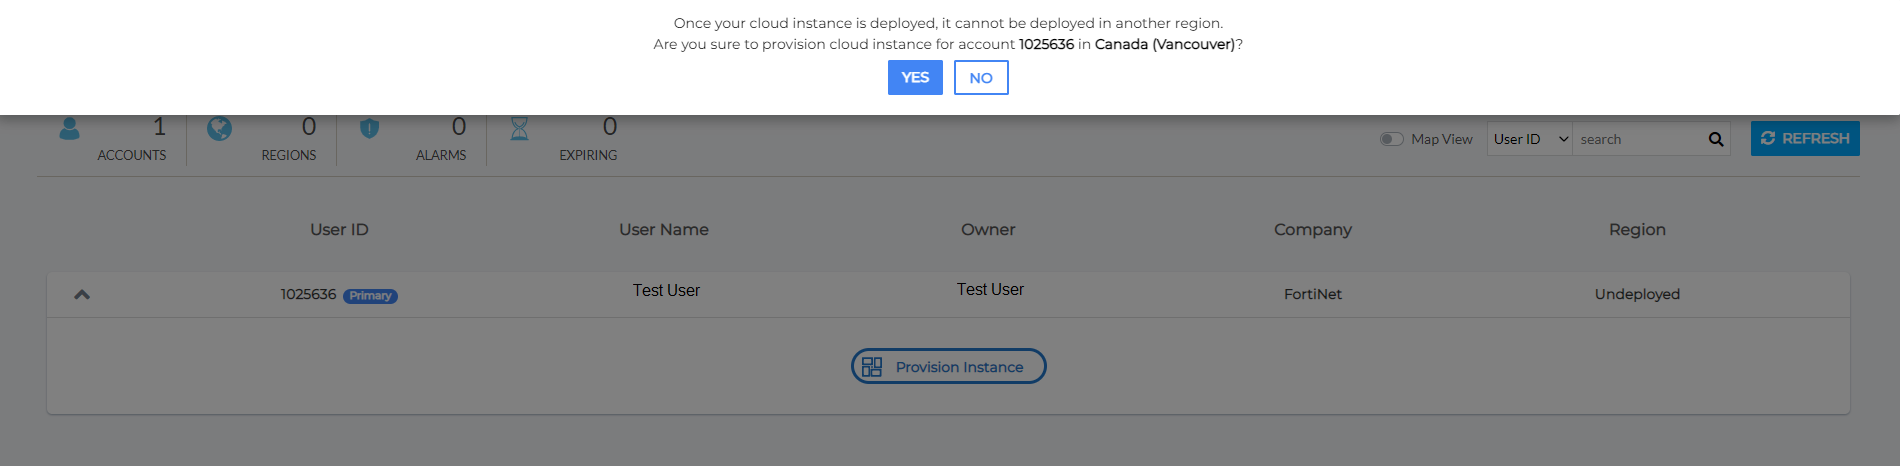
Clicking Yes starts the provisioning of the FortiSOAR Cloud instance, which gets provisioned in a few minutes.
During provisioning FortiSOAR Cloud performs certain initial configuration steps that are required for FortiSOAR. Initial configuration steps include running the automated non-interactive FortiSOAR configuration wizard, enabling the embedded Secure Message Exchange, triggering the heartbeat between FortiCloud and FortiSOAR etc.FortiSOAR VM provisioning is considered successful only after FortiCloud receives the first heartbeat from FortiSOAR.
If there are any provisioning failures, such as failures while FortiSOAR Cloud is performing initial configuration phase, using the automated non-interactive FortiSOAR configuration wizard, or failures while enabling the embedded Secure Message Exchange, then appropriate error messages are displayed on the FortiSOAR Cloud UI making it easier to understand the cause of the error , as shown in the following sample image: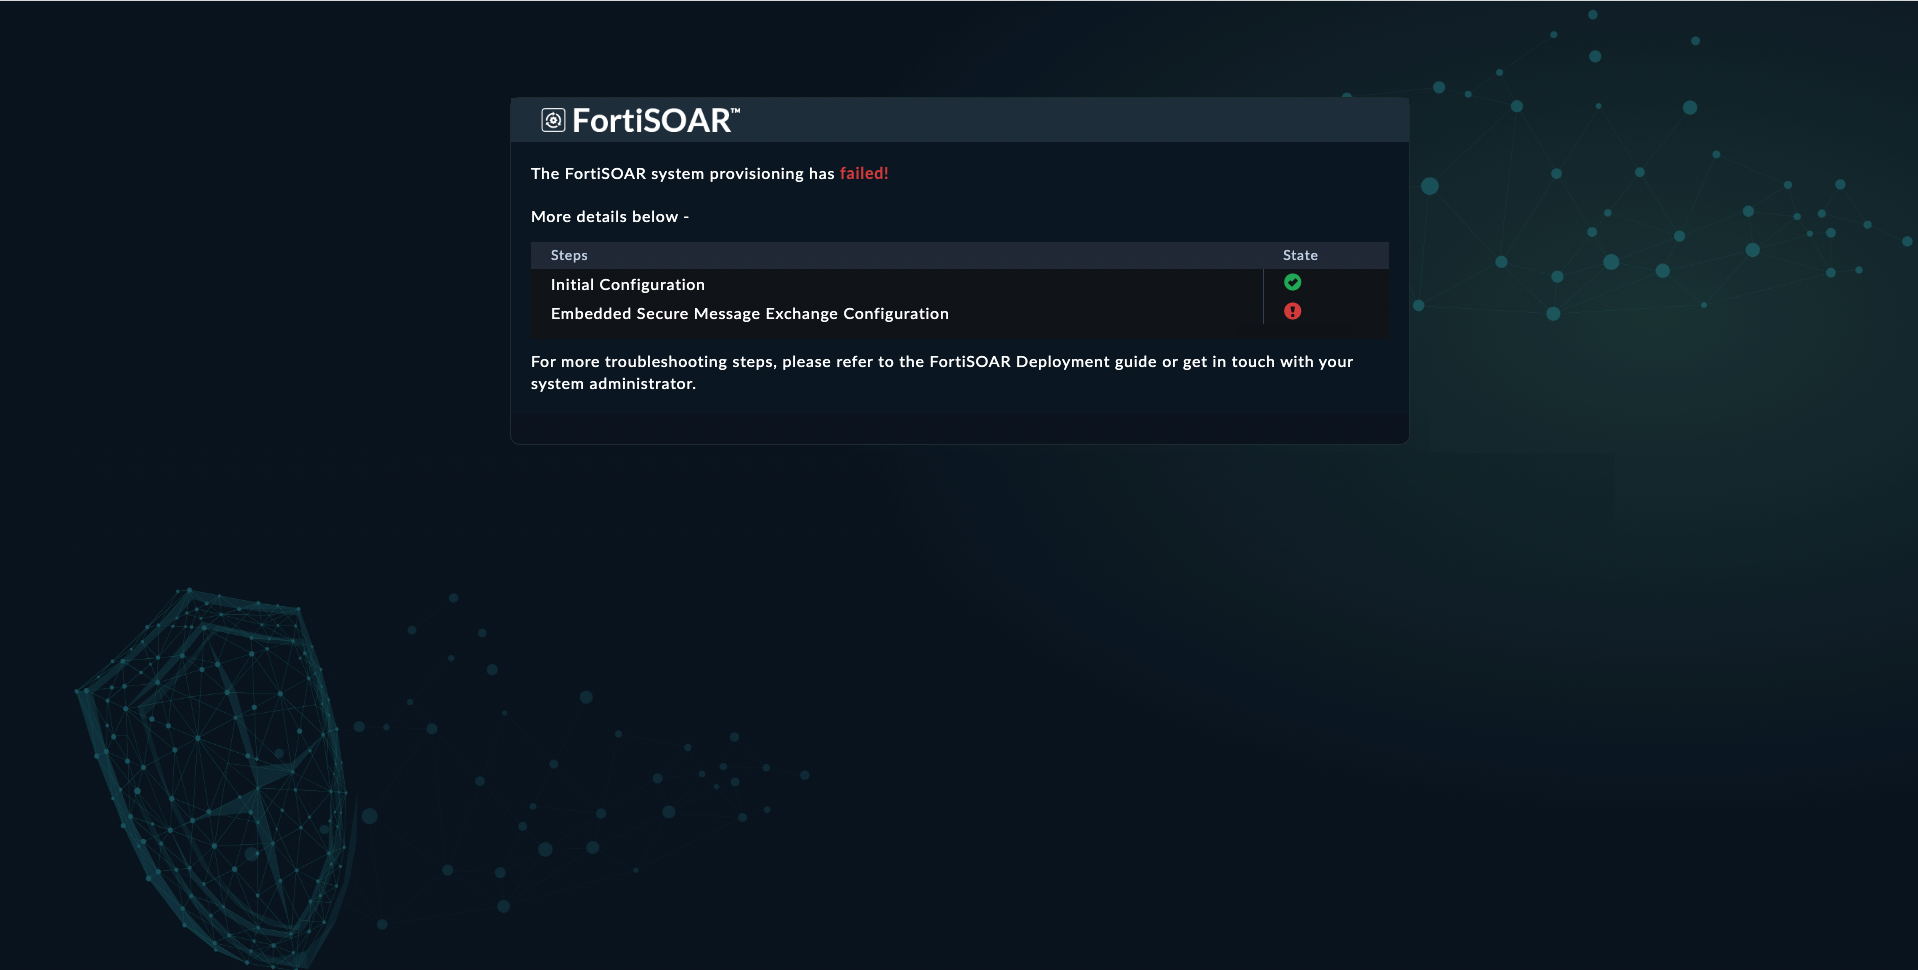
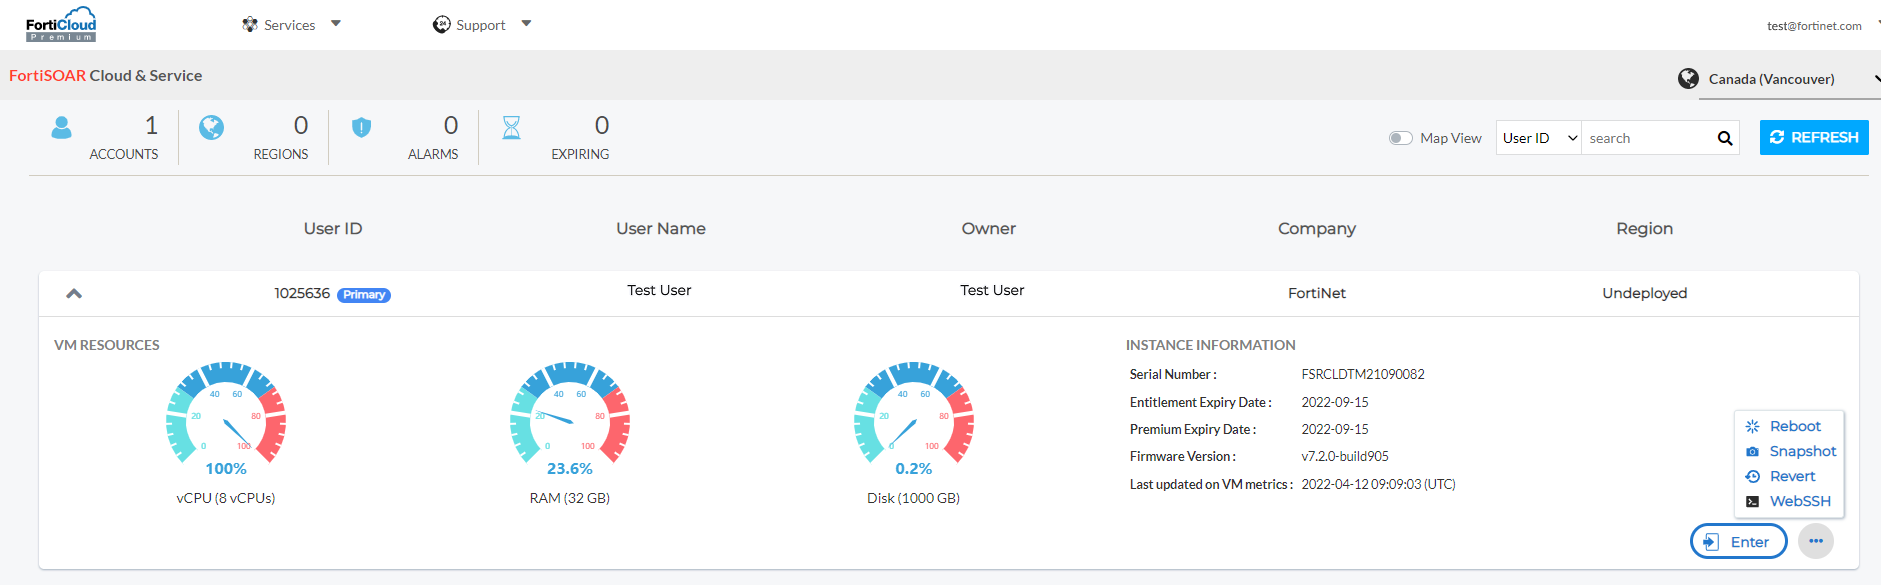
- Once provisioned, click Enter to access the FortiSOAR web GUI or select SSH to access the FortiSOAR console to begin using FortiSOAR Cloud. For more information, see the Beginning with FortiSOAR Cloud chapter.
Important: Once the VM is provisioned successfully, you must update the correct hostname value in the "Server_fqhn" global variable. You can updateServer_fqhnusing by opening the playbook designer and clicking Tools > Global Variables. In the 'Global Variables' list, click the edit icon besideServer_fqhnand in the Field Value field replace the current hostname value withfortisoar.localhost. The hostname will be<forticare_accountId>.fortisoar.forticloud.com.
|
|
Only the primary account holder can create secondary account holders in FortiCloud. The secondary account holder can log in to the same instance as a restricted user. The primary account holder can modify the admin profile for the secondary user. For more information see the Adding a secondary account chapter. |
Troubleshooting
Uniqueness error while adding a tenant in an MSSP setup using the Secure Message Exchange
The embedded Secure Message Exchange (SME) that is enabled by default in the case of FortiSOAR Cloud, throws the uniqueness error only when the tenant and master are in the same Cloud region.
Resolution
Before you configure your MSSP setup, ensure that you update the name of the SME on either the master node or the tenant node.