
Editing an interface
To edit an interface:
- Go to Network > Interfaces.
- Double-click an interface to edit it
The Edit Interface window opens.
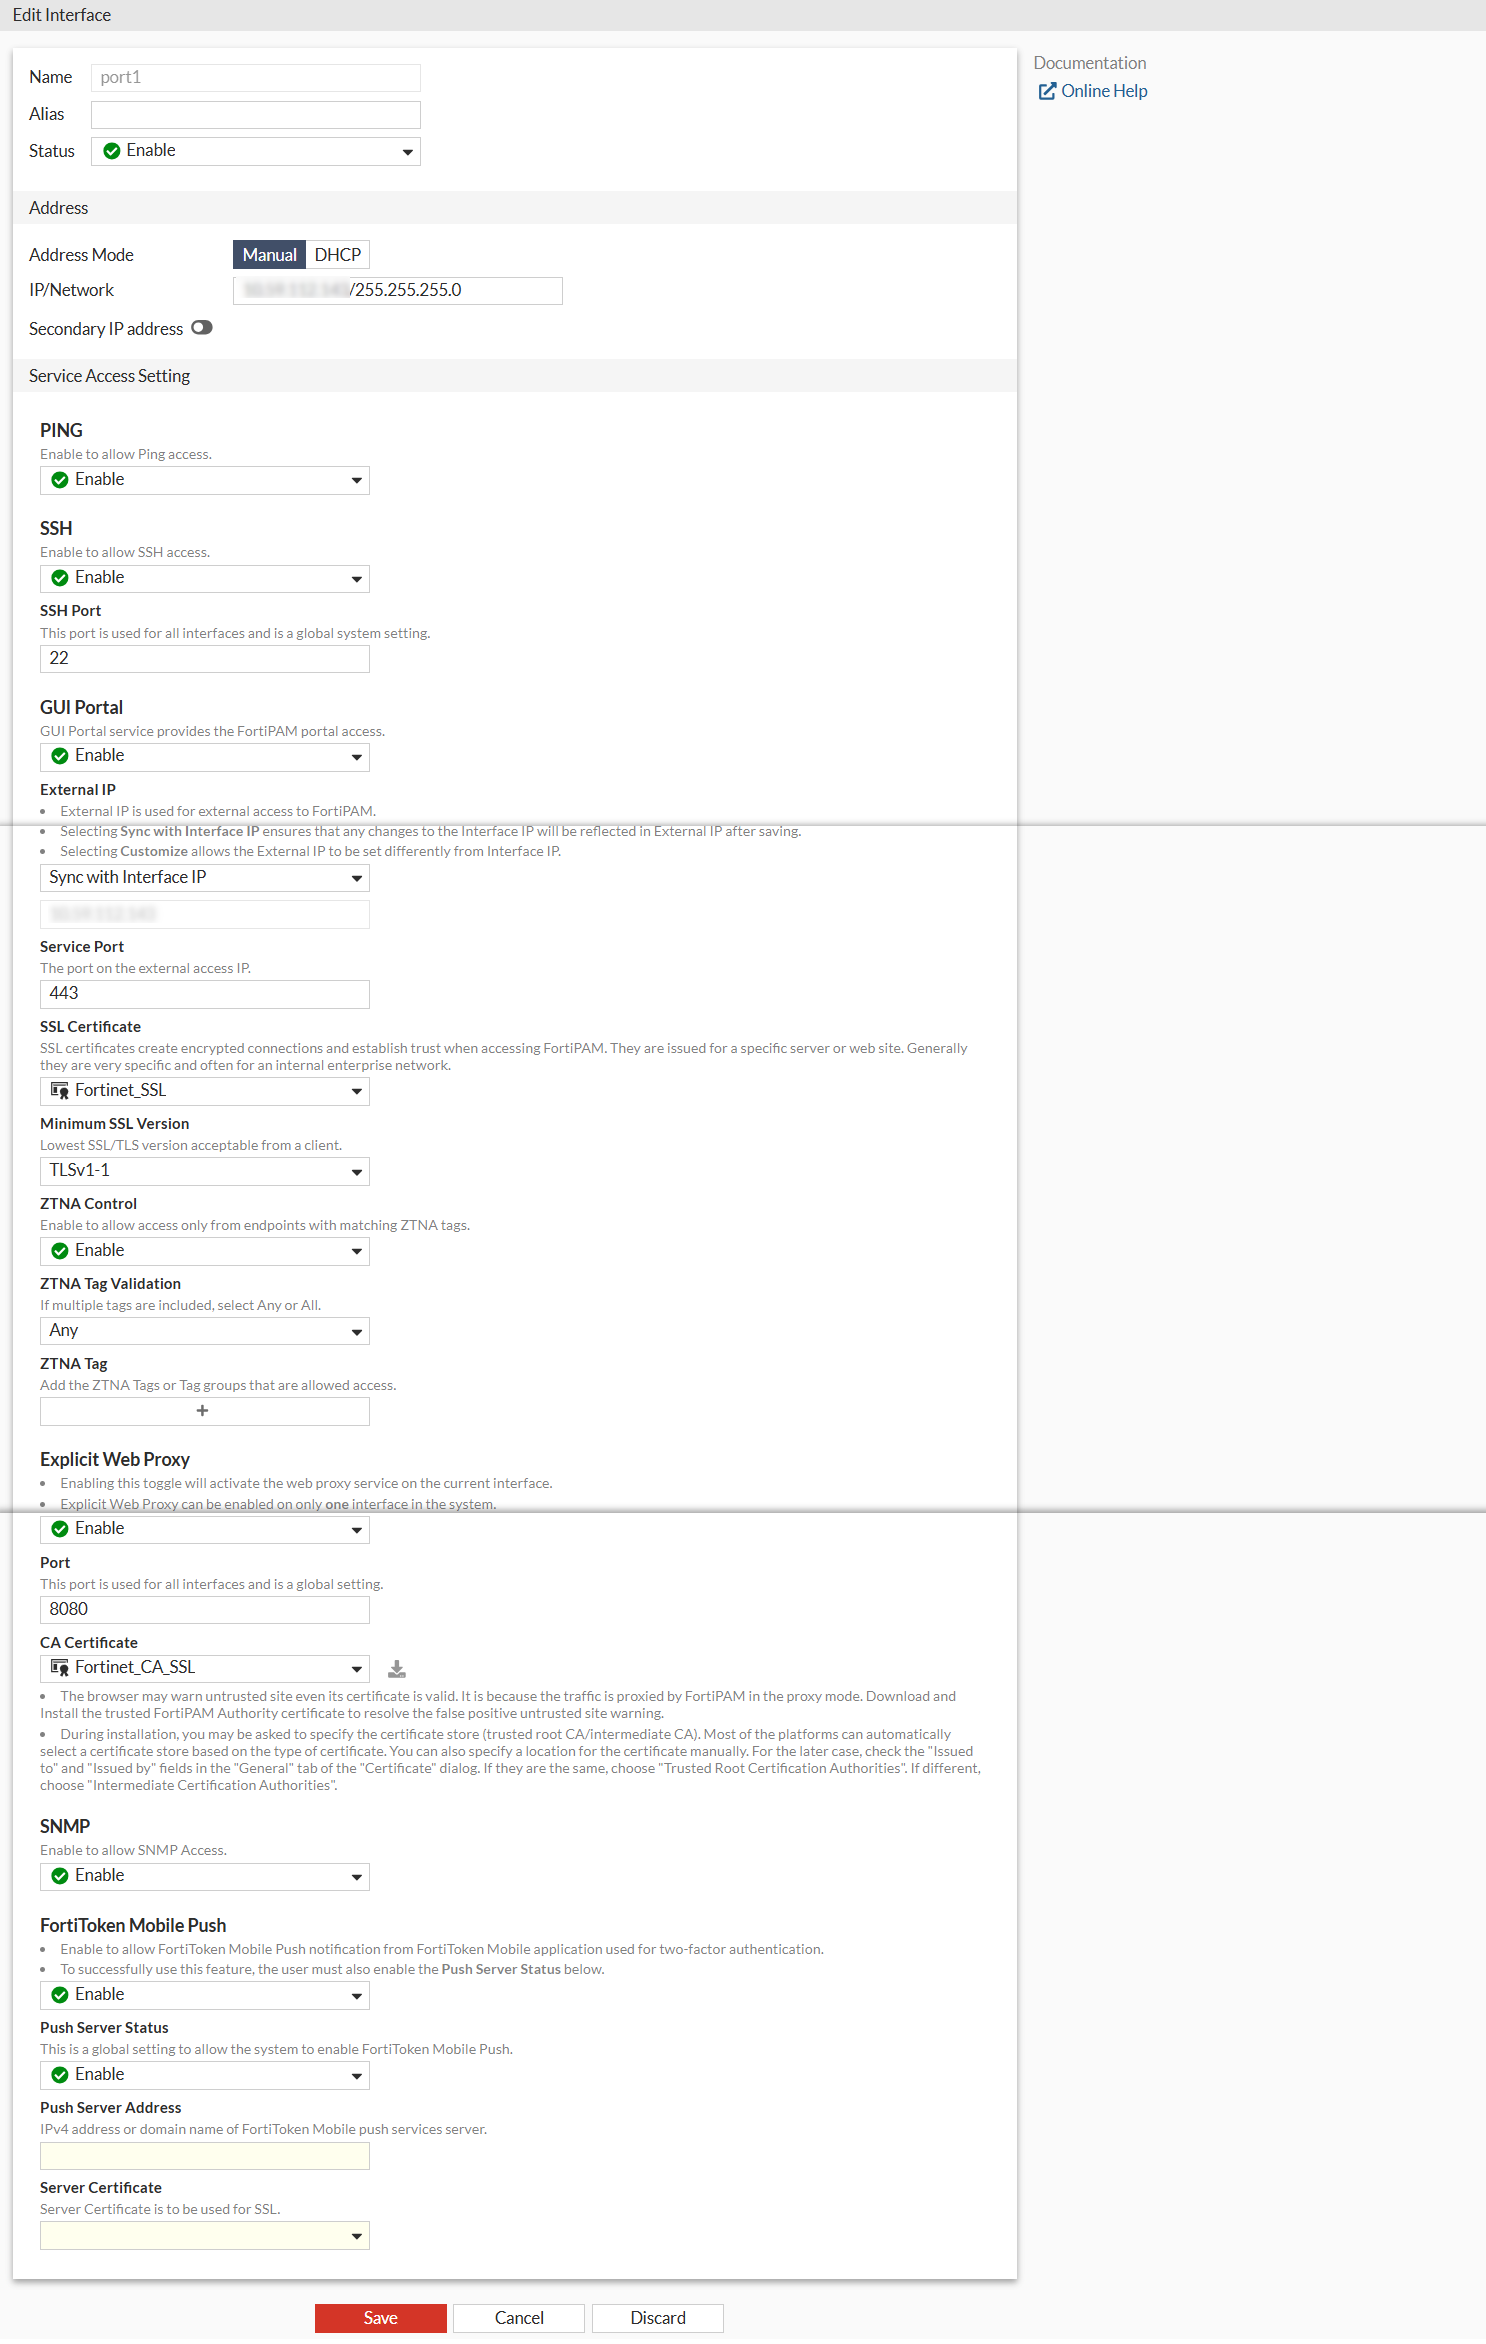
- Enter the following information:
Alias
Enter an alternate name for a physical interface on the FortiPAM device. This field appears when you edit an existing interface. The alias does not appear in logs.
The maximum length of the alias is 25 characters.
Status
From the dropdown, enable/disable the interface.
Address
Addressing Mode
Select the addressing mode for the interface.
Manual: Add an IP address and netmask for the interface.
DHCP: Get the interface IP address and other network settings from a DHCP server.
IP/Network
If Addressing mode is set to Manual, enter an IPv4 address and subnet mask for the interface.

FortiPAM interfaces cannot have IP addresses on the same subnet.
Note: The option is only available when the Addressing mode is Manual.
Retrieve default gateway from server
Enable to retrieve the default gateway from the server.
The default gateway is added to the static routing table.
Note: The option is enabled by default.
Note: The option is only available when the Addressing mode is DHCP.
Distance
Enter the administrative distance for the default gateway retrieved from the DHCP server (default = 5, 1 - 255).
Distance specifies the relative priority of a route when there are multiple routes to the same destination. A lower administrative distance indicates a more preferred route.
Note: The option is only available when Retrieve default gateway from server is enabled.
Secondary IP address
Add additional IPv4 addresses to this interface and select from PING, SSH, SNMP, and FTM.
Note: The option is disabled by default.
Note: The option is only available when the Addressing mode is Manual.
Service Access Setting
By default, all the options are disabled.
PING
From the dropdown, enable to allow PING access.
SSH
From the dropdown, enable to allow SSH access.
SSH Port
Enter the SSH port used for all the interfaces (a global system setting).
Note: The option is only available when SSH is enabled.
GUI Portal
From the dropdown, enable the GUI portal.
The GUI portal service provides the FortiPAM portal access.
Each interface can have more than one matched external access GUI Portal configuration, but the FortiPAM GUI displays the best matched configuration on GUI including its VIP.
If the current interface does not have a matched access portal, you can also create a new access portal on the interface page.
External IP
The external IP address is used for external access to FortiPAM.
Selecting Sync with Interface IP ensures that any changes to the interface IP address will be reflected in external IP address after saving.
Note: To use Sync with Interface IP,
extintfmust be configured to a specific interface in the CLI (notany).Selecting Customize allows the external IP address to be set differently from the interface IP address.
Note: The option is only available when GUI Portal is enabled.
Service Port
Enter the port number on the external access IP address.
Note: The option is only available when GUI Portal is enabled.
SSL Certificate
From the dropdown, select an SSL certificate.

Select + to create a new SSL certificate.
SSL certificates create encrypted connections and establish trust when accessing FortiPAM.
They are issued for a specific server or web site.
Generally, they are very specific and often used for an internal enterprise network.
Note: The option is only available when GUI Portal is enabled.
Minimum SSL Version
Lowest SSL/TLS version acceptable from a client:
Follow system global setting: As set up in Settings when editing system settings.
SSLv3
TLSv1
TLSv1-1 (default)
TLSv1-2
TLSv1-3
ZTNA Control
Enable to allow access only from endpoints with matching ZTNA tags.
Note: The option is only available when GUI Portal is enabled.
ZTNA Tag Validation
If multiple tags are included, select Any or All.
Note: The option is only available when ZTNA Control is enabled.
ZTNA Tag
Select +, from Select Entries, add ZTNA tags or tag groups that are allowed access to FortiPAM.
Note: The option is only available when ZTNA Control is enabled.
Explicit Web Proxy
From the dropdown, enable to activate the web proxy service on the current interface.
Note: Explicit web proxy can be enabled on only one interface in the system.
Port
The port number for all interfaces (a global setting).
Note: The option is only available when Explicit Web Proxy is enabled.
CA Certificate
From the dropdown, select a CA certificate.
Select + to create a certificate.
Use the search bar to look up a CA certificate.
The browser may warn untrusted sites even if its certificate is valid. This is because the traffic is proxied by FortiPAM in the proxy mode.
Download and install the trusted FortiPAM authority certificate to resolve the false positive untrusted site warning.
During installation, you may be asked to specify the certificate store (trusted root CA/intermediate CA).
Most platforms can automatically select a certificate store based on the type of certificate.
You can also specify a location for the certificate manually. For the latter case, check the Issued to and Issued by fields in the General tab of the Certificate dialog. If they are the same, choose Trusted Root Certification Authorities. If different, select Intermediate Certification Authorities.
Note: The option is only available when Explicit Web Proxy is enabled.
SNMP
From the dropdown, enable to allow SNMP access.
FortiToken Mobile Push
From the dropdown, enable to allow FortiToken Mobile Push notification from FortiToken Mobile application used for 2FA.
Note: To successfully use FortiToken Mobile Push, you must also enable Push Server Status.
Push Server Status
Enable/disable FortiToken Mobile push (a global setting).
Push Server Address
The IPv4 address or domain name of the FortiToken Mobile push services server.
Note: The option is only available when Push Server Status is enabled.
Server Certificate
From the dropdown, select the server certificate to be used for SSL.
Note: The option is only available when Push Server Status is enabled.
- Click Save.