
Setup wizard
The FortiPAM setup wizard gathers all essential settings to setup a FortiPAM from scratch and provide useful information to the new users.
To access the setup wizard, go to System > Setup Wizard.
Prerequisites
-
Installed FortiPAM
-
The GUI IP address is already set up
If this is a fresh FortiPAM setup, the wizard is the default page once you log in to FortiPAM.
For an existing FortiPAM instance, the wizard is available in System.
Setting up FortiPAM
- Go to System > Setup Wizard.
The Network tab opens.
The following information is displayed:
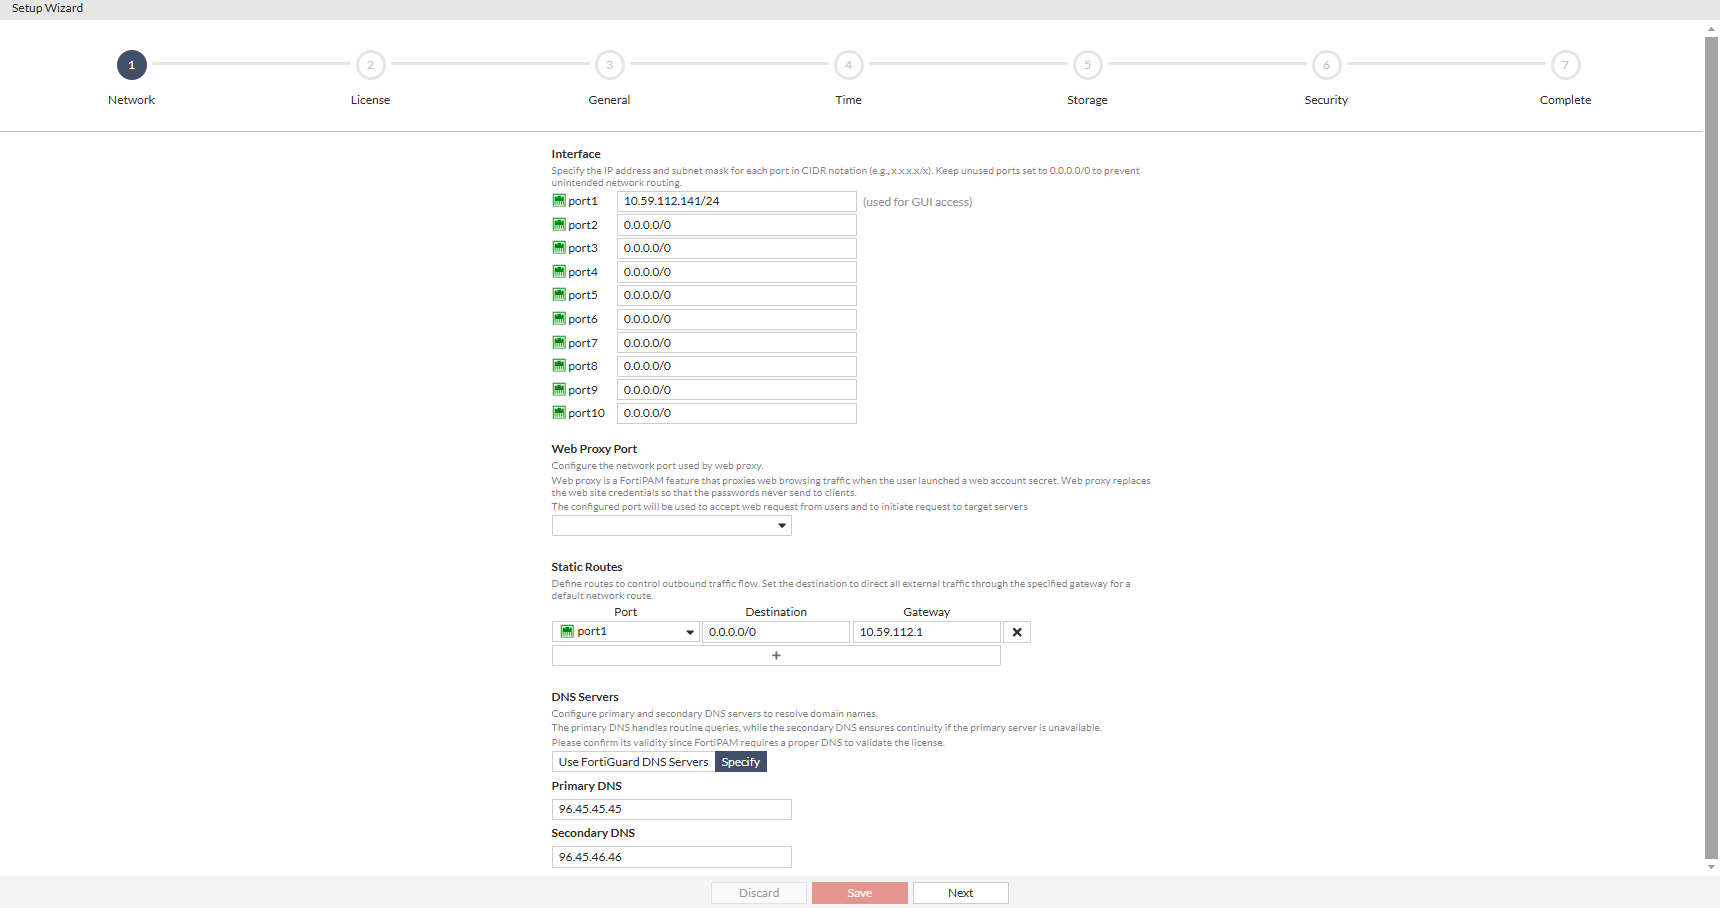
Interface
Specify the IP address and the subnet mask for each port in CIDR notation, e.g.,
x.x.x.x/x.Keep the unused ports set to
0.0.0.0/0to prevent unintended network routing.Web Proxy Port
Configure the network port used by the web proxy.
Web proxy allows FortiPAM to proxy the web browsing traffic when you launch a web account secret.
Web proxy replaces the web credentials so that the password is never available to the client.
The configured port is used to accept web requests to initiate request to the target server.
Static Routes
Define routes to control the outbound traffic.
Set the destination to direct all the external traffic through the specified gateway for the default network route.
DNS Servers
Configure the primary and the secondary DNS servers to resolve the domain names.
The primary DNS handles routine queries while the secondary DNS ensures continuity if the primary server is unavailable.
FortiPAM requires DNS to validate the license.
- Click Next.
The License tab opens.
The License tab displays how to update the license
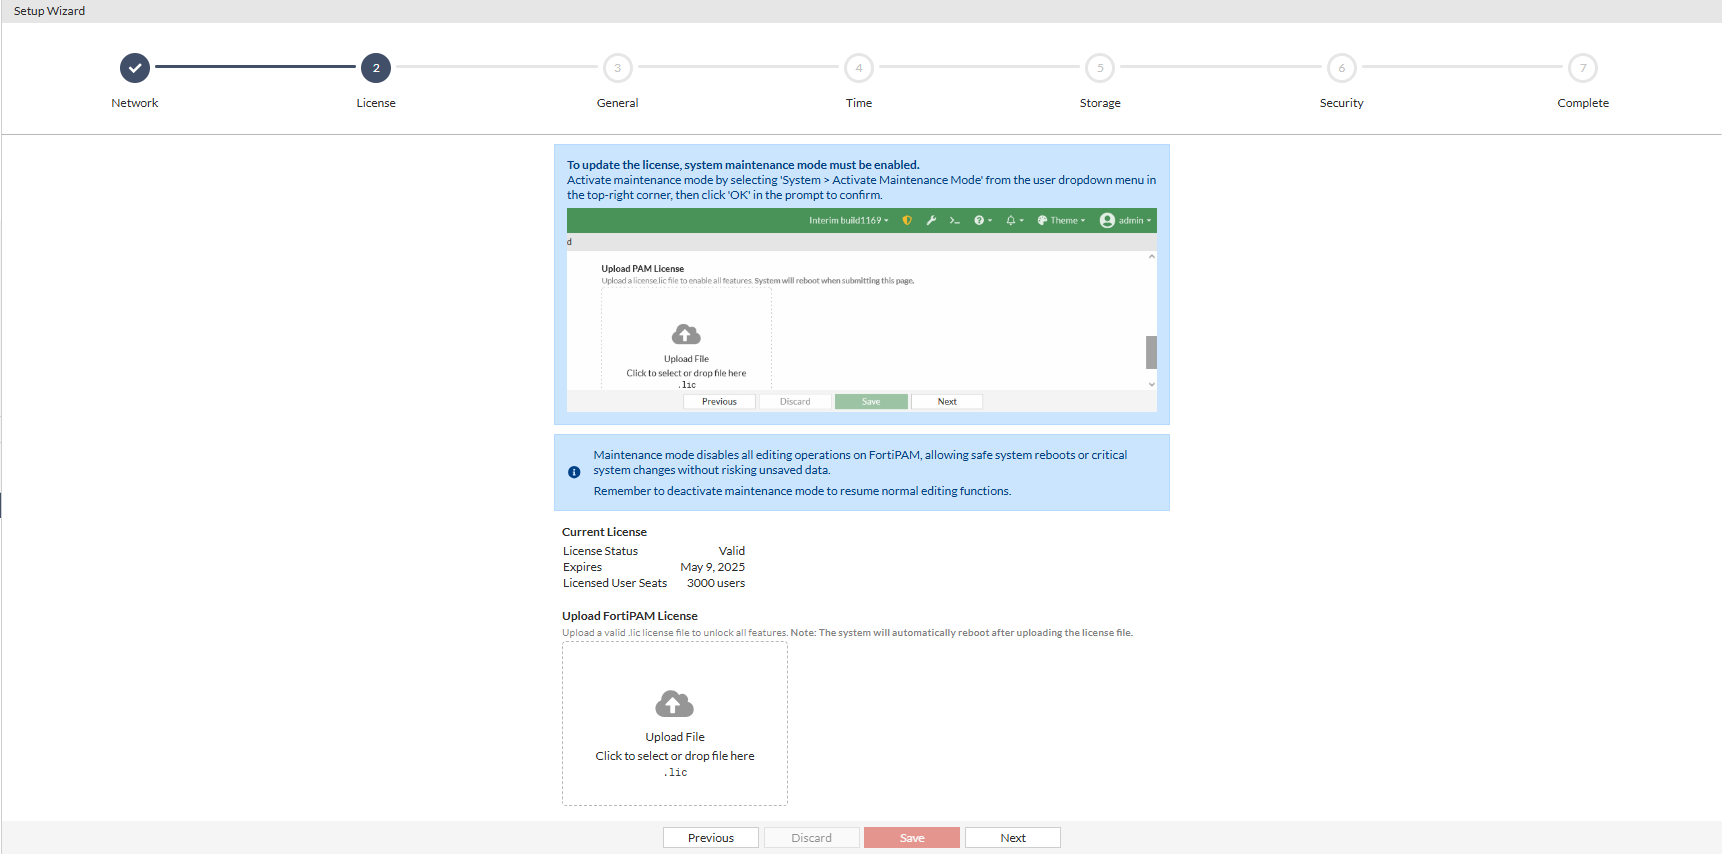
See FortiPAM license.
To update the license, maintenance mode must be enabled. See Maintenance mode.
The maintenance mode disables editing operations on FortiPAM to allow safe system reboots or critical system changes without risking the unsaved data.
Note: Remember to deactivate the maintenance mode to resume normal editing functions.
In Upload FortiPAM License, you can upload a valid
.licfile. - Click Next.
The General tab opens.
The following information is available.
Hostname
Specify the hostname for the FortiPAM unit.
Max Secret Launching Duration
Set the maximum duration for sessions.
Any session exceeding the time list is terminated automatically (default = 120).
For example, if set to 60 minutes and you launch a secret through remote desktop and forget to end the session, the session will be automatically terminated after 60 minutes.
Live Recording
Enable live recording to monitor the user session in real-time (default = disable).
If disabled, recordings are accessible only after the session ends.
- Click Next.
The Time tab opens.
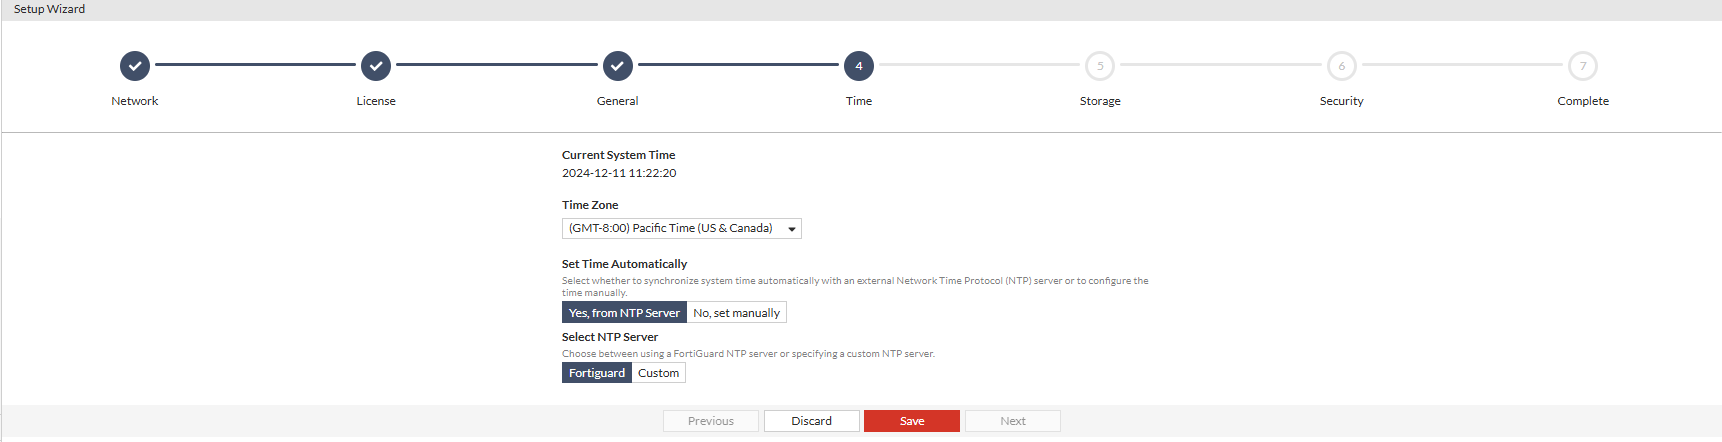
The following information is displayed.
Current System Time
The current system time.
Timezone
From the dropdown, select the timezone.
Set Time Automatically
Select whether to synchronize the system time automatically with an external Network Time Protocol (NTP) server or to configure the time manually.
When you select No, set manually, enter the date and time.
Select NTP Server
Choose between using a FortiGuard NTP server or specify a custom NTP server.
When you select Custom, enter the NTP server IP address.
-
Click Next.
The Storage tab opens.
Note: FortiPAM requires two disks to work; one for log and another for video.
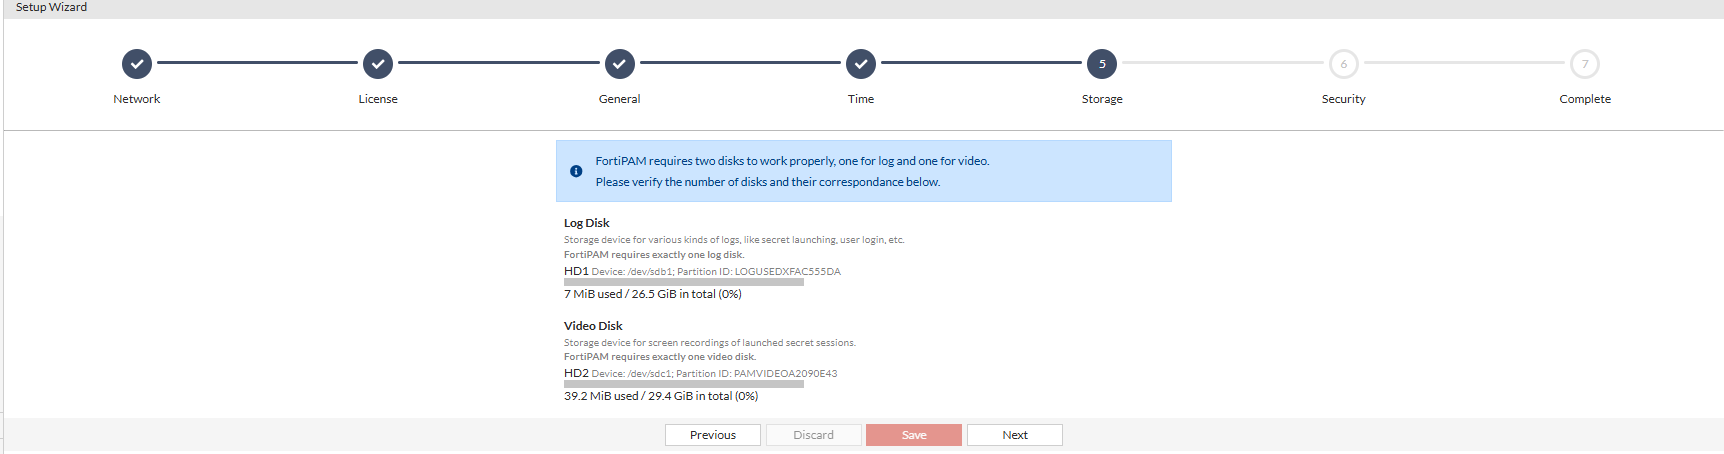
The following information is displayed.
Log Disk
The storage device for various kinds of logs, e.g., secret launching, user login, etc.
Video Disk
The storage device for screen recording the launched secret sessions.
Note: FortiPAM requires exactly one video disk.
- Click Next.
The Security tab opens.
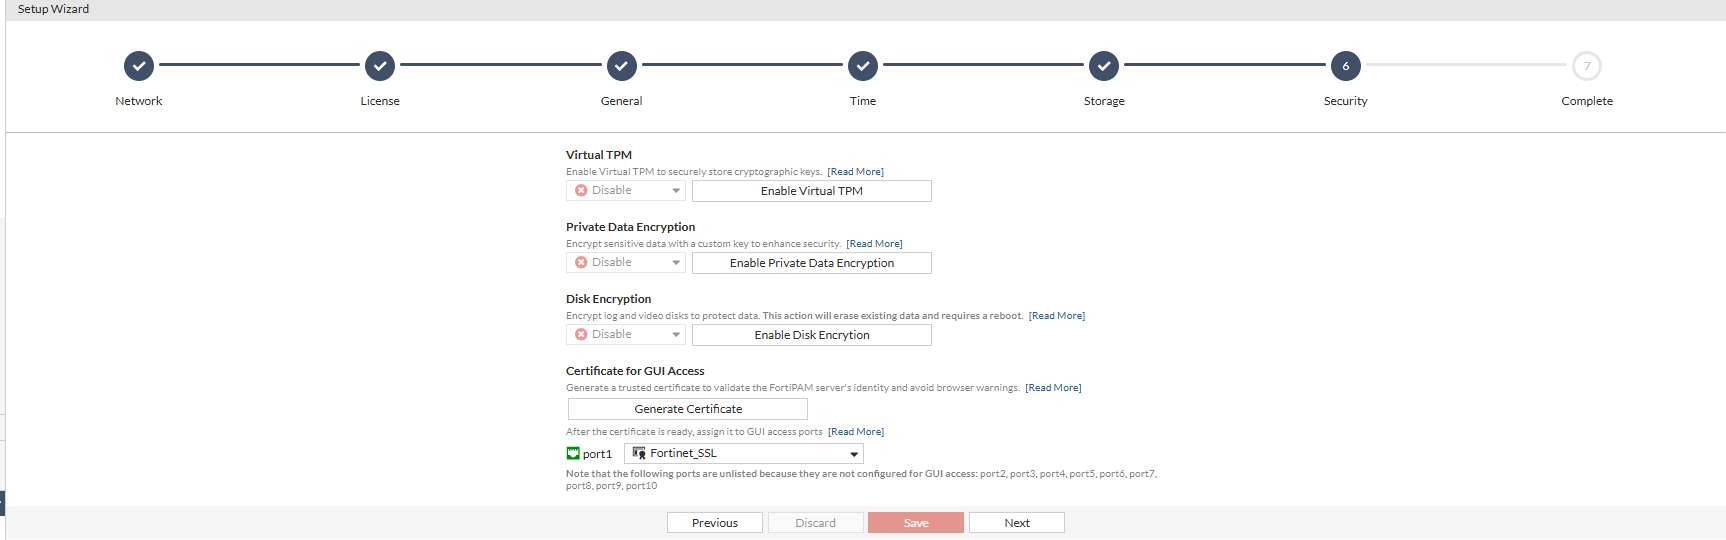
The following information is displayed.
Virtual TPM
Enable vTPM to securely store cryptographic keys.
Click Enable Virtual TPM to see the related CLI command.
  config system global
   set v-tpm enable
  end
You can either run the command yourself or click Run the Command in CLI. This opens a CLI console and the command runs automatically.
Note: Maintenance mode is enabled.
Private Data Encryption
Encrypt sensitive date with a custom key to enhance security.
Click Enable Private Data Encryption to see the related CLI command.
execute disk encrption enable
You can either run the command yourself or click Run the Command in CLI. This opens a CLI console and the command runs automatically.
Note: Maintenance mode is enabled.
Disk Encryption
Encrypt log and video disks to protect data.
Note: The action erases existing data and requires a reboot.
Click Enable Disk Encryption to see the related CLI command.
execute disk encryption enable
You can either run the command yourself or click Run the Command in CLI. This opens a CLI console and the command runs automatically.
Note: Maintenance mode is enabled.
Certificate GUI Access
Generate a trusted certificate to validate the FortiPAM server identity and avoid browser warnings.
Select Generate Certificate.
After the certificate is ready, assign it to the GUI access ports.
Note: Ports not configured for GUI access are not listed.
- Click Next.
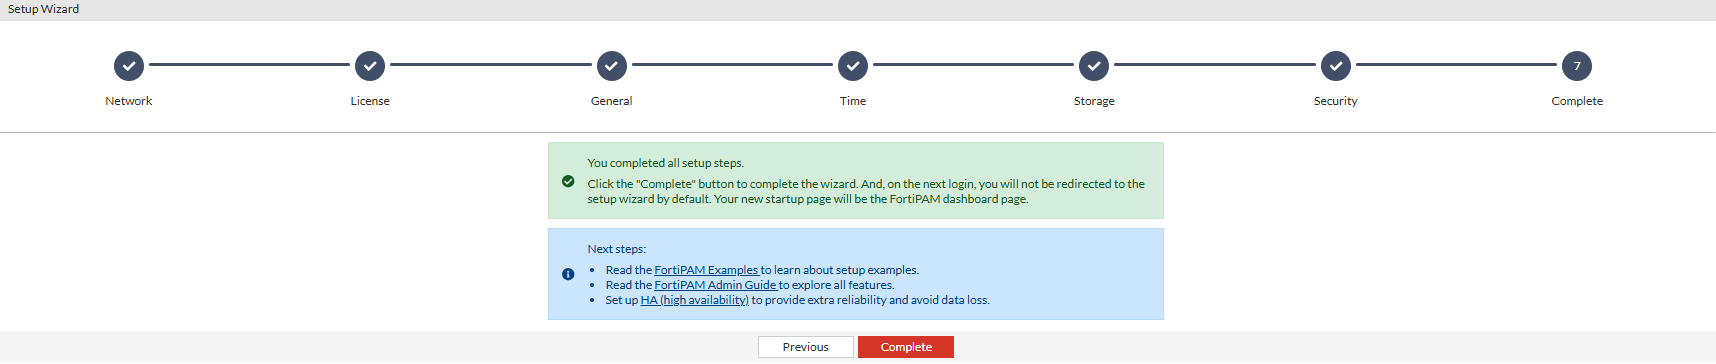
- Click Complete.