


Tables
Many GUI pages contain tables of information that can be filtered and customized to display specific information in a specific way.
Some tables allow content to be edited directly on that table.
Navigation
Some tables contain information and lists that span multiple pages.
Navigation controls are available at the bottom of the page.
Filters
Filters are used to locate a specific set of information or content in a table. They can be particularly useful for locating specific log entries. The filtering options vary, depending on the type of information in the log.
Depending on the table content, filters can be applied using the filter bar, using a column filter, or based on a cell's content. Some tables allow filtering based on regular expressions.
Administrators with read and write access can define filters. Multiple filters can be applied at one time.
To create a column filter:
- When available on a GUI page, select + in the search bar.
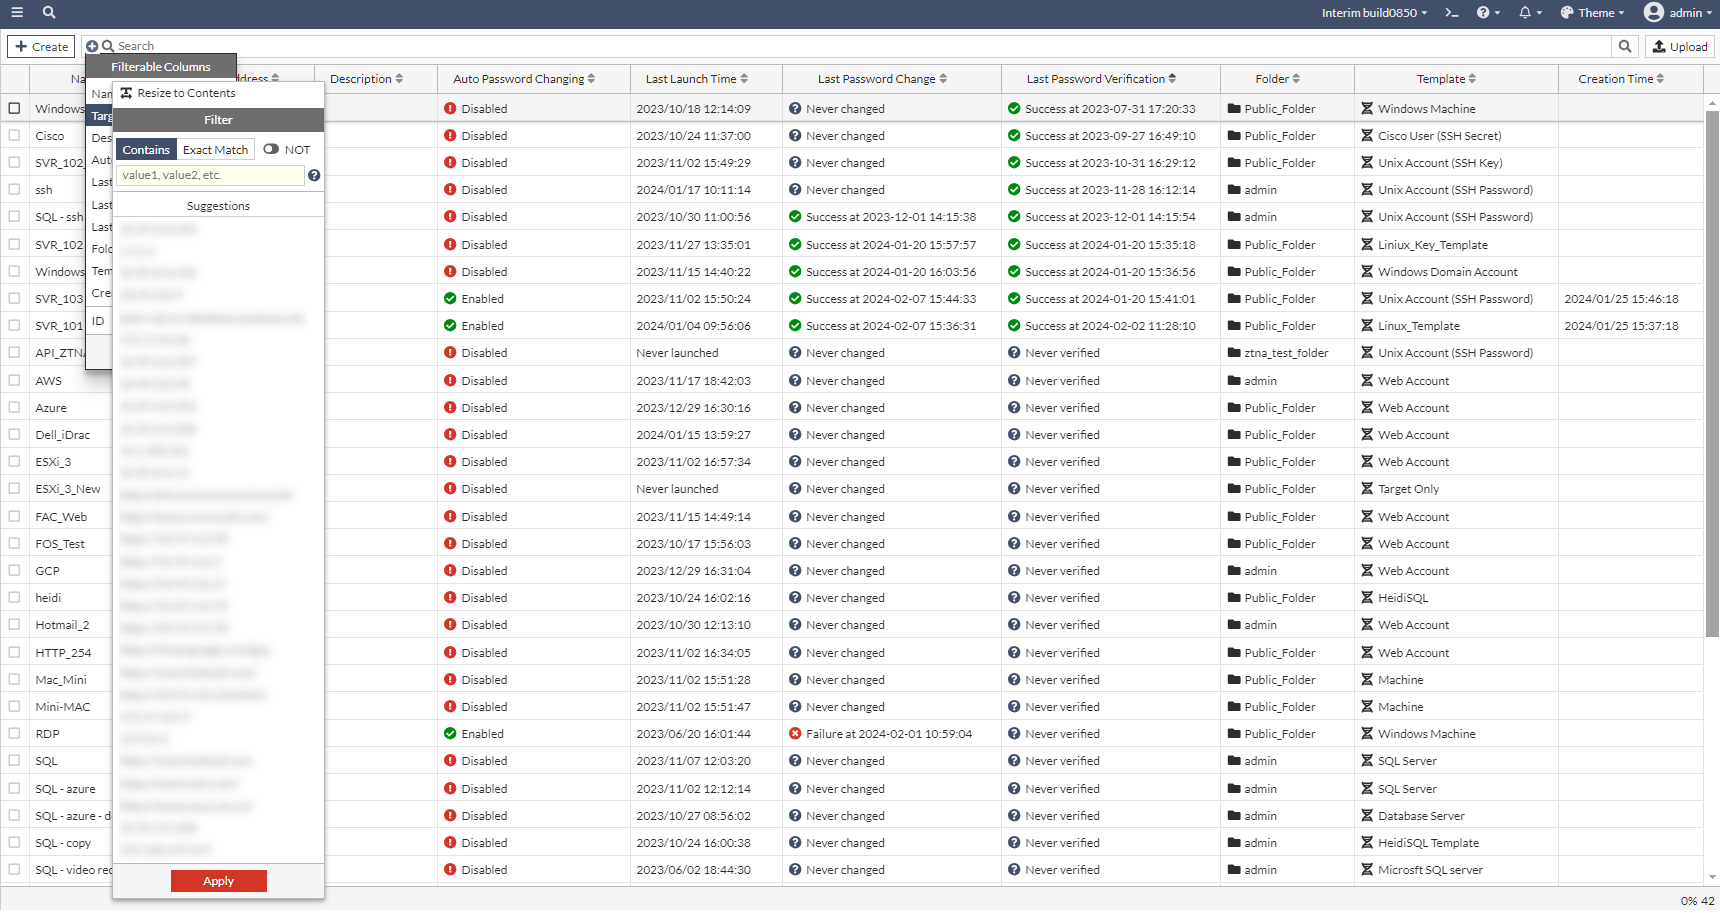
Alternatively, select the Filter/Configure Column (
 ) icon when you hover on the right of the column header, and skip to step 3.

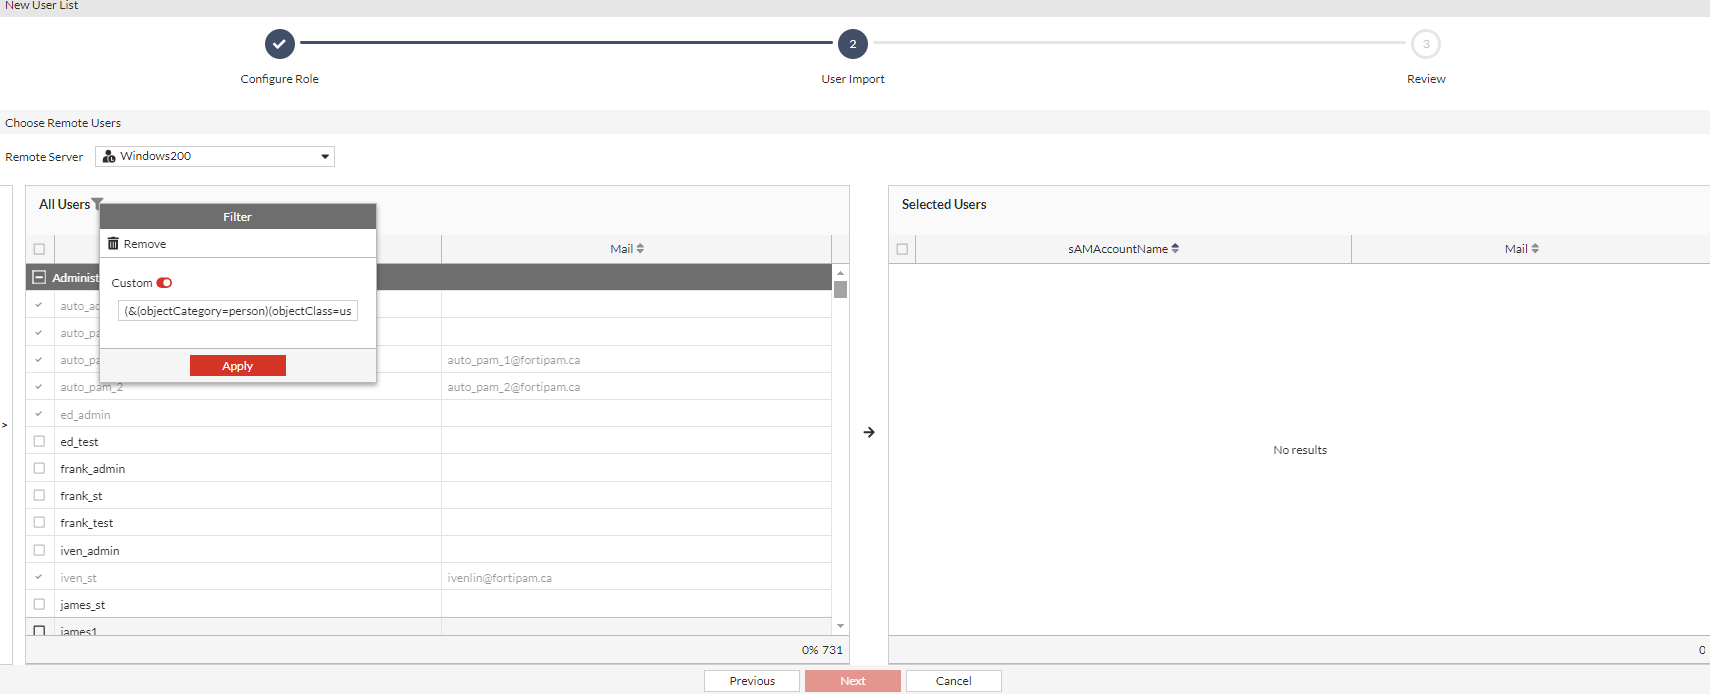
When importing users as shown in Importing LDAP users, the Filter/Configure Column (
) icon is available next to All Users. - Select one of the columns as a filter.
- In the window that opens, you can set combinations of Contains, Exact Match, and NOT.
When importing users as shown in Importing LDAP users, the following options are available for All Users and Group:
Contains
End With
Exact Match
None
Start With

You can also create a custom filter by enabling Custom and setting up a filter:
In the Replacement Message page, the following options are available:
Contains
Does Not Contain
Regex
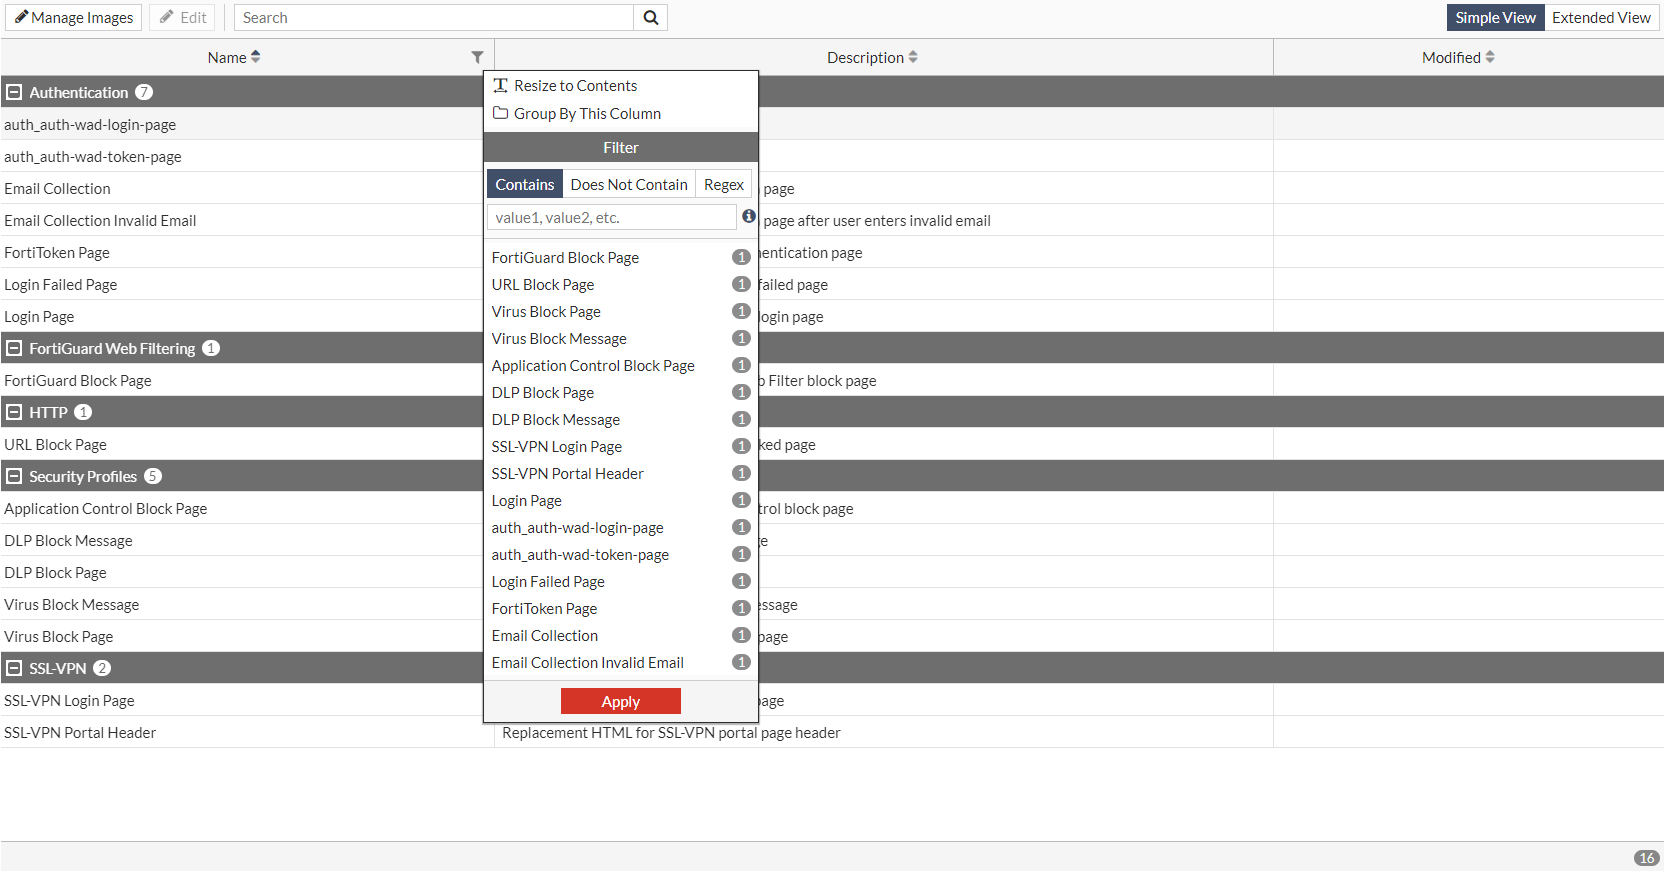
- Either enter a term or terms separated by
","or|, or select from the list that appears. - Click Apply.
|
|
You can combine multiple filters by selecting + and repeating steps 2 to 5 for every new filter that you require. Alternatively, select Filter/Configure Column on the right of the column header, and repeat steps 3 to 5 for every new filter that you require. |
Column settings
Columns can be rearranged, resized, and added or removed from tables.
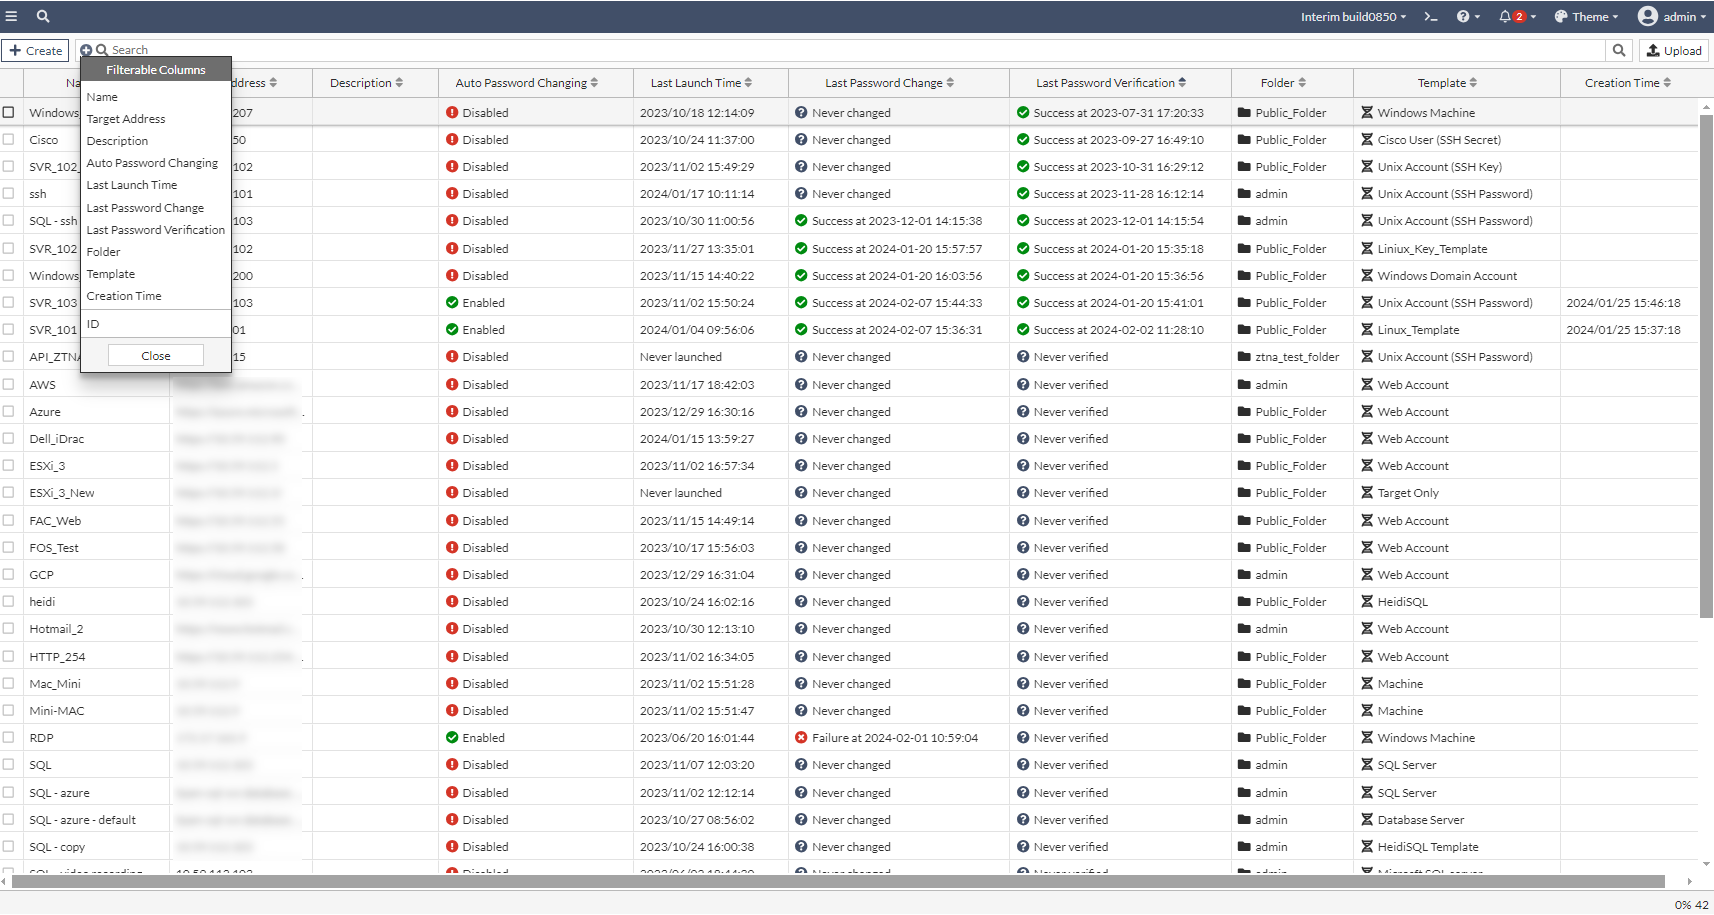
To add or remove columns:
- Right-click a column header, or click the gear icon on the left side of the header row that appears when hovering the cursor over the headers.
- Select columns to add or remove.
- Click Apply.
To rearrange a columns in a table:
- Click and drag the column header.
To resize a column to fit its contents:
- Select Filter/Configure Column from the column header.
- In the window that opens, select Resize to Contents.
- Click Apply.
To group contents by a column:
- Select Filter/Configure Column from the column header.
- In the window that appears, select Group By This Column.
- Click Apply.
To resize all of the columns in a table to fit their content:
- Right a column header, or click the gear icon on the left side of the header row that appears when hovering the cursor over the headers.
- Click Best Fit All Columns.
To reset a table to its default view:
- Right-click a column header, or click the gear icon on the left side of the header row that appears when hovering the cursor over the headers.
- Click Reset Table.

Resetting a table removes applied filters.
To arrange contents in a column by ascending or descending order:
- Click the up or down arrow to arrange contents in a column by ascending or descending order respectively.
To select multiple entries in a table:
- Select the first entry.
- Press and hold
ctrl, select the second item, and so on.