Example 5: FortiGate IPsec as SP
- On the FIC portal, click Applications > SSO > Add SSO Application.
-
In the General Information and Interface Detail sections, make the required entries and selections.
-
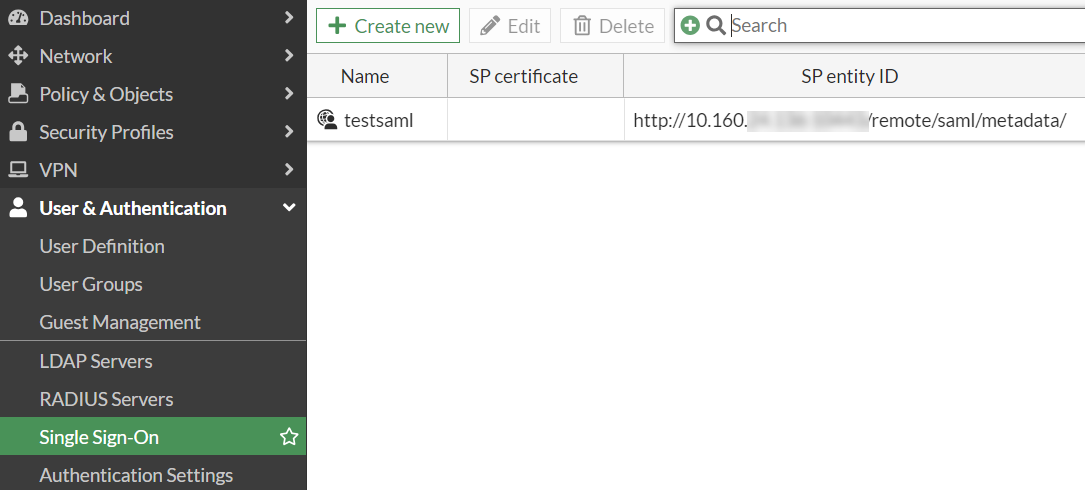
Leave the FIC GUI page open, launch the FortiGate GUI, and click User & Authentication > Single Sign-On.
-
In the Address field, enter the IPsec address that you want to use. In this example, we use Port 9443 for the
auth-ike-saml-port, so make sure to append the port number to the address. Then take note of the Entity ID, Assertion consumer service URL, Single logout service URL, and copy and paste them into the SP Metadata section in the FIC SAML app that you have added in Steps 1 through 2.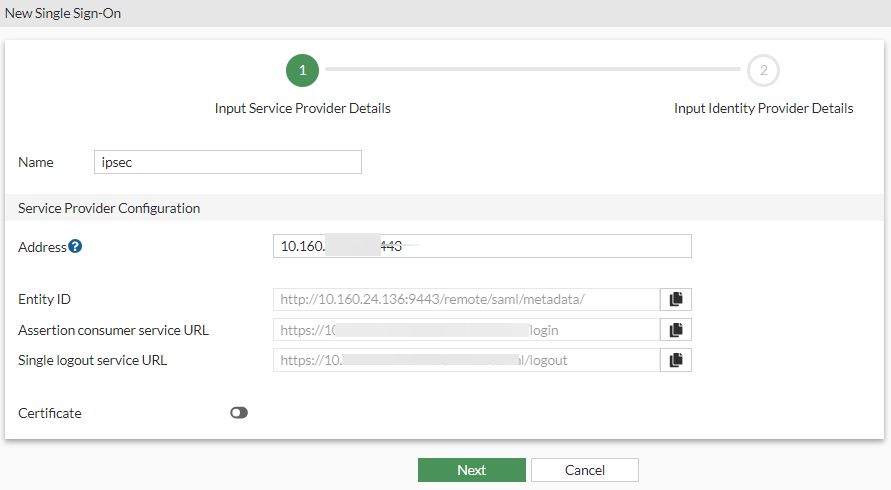
-
Click Next.
-
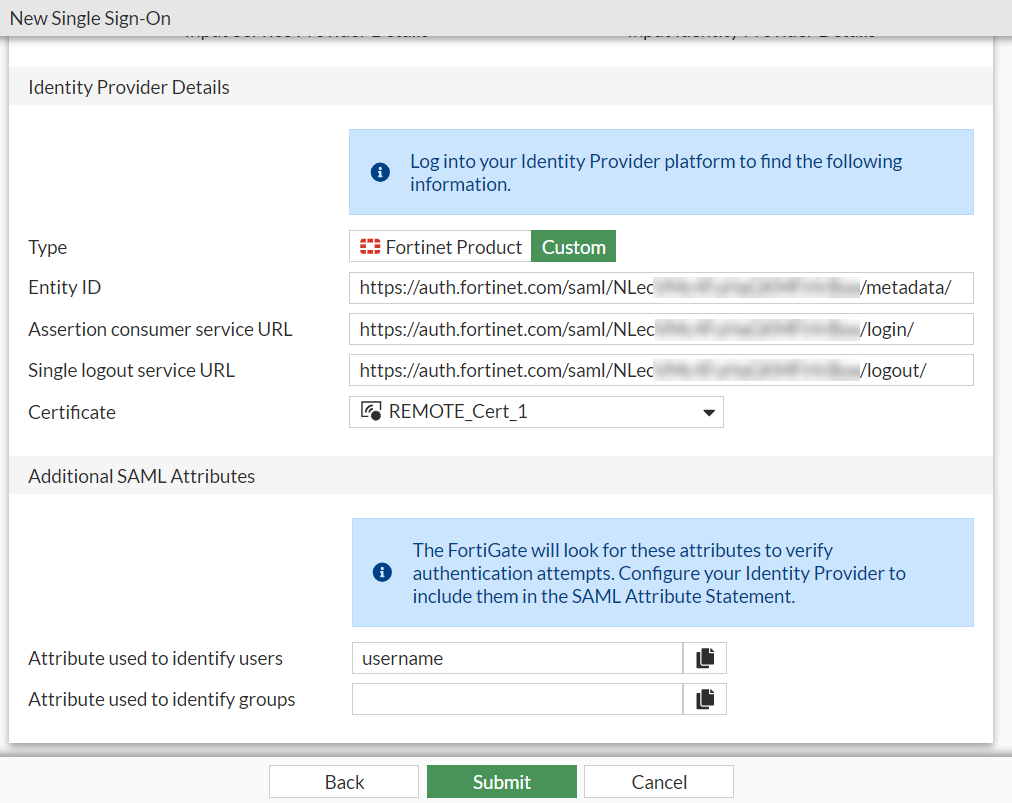
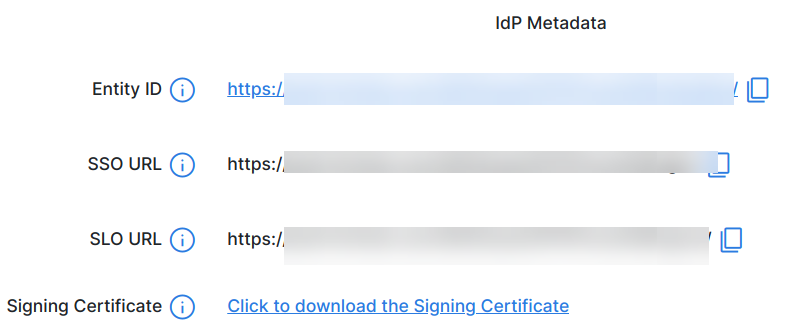
Then go back to the FortiGate GUI, copy the Entity ID, SSO URL, and SLO URL from the IdP Metadata section on FIC to the Identity Provider Details section on FortiGate.
-
Go back to the FIC portal to complete configuring the SAML app that you left off in Step 2 by clicking Applications > Web > Authentication to configure its authentication settings, (optionally) add any customized attribute that you may want, and click Save.
-
Click Applications >Web, and locate the SAML application that you have created. Then click the tool icon, select Details, and download the signing certificate to your local machine.
-
Go back to the FortiGate GUI (Step 4 above), and import the certificate to the FortiGate, and click Submit.
-
Now on the FortiGate, launch the Console interface and start configuring the IPsec VPN using the following CLI command.
config system global set auth-ike-saml-port 9443 end -
The
ike-saml-serversetting enables a configured SAML server to listen on a FortiGate interface for SAML authentication requests from FortiClient remote access IPsec VPN clients. Currently, this setting can only be configured in the CLI as follows. Here, “vpnsaml” is the name we used in the single sign-on setting we configured earlier.config system interface edit <name> set ike-saml-server vpnsaml next end -
Next, configure the IPsec VPN certificate either from the FortiGate GUI or Console interface.
To configure the IPsec VPN certificate from the GUI:
-
Go to User & Authentication > Authentication Settings, and select the certificate from the Certificate drop-down menu.
-
Import the certificate on the FortiGate by following the procedures in Import a certificate.
To configure the IPsec VPN certificate in the CLI:
-
Make sure that the certificate (i.e., VPN-Certificate) has been imported to the FortiGate.
-
Execute the following commands:
config user setting
    set auth-cert "VPN_Certificate"
end
-
-
Configure IPsec VPN on the FortiGate with FortiClient as the dial-up client:
- Go to VPN > IPsec Tunnels.
-
Click Create New > IPsec Tunnel.
The VPN Creation Wizard is displayed.
-
Enter the Name as FCT_SAML.
Note: This example does not use the VPN wizard for the IPsec tunnel configuration, but configures a Custom IPsec tunnel instead.
- Configure the Template type as Custom.
- Click Next.
-
Configure the following options:
Parameter Description Name FCT_SAML
Comments (Optional)
Network IP Version IPv4 Remote Gateway Dialup User Interface port1
Select the IPsec tunnel gateway interface.
Mode Config Enable Use system DNS in mode config (Optional) Enable FortiClient to use the host's DNS server after it connects to VPN. Assign IP From
Enable
Select Address/Address Group from the dropdown list.
IPv4 mode config
Client Address Range
VPN_Client_IP_Range
VPN_Client_IP_Range is configured from 10.212.134.1 to 10.212.134.200. If it is not already created, select Create > Address from the dropdown menu to create a new address object. See Subnet for more information.
Subnet Mask
255.255.255.255
DNS Server
8.8.8.8
Authentication
Method
Pre-shared key
Pre-shared key
Enter the pre-shared key of at least six characters.
IKE
Version
2
Peer Options
Accept Types
Any peer ID
Phase 1 Proposal
Encryption
AES128
Authentication
SHA256
Select the desired Encryption and Authentication algorithms that should also match with Phase1 Proposals configured on FortiClient. See Configuring IPsec VPN profile on FortiClient.
-
Keep the other settings as default.
-
Click OK. The newly created IPsec tunnel should now be visible under VPN > IPsec Tunnels.
-
Because IKEv2 uses EAP for user authentication, enable EAP using the following CLI command inside the configured IPsec tunnel for user authentication:
config vpn ipsec phase1-interface
    edit "FCT_SAML"
        set eap enable
        set eap-identity send-request
    next
end
For advanced custom configurations as per your requirement, see Remote access.
-
Configure firewall policies using the following steps:
- Go to Policy & Object > Firewall Policy.
- Click Create New.
-
Make the following entries:
Parameters Description Name IPsec to DMZ
Enter the desired name.
Incoming Interface FCT_SAML
Select the configured IPsec tunnel.
Outgoing Interface DMZ
Select the interfaces that FortiClient needs access to when it connects to VPN.
Source Under Address, select VPN_Client_IP_Range.
Under User, select vpnsaml .

The group under User is the SAML user group configured in the earlier steps. You need to add the single sign-on server you made into a user group and then add that user group to this policy.
Destination DMZ subnet
Click Create if it is not already created. See Subnet for more information.
Service ALL -
Click OK.
-
Because the IPsec tunnel is configured as a full-tunnel, create another policy to allow traffic from IPsec to Internet and to allow FortiClient to access Internet through IPsec tunnel.
-
Configure the IPsec VPN profile on FortiClient:
-
In FortiClient, go to Remote Access > Configure VPN or Add a new connection.
-
Configure the following settings to set up an IPsec IKEv2 profile on FortiClient:
Parameter Description Connection Name VPN-Tunnel Remote Gateway <VPN Gateway FQDN> or <VPN Gateway IP> Authentication Method Pre-shared key with Enable Single Sign On (SSO) for VPN Tunnel enabled. Customize port 9443 Advanced Settings > VPN Settings IKE Version 2 Options Mode Config To explore additional custom options to configure IPsec VPN profile, see Configuring an IPsec VPN connection.
-
-
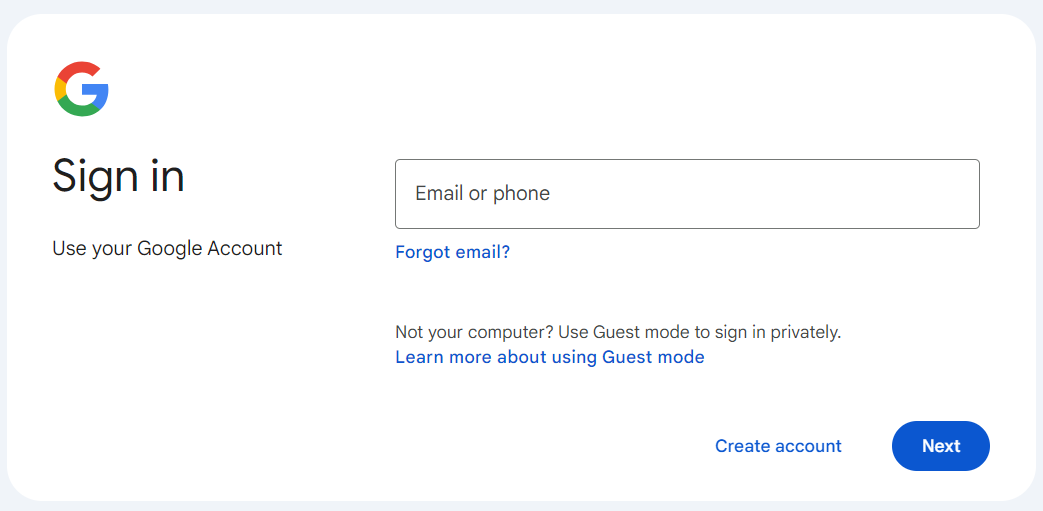
After clicking Save, if you try to connect to the VPN, you now should be taken to your IdP's sign-in page.
-
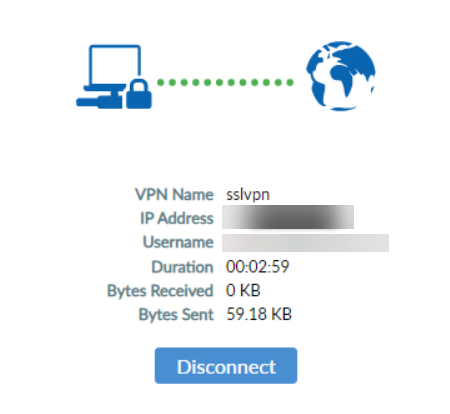
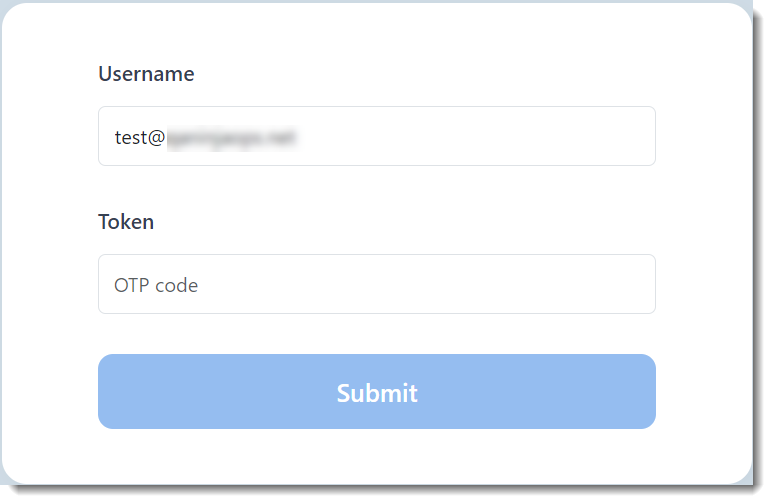
Log in, and you should be taken to the OTP page.
-
Verify the token using the MFA method you selected when creating the user on FIC earlier. Now the end user should be able to log into the IPsec VPN through FortiClient, as shown in the following illustration.