
Splitting user quota among different realms
FortiIdentity Cloud enables you to split out user quota among sub-accounts. Sub-accounts can also use functions like MFA, bypass, block, and realm configuration. This is the so-called “Managed Security Service Provider” capability. The host account holder can create sub-accounts and assign user quotas to the sub-accounts. Each sub-account can create its own password and has its own private login portal. The account holder is the security service provider and can manage all of the sub-accounts on the FortiIdentity Cloud portal.
To create a sub-account:
-
Log in to fic.fortinet.com using the host account holder's credential.
-
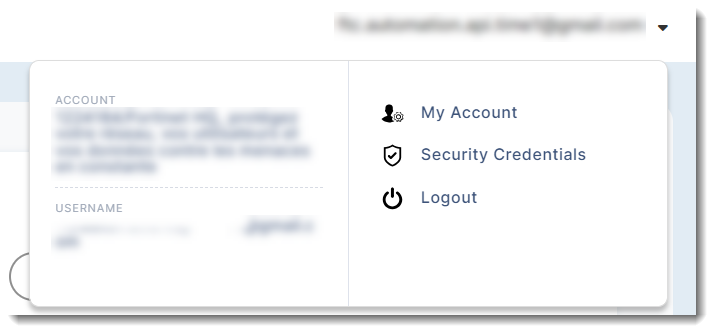
Click the username (email ) in the upper-right corner, and select My Account.
-
The browser will be navigated to support.fortinet.com automatically.
-
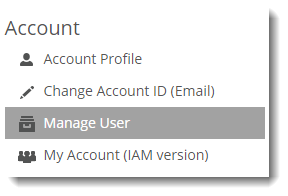
Click Manage User in the left sidebar to open the sub-users list.
-
In the upper-right corner of the sub-users list, click the
 (Add user button).
 -
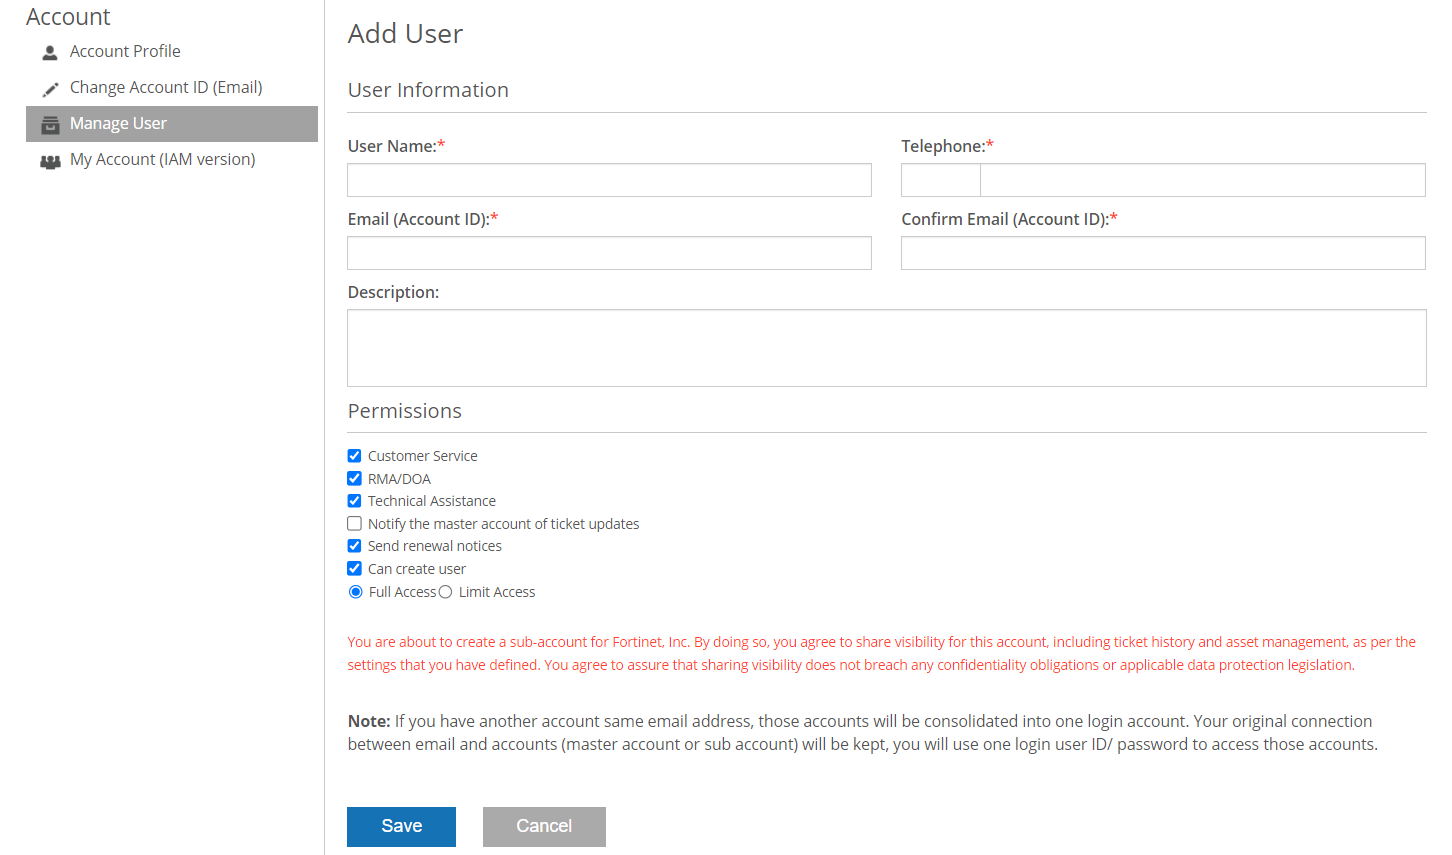
Enter the sub-user client information, including Username, Email (Account ID), and Telephone. Additionally, enter some details, such as “purchased 10 user quotas”, in the Description field.
-
Select Limit Access, which allows you (the host account holder) to assign specific devices (e.g., FortiGates) to this sub-user.
-
Click Save.
-
The sub-user clients will receive an email, asking them to create their own login passwords for fic.fortinet.com.
-
After the sub-users are created, the host account holder can assign resources to them, including user quotas, realms, and applications. For more details of assigning resources, see Managing admin groups.
The following steps show how to use this feature:
-
The host account holder creates a sub-user “subuser1” by using the provided client’s email. Clients can use their own email and password to log into fic.fortinet.com, and can see the user quota assigned to them by the host account holder.
-
The host account holder can assign a user quota to a client in FIC:
-
Navigate to User Management >Realms, and click Add Realm.
-
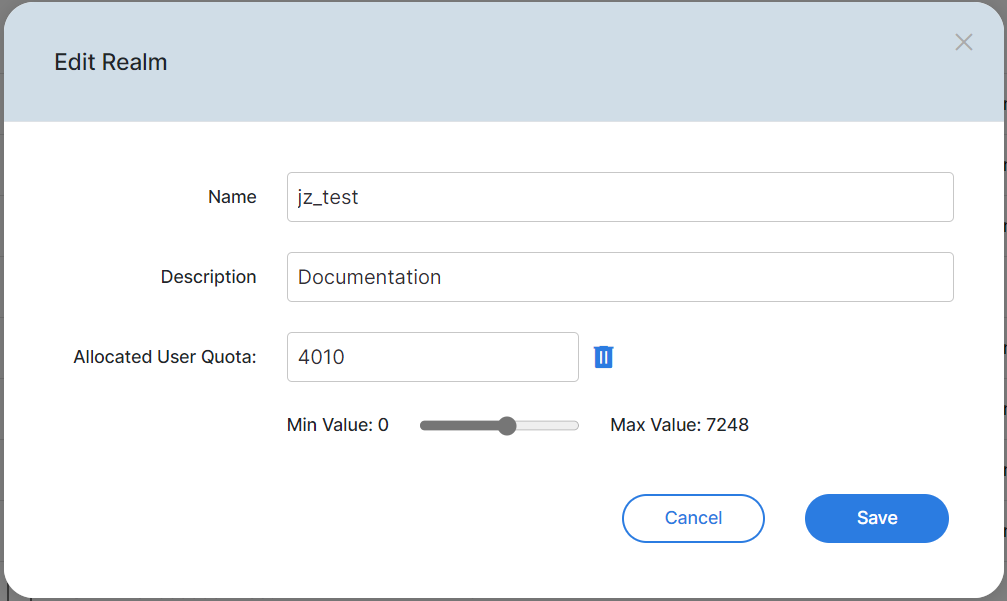
Mouse over the newly created realm, and select Edit in the pop-up tool menu.

-
Assign a user quota, and click Save.
-
The host account holder can assign the realms to a client in FIC:
-
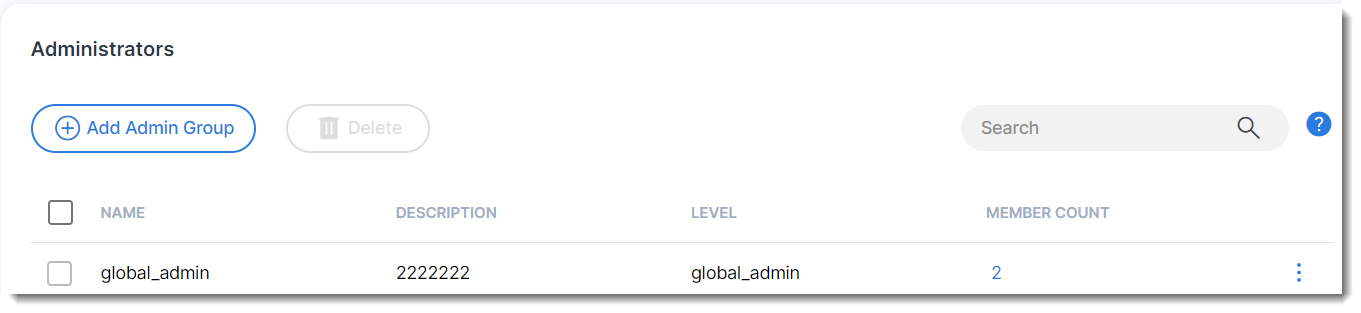
Navigate to Settings>Administrators, and click Add Admin Group.
-
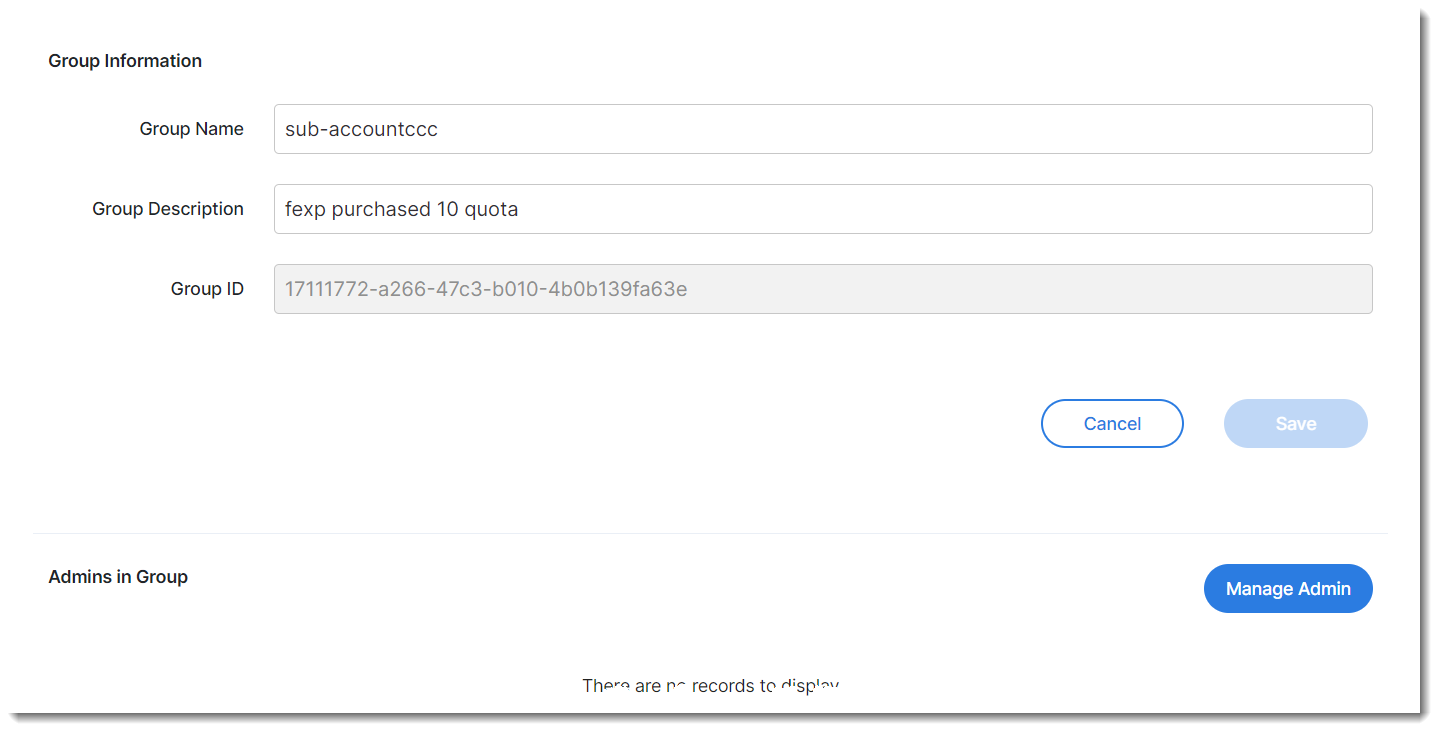
Edit the admin group by clicking the new group name.
-
Assign to this group the sub-account in Admins in Group and the realm in Managed Realms which were created in Step 2, and click Apply.
-
The host account holder can assign applications to the client by selecting Applications>FortiProducts.
-
The client can see the users created by the host on the assigned FortiProduct, for example, FortiGate.