
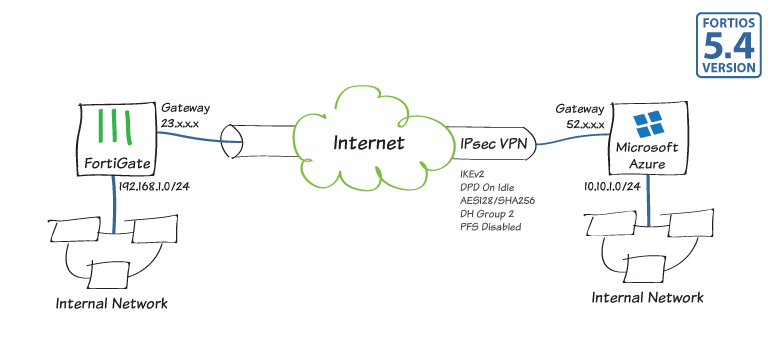
IPsec VPN to Microsoft Azure
The following recipe demonstrates how to configure a site-to-site IPsec VPN tunnel to Microsoft Azure™.
Using FortiOS 5.4, the example describes how to configure the tunnel between each site, avoiding overlapping subnets, so that a secure tunnel can be established.
1. Configuring the Microsoft Azure virtual network
Log into Microsoft Azure and click New. In the Search the marketplace field, type “Virtual Network”.
Locate Virtual Network from the returned list and click to open the Virtual Network blade.

Near the bottom of the Virtual Network blade, from the Select a deployment model list, select Resource Manager, and then click Create.

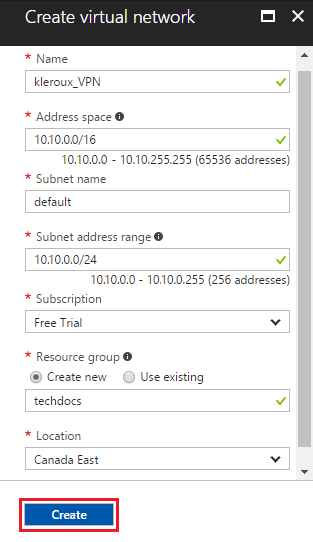
On the Create virtual network blade, fill in the values for your Virtual Network settings and click Create.
2. Specifying the Microsoft Azure DNS server
Open the virtual network you just created, navigate to DNS Servers, and click to open the DNS servers blade.
Enter the IP address of the DNS server and click Save at the top of the blade.

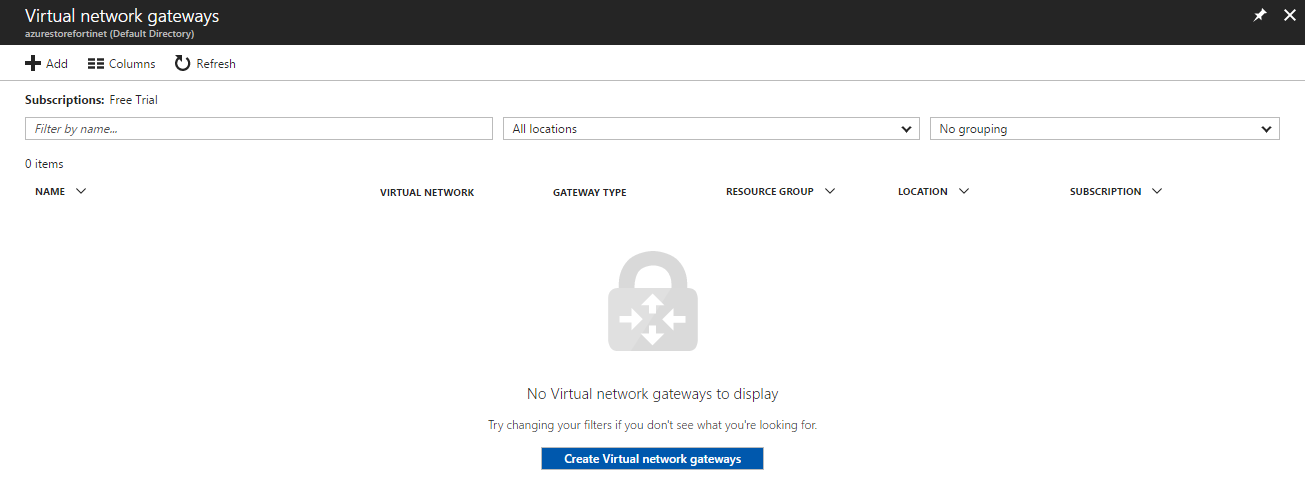
3. Creating the Microsoft Azure virtual network gateway
In the portal dashboard, go to New.
Search for “Virtual Network Gateway” and select it to open the Create virtual network gateway blade.
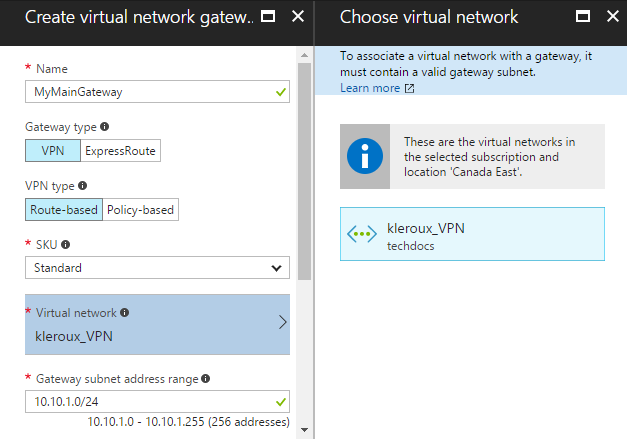
In the Create virtual network gateway blade, fill in the values for your virtual network gateway.
Create a Public IP address if necessary and click Create at the bottom.

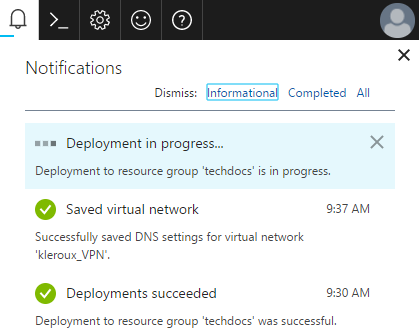
Provisioning the virtual network gateway may take some time.
You will receive a notification about the deployment.
4. Creating the Microsoft Azure local network gateway
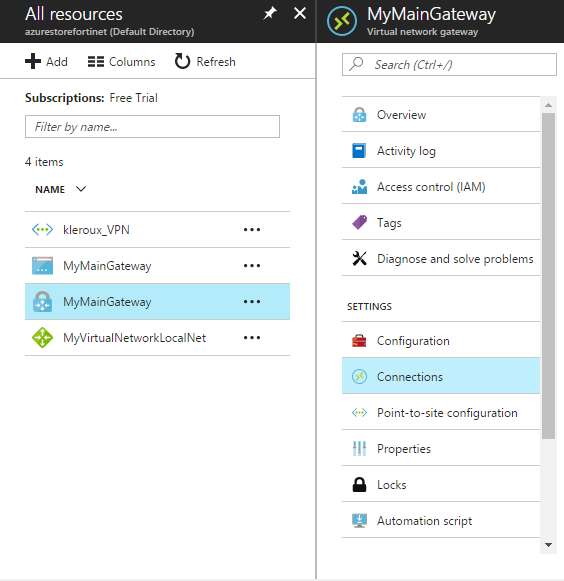
From the dashboard, select All resources.
Click +Add and then choose to See all.
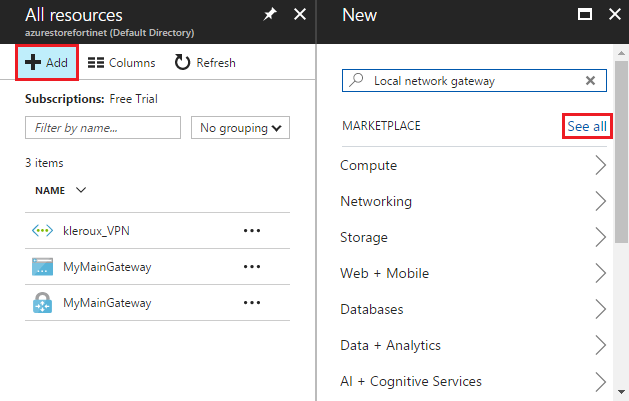
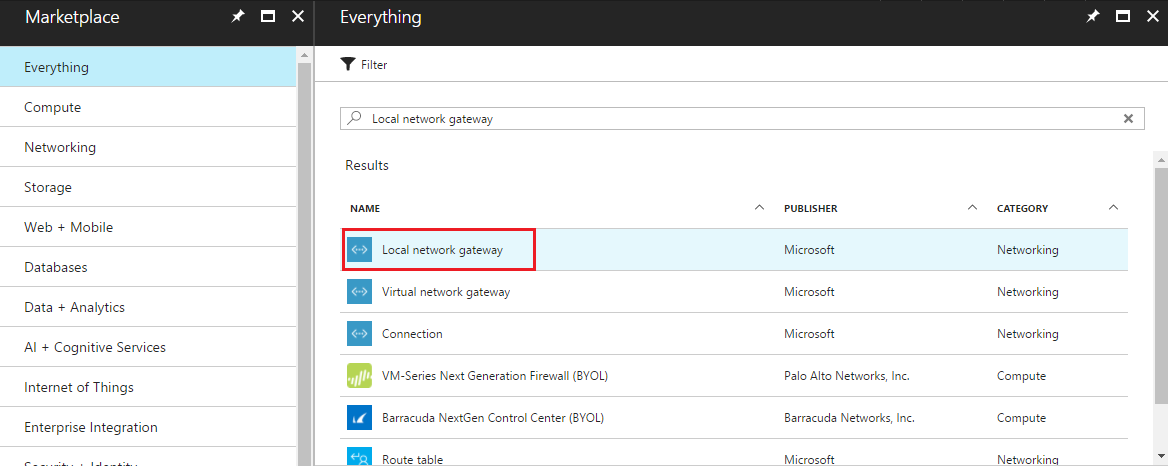
In the Everything blade search box, type Local network gateway, and select Create local network gateway.
Set IP address to the local network gateway address (the FortiGate's external IP address).
Fill in the remaining values for your local network gateway and click Create.

5. Configuring the FortiGate tunnel
Go to VPN > IPsec Wizard.
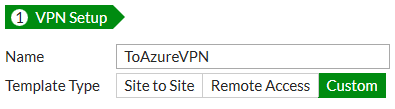
Enter a Name for the tunnel, select Custom, and click Next.
Set the Remote Gateway to Static IP Address, and include the gateway IP Address provided by Microsoft Azure. Located under All Resources > MyMainGateway (Virtual network gateway) > Overview > Public IP address. Note that it may take some time for this address to populate.
Set the Local Interface to wan1.
Disable NAT Traversal and set Dead Peer Detection to On Idle.
Under Authentication, enter a Pre-shared Key and ensure that you enable IKEv2.
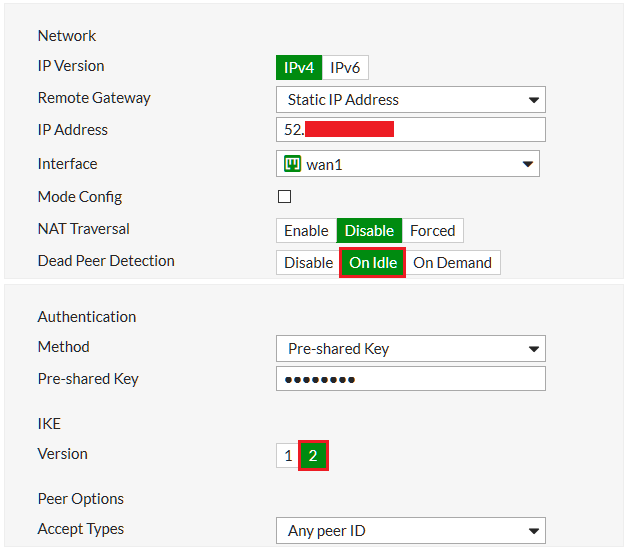
Under Phase 1 Proposal set the Encryption algorithm combinations to the following: AES 256 – SHA1, 3DES – SHA1, and AES256 – SHA256.
Note that these are just three supported encryption-algorithm combinations that are accepted by Azure. For more information about these combinations, and an up to date list of recommended IPsec VPN settings, see this article.
Select 2 for Diffie-Hellman Group.
Set Key Lifetime (seconds) to 28800.

Scroll down to Phase 2 Selectors and expand the Advanced section.
Set the Encryption combinations.
Disable Perfect Forward Secrecy.
Set Key Lifetime Seconds to 27000.

6. Creating the Azure firewall object
Go to Policy & Objects > Addresses and create a firewall object for the Azure VPN tunnel subnet.

7. Creating the FortiGate firewall policies
Go to Policy & Objects > IPv4 Policy and create a new policy for the site-to-site connection that allows outgoing traffic.
Set the Source Address and Destination Address using the firewall objects you just created.
Ensure that NAT is disabled.

Create a second policy for the same connection to allow incoming traffic.
This time, invert the Source Address and Destination Address.

In order to avoid packet drops and fragmentation, it is strongly recommended to limit the TCP maximum segment size (MSS) being sent and received.
Enter the following in the CLI Console for both firewall policies:
config firewall policy
    edit <policy-id>
        set tcp-mss-sender 1350
        set tcp-mss-receiver 1350
    next
end
8. Creating the FortiGate static route
Go to Network > Static Routes and create a new static route forcing outgoing traffic destined to the Microsoft Azure network to flow through the route-based tunnel.
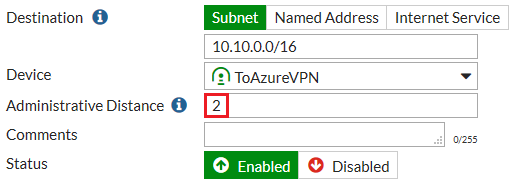
Set the Administrative Distance to a value lower than the value set for the existing default route.
9. Creating a Microsoft Azure Site-to-Site VPN connection
In the Azure portal, locate and select your virtual network gateway.
On the Settings blade, click Connections, and then click Add at the top of the blade to open the Add connection blade.
Fill in the values for your connection and click OK.
Make sure that the Shared Key (PSK) matches the shared key configured on the FortiGate in step 5.

10. Results
Go to Monitor > IPsec Monitor. You should see that the tunnel is UP.
If it is down, right-click the tunnel and select Bring Up. If the tunnel fails to come up, begin troubleshooting by double-checking the encryption algorithm and PSK settings match on both ends for Phase 1 and Phase 2. For other troubleshooting tips, refer to IPsec VPN troubleshooting.


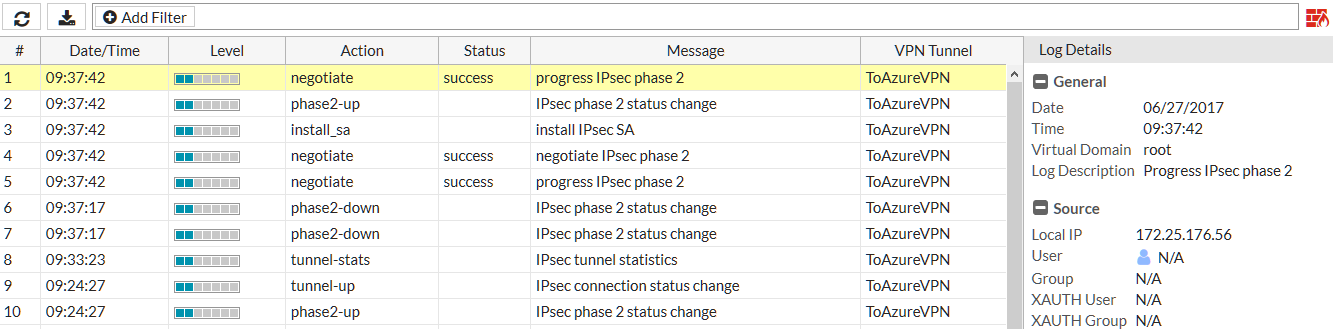
Go to Log & Report > VPN Events
Select an entry to view more information and verify the connection.
Return to the Microsoft Azure portal, click All resources and navigate to your virtual network gateway.
On the blade for your virtual network gateway, click Connections. You can see the status of each connection.
Click the name of the connection that you want to verify to open Essentials.
In Essentials, you can view more information about your connection.
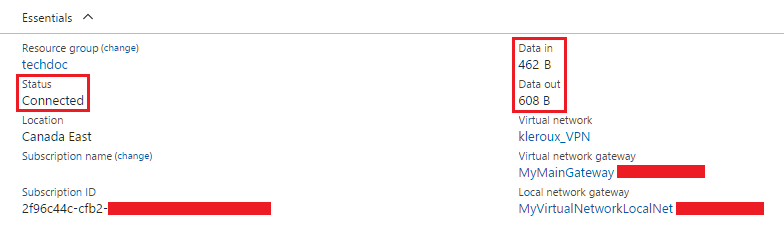
The Status is ‘Connected' when you have made a successful connection.
Ingress and egress bytes confirm traffic flowing through the tunnel.