


Deployment Map
Deception > Deployment Map is a visual representation of the entire network showing real endpoints and decoy VMs. You can apply filters to focus on specific decoys.
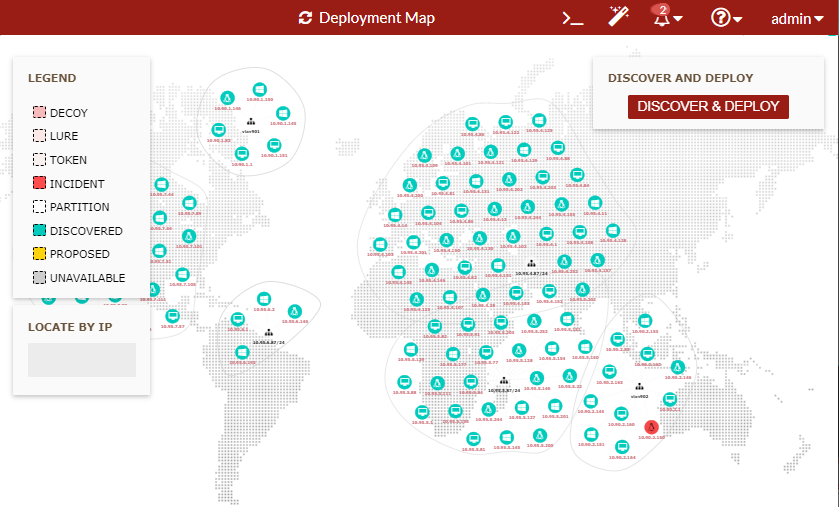
- To start automatic discovery and deployment, click DISCOVER & DEPLOY to display the Discovery & Deployment popup dialog box.
The Discovery & Deployment dialog box has the following options:
- Select deployment networks to scan.
- Add deployment networks to scan.
- Add TCP scan ports for discovery.
- Specify the number of decoys per OS per VLAN/subnet.
When you click DISCOVER, the automatic deployment purges the existing auto-deployed decoys and uses the same license for the new settings. It starts the discovery and deploy process and discovered endpoints appear on the Deployment Map.
- If the DISCOVER & DEPLOY dialog box displays ACCEPT & DEPLOY, check the settings to see if you want to accept the proposal and start auto-deployment.
- The top of this dialog box displays the proposal showing the OSes covered, total decoys, and total coverage.
- Click the link to download the asset list.
- To change the display, drag items to another location.
- Scroll to zoom in or out.
- To locate the node on the map, use the LOCATE BY IP box.
- Click a node to see more information.
- Green nodes are the discovered endpoints.
- Pink nodes are decoys.
Click a pink node to start or stop it, view its configuration, save it as a template, view the VNC, or delete it.
- Red blinking nodes are decoys that have been attacked.
- Yellow nodes are proposal decoys.
Click a yellow node to edit its settings, generate lures, duplicate, or delete it.