


Add an Aggregate Interface for WLAN Uplink Traffic – SSID outgoing
This is the interface for WLAN traffic to route to its final destination, whether the Internet, or an internal or campus resource. This is the outgoing/breakout/uplink/interface for all WLANs after traffic. The configuration is only marginally different from the previous section:
-
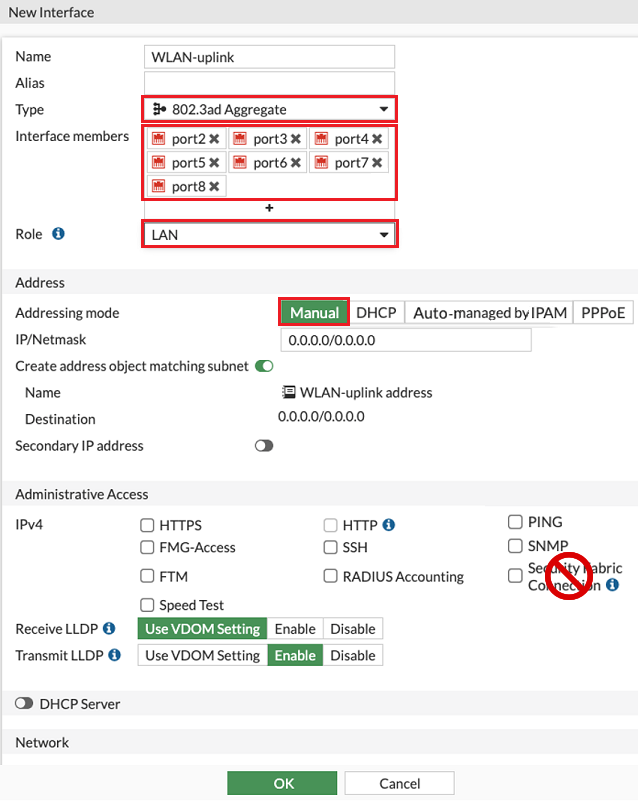
Do not enable "Security Fabric Connection" under the interface's "Administrative Access".
-
Add a default route for this interface.

Multiple outgoing interfaces are possible, and may make sense here, but all traffic will have already been fully inspected by the WLAN controller FortiGate. Experience shows that a single distribution here often makes the most sense. Adjust as necessary to fit the campus network.
Mid-range FortiGates may come with most ports preassigned as LAN ports. In such a case, you may first need to remove the ports from the default LAN interface to configure an aggregate interface across multiple physical ports.
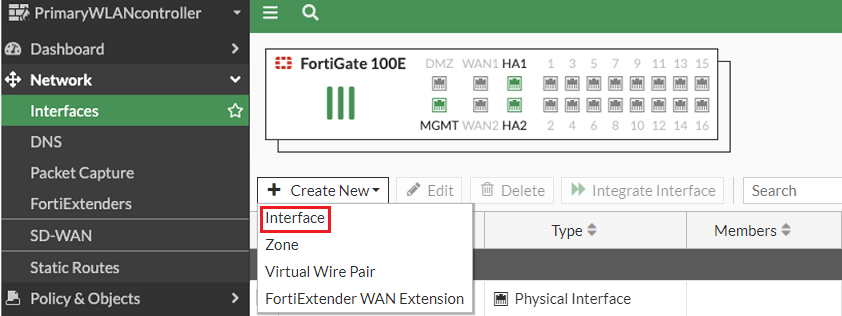
- Go to Network > Interfaces.
- Find the default lan interface—usually under VLAN Switch or Hardware Switch.
-
Double-click lan interface.

The Edit Interface screen appears.
-
In the Interface members section, remove the interfaces that will become part of the AP uplink interface.

- Click OK.
Now, to create the aggregate interface:
- Go to Network > Interfaces.
-
Click Create New and select Interface.
The New Interface screen appears.
-
In the New Interface screen:
- Name the interface.
- Under type, select 802.3ad Aggregate.
- In Interface members, add the physical ports for the interface.
- In Role, select LAN.
- Give the interface an address – this is a permanent interface and needs a fixed, manually assigned IP address.
- Click OK.

|
|
Security Fabric Connection is the setting that tells the FortiGate Controller to accept FortiLink connections originating on this interface. No APs should connect over this interface, and disabling Security Fabric Connection ensures that does not happen. |
Finally, you must configure a default route on the FortiGate WiFi Controller for the WLAN uplink.
- Go to Network > Static routes.
-
Click Create New.
The New Static Route window opens.
- Choose Subnet and enter 0.0.0.0/0.0.0.0.
- In Gateway Address, enter the of the WLAN aggregate uplink interface gateway.
-
In Interface, select the WLAN aggregate interface.

-
To save, click OK.
FortiGate creates a new static route.

The ports of the aggregate interface are now ready to be connected to the LAG ports of the aggregation or core switch. As shown in the previous example, this is an HA configuration, and the uplink LAG switch stack will need enough ports for both the Primary and Secondary FortiGate WiFi Controllers. This means it needs twice as many as configured on the controller, half of them active and half of them available for the inactive controller as backup.
Once the HA Controller pair is deployed, it is ready for AP deployment.