


SSID for PSK-only Devices with FortiLink NAC
There are many devices that do not support RADIUS authentication and must use Pre-Shared Key (PSK) authentication. These devices may include IoT devices such as temperature sensors, or consumer-oriented products such as video streaming devices in conference rooms.
Despite the poor security, these devices are widely used. FortiGate WiFi Controllers include options for securely isolating different devices types using device fingerprinting and the FortiLink NAC feature. FortiLink NAC is part of FortiOS and requires no additional licensing. FortiLink NAC identifies devices by various criteria such as MAC address, device type, or operating system and then assigns them to VLANs as specified in NAC policies.
Create a PSK SSID
- Go to WiFi & Switch Controller > SSIDs.
- Click Create New > SSID.
-
Configure the following:
Field
Description
Name
This is an internal name on the WiFi controller and does not have to match the broadcast name.
Traffic Mode
Choose Tunnel, the default mode.
IP/Netmask
Give the SSID interface an IP address.
Administrative Access
This section is for connecting to the FortiGate WiFi controller from this interface. For most campus environments, none of these should be allowed.
DHCP server
Enable. This is the DHCP server for the clients using this SSID, and their traffic will be routed and usually NATed from the WiFi Controller.

-
Scroll to WiFi Settings and complete the following fields:
Field
Description
Name
This is the over-the-air name of the WLAN.
Security Mode
Select WPA2 Personal. If devices support WPA3, choose WPA3.
Pre-Shared Key
Single
Passphrase
Enter a passphrase of 8-63 characters.
-
Take note of NAC profile, but leave it disabled for now.

-
Click OK.
The IoT/PSK only SSID is now broadcasting, but the NGFW of the FortiGate will not pass traffic that is not specifically allowed. Firewall Policies must be added for the authorized user WLAN.
Add Firewall Policies for the IoT SSID
The exact Firewall Policies needed here are very environment dependent. Conference room TV streamers may only require simple internet access, but IoT sensors may need to access campus-based management servers. For demonstration, we can temporarily add an Internet only policy exactly like the Guest SSID policy above. Such a policy could be disabled after FortiLink NAC policies are added below. In fact, adding FortiLink NAC will effectively put all WiFi clients on a different interface—see FortiLink NAC: Add Onboarding and Target VLANs.
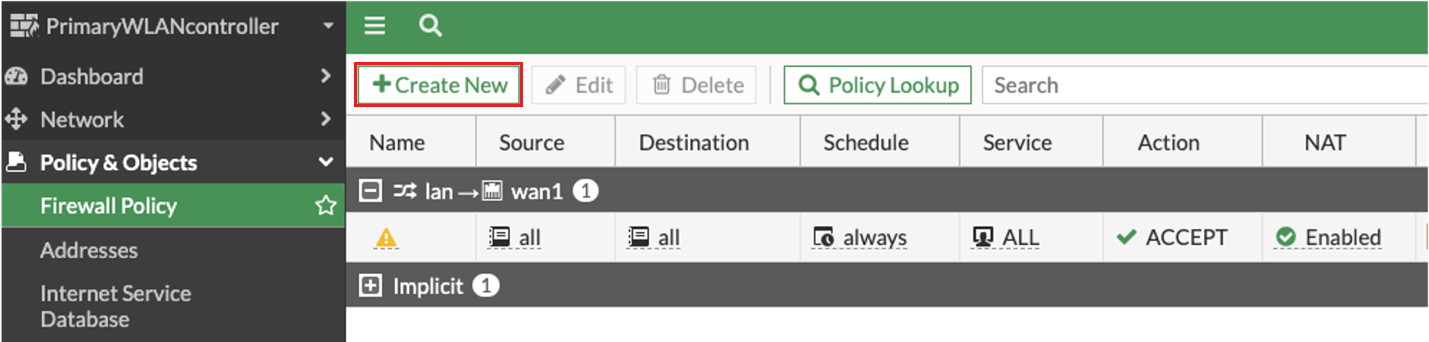
- Go to Policy & Objects > Firewall Policy.
-
Click Create New.
The New Policy screen appears.
- Configure the following:
- Enter a Name for the policy.
Select the Incoming Interface.
The Incoming Interface is the Guest SSID Interface. FortiGate WiFi Controller automatically creates an address object.
- Following the above example configurations, the Outgoing Interface is the WLAN-uplink interface.
- For simplicity, configure the Source and Destination fields as all.
- Click Services and scroll to the Services Group category to select the following:
- Email Access
- Exchange Server
- Web Access
- Windows AD

- Leave the other fields with the default settings.
- Ensure that NAT is enabled.
Click OK.
The Firewall policy is configured.
FortiLink NAC: Add Onboarding and Target VLANs
In the FortiGate WiFi controller, VLANs can be added to Wi-Fi SSIDs. Each SSID can be thought of as a logical switch. To utilize FortiLink NAC device identification and VLAN assignment, an SSID needs:
-
An Onboarding VLAN – the onboarding VLAN allows Wi-Fi clients on the network so that device detection can be applied and the device identified.
-
A Target VLAN - the VLAN an identified device will be moved to, according to NAC Policies.
There can be multiple Target VLANs to serve multiple NAC policies, while there is one onboarding VLAN per SSID.
To add VLANs to the SSID:
-
Go to Network > Interfaces.
-
Click Create New, and select Interface.

The New Interface screen appears.
-
Enter an Interface Name, for example IoT-onboarding.
-
Set Type to VLAN,
-
In Interface, select the IoT/PSK only SSID defined previously.
-
Enter a VLAN ID.
Note: This ID is only going to exist inside the WiFi controller when following this guide.
-
Set Role to LAN.
-
Enter an interface IP Address/Netmask.
-
Enable DHCP server.
-
Click OK.
Repeat for at least one target VLAN. For this topic, our example will target Android devices so the VLAN is named IoT-android.

The interfaces view:

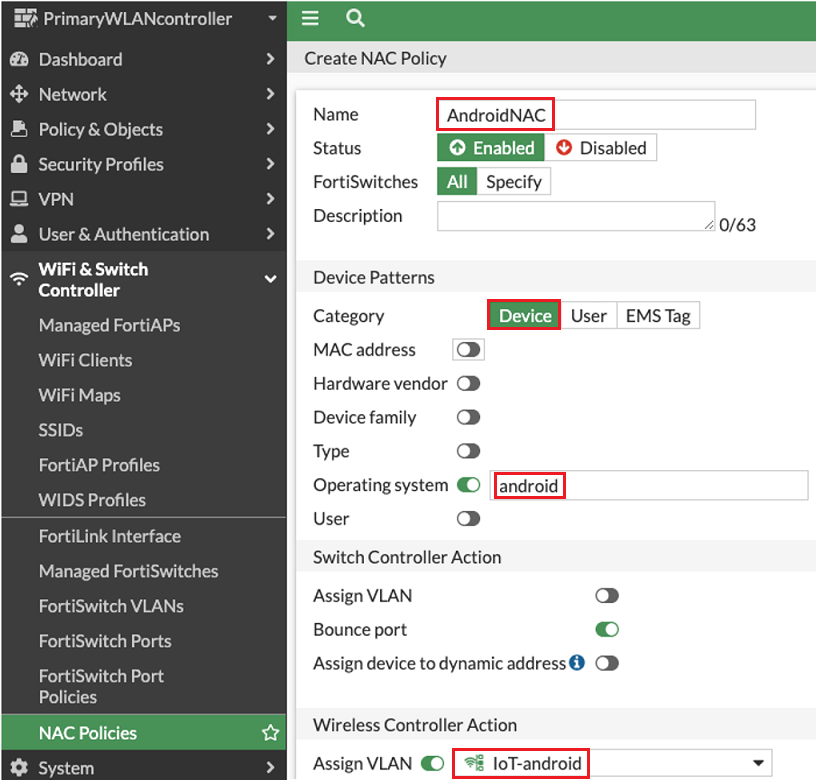
FortiLink NAC: Create a NAC Policy
-
Go to WiFi & Switch Controller > NAC Policies.
You may see a "Configure NAC Settings" warning, but this is for FortiLink NAC on FortiSwitches and can be skipped for purposes of this guide.
-
Click Create New.
The Create NAC Policy screen loads.
-
Configure the following:
-
Enter a policy Name.
-
Under Device Patterns, configure a Category type and necessary options. For example:
-
Select Device.
-
Enable Operating system and enter the string android.
-
-
Under Wireless Controller Action, enable Assign VLAN and select the target VLAN you created.
-
-
Click OK.
The NAC policy is saved.

Add The FortiLink NAC Policy to the PSK SSID
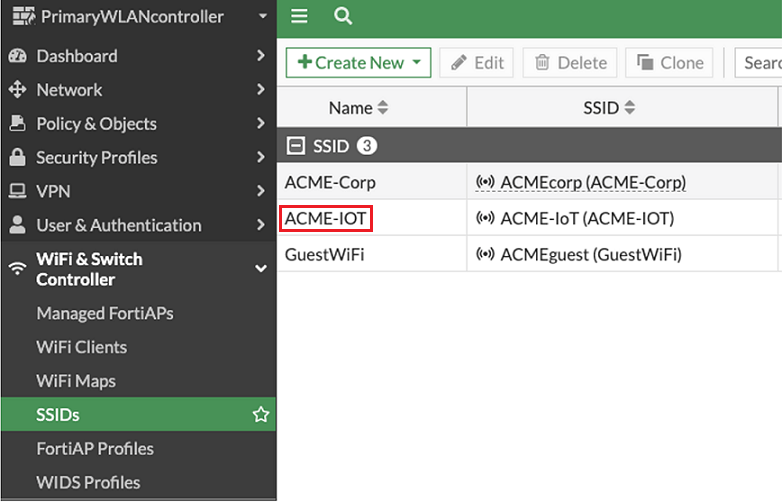
Return to the IoT/PSK only SSID.
-
Go to WiFi & Switch Controller > SSIDs.
-
Double-click on the IoT/PSK only SSID.
-
Enable NAC profile and click Create.
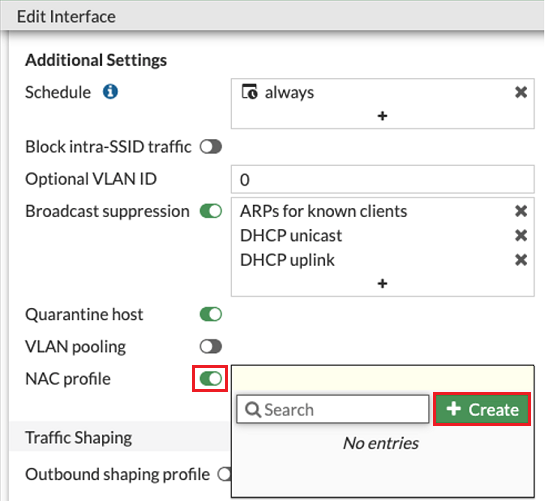
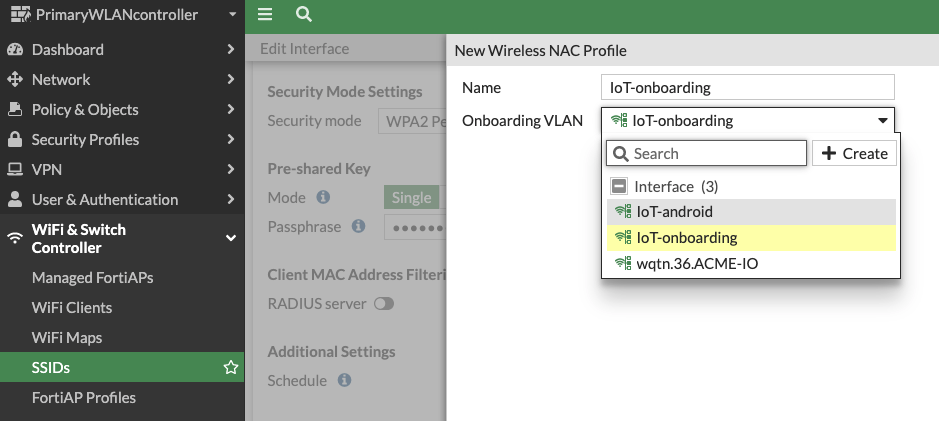
The New Wireless NAC Profile screen appears.
-
Enter a profile Name.
-
In Onboarding VLAN, select the VLAN you previously defined.
-
Click OK.
-
In the SSID Edit Interface screen, confirm the NAC profile is enabled and that the onboarding profile is correct.

- Click OK.
Add Firewall Policies for the IT/PSK Only SSID
Once again, the APs are now broadcasting the authenticated user SSID and clients can connect to the WLAN, but the traffic is isolated to the FortiGate WiFi Controller. The Fortinet Security Driven Networking model allows only explicitly allowed traffic. Firewall policies must be added to allow Internet or other network access.
The advantage of using FortiLink NAC is the simple VLAN isolation and the option of using VERY targeted Firewall Policies. Perhaps AppleTV devices are not allowed all internet access, but only specific streaming services. IoT device may have cloud-based management or local servers, but in either case, a temperature sensor has no need to talk to any other server. FortiLink NAC, as part of Fortinet's Security Driven Networking philosophy enables very narrow targeting of security policies.
To add a temporary Internet access policy to either the onboarding or target VLAN, follow the example of the Guest SSID above. For your convenience:
-
Go to Policy & Objects > Firewall Policy.
-
Click Create New.
The New Policy screen appears.
-
Configure the following:
- Enter a Name for the policy.
-
Select the Incoming Interface.
The Incoming Interface is the subject VLAN. At interface creation, the FortiGate WiFi Controller automatically creates an address object.
- Following the above example configurations, the Outgoing Interface is the WLAN-uplink interface.
- For simplicity, configure the Source and Destination fields as all.
- Click Services and scroll to the Services Group category to select the following:
- Email Access
- Exchange Server
- Web Access
- Windows AD
- Leave the other fields with the default settings.
- Ensure that NAT is enabled.
-
Click OK.
The Firewall policy is configured. The result of FortiLink NAC policies are multiple VLANs on a single SSID, with devices sorted by policy.
