


Blocking file with MPIP sensitivity label example
To safeguard your organization's data, you can employ labels as markers for sensitive information. Microsoft provides sensitivity labels, which act as identifiers emphasizing the importance of the data that they are associated with, thereby enhancing the security measures in place. See Protect your sensitive data with Microsoft Purview.
You can effectively manage any data traffic that includes a sensitivity label using FortiSASE. Usage of a predefined data source type, MPIP Label, specifically designed for matching MPIP sensitivity labels previously applied to files, makes this possible.
This configuration blocks HTTPS upload traffic that includes an MPIP sensitivity label.
To complete prerequisites:
Before configuring FortiSASE, complete the following steps:
- Create and configure sensitivity labels and their policies. See Create sensitivity labels.
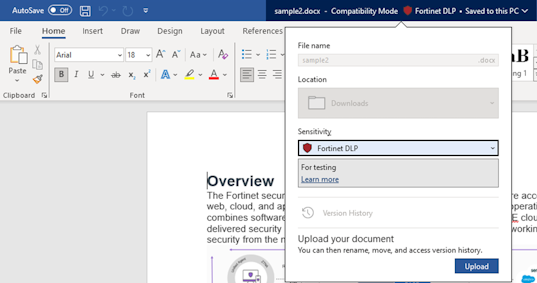
- Apply a sensitivity label to content. See Apply sensitivity labels to your files and email. Once the sensitivity label is applied on a file, it displays on the sensitivity bar.
- Obtain the globally unique identifier (GUID) for your sensitivity labels. See Search for documents by sensitivity label. The following shows a sample GUID:

|
|
FortiSASE uses the GUID for label matching. The value of Sensitivity level GUID is configured to correspond to the label’s GUID. |
To configure blocking HTTPS upload traffic that includes an MPIP sensitivity label applied:
- Go to Configuration > Security.
- For Profile Group, select an existing profile group to edit or create a new profile group using + in the Profile Group dropdown list.
- Disable all enabled security features (AntiVirus, Web Filter with Inline-CASB, Intrusion Prevention, DNS Filter) using these steps for each security feature:
- Click the toggle button next to the security feature widget to disable the feature.
- Click OK to confirm disabling the security feature.
- In the SSL Inspection widget, ensure deep inspection is enabled:
- For SSL inspection, click Customize.
- Select Deep Inspection.
- Click OK.
- Create a DLP rule:
- In the Data Loss Prevention (DLP) widget, click the toggle button to enable this feature, and then click Customize.
- In the DLP slide-in, click Create to create a new DLP rule.
- In the New Rule slide-in, configure these settings:
Field
Description
Name
Rule name.
Data Source Type
Select MPIP Label. You must select or create a new sensitivity label.
Sensitivity Label
Create a new sensitivity label and then select it.
Severity
Select the severity or threat level that matches this filter.
Action
Action to take with content that this DLP profile matches.
Type
Select whether to check the content of messages (an email message) or files (downloaded files or email attachments).
File type
Select the number of a DLP file pattern table to match. You can either select a predefined file pattern table or create a new one by clicking + in the dropdown list.
Protocol
Check messages or files over one or more of these protocols.
- Create a new sensitivity label:
- Create a new sensitivity label by clicking + next to Sensitivity Label.
- In the Create MPIP sensitivity label slide-in, configure these settings:
Field
Description
Name
Sensitivity label name.
Sensitivity level GUID
Enter the globally unique identifier (GUID) for your sensitivity label.
See To complete prerequisites: for how to obtain the GUID for your sensitivity label.
- Click OK.
- Click OK twice to complete creating the DLP rule:
- Click OK to create the sensitivity label. You will be prompted to select the newly created sensitivity label.
- Click OK to create the new DLP rule.
- Configure the updated profile group in a policy:
- Go to Configuration > Policies.
- Select an existing policy to apply the profile group to and click Edit. Alternatively, create a new policy to apply the profile group to.
- In the Profile Group field, select Specify. From the dropdown list, select the desired profile group. The Profile Group field is only available for policies where Action is configured as Accept.
- Click OK.
To configure blocking HTTPS upload traffic that includes an MPIP sensitivity label applied is working:
- Ensure that your endpoint with FortiClient installed is registered with FortiSASE Endpoint Management Service and that you have established a secure connection to FortiSASE.
- On the connected endpoint, open the Chrome web browser in incognito mode.
- In the web browser, go to https://dlptest.com/https-post/
- Upload a Word document file with an MPIP sensitivity label applied.
- Observe that the file upload fails before and after file submission:

- In FortiSASE, go to Analytics > Security > Data Loss Prevention (DLP) and confirm that FortiSASE generated a DLP block log entry that corresponds to your VPN user and visiting https://dlptest.com/https-post/

- Go to Analytics > Security > Traffic > Internet Access Traffic and confirm that FortiSASE generated a DLP block log entry that corresponds to your VPN user and visiting https://dlptest.com/https-post/
