Using SAML authentication with Microsoft ADFS
This example shows how to configure SAML authentication with Microsoft ADFS on a FortiProxy unit. You need to configure both FortiProxy and Microsoft ADFS to allow SAML authentication to work.
FortiProxy configuration
Perform the following steps on FortiProxy to configure SAML authentication.
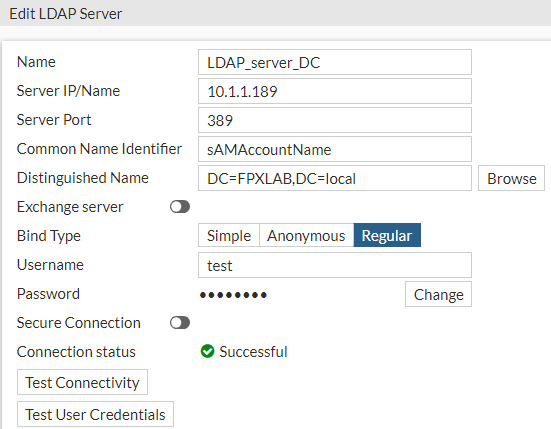
Step 1: Configure an LDAP server
To configure an LDAP server from the GUI:
-
Select User & Authentication > LDAP Servers and click Create New.
To configure an LDAP server from the CLI:
FPX222 # sh user ldap LDAP_server_DC
config user ldap
edit "LDAP_server_DC"
set server "10.1.1.189"
set cnid "sAMAccountName"
set dn "DC=FPXLAB,DC=local"
set type regular
set username "test"
set password ENC YXRhbFg8uvof/JrL06vpvBbR/Yghbmyp6LTdKDjy5ZX+X/4AGK4/MOSZd3JDBcJ6GLHwOeQ0d4lPvjqiHRJ7yNonLWGhrr/RKhmyrfsvYrB9cwc9Rbpx0B5vRT6Psmlbqi84JZsdg64tFkHyJ8JQCxrvzsM7S0MMtPCpAJ0LqLxkukwH31wC3gk5Vli59J3kYRXRFQ==
set group-search-base "DC=FPXLAB,DC=local"
set account-key-processing strip
set account-key-filter "(&(sAMAccountName=%s)(!(UserAccountControl:1.2.840.113556.1.4.803:=2)))"
next
end
Step 2: Configure DNS Database and FQDN
FPX222 # sh sys dns-database
config system dns-database
edit "domain.local"
set domain "domain.local"
set authoritative disable
config dns-entry
edit 5
set hostname "fpx222"
set ip 10.4.62.222
next
end
next
edit "FPXLAB.local"
set domain "FPXLAB.local"
config dns-entry
edit 1
set hostname "FPXQA"
set ip 172.18.20.189
next
end
next
end
FPX222 # sh firewall address fpx222.domain.local
config firewall address
edit "fpx222.domain.local"
set uuid 0f240354-1f5c-51ee-2cbe-86f83369c807
set type fqdn
set fqdn "fpx222.domain.local"
next
end
FPX222 # sh firewall address win.domain.local
config firewall address
edit "win.domain.local"
set uuid a70295d8-11ff-51ee-3116-230eb3789570
set type fqdn
set fqdn "win.domain.local"
next
end
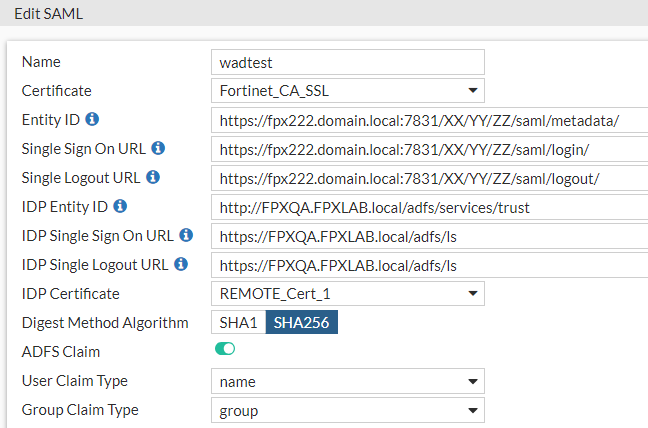
Step 3: Configure SAML
To configure SAML from the GUI:
-
Select User & Authentication > SAML and click Create New.
To configure SAML from the CLI:
FPX222 (wadtest)# show
config user saml
edit "wadtest"
set cert "Fortinet_CA_SSL"
set entity-id "https://fpx222.domain.local:7831/XX/YY/ZZ/saml/metadata/"
set single-sign-on-url "https://fpx222.domain.local:7831/XX/YY/ZZ/saml/login/"
set single-logout-url "https://fpx222.domain.local:7831/XX/YY/ZZ/saml/logout/"
set idp-entity-id "http://FPXQA.FPXLAB.local/adfs/services/trust"
set idp-single-sign-on-url "https://FPXQA.FPXLAB.local/adfs/ls"
set idp-single-logout-url "https://FPXQA.FPXLAB.local/adfs/ls"
set idp-cert "REMOTE_Cert_1" -> Name of certificate from MicroSoft ADFS.
set digest-method sha256
set adfs-claim enable
set user-claim-type name
set group-claim-type group
next
end
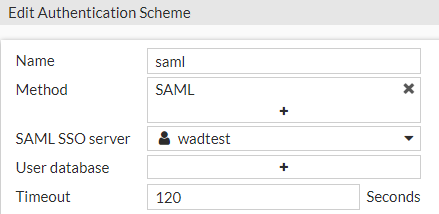
Step 4: Configure an authentication scheme
To configure an authentication scheme from the GUI:
-
Select Policy & Objects > Authentication Rules and click Create New > Authentication Scheme.
To configure an authentication scheme from the CLI:
config authentication scheme
edit "saml"
set method saml
set saml-server "wadtest"
next
end
Step 5: Configure an authentication rule
To configure an authentication rule from the GUI:
-
Select Policy & Objects > Authentication Rules and click Create New > Authentication Rule.
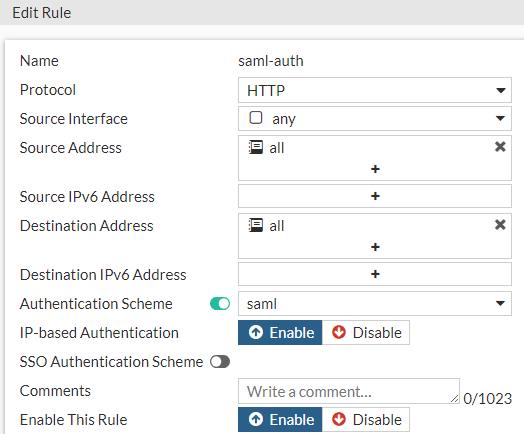
To configure an authentication rule from the CLI:
FPX222 # sh authentication rule saml-auth
config authentication rule
edit "saml-auth"
set srcintf "any"
set srcaddr "all"
set dstaddr "all"
set active-auth-method "saml"
next
end
Step 6: Configure authentication settings
To configure authentication settings from the GUI:
-
Select Policy & Objects > Proxy Auth Setting.
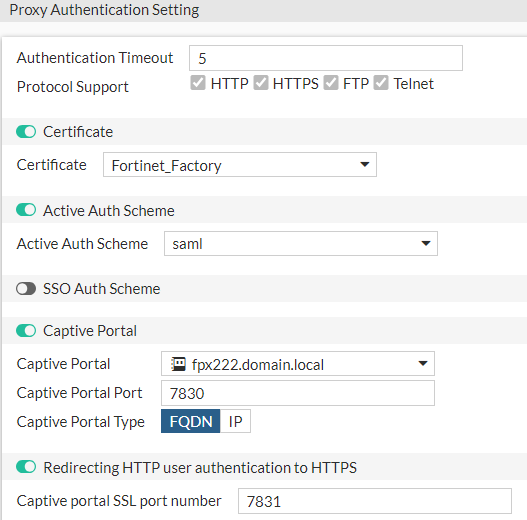
To configure authentication settings from the CLI:
FPX222 # sh authentication setting
config authentication setting
set active-auth-scheme "saml"
set captive-portal "fpx222.domain.local"
end
Step 7: Configure a user group
To configure a user group from the GUI:
-
Select User & Authentication > User Groups.
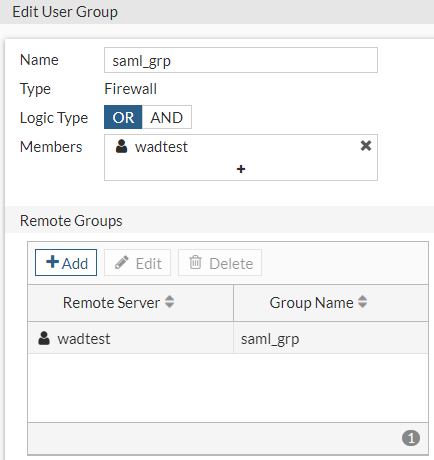
To configure a user group from the CLI:
config user group
edit "saml_grp"
set member "wadtest"
config match
edit 1
set server-name "wadtest"
set group-name "saml_grp"
next
end
next
end
Step 8: Configure a firewall policy
config firewall policy
edit 18
set type explicit-web
set name "SAML- ADFS _Access"
set uuid ceacefd8-4392-51ee-7278-44d09ef3bcd0
set dstintf "any"
set srcaddr "all"
set dstaddr "FPXQA.FPXLAB.local"
set action accept
set schedule "always"
set service "webproxy"
set explicit-web-proxy "web-proxy"
set log-http-transaction all
next
edit 16
set type explicit-web
set name "SAML_auth"
set uuid 8d2050cc-4389-51ee-b9bd-d28c45e0827d
set dstintf "any"
set srcaddr "all"
set dstaddr "all"
set action accept
set schedule "always"
set service "webproxy"
set explicit-web-proxy "web-proxy"
set groups "saml_grp"
set ssl-ssh-profile "deep-inspection"
next
end
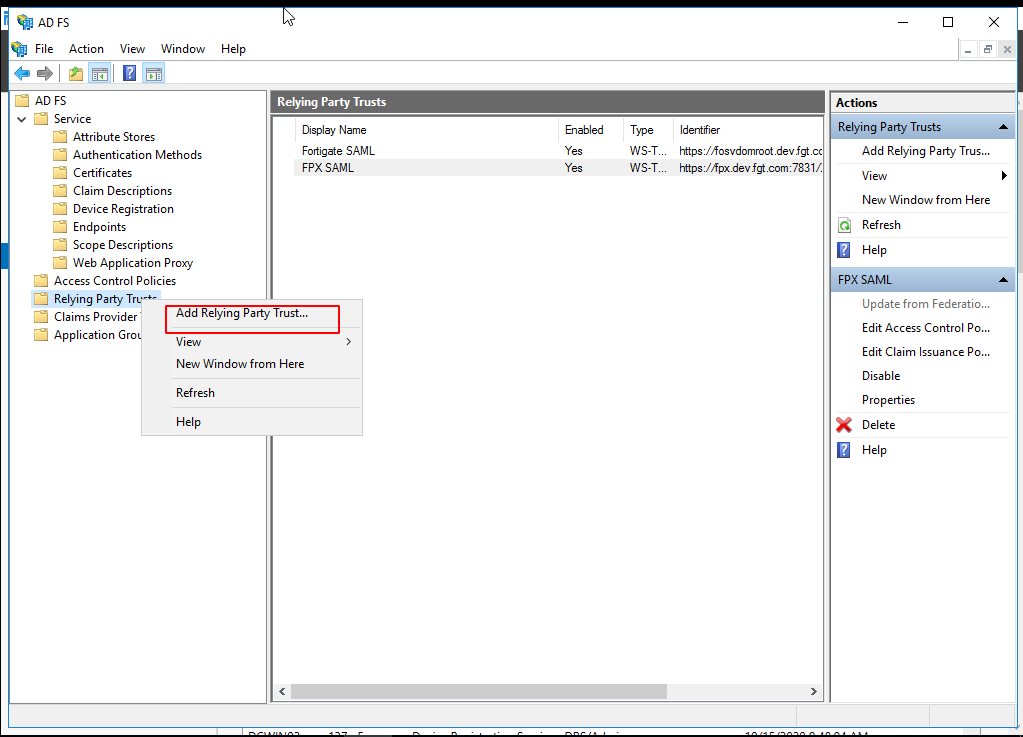
Microsoft ADFS configuration
To configure SAML authentication with Microsoft ADFS, you must create a relying party trust, edit the Claim Issuance so that ADFS transfers the Name ID and Name attribute assertion in the SAML response, and upload the FortiProxy SAML SP certificate to the relying party. The example below uses Windows Server 2016.
-
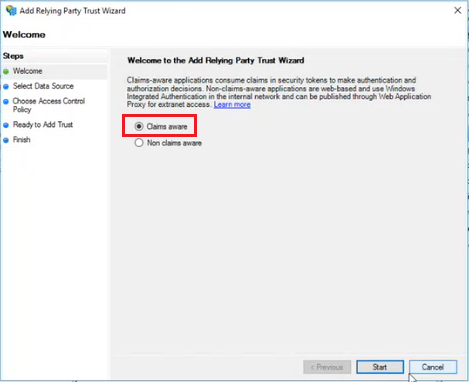
In AD FS Manager, right-click Relying Party Trust and select Add Relying Party Trust.
-
On the Welcome page, select Claims aware and click Start.
-
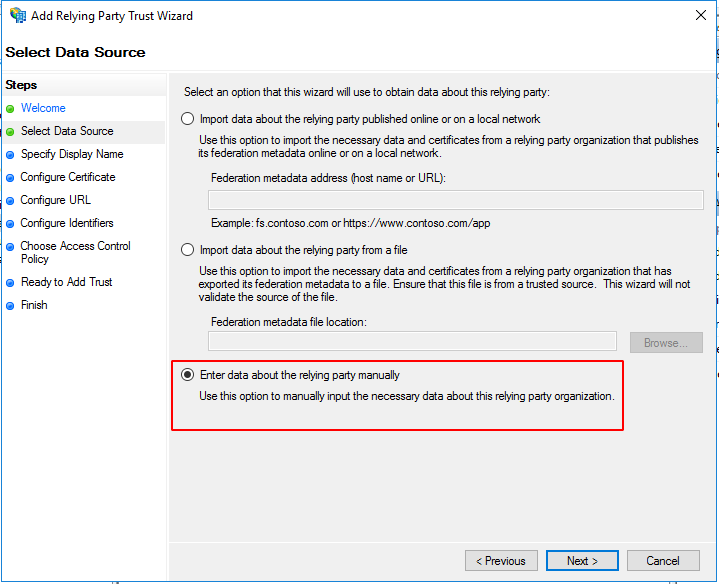
On the Select Data Source page, select Enter data about the relying party manually and click Next.
-
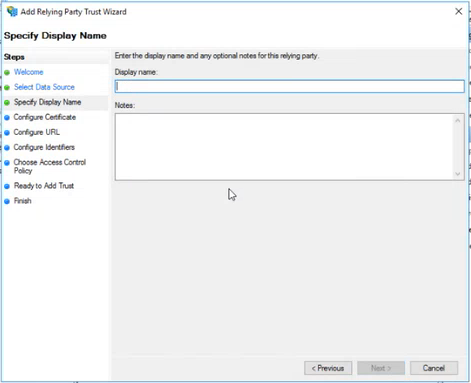
On the Specify Display Name page, type a name in Display name, under Notes type a description for this relying party trust, and then click Next.
-
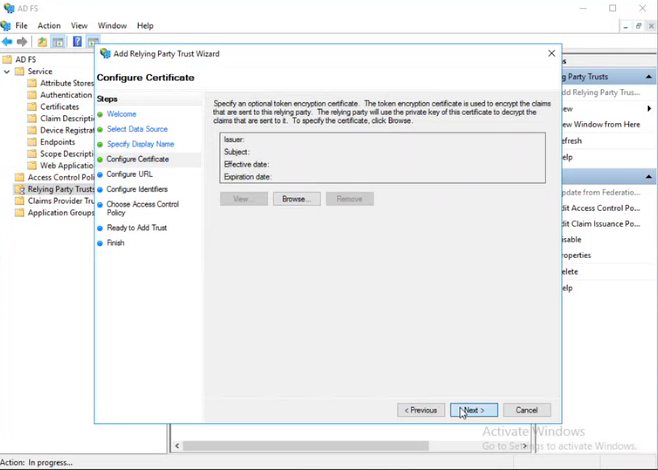
On the Configure Certificate page, click Next to skip the configuration.
-
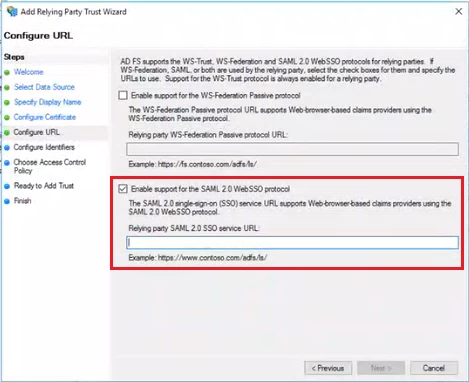
On the Configure URL page, select Enable support for the SAML 2.0 Web SSO protocol and enter the single sign on URL that you configured in Step 3: Configure SAML above. Click Next.
-
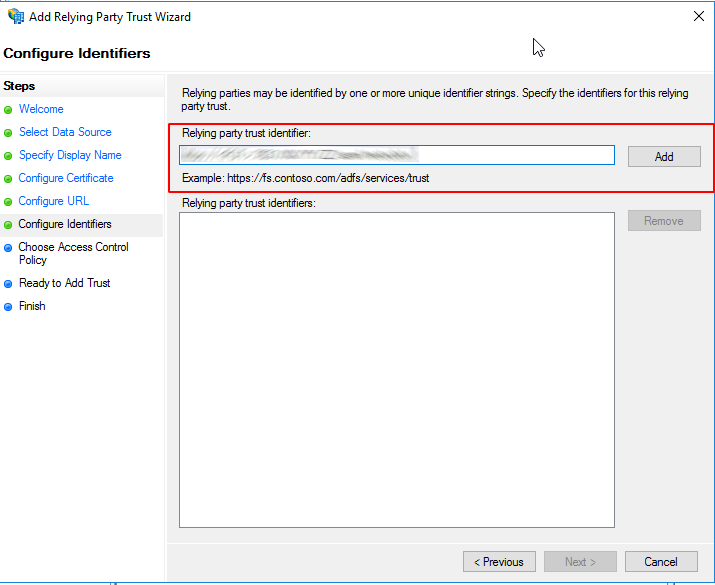
On the Configure Identifiers page, enter the entity ID that you configured in Step 3: Configure SAML above, click Add, and then click Next.
-
On the Choose Access Control Policy page, select a policy and click Next. For more information about Access Control Policies, see Access Control Policies in AD FS.
-
On the Ready to Add Trust page, review the settings and click Next to save your relying party trust information.
-
On the Finish page, click Close. This action automatically displays the Edit Claim Rules dialog box. Click Add Rule.
-
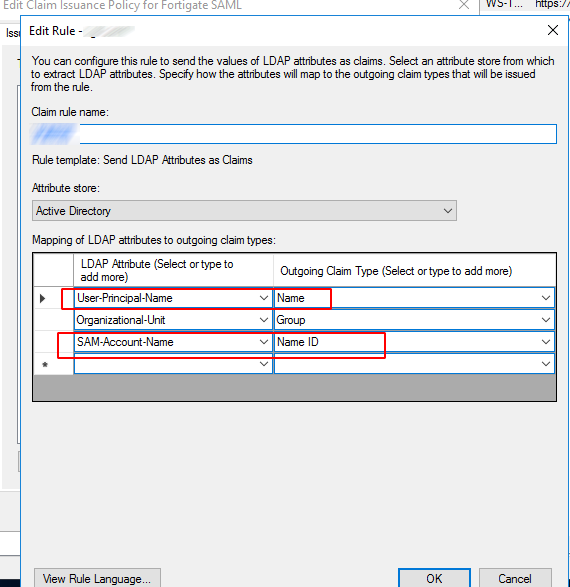
Enter the Claim rule name, select Active Directory under Attribute store, add mapping of LDAP attributes for Name and Name ID, and click OK.
-
In the Relying Party Trusts list, select the relying party trust you just created and click Properties on the right pane.
-
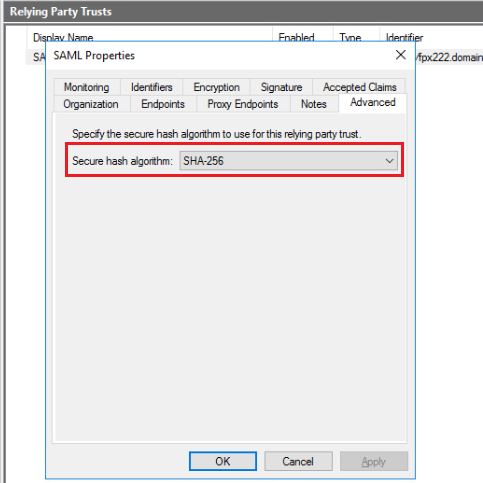
In the Advanced tab, select the correct secure hash algorithm. In this example, we select SHA-256 which is the algorithm we configured in Step 3: Configure SAML above.
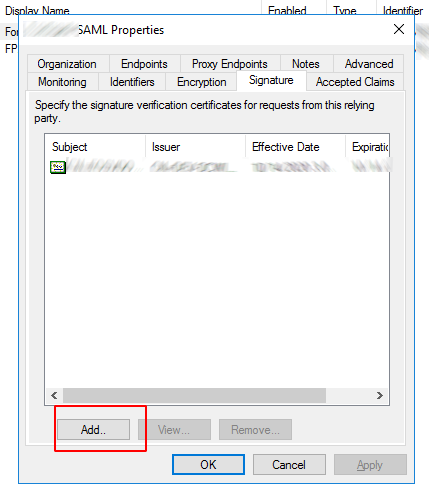
-
In the Signature tab, click Add to upload the FortiProxy SAML SP certificate to the relying party and click OK. Use the certificate that you configured in Step 3: Configure SAML above. You must first download the certificate from the FortiProxy Certificate list.