
Web proxy
When accessing a target using the FortiPAM browser extension, the browser extension now sends the browser requests through the FortiPAM web proxy. This enhances security by not delivering credential information to the client.
FortiPAM offers the web proxy feature to dynamically operate on the web browser tab's PAC rule (on Google Chrome and Microsoft Edge) to successfully proxy the traffic to FortiPAM based on the configured domain. On Mozilla Firefox, FortiPAM sends the request to the web proxy instead.
|
|
Fortinet Privileged Access Agent 7.2.3 or above is required to support the web proxy feature. |
FortiPAM scans the incoming web traffic and can replace the password.
The web proxy feature is supported on both extension only deployment and extension with FortiClient deployment.
This section describes how the web proxy feature on FortiPAM works:
- You log in to FortiPAM on a browser and launch a web account secret.
- The FortiPAM browser extension requests session information from the FortiPAM.
- FortiPAM returns the following:
- Web account URL
- Web proxy address and the port number
- Proxy sub domains
- Fake password (if Replace Web Credential is enabled for the target associated with the secret)
- The FortiPAM browser extension adds rules for the browsers and sets the proxy address and the port number.
- The FortiPAM browser extension creates a new tab that opens the URL (target).
- FortiPAM receives the proxied web traffic and replaces the fake password during authentication.
Password replacement
If the Authentication URL is set up, FortiPAM deepscans to see if fake password was used in the request.
If there is no Authentication URL set up, FortiPAM checks each request.
FortiPAM stops checking requests once it has detected and replaced the fake password from a request.
Prerequisites
- You must manually enable
explicit-web-proxyfor the interface that handles incoming and outgoing traffic:config system interface edit "port1" set explicit-web-proxy enable #must be enabled next end
Alternatively, you can enable the feature by enabling Explicit web proxy for the interface that handles incoming and outgoing traffic. See Editing an interface.
- You must import the related certificate from FortiPAM. Otherwise, the site (target) is not trusted. See Installing CA certificates for web launching.
- By default, when using web proxy, port
8080is the listening port. You can change this using the following CLI commands:config web-proxy explicit-proxy edit "web-proxy" set status enable set interface "any" set http-incoming-port 65530 #between 0 - 65535, default = 8080 next end
- If the FortiPAM interface cannot be reached from a web browser on Windows as the FortiPAM interface is behind FortiOS, configure a VIP on the FortiOS side to forward to the FortiPAM interface IP and VIP.
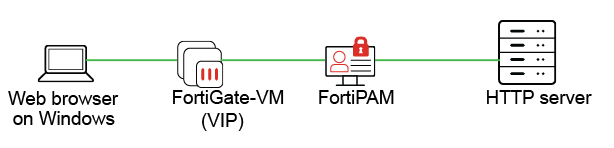
You must add the VIP to your DNS server and give it an FQDN.
On the FortiPAM side, add the FQDN to your web proxy configuration using the following CLI commands:
 config web-proxy global
  set proxy-fqdn [FQDN of FortiOS VIP]
 end
- Ensure that the external interface of the firewall VIP is set to the correct port.
If you are on FortiPAM
1.1.0 or above, setting up the external interface of the firewall VIP to the correct port should be done when setting up FortiPAM:config firewall vip edit "
fortipam _vip" set uuid 7b240e68-fa78-51ed-7846-7536d320d9d3 set type access-proxy set extip 172.16.80.209 set extintf "port2" set server-type https set extport 443 set ssl-certificate "Fortinet_SSL" next end
See Configuring the web proxy feature to prevent web credentials from leaking example in the latest FortiPAM Examples.