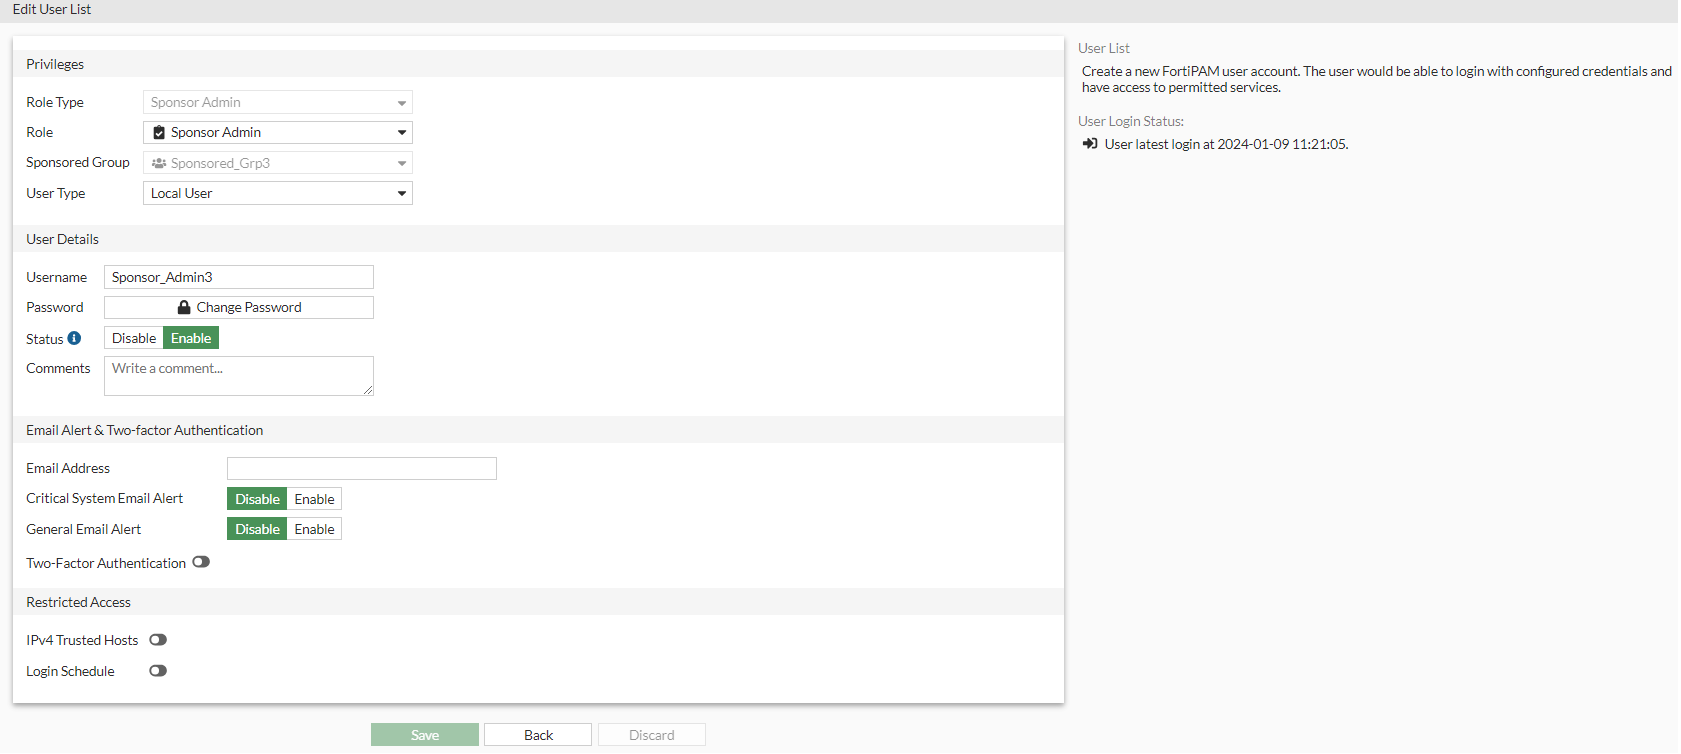
Creating a sponsor admin
We now create a sponsor admin assigned to the sponsored group created in Creating a sponsored group.
To create a sponsor admin:
- Go to User Management > User List, and select Create.
The New User List wizard is launched.
- In Configure Role, select Sponsor Admin, and from the Choose a Sponsor Administrator Role dropdown, select the sponsored group created in Creating a sponsored group.

Sponsor admins can only manage users within their assigned sponsored group.
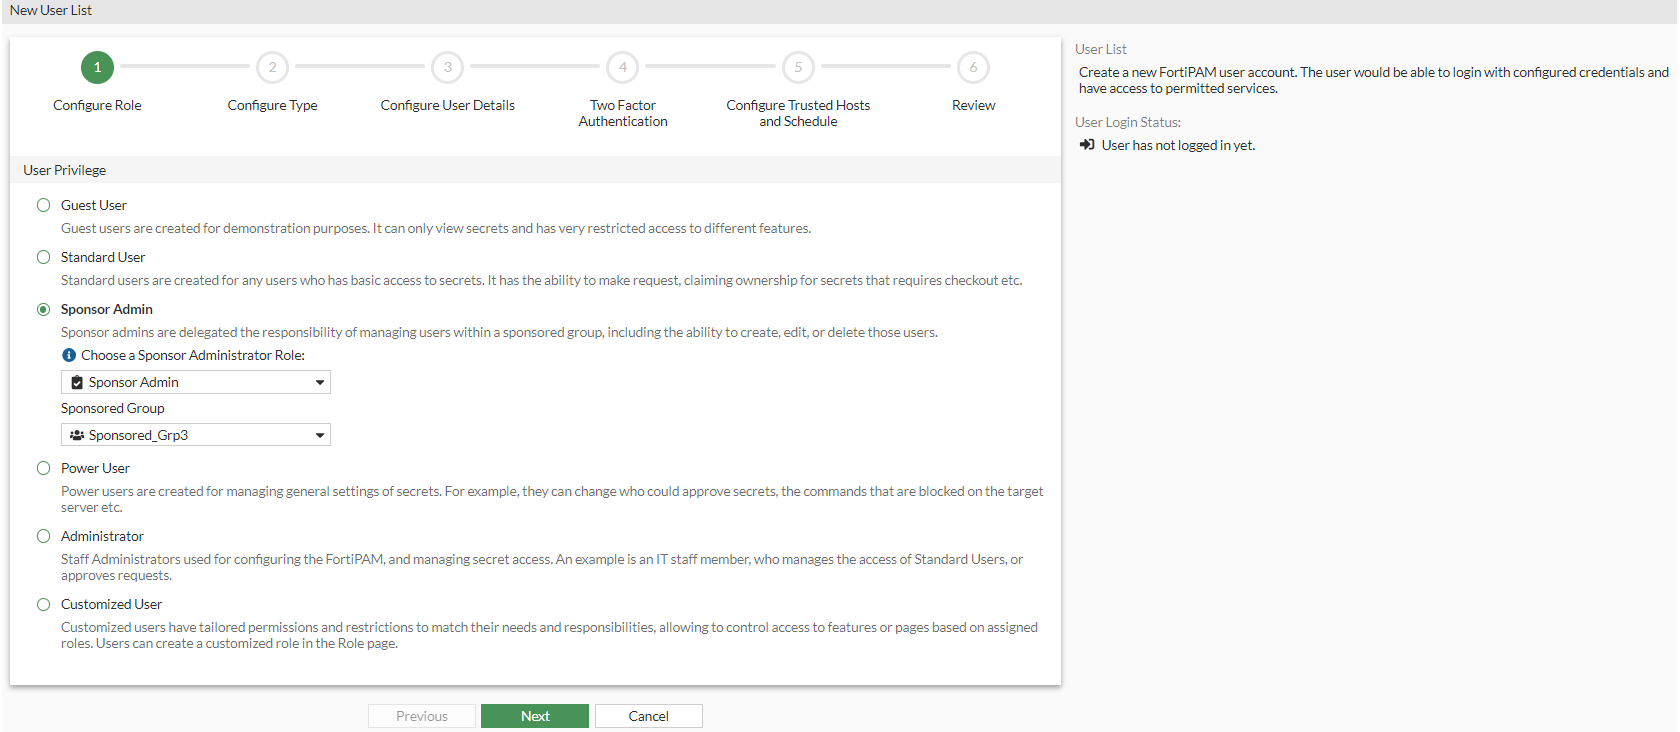
- Click Next.
- In Configure Type, select Local User and click Next.
- In Configure User Details:
- In Username, enter a username.
- In Password, enter a password.
- In Confirm Password, enter the password again.
- In Status, select Enable.
- Optionally, you can enter a description about the user.
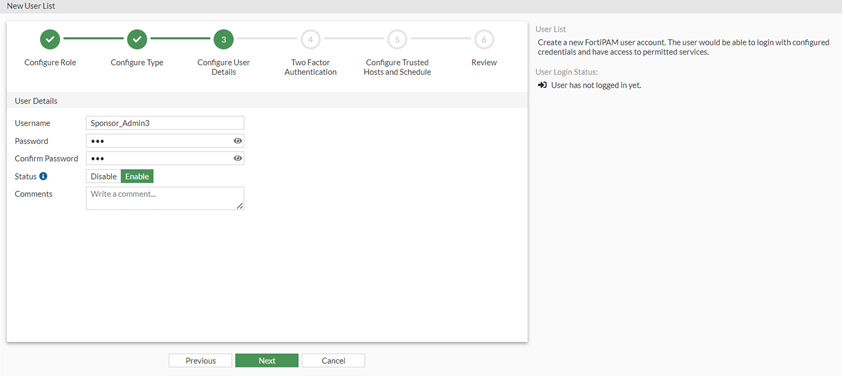
- Click Next.
- In Two Factor Authentication, click Next.
- In Configure Trusted Hosts and Schedule, click Next.
- Review the configuration and click Submit.