


Creating custom dashboards
Combine widgets to create custom dashboards. Custom dashboards are automatically updated approximately every five minutes. You can also set a custom dashboard as your default dashboard.
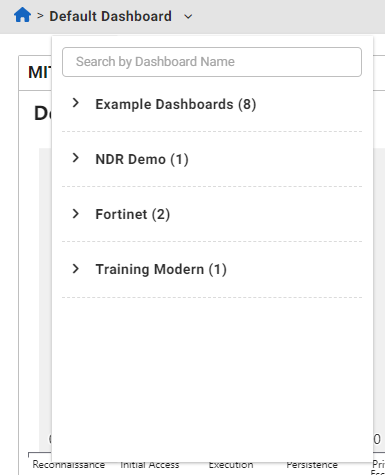
To switch between dashboards, click the Default Dashboard drop down in the toolbar, at the top left-side of the page.
To create a custom dashboard:
- Click the Dashboard tab.
- In the toolbar at the top right-side of the page, click Add. The Create Dashboard dialog opens.

- In the Name field, enter a name for the dashboard and click Create.

- Drag and drop the widgets from the pane on the right side of the page onto the dashboard.
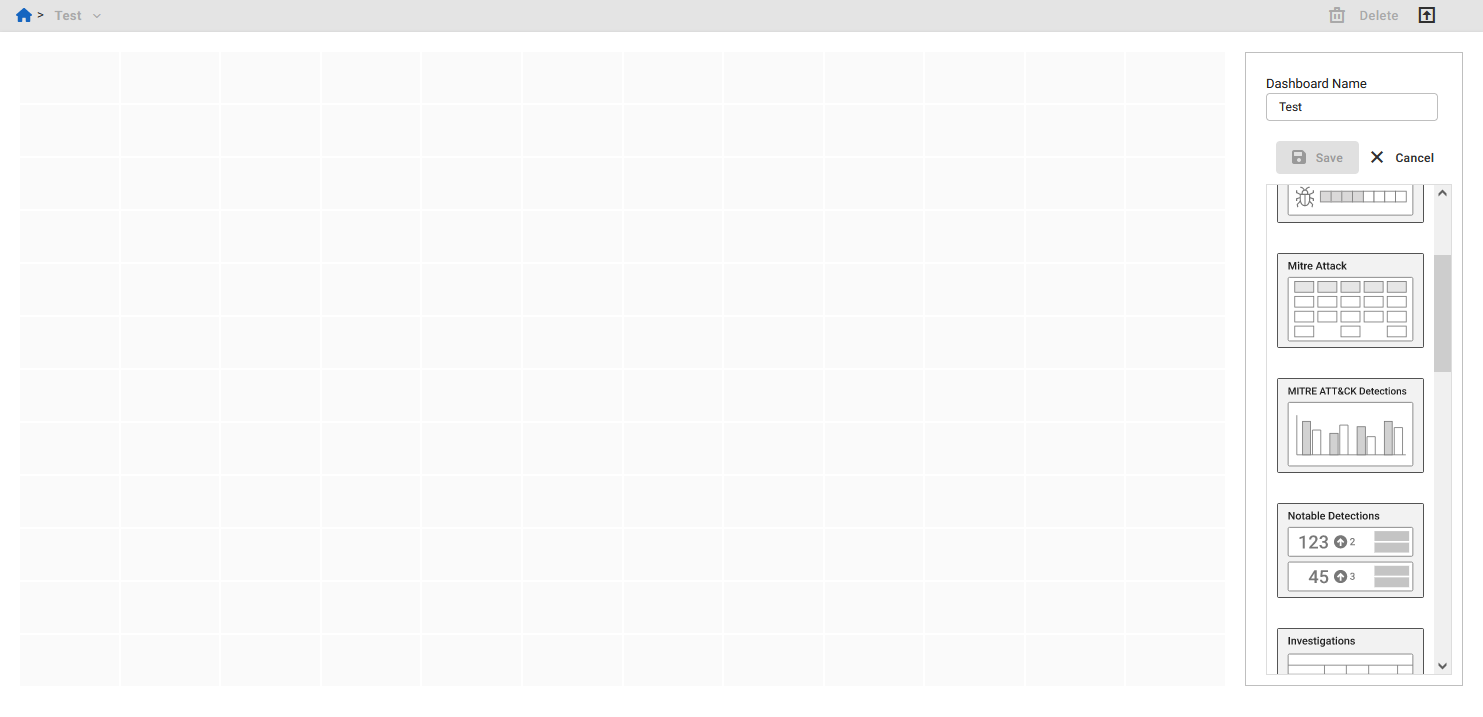
- Arrange the widgets on the dashboard and click Save.
To change the Block Name, click the edit icon.
To remove the widget from the dashboard, click the delete icon.

Each widget takes up a different amount of space. Some widgets may not fit onto one dashboard.
- Click Save.
To edit a custom dashboard
- Click the Dashboard tab.
- Click the Default Dashboard menu at the top left-side of the page and select a dashboard from the list.
- In the toolbar, click the edit icon.

- Edit the dashboard and click Save. The dashboard is added to the Default Dashboard drop down.
|
|
You cannot edit the default dashboard. |
To copy a dashboard:
- Click the Dashboard tab.
- Click the Default Dashboard drop down at the top left-side of the page and select a dashboard from the list.
- In the toolbar, click the copy icon. The Copy Dashboard dialog opens.
- In the Name field, enter a new name for the dashboard.
- In the Account drop down, select where the dashboard will appear in the menu.
- Click Copy.
To set a custom dashboard as the default:
- Click the Dashboard tab.
- Click the Default Dashboard menu at the top left-side of the page and select a dashboard from the list.
- In the toolbar, click the Set as My Default.
